Page 240 of 382
Engine Air Cleaner/Filter
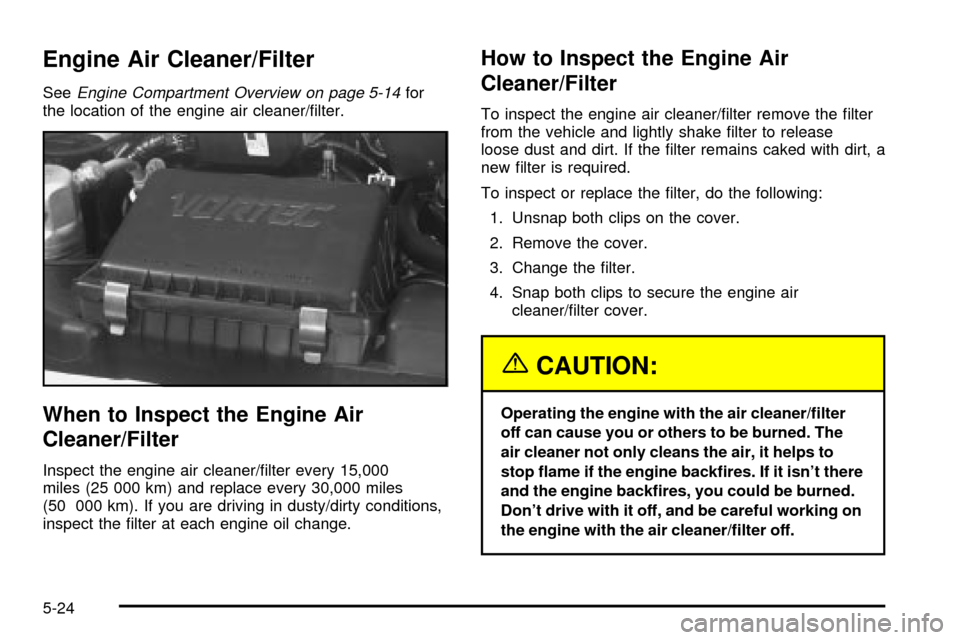
SeeEngine Compartment Overview on page 5-14for
the location of the engine air cleaner/®lter.
When to Inspect the Engine Air
Cleaner/Filter
Inspect the engine air cleaner/®lter every 15,000
miles (25 000 km) and replace every 30,000 miles
(50 000 km). If you are driving in dusty/dirty conditions,
inspect the ®lter at each engine oil change.
How to Inspect the Engine Air
Cleaner/Filter
To inspect the engine air cleaner/®lter remove the ®lter
from the vehicle and lightly shake ®lter to release
loose dust and dirt. If the ®lter remains caked with dirt, a
new ®lter is required.
To inspect or replace the ®lter, do the following:
1. Unsnap both clips on the cover.
2. Remove the cover.
3. Change the ®lter.
4. Snap both clips to secure the engine air
cleaner/®lter cover.
{CAUTION:
Operating the engine with the air cleaner/®lter
off can cause you or others to be burned. The
air cleaner not only cleans the air, it helps to
stop ¯ame if the engine back®res. If it isn't there
and the engine back®res, you could be burned.
Don't drive with it off, and be careful working on
the engine with the air cleaner/®lter off.
5-24
Page 241 of 382

Notice:If the air cleaner/®lter is off, a back®re can
cause a damaging engine ®re. And, dirt can
easily get into your engine, which will damage it.
Always have the air cleaner/®lter in place when
you're driving.
Automatic Transmission Fluid
When to Check and Change
A good time to check your automatic transmission ¯uid
level is when the engine oil is changed.
Change both the ¯uid and ®lter every 15,000 miles
(25 000 km) if the vehicle is mainly driven under one or
more of these conditions:
·In heavy city traffic where the outside temperature
regularly reaches 90ÉF (32ÉC) or higher.
·In hilly or mountainous terrain.
·When doing frequent trailer towing.
·Uses such as found in taxi, police or delivery
service.
If you do not use your vehicle under any of these
conditions, change the ¯uid and ®lter every 50,000 miles
(83 000 km).
See
Part A: Scheduled Maintenance Services on
page 6-4.
How to Check
Because this operation can be a little difficult, you may
choose to have this done at the dealership service
department.
If you do it yourself, be sure to follow all the instructions
here, or you could get a false reading on the dipstick.
Notice:Too much or too little ¯uid can damage
your transmission. Too much can mean that some
of the ¯uid could come out and fall on hot engine
part or exhaust system parts, starting a ®re.
Too little ¯uid could cause the transmission to
overheat. Be sure to get an accurate reading if you
check your transmission ¯uid.
Wait at least 30 minutes before checking the
transmission ¯uid level if you have been driving:
·When outside temperatures are above 90ÉF (32ÉC).
·At high speed for quite a while.
·In heavy traffic Ð especially in hot weather.
·While pulling a trailer.
To get the right reading, the ¯uid should be at normal
operating temperature, which is 180ÉF to 200ÉF
(82ÉC to 93ÉC).
5-25
Page 244 of 382
Engine Coolant
The cooling system in your vehicle is ®lled with
DEX-COOLžengine coolant. This coolant is designed
to remain in your vehicle for 5 years or 150,000 miles
(240 000 km), whichever occurs ®rst, if you add
only DEX-COOL
žextended life coolant.
The following explains your cooling system and how to
add coolant when it is low. If you have a problem
with engine overheating, see
Engine Overheating on
page 5-31.
A 50/50 mixture of clean, drinkable water and
DEX-COOL
žcoolant will:
·Give freezing protection down to-34ÉF (-37ÉC).
·Give boiling protection up to 265ÉF (129ÉC).
·Protect against rust and corrosion.
·Help keep the proper engine temperature.
·Let the warning lights and gages work as they
should.
Notice:When adding coolant, it is important that
you use only DEX-COOLž(silicate-free) coolant.
If coolant other than DEX-COOLžis added to
the system, premature engine, heater core or
radiator corrosion may result. In addition, the engine
coolant will require change sooner Ð at 30,000 miles
(50,000 km) or 24 months, whichever occurs ®rst.Damage caused by the use of coolant other than
DEX-COOL
žis not covered by your new vehicle
warranty.
What to Use
Use a mixture of one-halfclean, drinkable waterand
one-half DEX-COOLžcoolant which won't damage
aluminum parts. If you use this coolant mixture,
you don't need to add anything else.
{CAUTION:
Adding only plain water to your cooling
system can be dangerous. Plain water, or
some other liquid such as alcohol, can boil
before the proper coolant mixture will. Your
vehicle's coolant warning system is set for the
proper coolant mixture. With plain water or the
wrong mixture, your engine could get too hot
but you wouldn't get the overheat warning.
Your engine could catch ®re and you or others
could be burned. Use a 50/50 mixture of clean,
drinkable water and the proper coolant.
5-28
Page 249 of 382
Cooling System
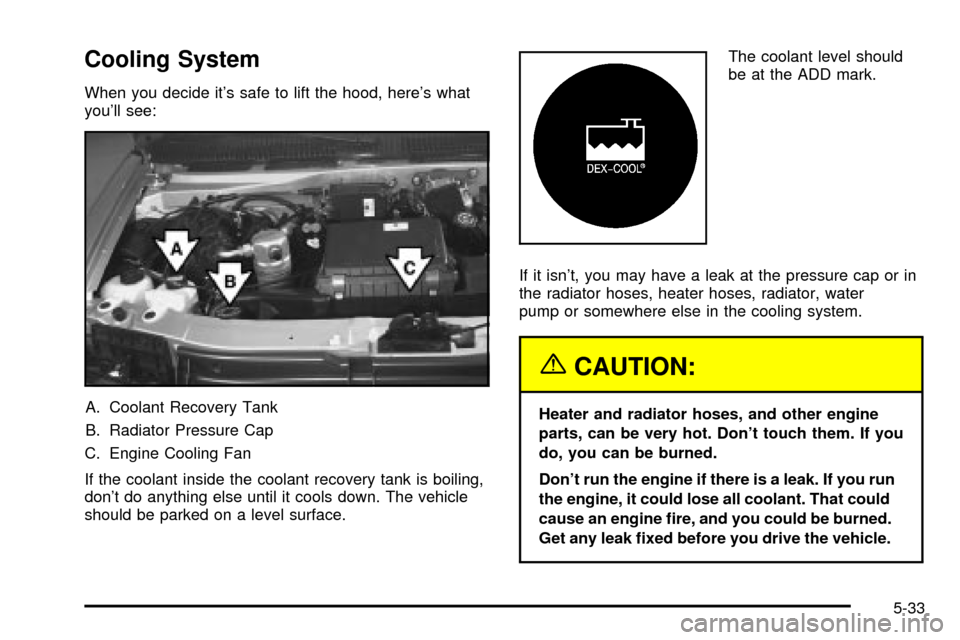
When you decide it's safe to lift the hood, here's what
you'll see:
A. Coolant Recovery Tank
B. Radiator Pressure Cap
C. Engine Cooling Fan
If the coolant inside the coolant recovery tank is boiling,
don't do anything else until it cools down. The vehicle
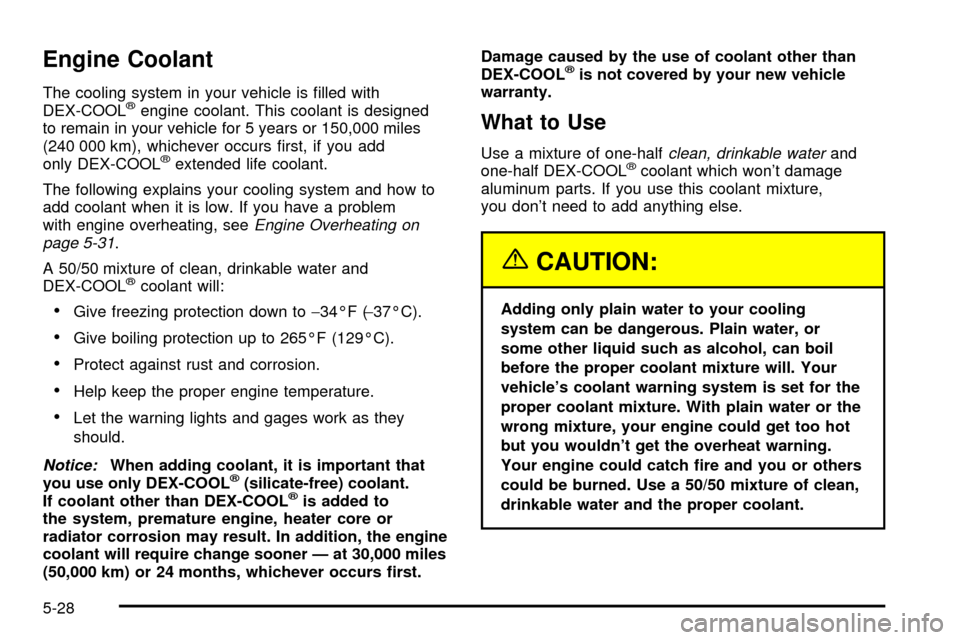
should be parked on a level surface.The coolant level should
be at the ADD mark.
If it isn't, you may have a leak at the pressure cap or in
the radiator hoses, heater hoses, radiator, water
pump or somewhere else in the cooling system.
{CAUTION:
Heater and radiator hoses, and other engine
parts, can be very hot. Don't touch them. If you
do, you can be burned.
Don't run the engine if there is a leak. If you run
the engine, it could lose all coolant. That could
cause an engine ®re, and you could be burned.
Get any leak ®xed before you drive the vehicle.
5-33
Page 250 of 382
If there seems to be no leak, start the engine again.
The engine cooling fan speed should increase when idle
speed is doubled by pushing the accelerator pedal
down. If it doesn't, your vehicle needs service. Turn off
the engine.
Notice:Engine damage from running your engine
without coolant isn't covered by your warranty.
Notice:When adding coolant, it is important that
you use only DEX-COOLž(silicate-free) coolant.
If coolant other than DEX-COOLžis added to
the system, premature engine, heater core or
radiator corrosion may result. In addition, the engine
coolant will require change sooner Ð at 30,000 miles
(50 000 km) or 24 months, whichever occurs ®rst.
Damage caused by the use of coolant other
than DEX-COOL
žis not covered by your new vehicle
warranty.
How to Add Coolant to the Coolant
Recovery Tank
If you haven't found a problem yet, but the coolant level
isn't at the ADD mark, add a 50/50 mixture ofclean
drinkable water, and DEX-COOLžengine coolant at the
coolant recovery tank. SeeEngine Coolant on
page 5-28for more information.
{CAUTION:
Adding only plain water to your cooling
system can be dangerous. Plain water, or
some other liquid such as alcohol, can boil
before the proper coolant mixture will. Your
vehicle's coolant warning system is set for the
proper coolant mixture. With plain water or the
wrong mixture, your engine could get too hot
but you wouldn't get the overheat warning.
Your engine could catch ®re and you or others
could be burned. Use a 50/50 mixture of clean,
drinkable water and DEX-COOL
žcoolant.
5-34
Page 260 of 382
What to Add
When you do need brake ¯uid, use only DOT-3 brake
¯uid. Use new brake ¯uid from a sealed container
only. See
Part D: Recommended Fluids and Lubricants
on page 6-32.
Always clean the brake ¯uid reservoir cap and the area
around the cap before removing it. This will help
keep dirt from entering the reservoir.
{CAUTION:
With the wrong kind of ¯uid in your brake
system, your brakes may not work well, or they
may not even work at all. This could cause a
crash. Always use the proper brake ¯uid.
Notice:
·Using the wrong ¯uid can badly damage brake
system parts. For example, just a few drops of
mineral-based oil, such as engine oil, in your
brake system can damage brake system
parts so badly that they'll have to be replaced.
Don't let someone put in the wrong kind of ¯uid.
·If you spill brake ¯uid on your vehicle's painted
surfaces, the paint ®nish can be damaged.
Be careful not to spill brake ¯uid on your
vehicle. If you do, wash it off immediately. See
ªAppearance Careº in the Index.
5-44
Page 295 of 382
9. Remove any rust or dirt from the wheel bolts,
mounting surfaces and spare wheel.
{CAUTION:
Rust or dirt on the wheel, or on the parts to
which it is fastened, can make the wheel nuts
become loose after a time. The wheel could
come off and cause an accident. When you
change a wheel, remove any rust or dirt from
the places where the wheel attaches to the
vehicle. In an emergency, you can use a cloth
or a paper towel to do this; but be sure to use
a scraper or wire brush later, if you need to, to
get all the rust or dirt off.
{CAUTION:
Never use oil or grease on studs or nuts. If you
do, the nuts might come loose. Your wheel
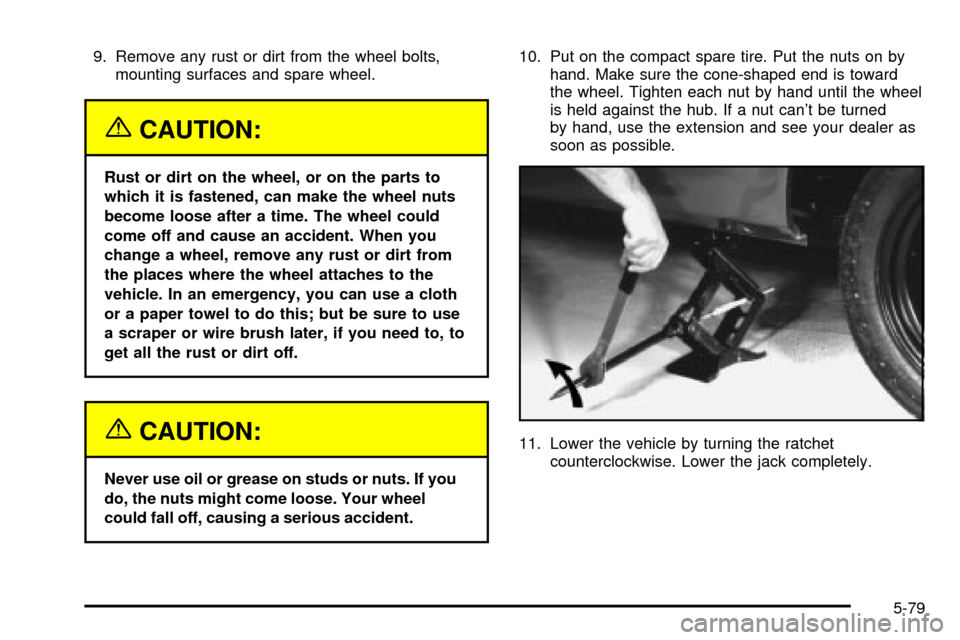
could fall off, causing a serious accident.10. Put on the compact spare tire. Put the nuts on by
hand. Make sure the cone-shaped end is toward
the wheel. Tighten each nut by hand until the wheel
is held against the hub. If a nut can't be turned
by hand, use the extension and see your dealer as
soon as possible.
11. Lower the vehicle by turning the ratchet
counterclockwise. Lower the jack completely.
5-79
Page 300 of 382

Here are some cleaning tips:
·Always read the instructions on the cleaner label.
·Clean up stains as soon as you can ± before
they set.
·Carefully scrape off any excess stain.
·Use a clean cloth or sponge, and change to a clean
area often. A soft brush may be used if stains are
stubborn.
·If a ring forms on fabric after spot cleaning, clean
the entire area immediately or it will set.
Using Cleaner on Fabric
1. Vacuum and brush the area to remove any
loose dirt.
2. Always clean a whole trim panel or section. Mask
surrounding trim along stitch or welt lines.
3. Follow the directions on the container label.
4. Apply cleaner with a clean sponge. Don't saturate
the material and don't rub it roughly.
5. As soon as you've cleaned the section, use a
sponge to remove any excess cleaner.
6. Wipe cleaned area with a clean, water-dampened
towel or cloth.
7. Wipe with a clean cloth and let dry.
Special Fabric Cleaning Problems
Stains caused by such things as catsup, coffee (black),
egg, fruit, fruit juice, milk, soft drinks, vomit, urine
and blood can be removed as follows:
1. Carefully scrape off excess stain, then sponge the
soiled area with cool water.
2. If a stain remains, follow the cleaner instructions
described earlier.
3. If an odor lingers after cleaning vomit or urine, treat
the area with a water/baking soda solution:
1 teaspoon (5 ml) of baking soda to 1 cup (250 ml)
of lukewarm water.
4. Let dry.
Stains caused by candy, ice cream, mayonnaise, chili
sauce and unknown stains can be removed as follows:
1. Carefully scrape off excess stain.
2. Clean with cool water and allow to dry completely.
3. If a stain remains, follow the cleaner instructions
described earlier.
5-84