2003 BUICK PARK AVENUE ECO mode
[x] Cancel search: ECO modePage 70 of 372

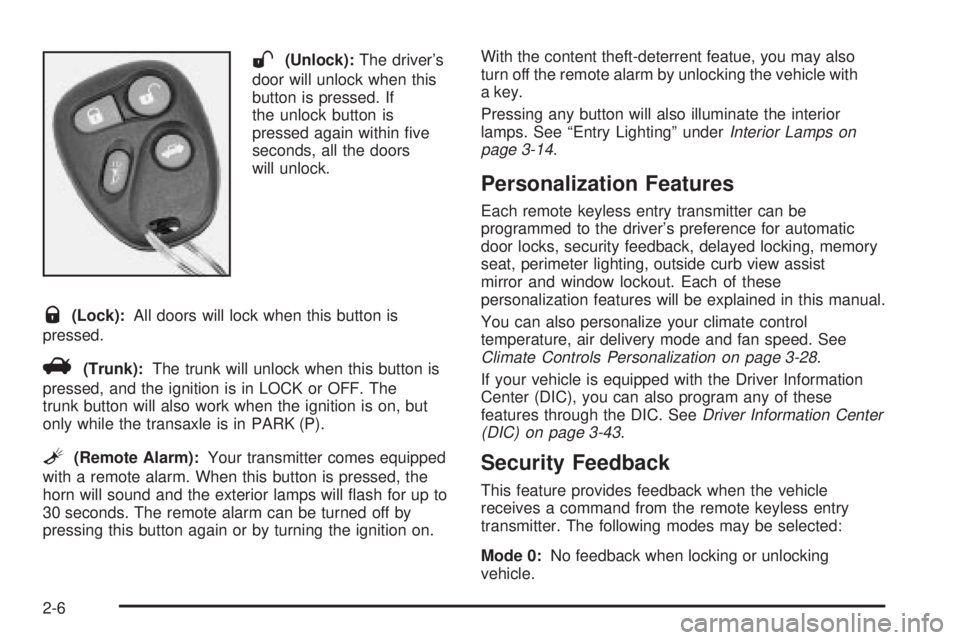
W(Unlock):The driver's
door will unlock when this
button is pressed. If
the unlock button is
pressed again within ®ve
seconds, all the doors
will unlock.
Q(Lock):All doors will lock when this button is
pressed.
V(Trunk):The trunk will unlock when this button is
pressed, and the ignition is in LOCK or OFF. The
trunk button will also work when the ignition is on, but
only while the transaxle is in PARK (P).
L(Remote Alarm):Your transmitter comes equipped
with a remote alarm. When this button is pressed, the
horn will sound and the exterior lamps will ¯ash for up to
30 seconds. The remote alarm can be turned off by
pressing this button again or by turning the ignition on.With the content theft-deterrent featue, you may also
turn off the remote alarm by unlocking the vehicle with
a key.
Pressing any button will also illuminate the interior
lamps. See ªEntry Lightingº under
Interior Lamps on
page 3-14.
Personalization Features
Each remote keyless entry transmitter can be
programmed to the driver's preference for automatic
door locks, security feedback, delayed locking, memory
seat, perimeter lighting, outside curb view assist
mirror and window lockout. Each of these
personalization features will be explained in this manual.
You can also personalize your climate control
temperature, air delivery mode and fan speed. See
Climate Controls Personalization on page 3-28.
If your vehicle is equipped with the Driver Information
Center (DIC), you can also program any of these
features through the DIC. See
Driver Information Center
(DIC) on page 3-43.
Security Feedback
This feature provides feedback when the vehicle
receives a command from the remote keyless entry
transmitter. The following modes may be selected:
Mode 0:No feedback when locking or unlocking
vehicle.
2-6
Page 74 of 372

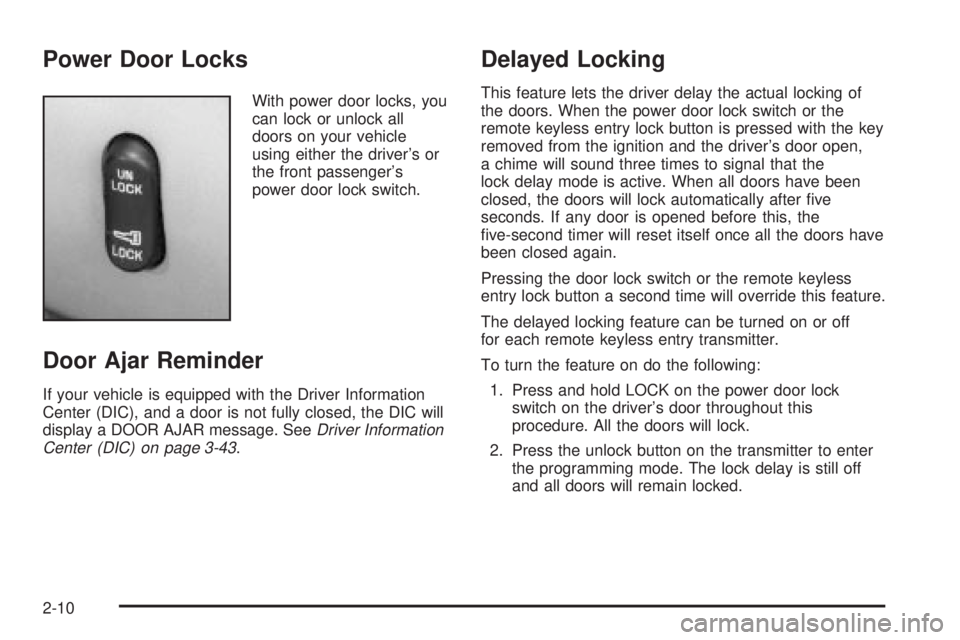
Power Door Locks
With power door locks, you
can lock or unlock all
doors on your vehicle
using either the driver's or
the front passenger's
power door lock switch.
Door Ajar Reminder
If your vehicle is equipped with the Driver Information
Center (DIC), and a door is not fully closed, the DIC will
display a DOOR AJAR message. See
Driver Information
Center (DIC) on page 3-43.
Delayed Locking
This feature lets the driver delay the actual locking of
the doors. When the power door lock switch or the
remote keyless entry lock button is pressed with the key
removed from the ignition and the driver's door open,
a chime will sound three times to signal that the
lock delay mode is active. When all doors have been
closed, the doors will lock automatically after ®ve
seconds. If any door is opened before this, the
®ve-second timer will reset itself once all the doors have
been closed again.
Pressing the door lock switch or the remote keyless
entry lock button a second time will override this feature.
The delayed locking feature can be turned on or off
for each remote keyless entry transmitter.
To turn the feature on do the following:
1. Press and hold LOCK on the power door lock
switch on the driver's door throughout this
procedure. All the doors will lock.
2. Press the unlock button on the transmitter to enter
the programming mode. The lock delay is still off
and all doors will remain locked.
2-10
Page 98 of 372

Mirror Operation
MIRROR:Press this button to turn on the automatic
dimming feature. Press it again to turn off the automatic
dimming feature.
O(On/Off):For mirrors equipped with OnStarž
controls, press and hold this button for several seconds
to turn on the automatic dimming feature. Press and
hold it again to turn the automatic dimming feature off.
The green indicator light will come on when this
feature is active. The automatic dimming feature will be
active each time the vehicle is started.
Compass Operation
COMPASS:Press this button once to turn the compass
on or off.
O(On/Off):For mirrors equipped with OnStarž
controls, press this button once to turn the compass on
or off.
When the ignition and the compass feature are on, the
compass will show two character boxes for
approximately two seconds. After two seconds, the
mirror will display the compass heading.
Compass Calibration
When on, the compass automatically calibrates as the
vehicle is driven. If, after two seconds, the display
does not show a compass heading (N for North, for
example), there may be a strong magnetic ®eld
interfering with the compass. Such interference may be
caused by a magnetic antenna mount, magnetic
note pad holder or a similar magnetic item. If the
letter C should ever appear in the compass window, the
compass may need calibration.
The mirror can be calibrated by driving the vehicle in
circles at 5 mph (8 km/h) or less until the display reads a
direction.
Mirrors equipped with OnStar
žcontrols can be placed
in calibration mode by pressing and holding the
on/off button untilaCisshown in the compass display.
2-34
Page 106 of 372

Erasing HomeLinkžButtons
To erase programming from the three buttons do the
following:
1. Press and hold down the two outside buttons until
the indicator light begins to ¯ash, after 20 seconds.
2. Release both buttons. Do not hold for longer than
30 seconds.
HomeLink
žis now in the train (learning) mode and can
be programmed at any time beginning with Step 2
under ªProgramming HomeLink
ž.º
Individual buttons can not be erased, but they can be
reprogrammed. See ªReprogramming a Single
HomeLink
žButtonº next.
Reprogramming a Single HomeLinkž
Button
To program a device to HomeLinkžusing a HomeLinkž
button previously trained, follow these steps:
1. Press and hold the desired HomeLink
žbutton. Do
not release the button.
2. The indicator light will begin to ¯ash after
20 seconds. While still holding the HomeLink
ž
button, proceed with Step 2 under ªProgramming
HomeLinkž.º
Resetting Defaults
To reset HomeLinkžto default settings do the following:
1. Hold down the two outside buttons for about
20 seconds until the indicator light begins to ¯ash.
2. Continue to hold both buttons until the HomeLink
ž
indicator light turns off.
3. Release both buttons.
For questions or comments, contact HomeLink
žat
1-800-355-3515, or on the internet at
www.homelink.com.
Storage Areas
Glove Box
Use the key to lock and unlock the glove box. To open
the glove box, pull the handle upward until the latch
opens.
2-42
Page 120 of 372

RainsenseŸ II Wipers
If your vehicle has this feature, the moisture sensor is
mounted on the interior of the windshield below the
rearview mirror and is used to automatically operate the
wipers. This system operates by monitoring the
amount of moisture build-up on the windshield. Wipes
occur as needed to clear the windshield depending
on the driving conditions and the sensitivity setting. In
light rain or snow, fewer wipes will occur. In heavy
rain or snow, wipes will occur more frequently.
The system will operate in the delay, low speed and
high speed modes. If the system is left on for long
periods of time, occasional wipes may occur without any
moisture on the windshield. This is normal and
indicates that the RainsenseŸ system is active.
The RainsenseŸ system is activated by turning the
wiper control band to one of the ®ve sensitivity levels
within the delay area. The delay position closest to
OFF/MIST is the lowest sensitivity setting, level
one. This allows more rain or snow to collect on the
windshield between wipes. You can increase the
sensitivity of the system and the frequency of wipes by
turning the wiper control band away from you to the
higher sensitivity levels. The highest sensitivity setting,
level ®ve, is closest to the LO position. A single wipe
will occur each time you turn the wiper control band to a
higher sensitivity level to indicate that the sensitivity
level has been increased.The windshield wipers also remain in a ªhigh parkº
position (the wipers are stopped on the windshield and
are not in the normal park position), even when the
ignition is turned off.
Notice:Turn the windshield wiper band on the
multifunction lever to off to avoid wiper damage
when going through an automatic car wash.
The MIST and wash cycles operate as normal and are
not affected by the moisture-sensing function. The
system can be overridden at any time by manually
turning the wiper band to LO or HI speed.
Notice:Do not place stickers or other items on the
exterior glass surface directly in front of the
moisture sensor. Doing this could cause the
moisture sensor to malfunction.
Windshield Washer
At the top of the multifunction lever there is a paddle
with the word PUSH on it. For ªprogrammedº operation,
press and release the paddle. The washer will provide
a measured amount of ¯uid to the windshield and
the wiper will either stop or return to your original wiping
speed. For ªdemandº operation, press and hold the
paddle for at least two seconds. Release the paddle
when you have enough ¯uid and the wipers will either
stop or return to your original wiping speed.
3-8
Page 127 of 372

Delayed Entry Lighting
When you open the door, the interior lamps will come on.
When you close the door with the ignition off, the interior
lamps will stay on for 25 seconds or until the ignition is
turned to an on position. Locking the doors with the power
door lock switch will override the delayed entry lighting
feature and the lamps will turn off right away.
Using the remote keyless entry transmitter to lock the
door will not cancel delayed lighting.
Theater Dimming
This feature allows for a three to ®ve-second fade out of
the courtesy lamps instead of immediate turn off.
Delayed Exit Lighting
With this feature, the interior lamps will come on for
25 seconds after you remove the key from the ignition.
This will give you time to ®nd the door handle or
lock switches.
Parade Dimming
This feature prohibits the dimming of your instrument
panel displays during daylight while your headlamps are
on. This feature operates with the light sensor for the
Twilight Sentinel
žand is fully automatic. When the light
sensor reads darkness outside, you will be able to
dim your instrument panel displays once again.
Perimeter Lighting
When the button with the unlock symbol on the remote
keyless entry transmitter is pressed, the DRL, parking
lamps and back-up lamps will come on if it is dark
enough outside.
This feature will only be activated when the security
feedback feature is programmed to be in Modes 1, 3
or 5 on the transmitter. Modes 0, 2 and 4 do not respond
with exterior lights ¯ashing when unlocking the vehicle
so perimeter lighting will not be active.
This feature can be programmed on or off for each
transmitter.
To turn the feature off do the following:
1. Press and hold LOCK on the driver's door
lock switch throughout this procedure. All doors will
lock.
2. Press the remote alarm button on the transmitter to
enter the programming mode. Perimeter lighting
remains on at this time and the horn will chirp two
times.
3. Press the remote alarm button on the transmitter
again. Perimeter lighting is disabled and the horn
will chirp one time.
4. Release the door lock switch. The perimeter lighting
feature is now off.
3-15
Page 135 of 372

Automatic Operation
AUTO (Automatic):Press the AUTO button for
automatic control of the inside temperature, the air
delivery mode and the fan speed.
1. Press the AUTO button.
2. Adjust the temperature to 75É F (24É C).
Choosing the coldest or warmest temperature
setting will not cause the system to heat or cool any
faster. If you set the system at the warmest
temperature setting, the system will remain in
manual mode at that temperature and it will not go
into automatic mode.
In cold weather, the system will start at reduced fan
speeds to avoid blowing cold air into your vehicle
until warmer air is available. The system will
start out blowing air at the ¯oor but may change
modes automatically as the vehicle warms up
to maintain the chosen temperature setting. The
length of time needed for warm up will depend on
the outside temperature and the length of time
that has elapsed since your vehicle was last driven.
3. Wait for the system to regulate. This may take from
10 to 30 minutes. Then adjust the temperature, if
necessary.
Do not cover the solar sensor located in the center of
the instrument panel, near the windshield. For more
information on the solar sensor, see ªSensorsº later in
this section.
Manual Operation
Pressing the FAN or AIR FLOW buttons cancels
automatic operation and places the system in manual
mode. Press the AUTO button to return to automatic
operation.
TEMP (Temperature):To manually adjust the
temperature inside the vehicle, push the TEMP arrow.
Push the TEMP up arrow for warmer temperature
settings and the TEMP down arrow for cooler
temperature settings. The setting will be shown on the
display. The display will return to the outside
temperature after a few seconds.
9FAN:Pressing the FAN button will display and hold
the current fan speed while in manual mode. If you
want the fan to run at a lower speed, push the down
arrow on the FAN button. If you want to increase the fan
speed, push the up arrow on the FAN button. The fan
indicators will also be shown on the display.
If the air¯ow seems low when the fan is at the highest
setting, the passenger compartment air ®lter may
need to be replaced. For more information, see
Passenger Compartment Air Filter on page 3-27.
AIR FLOW:Pressing the AIR FLOW button will display
and hold the current setting while in manual mode.
Use the up and down arrows on the AIR FLOW button
to cycle through the available modes.
3-23
Page 136 of 372

WINDSHIELD-FLOOR:This mode directs most of the
air¯ow to the windshield with some air¯ow to the
outboard outlets (for the side windows) and the ¯oor
outlets.
MID:This mode directs air¯ow through the instrument
panel outlets.
FLOOR-MID:This mode directs air¯ow through both
the ¯oor and the instrument panel outlets. There is also
a small amount of air directed to the windshield and
the outboard outlets (for the side windows).
FLOOR:This mode directs most of the air¯ow to the
¯oor outlets with some directed to the outboard
outlets (for the side windows) and the windshield.
OFF:Press the OFF button once to turn off the
passenger climate control, if it has been activated.
Pressing the OFF button a second time will turn off the
main system. The outside temperature will be shown
on the display when the system is off.
VENT:Pressing the VENT button allows outside air to
¯ow through your vehicle without the air conditioning
compressor working. To turn off the VENT selection,
push the VENT button again.
Selecting the VENT and AUTO buttons at the same
time allows the system to control the air¯ow
automatically without using the air conditioning
compressor or the recirculation mode.RECIRC (Recirculation):Press this button to limit the
amount of outside air coming into the vehicle. It can
be used to prevent outside air and odors from entering
your vehicle or to help heat or cool the air inside
your vehicle more quickly. Press this button to turn the
recirculation mode on or off. When the button is
pressed, an indicator light will come on. The recirculation
mode cannot be used with the FRONT defrost or
VENT mode.
On hot days, open the windows to let hot air escape;
then close them. This helps to reduce the time it takes
for your vehicle to cool down. It also helps the system
to operate more efficiently.
For quick cool down on hot days, press the AUTO
button and the system will automatically enter
recirculation mode and the temperature will be at the full
cold position for maximum cooling.
Using these settings together for long periods of time
may cause the air inside of your vehicle to become too
dry. To prevent this from happening, after the air in
your vehicle has cooled, turn the recirculation mode off.
The air conditioning system removes moisture from
the air, so you may sometimes notice a small amount of
water dripping underneath your vehicle while idling or
after turning off the engine. This is normal.
3-24