2003 BMW Z4 2.5I parking brake
[x] Cancel search: parking brakePage 4 of 106

Contents
Contents
Notes
6About this Owner's Manual
6Symbols used
6Symbol on vehicle parts
6Your individual vehicle
6Status at time of printing
7For your own safety
7Service and warranty
8Reporting safety defects
Overview
12Cockpit
13Instrument cluster
14Indicator and warning lamps
Opening and closing
18Keys
18Central locking system
18Remote control
20Door lock
20Interior
21Luggage compartment lid
22Luggage compartment
22Electric power windows
23Manual convertible top
24Fully automatic convertible top*
26Wind deflector*
27Alarm system*
Adjustments
29Safe seating position
29Seats
30Seat memory*
31Seat heating*
31Safety belts
32Steering wheel
32Mirrors
33Airbags
34Transporting children safely
37Vehicle Memory, Key Memory
Driving
38Ignition lock
38Engine
39Parking brake
40Manual transmission
40Automatic transmission with
Steptronic*
42Electric Power Steering EPS
42Drivelogic*
42Turn signal indicators/Headlamp
flasher
43Washer/wiper system and
rain sensor*
44Cruise control*
Lamps
45Parking lamps/Low beams
46High beams/Standing lamps
46Instrument lighting
46Fog lamps
46Interior lamps
© 2002 Bayerische Motoren Werke
Aktiengesellschaft
Munich, Germany
Reprinting, including excerpts, only with the
written consent of BMW AG, Munich.
Order No. 01 41 0 156 897
US English VIII/02
Printed in Germany
Printed on environmentally friendly paper –
bleached without chlorine, suitable for recycling.
Page 14 of 106

Overview
14
Indicator and warning
lamps
Technology that monitors itself
Indicator and warning lamps that are iden-
tified by
+ are tested for proper functioning
whenever the ignition key is turned. They
each light up once for different periods of
time.
If a fault should occur in one of these sys-
tems, the corresponding lamp does not go
out after the engine is started or it lights up
again while the vehicle is moving. The indi-
cated pages provide information on what
measures to take.
Please fasten safety belts
+31
Airbags
+33
Battery charge current
+87
Engine oil pressure/Engine oil level/
Engine oil sensor
+79
Parking brake/Chassis control sys-
tem/Dynamic Brake Control/Brake
fluid
+39/ 51/ 52/ 81
Brake warning lamp for Canadian
models
Antilock Brake System ABS/Chas-
sis control system
+53/ 51
Antilock Brake System ABS/Chas-
sis control system for Canadian
modelsDynamic Stability Control DSC
+51
Dynamic Traction Control DTC
+51
Flat Tire Monitor
+53
Automatic transmission
+41
Brake pads
+66
Add coolant80
Check Gas Cap
+
Service engine soon +83
Service engine soon
+
warning lamp for Canadian
models.
Defective bulbs45
Turn signal indicators42
Fog lamps46
Headlamp flasher/
High beams42/ 46
Page 39 of 106

At a glance
Controls
Driving tips
Mobility
Reference
39
the ignition key immediately when the
engine starts.<
Extended starting attempts, charac-
terized by excessively frequent or
long periods with the starter engaged, can
damage the catalytic converter.<
If the engine fails to start on the first
attempt – if it is very hot or cold, for
instance:
>Press the accelerator pedal halfway
down.
Cold starts at very low temperatures –
starting at approx. +57 / –156
>Press the accelerator pedal halfway
down while engaging the starter
>On the first start attempt, engage the
starter for a longer period –
approx. 10 seconds.
Manual transmission
1.Engage the parking brake
2.Gearshift lever in idling position
3.Depress clutch pedal
4.Start the engine.
Automatic transmission
1.Depress footbrake
2.Place selector lever in position P or N
3.Start the engine.
Before leaving the vehicle with the
engine running, place the selector
lever in position P and pull the parking
brake.
Do not leave the vehicle unattended with
the engine running. An unattended vehicle
with a running engine poses a safety haz-
ard.<
Switching off the engine
Do not remove the ignition key while
the vehicle is still moving. If you did so,
the steering lock would engage when the
steering wheel is turned.
When you leave the vehicle, always remove
the ignition key and engage the steering lock.
Always engage the parking brake when park-
ing on downhill roads.<
Manual transmission
Turn the ignition key to position 1 or 0.
Automatic transmission
Place the selector lever in position P and
turn the ignition key to position 1 or 0.
Parking brake
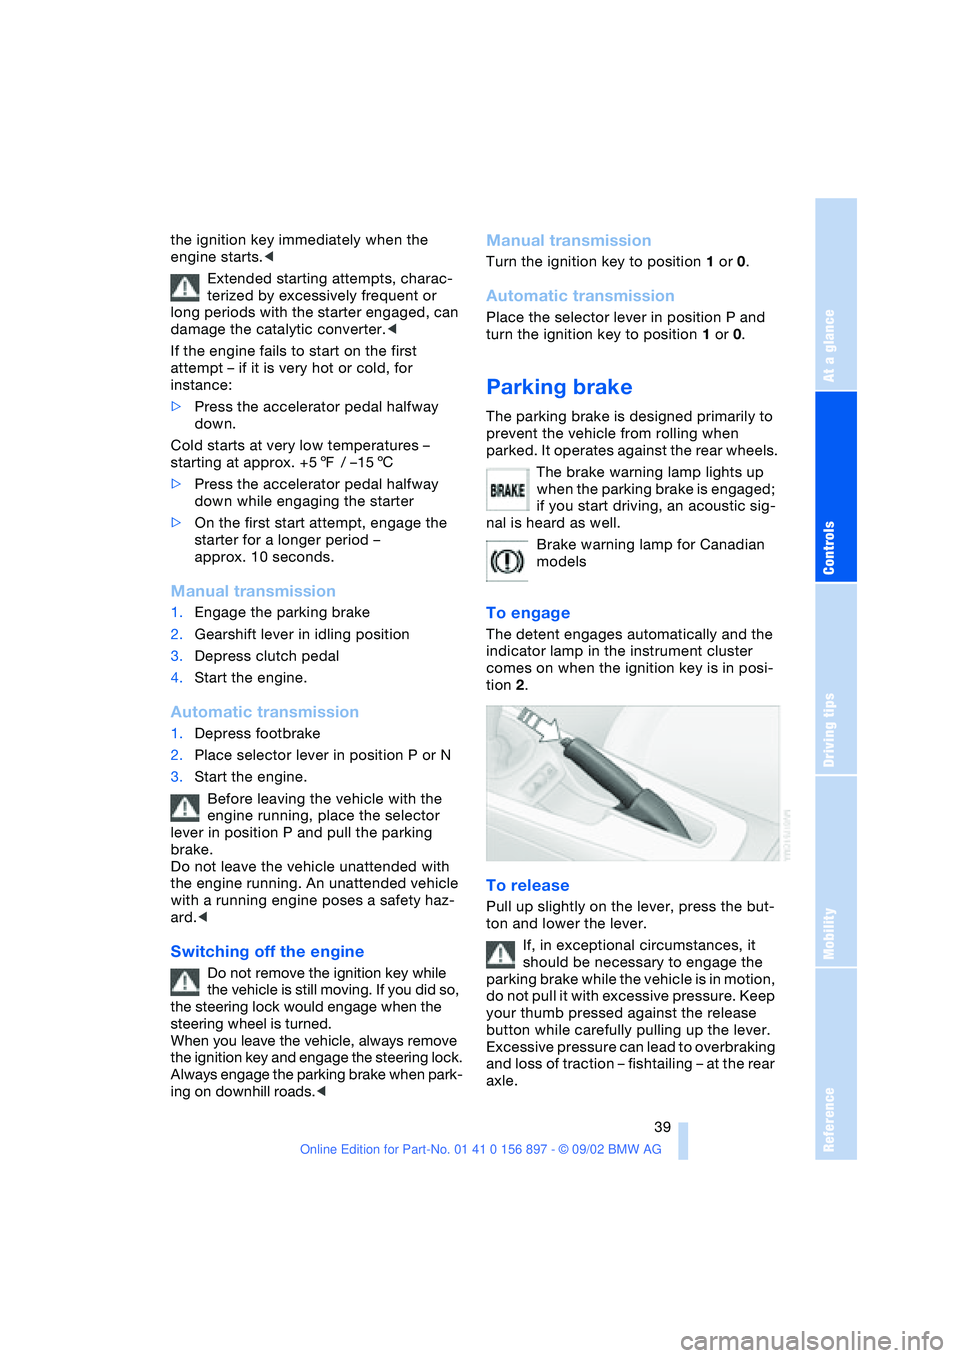
The parking brake is designed primarily to
prevent the vehicle from rolling when
parked. It operates against the rear wheels.
The brake warning lamp lights up
when the parking brake is engaged;
if you start driving, an acoustic sig-
nal is heard as well.
Brake warning lamp for Canadian
models
To engage
The detent engages automatically and the
indicator lamp in the instrument cluster
comes on when the ignition key is in posi-
tion 2.
To release
Pull up slightly on the lever, press the but-
ton and lower the lever.
If, in exceptional circumstances, it
should be necessary to engage the
parking brake while the vehicle is in motion,
do not pull it with excessive pressure. Keep
your thumb pressed against the release
button while carefully pulling up the lever.
Excessive pressure can lead to overbraking
and loss of traction – fishtailing – at the rear
axle.
Page 40 of 106

Driving
40 The brake lamps do not come on when the
parking brake is engaged.<
Vehicles with manual transmission:
Always engage the parking brake
when parking on slopes and inclined sur-
faces, since shifting into 1st gear or reverse
may not provide adequate resistance to
rolling. Vehicles with automatic transmis-
sion: place the selector lever in
position P.<
To avoid corrosion and one-sided
braking, apply the parking brake
lightly from time to time when coasting to a
standstill – at a traffic signal, for example –
provided that it is safe to do so.<
Manual transmission
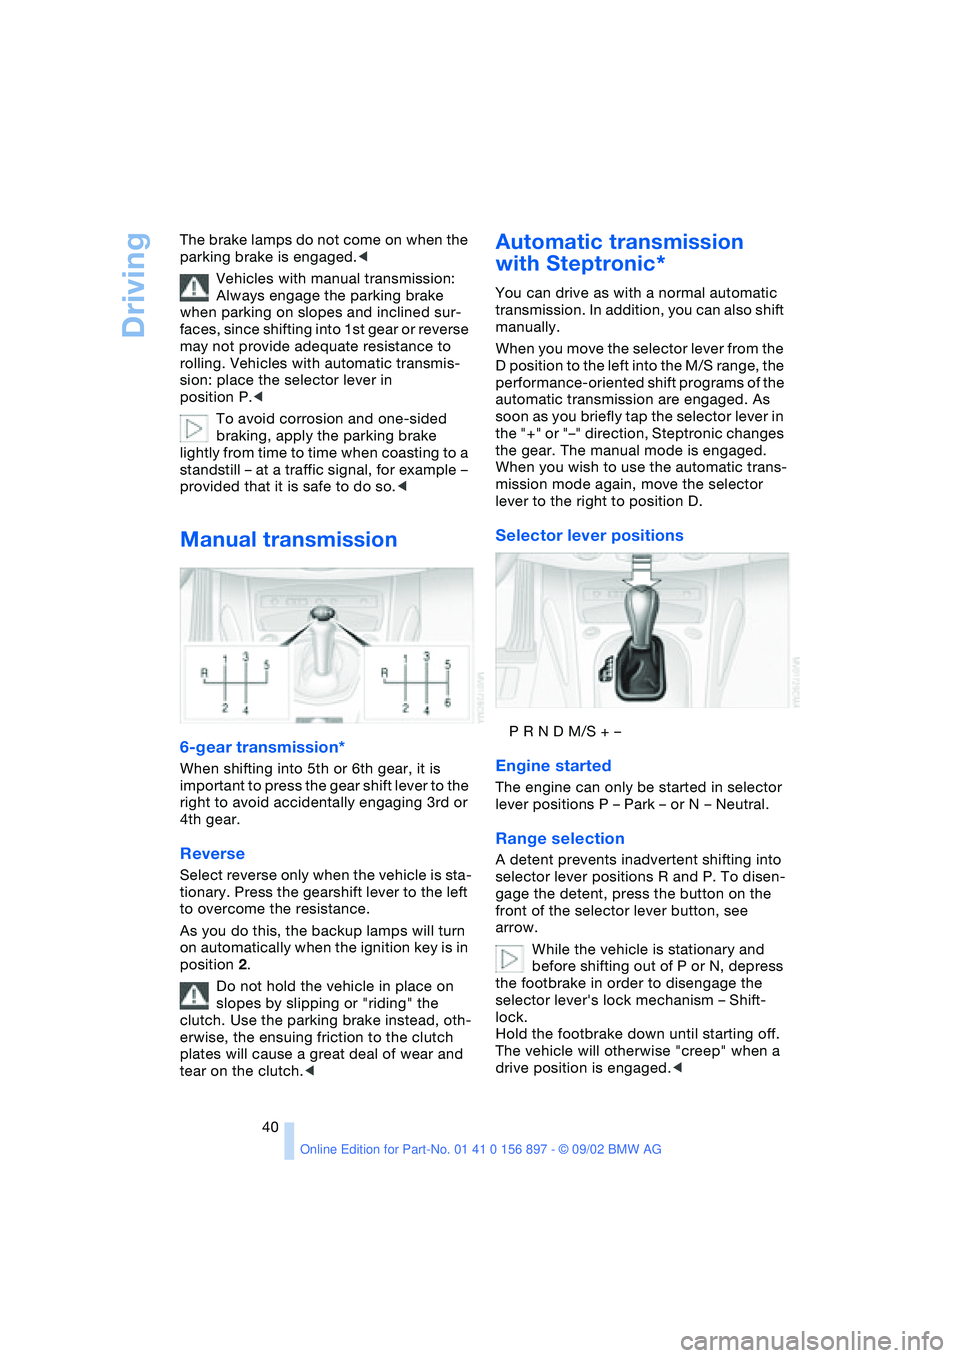
6-gear transmission*
When shifting into 5th or 6th gear, it is
important to press the gear shift lever to the
right to avoid accidentally engaging 3rd or
4th gear.
Reverse
Select reverse only when the vehicle is sta-
tionary. Press the gearshift lever to the left
to overcome the resistance.
As you do this, the backup lamps will turn
on automatically when the ignition key is in
position 2.
Do not hold the vehicle in place on
slopes by slipping or "riding" the
clutch. Use the parking brake instead, oth-
erwise, the ensuing friction to the clutch
plates will cause a great deal of wear and
tear on the clutch.<
Automatic transmission
with Steptronic*
You can drive as with a normal automatic
transmission. In addition, you can also shift
manually.
When you move the selector lever from the
D position to the left into the M/S range, the
performance-oriented shift programs of the
automatic transmission are engaged. As
soon as you briefly tap the selector lever in
the "+" or "–" direction, Steptronic changes
the gear. The manual mode is engaged.
When you wish to use the automatic trans-
mission mode again, move the selector
lever to the right to position D.
Selector lever positions
P R N D M/S + –
Engine started
The engine can only be started in selector
lever positions P – Park – or N – Neutral.
Range selection
A detent prevents inadvertent shifting into
selector lever positions R and P. To disen-
gage the detent, press the button on the
front of the selector lever button, see
arrow.
While the vehicle is stationary and
before shifting out of P or N, depress
the footbrake in order to disengage the
selector lever's lock mechanism – Shift-
lock.
Hold the footbrake down until starting off.
The vehicle will otherwise "creep" when a
drive position is engaged.<
Page 64 of 106

Special operating instructions
64
Special operating instructions
Break-in procedures
To ensure that your vehicle provides maxi-
mum economy throughout a long service
life, we request that you observe the fol-
lowing:
Engine and differential
Up to 1,250 miles / 2,000 km:
Drive at varying engine and road speeds,
but do not exceed the following engine or
road speed:
4,500/min or 100 mph / 160 km/h:
Obey your local and state maximum speed
limits.
Refrain from using full throttle and avoid
pressing the accelerator beyond the kick-
down point.
After you have driven 1,250 miles /
2,000 km, you can gradually increase the
engine or road speeds.
You should also comply with these break-in
procedures if the engine or differential is
replaced later in the course of the vehicle's
service life.
Tires
Due to technical factors associated with
their manufacture, tires do not achieve their
full traction potential until an initial break-in
period has elapsed. You should therefore
drive with extra caution during the first
200 miles / 300 km.
Obey your local and state maximum speed
limits.
When the vehicle is operated on wet
or slushy roads, a wedge of water
may form between the tire and the road
surface. This phenomenon is referred to as
hydroplaning and can lead to partial or
complete loss of traction, vehicle control
and braking effectiveness. Reduce your
speed on wet roads.<
Brake system
Approx. 300 miles / 500 km must elapse
before the brake pads and rotors achieve
their optimal surface and wear pattern.
To break in the separate parking brake
drums, apply the parking brake lightly when
coasting to a standstill – at a traffic signal,
for instance; use caution to avoid posing a
danger to other road users.
To avoid corrosion, repeat this procedure
from time to time.
The brake lamps do not come on when the
parking brake is set.
Vacuum for the brake system servo
unit on your BMW is available only
when the engine is running. When you
move the car with the engine off – e.g., by
towing – substantially higher levels of pedal
force will be required to brake the vehicle.<
Clutch
The clutch will achieve its optimal function-
ality after approx. 300 miles / 500 km. Shift
gears carefully during the break-in period.
Page 65 of 106

At a glance
Controls
Driving tips
Mobility
Reference
65
Driving notes
Parking the vehicle
Condensation forms in the air conditioner
system during operation, which then exits
under the vehicle. Traces of condensed
water on the ground underneath the vehi-
cle are thus normal.
Brakes
Do not drive with your foot resting on
the brake pedal. Even light but con-
sistent pedal pressure can lead to high
temperatures, brake wear and possibly
even brake failure.
Hydroplaning
When driving on wet or slushy roads,
reduce vehicle speed. If you do not, a
wedge of water may form between the tires
and the road surface. This phenomenon
can lead to partial or complete loss of trac-
tion, vehicle control and braking effective-
ness.<
Driving through water
Do not drive through water on the
road if it is deeper than 1 ft / 30 cm,
and then only at walking speed. Otherwise,
the vehicle's engine, the electrical systems
and the transmission may be damaged.<
High temperatures
High temperatures occur with every
vehicle equipped with a catalytic con-
verter. Heat shields are installed adjacent to
some sections of the exhaust system. Never
remove these shields; do not apply under-
coating to their surfaces. When driving,
standing at idle and parking the vehicle,
take care to avoid contact between the hot
exhaust system and flammable materials –
e.g. hay, leaves, grass, etc. Such contact
could lead to a fire, resulting in serious per-
sonal injury and property damage.<
Brake system
The brake warning lamp lights up
although the parking brake is not
engaged: check the brake fluid
level. It is very important that you follow the
instructions on page 81 before driving on.
Disc brakes
Corrosion
Limited vehicle use, extended periods with
the vehicle parked or in storage, and oper-
ating conditions in which braking is
restricted to gentle, low-pressure applica-
tions will all increase the tendency for cor-
rosion to form on the rotors and contamina-
tion to accumulate on the brake pads. This
occurs because the minimal pressure
which must be exerted by the pads to clean
the rotors by brake applications is not
reached.
If the brake rotors are corroded, they will
tend to respond to braking with a pulsating
effect which even extended application will
fail to cure.
Wet roads
When driving in heavy rain and on wet
roads, it is useful to apply light pressure
to the brake pedal every few miles. Watch
traffic conditions to ensure that this maneu-
ver does not endanger other road users.
The heat generated in this process helps
dry the pads and rotors to ensure that your
brake system will respond with undimin-
ished efficiency when you need it.
Inclines
Extended or steep mountain descents
should be driven in the gear or drive posi-
tion in which only minimal periodic brake
application is required. This helps avoid
placing excessive loads on the brake sys-
tem. Observe the maximum allowable
engine speed when doing so; refer to
page 47.
Do not coast with the clutch
depressed or with the transmission or
selector lever in Neutral. Do not coast with
Page 81 of 106

At a glance
Controls
Driving tips
Mobility
Reference
81
allow accumulated pressure to escape,
then open completely
2.The coolant level is correct when the
upper end of the red float is at least
even with the upper edge of the filler
neck but no more than ι in / 2 cm
above it, that is, up to the second mark
on the float. Refer also to the schematic
diagram next to the filler neck
3.If necessary, add coolant. Slowly add
coolant until the correct level is reached
– do not overfill.
Comply with the applicable environ-
mental laws regulating the disposal of
extended-duty antifreeze with corrosion
inhibitor.<
Brake fluid
Indicator lamp
The brake warning lamp lights up
red when the parking brake is not
engaged: the brake fluid level is too
low, refer to page 65.
Brake warning lamp for Canadian
models
Brake fluid, refilling
Brake fluid loss may result in extended
brake pedal travel. If this occurs, also refer
to the notes on page 65.
Brake fluid is hygroscopic, that is, it
absorbs moisture from the air over
time.
In order to ensure the brake system's
safety and reliability, have the brake fluid changed every two years by a BMW center.
Refer also to page 48 and the Service Man-
ual.
Brake fluid is toxic and damages the vehi-
cle's paint. You should always store it in the
closed original container and in a location
inaccessible to children.
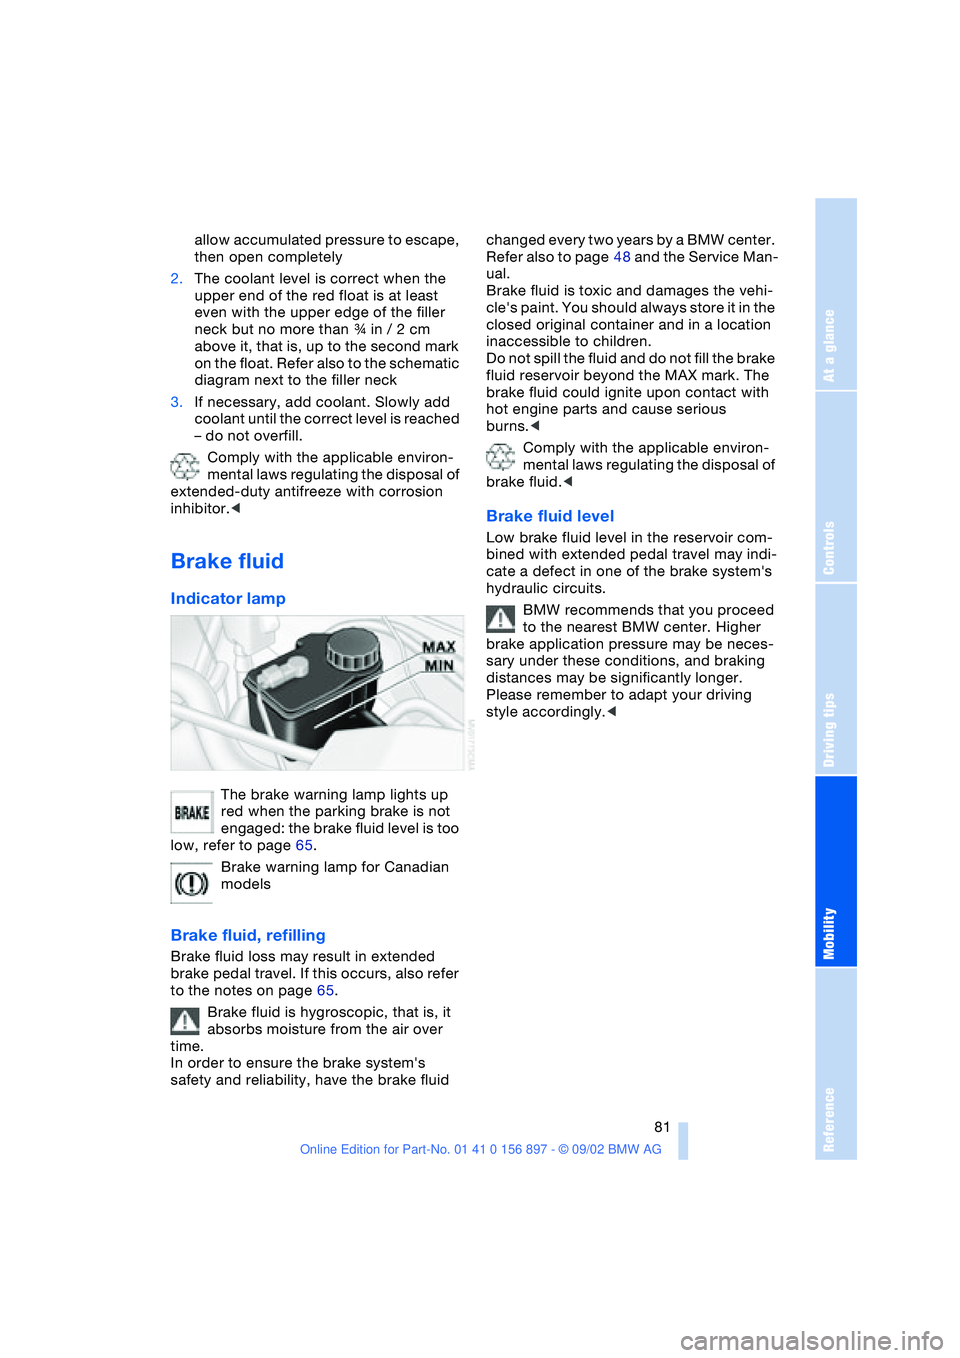
Do not spill the fluid and do not fill the brake
fluid reservoir beyond the MAX mark. The
brake fluid could ignite upon contact with
hot engine parts and cause serious
burns.<
Comply with the applicable environ-
mental laws regulating the disposal of
brake fluid.<
Brake fluid level
Low brake fluid level in the reservoir com-
bined with extended pedal travel may indi-
cate a defect in one of the brake system's
hydraulic circuits.
BMW recommends that you proceed
to the nearest BMW center. Higher
brake application pressure may be neces-
sary under these conditions, and braking
distances may be significantly longer.
Please remember to adapt your driving
style accordingly.<
Page 100 of 106

Everything from A - Z
100 Indicator lamps
– airbag 33
– alarm system 27
– brake fluid 81
– engine temperature 47
– flat tire 75
– Flat Tire Monitor 53
– reserve tank 47
Inflation pressure 71
– monitor 53
INSPECTION 48
Instrument cluster 13
Instrument lighting 46
Instrument panel 12
Interior
– central locking system 20
Interior lamps 19, 46
– remote control 19
Interior mirror
– automatic dimming
feature 33
Interior motion sensor 19
– deactivating 28
Interior rearview mirror 32
Interlock 38
Intermittent operation,
windshield wipers 43
J
Jack 87
– jacking points 87
Jets, refer to
Ventilation 56, 59
Jump-starting 89
K
Key Memory 37
Keys 18
– spare 18
– with remote control 18
Knee airbags 33
L
Lamp
– passenger airbags 35
Lamp control 45
Lamp replacement 84Lamps
– backup lamp 86
– brake lamp 86
– bulb replacement 84
– center high-mount brake
lamp 87
– daytime driving lamps 45
– defective bulbs 45
– fog lamps 46
– headlamp flasher 46
– headlamps 84
– high beams 46, 85
– indicator lamp, defective
bulb 14
– instrument lighting 46
– interior lamps 46
– lamp replacement 84
– license plate lamps 87
– LIGHTS ON warning 45
– low beams 45, 85
– low beams, automatic 45
– parking lamps 45
– reading lamps 46
– rear lamp 86
– standing lamps 46
– turn signal indicators 86
– xenon lamps 85
LATCH child-restraint
mounting system 36
Length 95
License plate lamps
– bulb replacement 87
Light switch 45
Lighter 61
LIGHTS ON warning 45
Loads, securing 66
Lock
– door 20
Locking 19
Longlife oils 80
Low beams 45
– automatic 45
– bulb replacement 85
– indicator lamp, defective
bulb 14
Luggage
compartment 22, 94
– capacity 94
– enlarging 22
– remote control 19Luggage compartment
lid 21
– emergency release from
luggage compartment's
interior 22
– opening from the
inside 21
– opening from the
outside 21
– opening/closing 21
– remote control 19
M
M+S tires 76
Maintenance system 82
Malfunction
– door lock 20
– fuel filler door 70
– remote control 19
– storage compartment 60
Malfunction of electrical
accessory 88
Manual convertible top 23
Manual operation
– door lock 20
– electrical convertible
top 25
– fuel filler door 70
– storage compartment 60
Manual transmission 40
Master key 18
Maximum cooling 58
MC operation, refer to the
Owner's Manual for Radio
MD operation, refer to the
Owner's Manual for Radio
Mechanical convertible
top 23
Mechanical seat 29
Memory
– seats 30
Memory, refer to Key Mem-
ory, Vehicle Memory 37
Microfilter 59
Microphone, cellular
phone 61
Mirrors 32
– heating 32
Modifications,
technical 7