2003 BMW Z4 2.5I door lock
[x] Cancel search: door lockPage 25 of 106
At a glance
Controls
Driving tips
Mobility
Reference
25
Ignition key in position 1 or higher.
With the vehicle standing.
1.Read and comply with the preceding
safety precautions
2.Make sure that the convertible top com-
partment panel in the luggage compart-
ment is lowered; refer to page 22. Oth-
erwise the convertible top cannot be
opened
3.Ensure that the luggage compartment
lid is closed
4.Press and hold the corresponding but-
ton for convertible top operation.
If the convertible top should halt right
before the closing phase is completed,
press against the front part of the convert-
ible top frame from the outside to help the
closing process along. Keep pressing the
button while doing so until the top starts up
again on its own.
Indicator lamps
>The red indicator lamp will light up while
the convertible top is in motion. It goes
out as soon as the opening or closing
operation has been completed
>If the red indicator lamp flashes after
the button has been released, then the
opening or closing operation has not
yet been completed.
The sequence can be continued in the
desired direction by pressing this but-
ton
>If the yellow indicator lamp lights up
continuously with the button pressed,
then the convertible top compartment
panel is raised and the convertible top
cannot be moved.
The side windows will lower slightly when
you press the button for operating the con-
vertible top.
After the opening or closing operation, the
side windows will go back up if you keep
the button pressed for more than 2 sec-
onds after the indicator lamp has gone out.
The automatic sequence will be interrupted
immediately if you release the button that
operates the top. The sequence can be continued in the desired direction by press-
ing this button.
If the convertible top operation has
been interrupted, do not close the
side windows using the power window but-
tons. Otherwise the side windows may not
close properly against the rubber seal of
the convertible top.<
After the convertible top has been
stored for an extended period of time
in the convertible top compartment – e.g. in
the winter months because the hardtop
was being used – you may have to support
the convertible top by hand when closing it
for the first time.<
If the opening or closing procedure has
been interrupted due to an electrical mal-
function, the convertible top will remain in
that position for 15 minutes. The procedure
can be resumed in the desired direction by
pressing the button. After that, the convert-
ible top can be moved again and, if it is an
emergency situation, you may have to help
the top along manually. This can also be
done in ignition key position 0.
Convenience operation from the
driver's door lock
Refer to page 20.
To close manually in the event of
an electrical malfunction
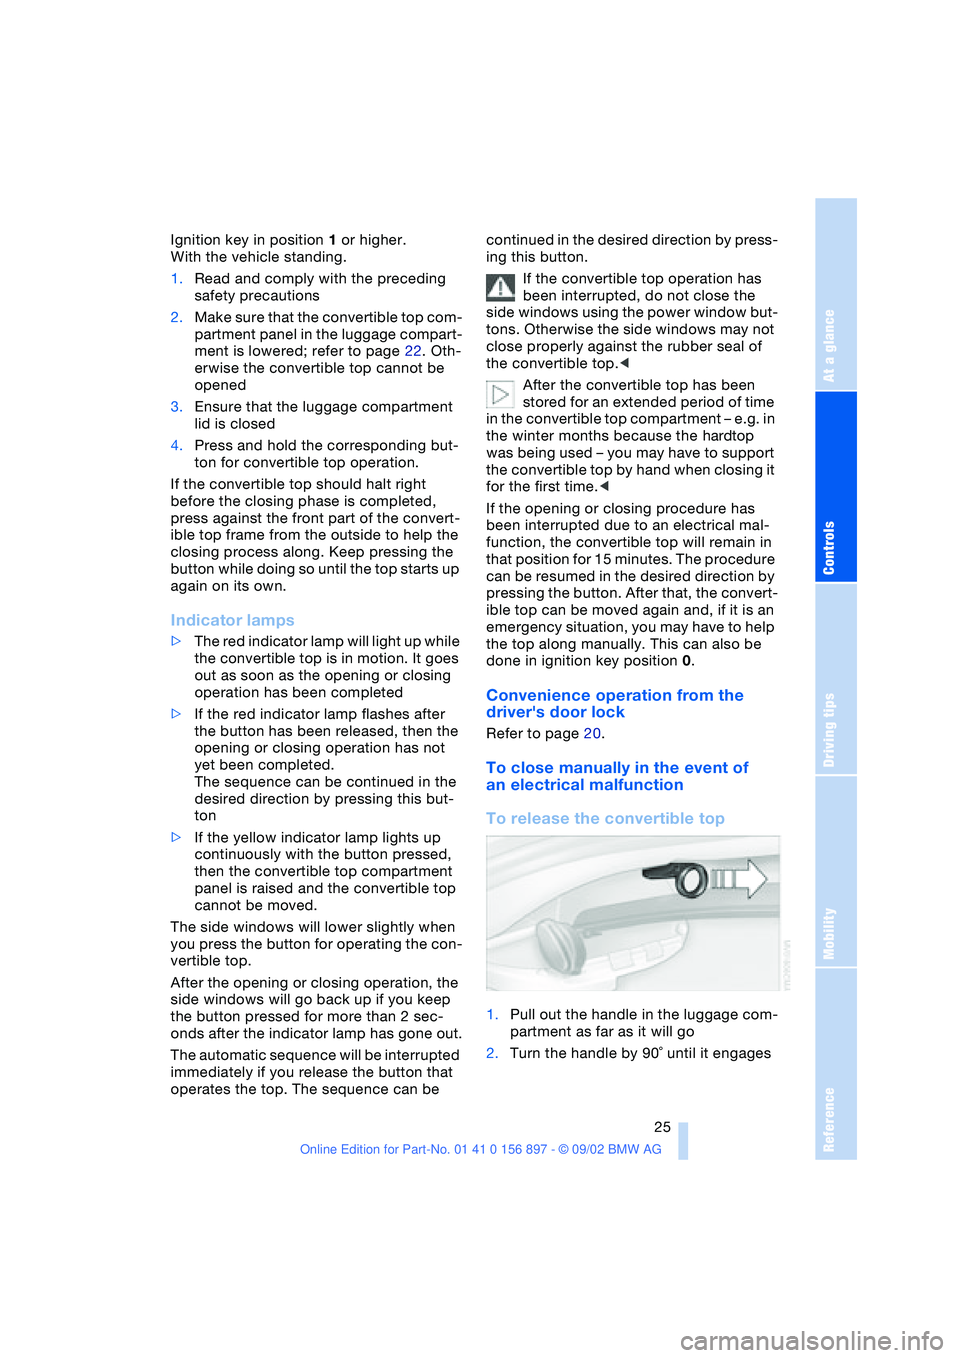
To release the convertible top
1.Pull out the handle in the luggage com-
partment as far as it will go
2.Turn the handle by 90˚ until it engages
Page 27 of 106

At a glance
Controls
Driving tips
Mobility
Reference
27
Installation
Insert the wind deflector in the guides pro-
vided on the rollover bars.
The wind deflector panels inserted in the
rollover bars cannot be removed.
Clothes hooks
Located on the wind deflector panel in the
rollover bars.
Do not hang heavy objects on the
hooks. If you do so, personal injury
could result during braking or evasive
maneuvers, for example.<
Alarm system*
The concept
The vehicle alarm system responds:
>When a door, the hood or the luggage
compartment lid is opened
>When attempts are made to start the
vehicle
>To movement inside the vehicle – inte-
rior motion sensor
>To alterations in the vehicle tilt, e.g. as
would occur during attempts to steal
the wheels or tow the vehicle
>To interruption of battery voltage.
The alarm produced by the system in the
event of unauthorized vehicle entry and
attempted theft depends on the country
version:
>Sounding of an acoustical alarm for
30 seconds
>Activation of the hazard warning flash-
ers for approx. five minutes.
Arming and disarming the alarm sys-
tem
When the vehicle is locked or unlocked
either via the driver's door lock or with the
remote control, the alarm system is simul-
taneously armed or disarmed.The hazard warning flashers blink once
when the alarm system has been properly
armed.
You can have different acknowledg-
ment signals set to confirm arming
and disarming.<
You can open the luggage compartment lid
when the system is armed by pressing the
remote control button. Refer to page 19.
When it is closed, the lid is once again
secured.
Manual operation of the luggage
compartment lid triggers the alarm.
Refer to page 21.<
To cancel an alarm:
Press the button on the remote control,
refer to page 18, or turn the ignition key to
position 1. Refer to page 38.
Indicator lamp displays
>The indicator lamp beneath the interior
mirror flashes continuously:
The system is armed
>The indicator lamp flashes when it is
being armed:
A door, the hood or luggage compart-
ment lid is not completely closed. Even
if you do not close the area causing the
alert, the remaining areas are secured
and the indicator lamp flashes continu-
ously after 10 seconds.
However, the interior motion sensor is
not activated
Page 31 of 106
At a glance
Controls
Driving tips
Mobility
Reference
31
4.Press memory button 1, 2 or 3, as
desired. The indicator lamp goes out.
To select a stored setting
Do not select a memory position while
the vehicle is moving. If you do so,
there is a risk of accident due to unex-
pected seat movement.<
Ignition key position 1:
>Briefly press memory button 1, 2 or 3,
as desired.
Movement stops immediately when one
of the seat adjustment or memory but-
tons is operated during the adjustment
process.
With the driver's door closed and the igni-
tion key either removed or in position 0
or 2:
>Press and hold the desired memory
button – 1, 2 or 3 – until the adjustment
process is completed.
If you press the
MEMORY button
accidentally: press the button again;
the indicator lamp goes out.<
You can have your vehicle adjusted in
such a way that your personal set-
tings are automatically set for the seat
positions when you unlock the vehicle with
your personal remote control.<
If you make use of this method of
adjustment, be sure that the space
behind the driver's seat is unobstructed
before unlocking the vehicle. If you fail to
do so, objects behind the seat could be
damaged by a rearward movement of the
seat.<
Seat heating*
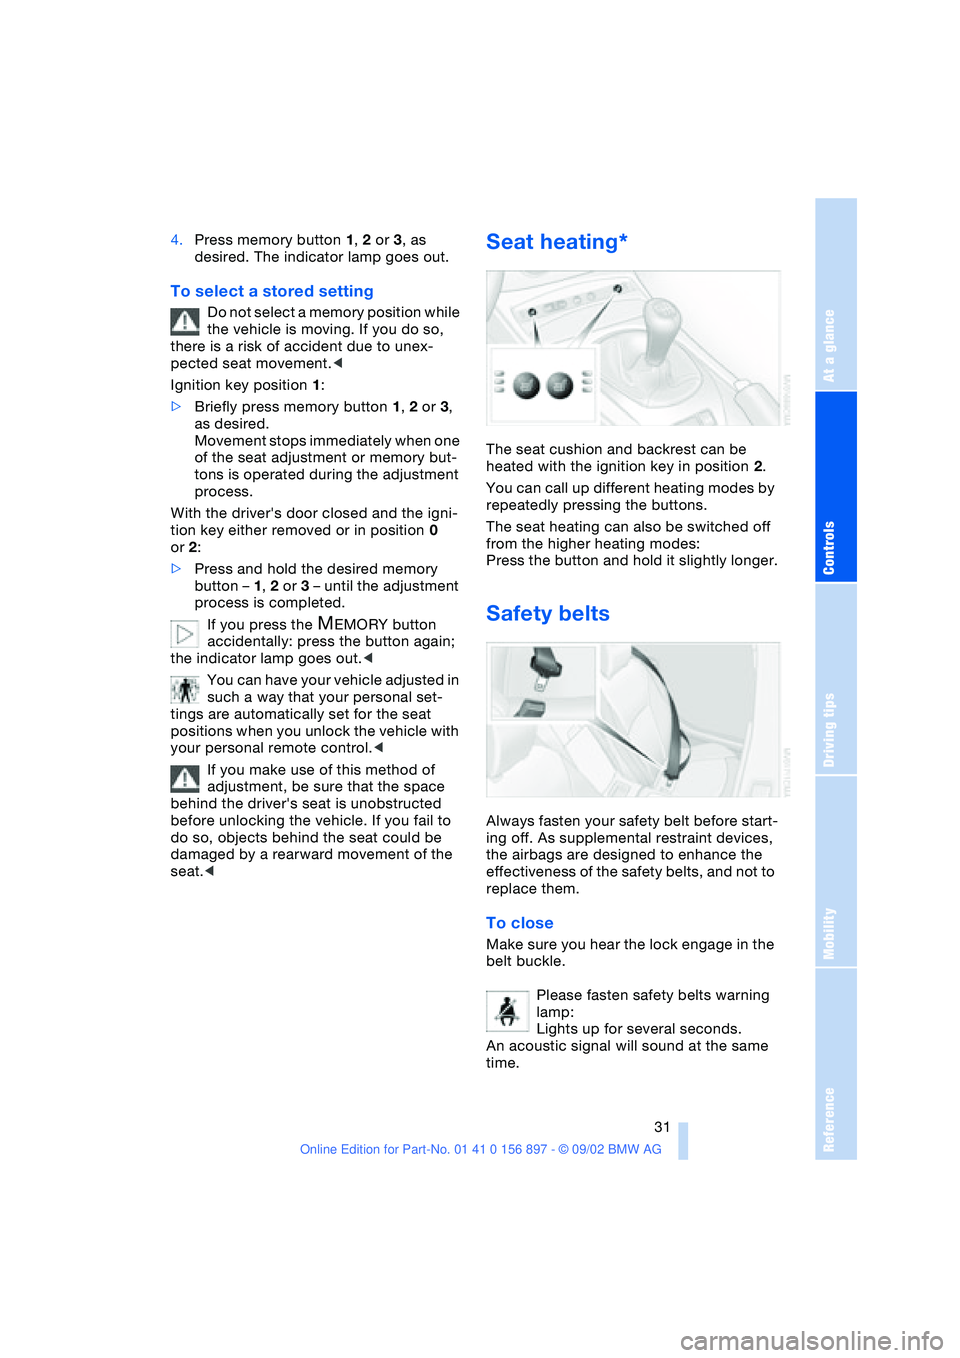
The seat cushion and backrest can be
heated with the ignition key in position 2.
You can call up different heating modes by
repeatedly pressing the buttons.
The seat heating can also be switched off
from the higher heating modes:
Press the button and hold it slightly longer.
Safety belts
Always fasten your safety belt before start-
ing off. As supplemental restraint devices,
the airbags are designed to enhance the
effectiveness of the safety belts, and not to
replace them.
To close
Make sure you hear the lock engage in the
belt buckle.
Please fasten safety belts warning
lamp:
Lights up for several seconds.
An acoustic signal will sound at the same
time.
Page 38 of 106
Driving
38
Driving
Ignition lock
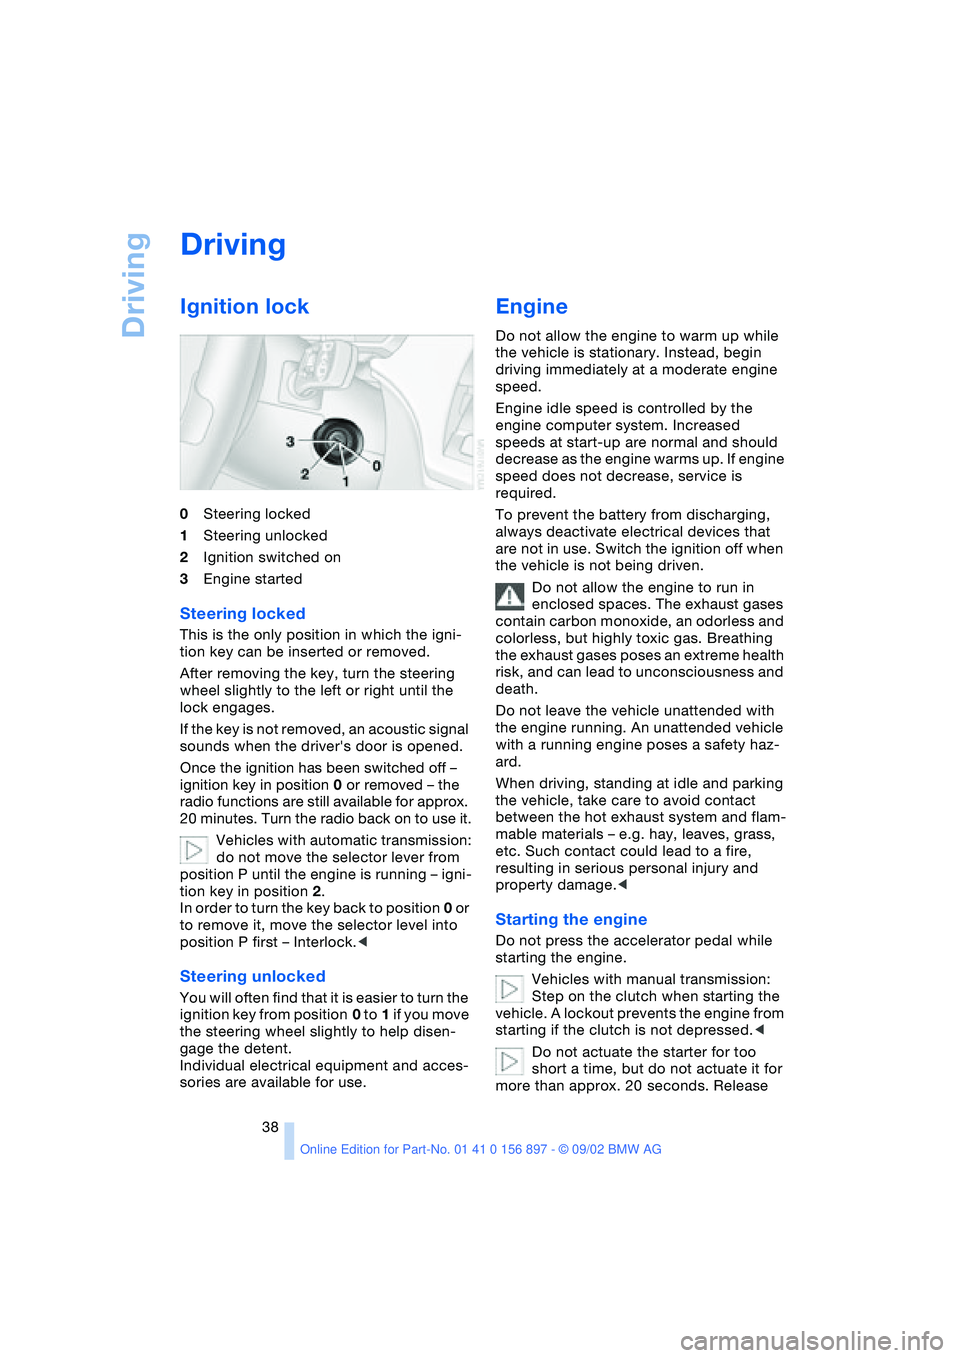
0Steering locked
1Steering unlocked
2Ignition switched on
3Engine started
Steering locked
This is the only position in which the igni-
tion key can be inserted or removed.
After removing the key, turn the steering
wheel slightly to the left or right until the
lock engages.
If the key is not removed, an acoustic signal
sounds when the driver's door is opened.
Once the ignition has been switched off –
ignition key in position 0 or removed – the
radio functions are still available for approx.
20 minutes. Turn the radio back on to use it.
Vehicles with automatic transmission:
do not move the selector lever from
position P until the engine is running – igni-
tion key in position 2.
In order to turn the key back to position 0 or
to remove it, move the selector level into
position P first – Interlock.<
Steering unlocked
You will often find that it is easier to turn the
ignition key from position 0 to 1 if you move
the steering wheel slightly to help disen-
gage the detent.
Individual electrical equipment and acces-
sories are available for use.
Engine
Do not allow the engine to warm up while
the vehicle is stationary. Instead, begin
driving immediately at a moderate engine
speed.
Engine idle speed is controlled by the
engine computer system. Increased
speeds at start-up are normal and should
decrease as the engine warms up. If engine
speed does not decrease, service is
required.
To prevent the battery from discharging,
always deactivate electrical devices that
are not in use. Switch the ignition off when
the vehicle is not being driven.
Do not allow the engine to run in
enclosed spaces. The exhaust gases
contain carbon monoxide, an odorless and
colorless, but highly toxic gas. Breathing
the exhaust gases poses an extreme health
risk, and can lead to unconsciousness and
death.
Do not leave the vehicle unattended with
the engine running. An unattended vehicle
with a running engine poses a safety haz-
ard.
When driving, standing at idle and parking
the vehicle, take care to avoid contact
between the hot exhaust system and flam-
mable materials – e.g. hay, leaves, grass,
etc. Such contact could lead to a fire,
resulting in serious personal injury and
property damage.<
Starting the engine
Do not press the accelerator pedal while
starting the engine.
Vehicles with manual transmission:
Step on the clutch when starting the
vehicle. A lockout prevents the engine from
starting if the clutch is not depressed.<
Do not actuate the starter for too
short a time, but do not actuate it for
more than approx. 20 seconds. Release
Page 60 of 106
Interior conveniences
60
Interior conveniences
Glove compartment
To open
Press the two push buttons together.
To close
Swing the door up.
To prevent injury in the event of an
accident, close the glove compart-
ment immediately after use.<
Storage compartments
Storage compartment between
backrests
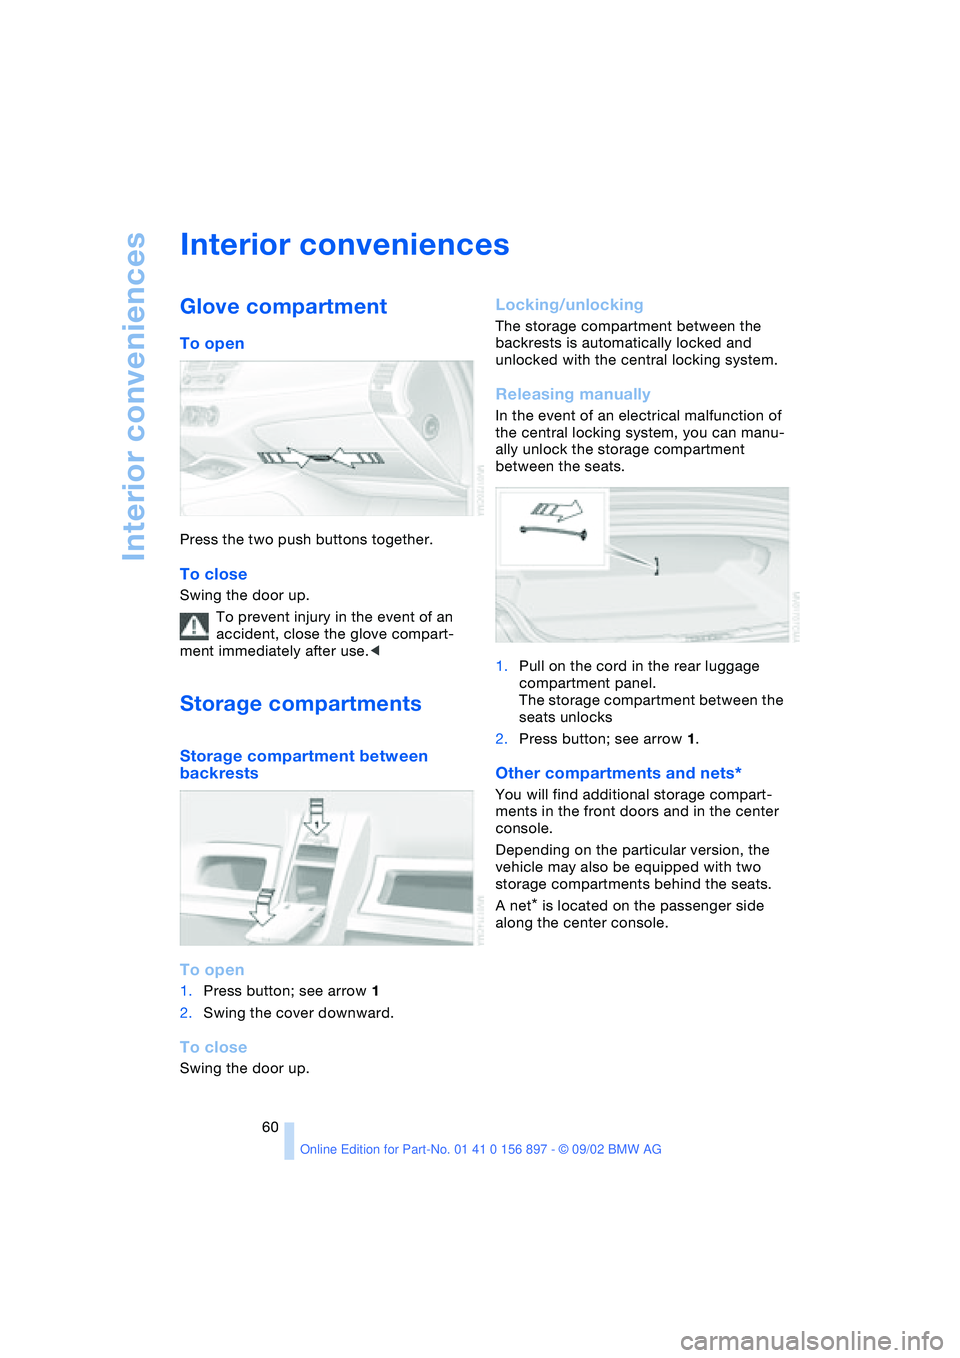
To open
1.Press button; see arrow 1
2.Swing the cover downward.
To close
Swing the door up.
Locking/unlocking
The storage compartment between the
backrests is automatically locked and
unlocked with the central locking system.
Releasing manually
In the event of an electrical malfunction of
the central locking system, you can manu-
ally unlock the storage compartment
between the seats.
1.Pull on the cord in the rear luggage
compartment panel.
The storage compartment between the
seats unlocks
2.Press button; see arrow 1.
Other compartments and nets*
You will find additional storage compart-
ments in the front doors and in the center
console.
Depending on the particular version, the
vehicle may also be equipped with two
storage compartments behind the seats.
A net
* is located on the passenger side
along the center console.
Page 70 of 106

Refueling
70
Refueling
Fuel filler door
1.Open fuel filler door
2.Turn the filler cap in a counter-clock-
wise direction
3.Place the filler cap in the bracket on the
filler door.
Releasing manually
If an electrical malfunction occurs, you can
unlock the fuel filler door manually.
1.Remove the covers of the tail lamps by
turning the lock to the right; refer also to
page 87
2.Pull the luggage compartment trim
panel slightly toward the interior.
The green button with the fuel pump
symbol is revealed
3.Undo the adhesive strip and pull off
4.Pull on the knob
Fuel filler cap is released.
Fuel gas cap
Close the gas cap carefully after refu-
eling until a "click" is heard. While closing, be sure not to squeeze the strap
which is fastened to the cap. A loose or
missing cap will activate the "Check gas
cap" lamp.<
Check gas cap
This indicator lamp comes on when
the fuel gas cap is loose or missing.
Close the gas cap tightly as described
above.
Tank capacity: approx. 14.5 gallons /
55 liters, of which approx. 2.1 gallons /
8 liters are reserve capacity.
Simple and environmentally friendly
When handling fuels, comply with all
of the applicable safety precautions
posted at the service station.<
When refueling, insert the filler nozzle com-
pletely into the filler pipe. Pulling the nozzle
out of the pipe during refueling
>results in premature shutoff
>and will reduce the effect of the vapor
recovery system on the pump.
The fuel tank is full when the filler nozzle
shuts off the first time.
Fill the fuel tank before it is com-
pletely empty. Driving to the last drop
of fuel can prevent the engine from operat-
ing properly and result in damage.<
Fuel specifications
The engine uses lead-free gasoline only.
Required fuel:
>Premium Unleaded Gasoline,
min. 91 AKI.
AKI = Anti Knock Index.
Do not use leaded fuels. The use of
leaded fuels will cause permanent
damage to the system's oxygen sensor and
the catalytic converter.<
Page 98 of 106
Everything from A - Z
98 Brake system 65
– brake fluid level 81
– brake pads 66
– break-in procedures 64
– disc brakes 65
Brakes
– driving notes 65
Break-in procedures 64
– brake system 64
– clutch 64
– differential 64
– engine 64
– tires 64
Bulb
– defective 45
– replacement 84
C
California Proposition 65
warning 83
Can holder 61
Capacities 94, 96
– luggage
compartment 22, 94
Car battery 87
Car radio, refer to the
Owner's Manual for Radio
Car wash, refer to the Car-
ing for your vehicle bro-
chure
Cargo loading 66
Cassette player operation,
refer to the Owner's Man-
ual for Radio
Catalytic converter, refer to
High temperatures 65
CD player operation, refer
to the Owner's Manual for
Radio
Cellular phone
preparation 61
Cellular phone, refer to the
separate Owner's Manual
Center high-mount brake
lamp 87
Central locking system 18
– button 20
– interior 20
Charge indicator
lamp 14, 88Check gas cap 70
– indicator lamp 14
Child seat 34
Child-restraint mounting
system (LATCH) 36
Child-restraint systems 34
Cigarette lighter 61
Cleaning the headlamps 43
Cleaning the windshield 43
Clock
– 12/24-hour mode 49
– adjusting, refer also to the
radio or onboard com-
puter Owner's Manual
Clothes hooks 27
Cluster 13
Clutch
– break-in procedure 64
Cockpit 12
Code, refer to the Owner's
Manual for Radio
Combination switch, refer
to Turn signal indicators/
Headlamp flasher 42
Compartments 60
Compression ratio 94
Computer 49
– average fuel
consumption 50
– average speed 50
– clock, 12/24-hour
mode 49
– cruising range 50
– outside temperature 49
Condensation
– removing from
windows 56, 58
Configuring adjustments,
refer to Vehicle Memory,
Key Memory 37
Consumption 50
Convenience operation
– convertible top 20
– windows 20
Convertible top 23
– convenience operation 20
– electrical fault 25
– emergency operation 25
– malfunction 25
– manual operation 23
– mechanical 23Convertible top compart-
ment panel 22
Coolant 80, 96
– indicator lamp 14
Coolant thermometer 47
Cooling system 96
Cooling, maximum 58
Copyright 4, 6
Cruise control 44
Cruising range 50
Cup holder, refer to Bever-
age holder 61
Curb weight 94
Cylinders 94
D
Data 94
– engine 94
– filling capacities 96
– weights 94
Daytime driving lamps 45
DBC Dynamic Brake
Control 52
Defects 8
Deflector for wind 26
Defrost setting 56, 58
Defroster, rear window
– air conditioning 56
– automatic climate
control 59
Defrosting
– windows 56, 58
Differential
– break-in procedures 64
Digital clock
Dimensions 95
Dimming mirror 33
Dipstick, engine oil 79
Disc brakes 65
Displacement 94
Displays, refer to Instru-
ment cluster 13
Door lock 20
Door lock buttons 21
Doors
– emergency operation 20
– locking 19
– unlocking 19
DOT quality grades 73
Drivelogic 42
Page 99 of 106

At a glance
Controls
Driving tips
Mobility
Reference
99
Driving lamps
– indicator lamp, defective
bulb 14
Driving notes 65
DSC Dynamic Stability
Control 51
– indicator lamp 14
DTC Dynamic Traction
Control 51
– indicator lamp 14
Dynamic Brake Control
DBC 52
– indicator lamp 14
Dynamic Stability Control
DSC 51
– indicator lamp 14
Dynamic Traction Control
DTC 51
– indicator lamp 14
E
Electric Power Steering
EPS 42
– indicator lamp 15
Electric power windows 22
Electrical convertible
top 25
Electrical fault
– convertible top 25
– door lock 20
– fuel filler door 70
– storage compartment 60
Emergency operation
– convertible top 25
– doors 20
– fuel filler door 70
– storage compartment 60
Emergency release
– from inside luggage
compartment 22
Engine 38
– break-in procedures 64
– starting 38
– switching off 39
Engine compartment 78
Engine coolant 96
– refilling 81Engine oil 79
– capacity 96
– quality 80
– refilling 79
Engine oil consumption 79
Engine oil level 79
– checking 79
Engine oil pressure 79
– indicator lamp 14
Engine oil sensor 79
– indicator lamp 14
Engine oil types 80
Engine output 94
Engine speed 94
EPS Electric Power
Steering 42
ESP, refer to DSC 51
Exhaust system, refer to
High temperatures 65
Exterior mirrors 32
– automatic dimming
feature 33
Eyelet for tow-starting and
towing 90
F
False alarm 28
Fault
– storage compartment 60
First-aid kit 89
Flat tire 73, 75
Flat Tire Monitor 53
– indicator lamp 14, 53
Fog lamps 46
– indicator lamp 14
Footbrake, refer to Driving
notes 65
Front airbags 33
Fuel consumption 50
– display 47
Fuel filler door 70
– unlocking in case of elec-
trical fault 70
Fuel gas cap 70
Fuel gauge 47
Fuel specifications 70, 94
Fuel tank capacity 96
Fuses 88
G
Gasoline gauge, refer to
Fuel gauge 47
Gasoline specifications,
refer to Fuel
specifications 70
Glove compartment 60
Gross vehicle weight,
approved 94
Guide Booklet, Warranty
and Service 82
H
Handbrake 39
Hands-free system 61
Hardtop preparation 67
Hardtop, refer to the sepa-
rate Owner's Manual
Hazard warning flashers 12
Hazard warning triangle 89
Head restraints 30
Headlamp flasher 42, 46
Headlamp washer
system 79, 96
Headlamps 84
– access 84
– high beam 42
Heated seats 31
Heavy loads 66
Height 95
High beams 42, 46
– bulb replacement 85
– indicator lamp 14
High temperatures 65
Hood 77
Hood release 77
Hydraulic brake assistant,
refer to DBC
Hydroplaning 65
I
Ignition lock 38
Imprint 4, 6
Indicator and warning
lamps 14