2003 BMW Z4 2.5I oil level
[x] Cancel search: oil levelPage 14 of 106

Overview
14
Indicator and warning
lamps
Technology that monitors itself
Indicator and warning lamps that are iden-
tified by
+ are tested for proper functioning
whenever the ignition key is turned. They
each light up once for different periods of
time.
If a fault should occur in one of these sys-
tems, the corresponding lamp does not go
out after the engine is started or it lights up
again while the vehicle is moving. The indi-
cated pages provide information on what
measures to take.
Please fasten safety belts
+31
Airbags
+33
Battery charge current
+87
Engine oil pressure/Engine oil level/
Engine oil sensor
+79
Parking brake/Chassis control sys-
tem/Dynamic Brake Control/Brake
fluid
+39/ 51/ 52/ 81
Brake warning lamp for Canadian
models
Antilock Brake System ABS/Chas-
sis control system
+53/ 51
Antilock Brake System ABS/Chas-
sis control system for Canadian
modelsDynamic Stability Control DSC
+51
Dynamic Traction Control DTC
+51
Flat Tire Monitor
+53
Automatic transmission
+41
Brake pads
+66
Add coolant80
Check Gas Cap
+
Service engine soon +83
Service engine soon
+
warning lamp for Canadian
models.
Defective bulbs45
Turn signal indicators42
Fog lamps46
Headlamp flasher/
High beams42/ 46
Page 48 of 106

Everything under control
48
Between the blue and red zones
Normal operating range. The needle may
rise as far as the edge of the red sector dur-
ing normal operation.
Red
When you switch on the ignition, warning
lamp 1 comes on briefly to indicate an
operational check.
Comes on while driving:
The engine has overheated. Switch off the
engine immediately and allow it to cool
down.
For checking the coolant level, refer to
page 80.
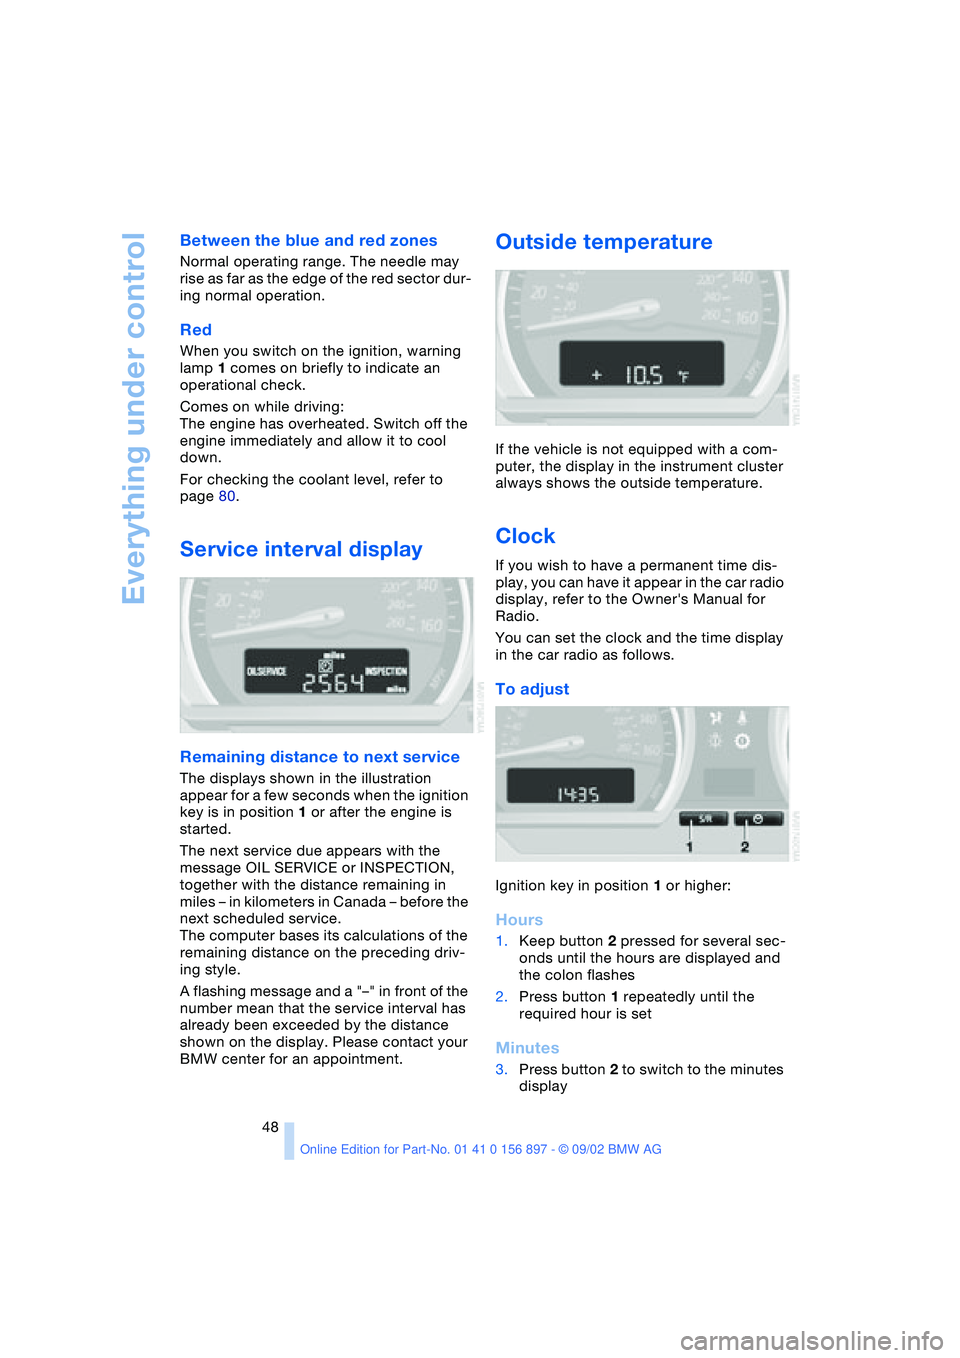
Service interval display
Remaining distance to next service
The displays shown in the illustration
appear for a few seconds when the ignition
key is in position 1 or after the engine is
started.
The next service due appears with the
message OIL SERVICE or INSPECTION,
together with the distance remaining in
miles – in kilometers in Canada – before the
next scheduled service.
The computer bases its calculations of the
remaining distance on the preceding driv-
ing style.
A flashing message and a "–" in front of the
number mean that the service interval has
already been exceeded by the distance
shown on the display. Please contact your
BMW center for an appointment.
Outside temperature
If the vehicle is not equipped with a com-
puter, the display in the instrument cluster
always shows the outside temperature.
Clock
If you wish to have a permanent time dis-
play, you can have it appear in the car radio
display, refer to the Owner's Manual for
Radio.
You can set the clock and the time display
in the car radio as follows.
To adjust
Ignition key in position 1 or higher:
Hours
1.Keep button 2 pressed for several sec-
onds until the hours are displayed and
the colon flashes
2.Press button 1 repeatedly until the
required hour is set
Minutes
3.Press button 2 to switch to the minutes
display
Page 76 of 106

Wheels and tires
76
Winter tires
Choosing the right tire
BMW recommends Run Flat winter tires –
M+S – for operation under inclement winter
driving conditions. While all-season tires
with the M+S identification mark do indeed
possess better winter traction than summer
tires that have the H, V, W, Y and ZR speed
ratings, they generally do not provide the
same levels of performance as true winter
tires.
In the interests of sure tracking and safe
steering response, mount winter tires
which are made by the same manufacturer
and which have the same tread configura-
tion on all four wheels.
Your BMW is equipped with Run Flat tires.
Please consult your BMW center if you
wish to replace the tires of your BMW or
change from summer to winter tires, or vice
versa.
When replacing tires or changing from
summer to winter tires – or vice versa –
use only Run Flat tires since a spare tire will
not be available in the event of a flat tire.<
Comply with recommended speed
Never exceed the maximum speed for
which the winter tires are rated.
Unprofessional attempts by laymen to ser-
vice tires can lead to damage and acci-
dents.
Have this work performed by skilled pro-
fessionals only. Any BMW center has the
required technical knowledge and the
proper equipment and will be happy to
assist you.<
Tire condition, tire pressure
Once the tire wears to below 3/16 in /
4 mm, winter tires display a perceptible
decrease in their ability to cope with winter
driving conditions, and should be replaced
in the interest of safety.
Comply with the specified tire inflation
pressures – and be sure to have the wheel
and tire assemblies balanced every time
you change the tires.
Storage
Store tires in a cool, dry place, protecting
them against light whenever possible. Pro-
tect the tires from contact with oil, grease
and fuel.
Snow chains*
Only certain types of snow chains have
been tested by BMW, classified as road-
safe and approved. Consult your BMW
center for more information. BMW recom-
mends using only approved fine-link snow
chains.
Their use is only permitted in pairs on the
winter tires on the rear wheels. Comply
with all manufacturer's safety precautions
when mounting the chains.
You cannot mount snow chains on the fol-
lowing tires:
245/40 R 17
255/35 R 18
Do not exceed a speed of 30 mph /
50 km/h when using snow chains.<
Do not initialize the Flat Tire Monitor
after snow chains have been
mounted.
When driving with snow chains, it may be
useful to deactivate the DSC briefly. Refer
to page 51.<
Page 79 of 106

At a glance
Controls
Driving tips
Mobility
Reference
79
Washer fluids for washer
systems
Headlamp* and windshield washer
system
Capacity of windshield washer system:
approx. 3.2 US quarts / 3 liters.
Capacity when equipped with headlamp
washer system: approx. 5.3 US quarts /
5 liters.
Fill with water and – if required – with an
antifreeze agent according to the manufac-
turer's recommendations.
We recommend that you mix the
washer fluid before adding it to the
reservoir.<
Antifreeze agent for the washer sys-
tems is flammable. For this reason,
keep it away from sources of flame and
store it only in its original container. Store it
so that it is inaccessible to children. Com-
ply with the instructions on the contain-
ers.<
Engine oil
Engine oil pressure
The red engine oil warning lamp
lights up:
Stop the vehicle immediately and
switch off the engine. Check the engine oil
level and top off as required. If the oil level
is correct, please contact the nearest BMW
center.
Do not continue driving, as the engine
could sustain serious damage from
inadequate lubrication.<
Engine oil level
The yellow engine oil indicator lamp
lights up while driving:
The oil level is at the absolute mini-
mum; refill as soon as possible. Do not
drive more than approx. 30 miles / 50 km
until you do.
The yellow engine oil indicator lamp
lights up after the engine is
switched off: add engine oil at the
earliest opportunity, when you stop to
refuel.
Engine oil sensor
The yellow engine oil indicator lamp
lights up within 20 seconds after
the engine is started:
The oil level sensor is defective. Please
have it checked by a BMW center.
Checking the oil level
1.Park the vehicle on a level surface
2.Switch the engine off after it has
reached normal operating temperature
3.After approx. 5 minutes, pull the dip-
stick out and wipe it off with a clean lint-
free cloth, paper towel, or similar mate-
rial
4.Carefully push the dipstick all the way
into the guide tube and pull it out again
5.The oil level should be between the two
marks on the dipstick
6.Return the dipstick to the guide tube,
inserting it as far as it will go.
As with fuel economy, oil consumption is
directly influenced by your driving style and
vehicle operating conditions.
Page 80 of 106

In the engine compartment
80 The oil volume between the two marks on
the dipstick corresponds to approx.
1.1 US quarts / 1 liter. Do not fill beyond
the upper mark on the dipstick. Excess oil
will damage the engine.
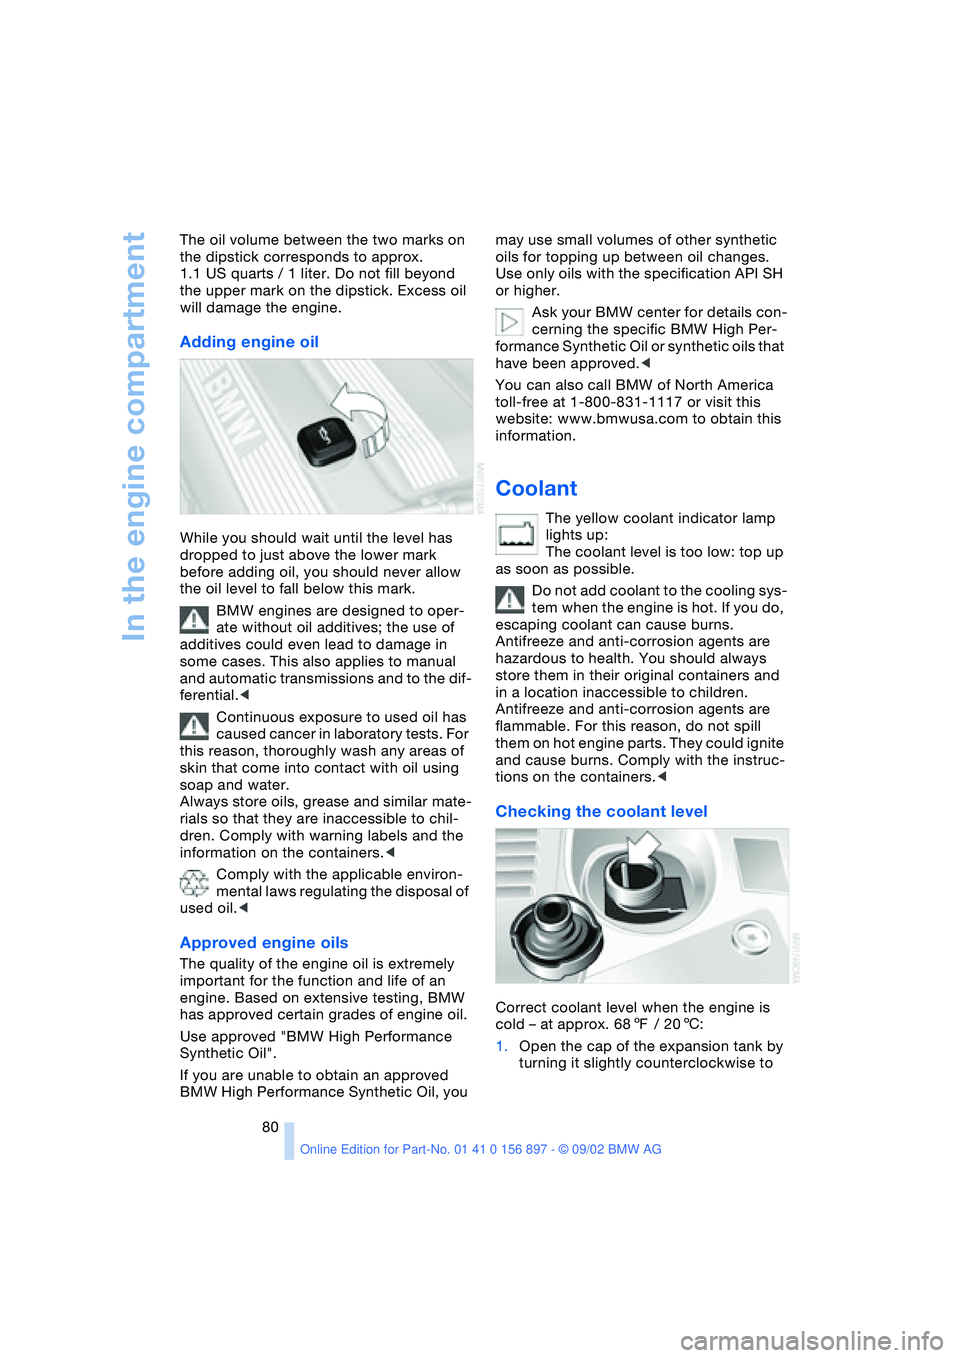
Adding engine oil
While you should wait until the level has
dropped to just above the lower mark
before adding oil, you should never allow
the oil level to fall below this mark.
BMW engines are designed to oper-
ate without oil additives; the use of
additives could even lead to damage in
some cases. This also applies to manual
and automatic transmissions and to the dif-
ferential.<
Continuous exposure to used oil has
caused cancer in laboratory tests. For
this reason, thoroughly wash any areas of
skin that come into contact with oil using
soap and water.
Always store oils, grease and similar mate-
rials so that they are inaccessible to chil-
dren. Comply with warning labels and the
information on the containers.<
Comply with the applicable environ-
mental laws regulating the disposal of
used oil.<
Approved engine oils
The quality of the engine oil is extremely
important for the function and life of an
engine. Based on extensive testing, BMW
has approved certain grades of engine oil.
Use approved "BMW High Performance
Synthetic Oil".
If you are unable to obtain an approved
BMW High Performance Synthetic Oil, you may use small volumes of other synthetic
oils for topping up between oil changes.
Use only oils with the specification API SH
or higher.
Ask your BMW center for details con-
cerning the specific BMW High Per-
formance Synthetic Oil or synthetic oils that
have been approved.<
You can also call BMW of North America
toll-free at 1-800-831-1117 or visit this
website: www.bmwusa.com to obtain this
information.
Coolant
The yellow coolant indicator lamp
lights up:
The coolant level is too low: top up
as soon as possible.
Do not add coolant to the cooling sys-
tem when the engine is hot. If you do,
escaping coolant can cause burns.
Antifreeze and anti-corrosion agents are
hazardous to health. You should always
store them in their original containers and
in a location inaccessible to children.
Antifreeze and anti-corrosion agents are
flammable. For this reason, do not spill
them on hot engine parts. They could ignite
and cause burns. Comply with the instruc-
tions on the containers.<
Checking the coolant level
Correct coolant level when the engine is
cold – at approx. 687 / 206:
1.Open the cap of the expansion tank by
turning it slightly counterclockwise to
Page 83 of 106

At a glance
Controls
Driving tips
Mobility
Reference
83
Laws and regulations
California Proposition 65
warning
California laws require us to state the fol-
lowing warning:
Engine exhaust, some of its constitu-
ents, and certain vehicle components
contain or emit chemicals known to the
State of California to cause cancer and
birth defects and reproductive harm. In
addition, certain fluids contained in vehi-
cles and certain products of component
wear contain or emit chemicals known to
the State of California to cause cancer and
birth defects or other reproductive harm.
Battery posts, terminals and related acces-
sories contain lead and lead compounds.
Wash your hands after handling. Used
engine oil contains chemicals that have
caused cancer in laboratory animals.
Always protect your skin by washing thor-
oughly with soap and water.<
OBD interface socket
The Onboard Diagnostic OBD interface
socket is located on the left of the driver's
side behind a specially marked cover
located beneath the instrument panel. The
cover has the letters OBD on it.
This interface makes it possible to access
data on emissions – related components
using special equipment.If the Service Engine Soon indicator
lamp comes on either continuously
or intermittently, this indicates a
fault in the emissions-related electronic
systems. Although the vehicle remains
operational, you should have the systems
checked by your BMW center at the earli-
est possible opportunity.
The illuminated indicator informs you of the
need for service, not that you need to stop
the vehicle. However, the systems should
be checked by your BMW center at the
next opportunity.
If the indicator blinks or flashes, this indi-
cates a high level of engine misfire. Reduce
speed and contact the nearest BMW center
immediately. Severe engine misfiring over
even a short period of time can seriously
damage emission control system compo-
nents, especially the catalytic converter.
Service Engine Soon
warning lamp for Canadian
models.
If the fuel filler cap is not on tight
enough, the OBD system can detect
leaking vapor and the indicator will light up.
If the fuel filler cap is then tightened, the
indicator will usually go out after a short
period of time.<
Page 98 of 106

Everything from A - Z
98 Brake system 65
– brake fluid level 81
– brake pads 66
– break-in procedures 64
– disc brakes 65
Brakes
– driving notes 65
Break-in procedures 64
– brake system 64
– clutch 64
– differential 64
– engine 64
– tires 64
Bulb
– defective 45
– replacement 84
C
California Proposition 65
warning 83
Can holder 61
Capacities 94, 96
– luggage
compartment 22, 94
Car battery 87
Car radio, refer to the
Owner's Manual for Radio
Car wash, refer to the Car-
ing for your vehicle bro-
chure
Cargo loading 66
Cassette player operation,
refer to the Owner's Man-
ual for Radio
Catalytic converter, refer to
High temperatures 65
CD player operation, refer
to the Owner's Manual for
Radio
Cellular phone
preparation 61
Cellular phone, refer to the
separate Owner's Manual
Center high-mount brake
lamp 87
Central locking system 18
– button 20
– interior 20
Charge indicator
lamp 14, 88Check gas cap 70
– indicator lamp 14
Child seat 34
Child-restraint mounting
system (LATCH) 36
Child-restraint systems 34
Cigarette lighter 61
Cleaning the headlamps 43
Cleaning the windshield 43
Clock
– 12/24-hour mode 49
– adjusting, refer also to the
radio or onboard com-
puter Owner's Manual
Clothes hooks 27
Cluster 13
Clutch
– break-in procedure 64
Cockpit 12
Code, refer to the Owner's
Manual for Radio
Combination switch, refer
to Turn signal indicators/
Headlamp flasher 42
Compartments 60
Compression ratio 94
Computer 49
– average fuel
consumption 50
– average speed 50
– clock, 12/24-hour
mode 49
– cruising range 50
– outside temperature 49
Condensation
– removing from
windows 56, 58
Configuring adjustments,
refer to Vehicle Memory,
Key Memory 37
Consumption 50
Convenience operation
– convertible top 20
– windows 20
Convertible top 23
– convenience operation 20
– electrical fault 25
– emergency operation 25
– malfunction 25
– manual operation 23
– mechanical 23Convertible top compart-
ment panel 22
Coolant 80, 96
– indicator lamp 14
Coolant thermometer 47
Cooling system 96
Cooling, maximum 58
Copyright 4, 6
Cruise control 44
Cruising range 50
Cup holder, refer to Bever-
age holder 61
Curb weight 94
Cylinders 94
D
Data 94
– engine 94
– filling capacities 96
– weights 94
Daytime driving lamps 45
DBC Dynamic Brake
Control 52
Defects 8
Deflector for wind 26
Defrost setting 56, 58
Defroster, rear window
– air conditioning 56
– automatic climate
control 59
Defrosting
– windows 56, 58
Differential
– break-in procedures 64
Digital clock
Dimensions 95
Dimming mirror 33
Dipstick, engine oil 79
Disc brakes 65
Displacement 94
Displays, refer to Instru-
ment cluster 13
Door lock 20
Door lock buttons 21
Doors
– emergency operation 20
– locking 19
– unlocking 19
DOT quality grades 73
Drivelogic 42
Page 99 of 106

At a glance
Controls
Driving tips
Mobility
Reference
99
Driving lamps
– indicator lamp, defective
bulb 14
Driving notes 65
DSC Dynamic Stability
Control 51
– indicator lamp 14
DTC Dynamic Traction
Control 51
– indicator lamp 14
Dynamic Brake Control
DBC 52
– indicator lamp 14
Dynamic Stability Control
DSC 51
– indicator lamp 14
Dynamic Traction Control
DTC 51
– indicator lamp 14
E
Electric Power Steering
EPS 42
– indicator lamp 15
Electric power windows 22
Electrical convertible
top 25
Electrical fault
– convertible top 25
– door lock 20
– fuel filler door 70
– storage compartment 60
Emergency operation
– convertible top 25
– doors 20
– fuel filler door 70
– storage compartment 60
Emergency release
– from inside luggage
compartment 22
Engine 38
– break-in procedures 64
– starting 38
– switching off 39
Engine compartment 78
Engine coolant 96
– refilling 81Engine oil 79
– capacity 96
– quality 80
– refilling 79
Engine oil consumption 79
Engine oil level 79
– checking 79
Engine oil pressure 79
– indicator lamp 14
Engine oil sensor 79
– indicator lamp 14
Engine oil types 80
Engine output 94
Engine speed 94
EPS Electric Power
Steering 42
ESP, refer to DSC 51
Exhaust system, refer to
High temperatures 65
Exterior mirrors 32
– automatic dimming
feature 33
Eyelet for tow-starting and
towing 90
F
False alarm 28
Fault
– storage compartment 60
First-aid kit 89
Flat tire 73, 75
Flat Tire Monitor 53
– indicator lamp 14, 53
Fog lamps 46
– indicator lamp 14
Footbrake, refer to Driving
notes 65
Front airbags 33
Fuel consumption 50
– display 47
Fuel filler door 70
– unlocking in case of elec-
trical fault 70
Fuel gas cap 70
Fuel gauge 47
Fuel specifications 70, 94
Fuel tank capacity 96
Fuses 88
G
Gasoline gauge, refer to
Fuel gauge 47
Gasoline specifications,
refer to Fuel
specifications 70
Glove compartment 60
Gross vehicle weight,
approved 94
Guide Booklet, Warranty
and Service 82
H
Handbrake 39
Hands-free system 61
Hardtop preparation 67
Hardtop, refer to the sepa-
rate Owner's Manual
Hazard warning flashers 12
Hazard warning triangle 89
Head restraints 30
Headlamp flasher 42, 46
Headlamp washer
system 79, 96
Headlamps 84
– access 84
– high beam 42
Heated seats 31
Heavy loads 66
Height 95
High beams 42, 46
– bulb replacement 85
– indicator lamp 14
High temperatures 65
Hood 77
Hood release 77
Hydraulic brake assistant,
refer to DBC
Hydroplaning 65
I
Ignition lock 38
Imprint 4, 6
Indicator and warning
lamps 14