Page 25 of 92
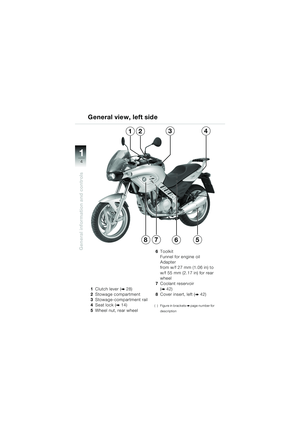
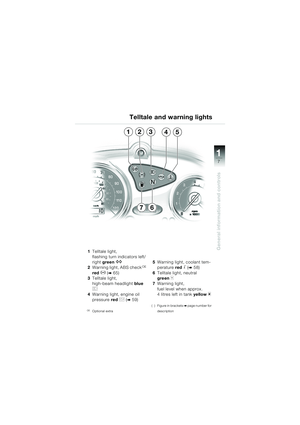
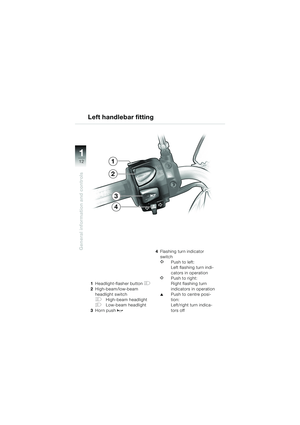
 1
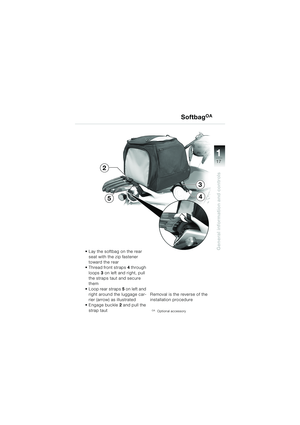
23
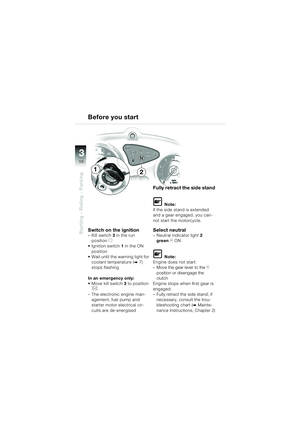
Safety check
2
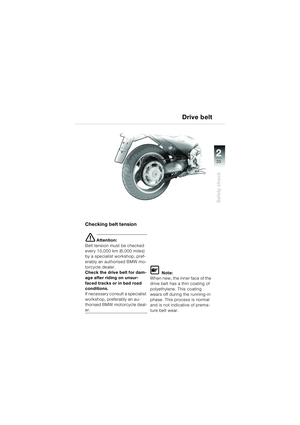
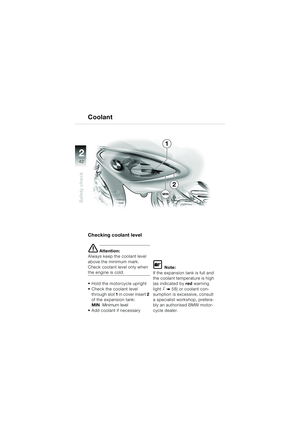
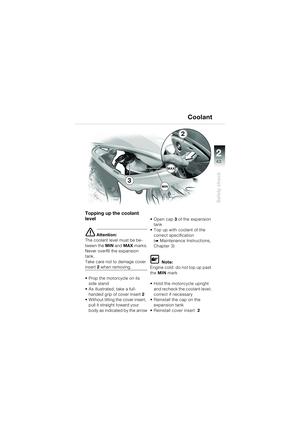
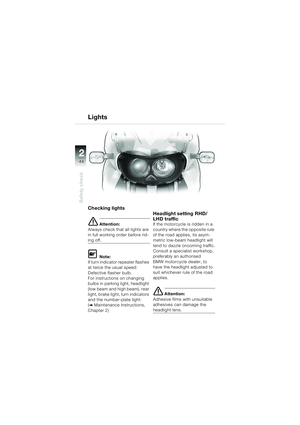
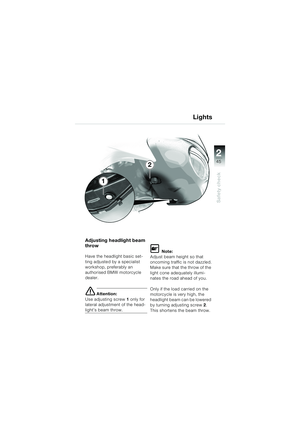
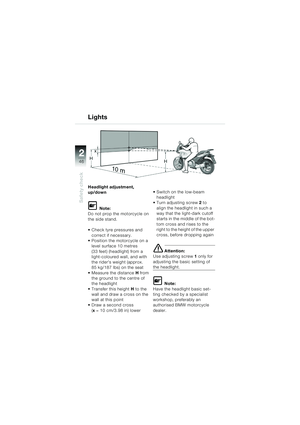
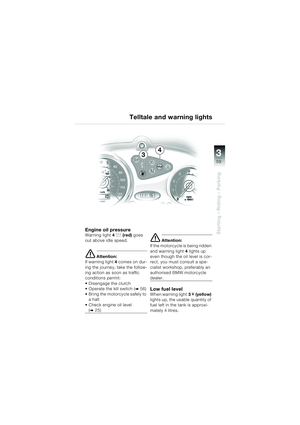
Engine oil
Checking oil level
e Attention:
The red warning light
p (b7)
for engine oil pressure indicates
that the oil pump is delivering
very little oil or none at all: do
n")
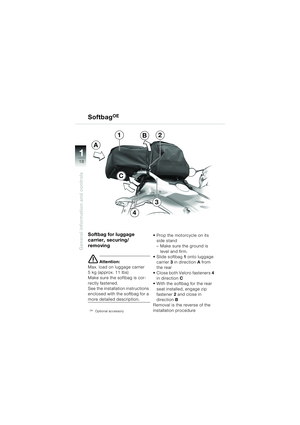
1
23
Safety check
2
Engine oil
Checking oil level
e Attention:
The red warning light
p (b7)
for engine oil pressure indicates
that the oil pump is delivering
very little oil or none at all: do
not regard this light as an oil
level indicator. Oil pressure
builds up after 1 – 2 seconds
and the warning light goes out –
the red engine oil pressure
warning light
p should remain
off when the engine is running.
Check the oil level regularly,
each time you stop for fuel (or
every second time at the latest).
e Attention:
The dipstick might show a low
oil level if the motorcycle has
been out of use for a lengthy
period. Under these circum-
stances top up the oil level only
after measuring the oil level in
accordance with the instruc-
tions.
Check the oil level only when
the engine is at operating tem-
perature.
Checking the oil level when the
engine is cold, just after the en-
gine has been run briefly or
when it is not properly warm will
falsify the reading, and could
lead to the engine being operat-
ed with the wrong quantity of oil
in the system.
10K14bkg2.book Seite 23 Montag, 15. September 2003 5:30 17
Page 26 of 92
24
Safety check
2
Engine oil
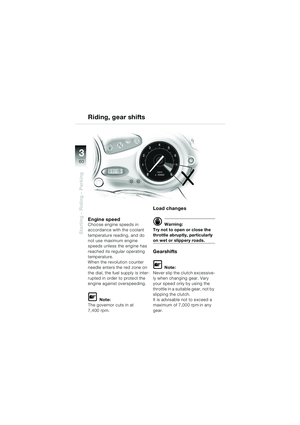
L Note:
The oil level varies with the tem-
perature of the oil. The higher
the temperature, the higher the
level of oil in the tank.
In order to avoid overfilling, it is
advisable to check the oil level
after the motorcycle has been
ridden. Hold the motorcycle upright
– Make sure the ground is level and firm.
– Check the oil when the engine is at operating temperature
(after the motorcycle has
been ridden, or else allow the
engine to idle until the fan
switches on)
Allow the engine to idle for at least 1 minute
Switch off the ignition
Remove plug 2
e Attention:
To avoid damage to the engine:
– Never exceed the maximum oil level.
– Always keep the level above
the minimum mark.
10K14bkg2.book Seite 24 Montag, 15. September 2003 5:30 17
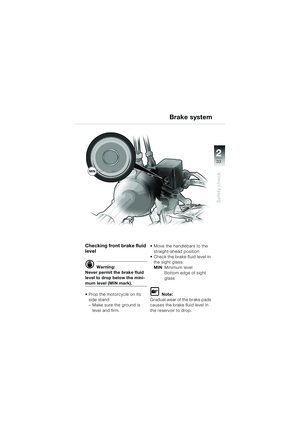
Page 27 of 92
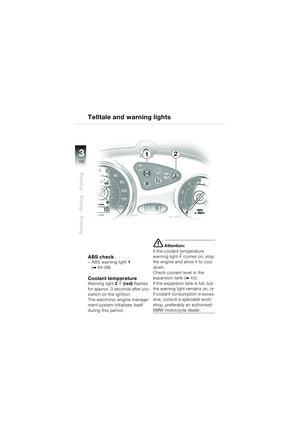
1
25
Safety check
2
MAX
MIN
1
34
2
A
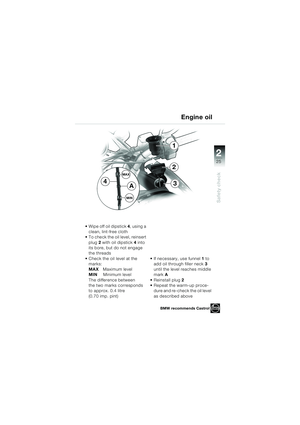
Wipe off oil dipstick 4, using a
clean, lint-free cloth
To check the oil level, reinsert
plug 2 with oil dipstick 4 into
its bore, but do not engage
the threads
Check the oil level at the marks:
MAX Maximum level
MIN Minimum level
The difference between
the two marks corresponds
to approx. 0.4 litre
(0.70 imp. pint) If necessary, use funnel
1 to
add oil through filler neck 3
until the level reaches middle
mark A
Reinstall plug 2
Repeat the warm-up proce- dure and re-check the oil level
as described above
Engine oil
BMW recommends Castrol
10K14bkg2.book Seite 25 Montag, 15. September 2003 5:30 17
Page 28 of 92
26
Safety check
2
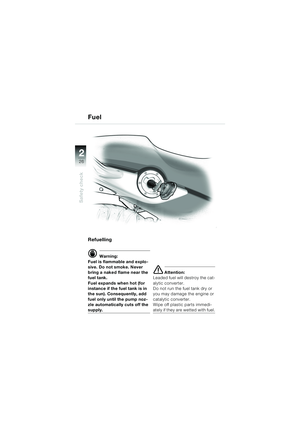
Refuelling
d Warning:
Fuel is flammable and explo-
sive. Do not smoke. Never
bring a naked flame near the
fuel tank.
Fuel expands when hot (for
instance if the fuel tank is in
the sun). Consequently, add
fuel only until the pump noz-
zle automatically cuts off the
supply.
e Attention:
Leaded fuel will destroy the cat-
alytic converter.
Do not run the fuel tank dry or
you may damage the engine or
catalytic converter.
Wipe off plastic parts immedi-
ately if they are wetted with fuel.
Fuel
10K14bkg2.book Seite 26 Montag, 15. September 2003 5:30 17
Page 29 of 92
1
27
Safety check
2
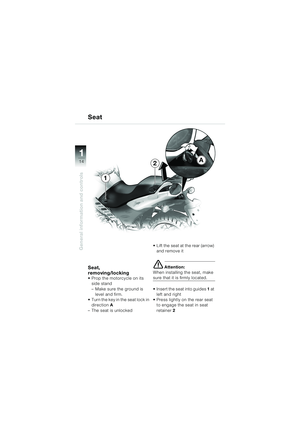
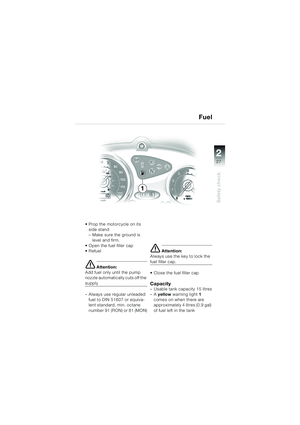
Prop the motorcycle on its side stand
– Make sure the ground is level and firm.
Open the fuel filler cap
Refuel
e Attention:
Add fuel only until the pump
nozzle automatically cuts off the
supply
– Always use regular unleaded fuel to DIN 51607 or equiva-
lent standard, min. octane
number 91 (RON) or 81 (MON)
e Attention:
Always use the key to lock the
fuel filler cap.
Close the fuel filler cap
Capacity– Usable tank capacity 15 litres
–A yellow warning light 1
comes on when there are
approximately 4 litres (0.9 gal)
of fuel left in the tank
Fuel
1
10K14bkg2.book Seite 27 Montag, 15. September 2003 5:30 17
Page 30 of 92
28
Safety check
2
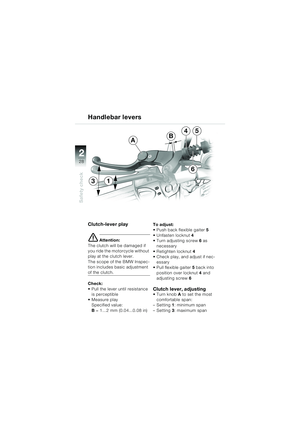
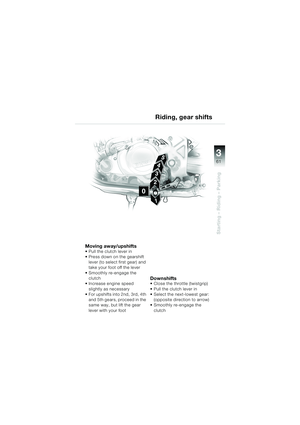
Clutch-lever play
e Attention:
The clutch will be damaged if
you ride the motorcycle without
play at the clutch lever.
The scope of the BMW Inspec-
tion includes basic adjustment
of the clutch.
Check:
Pull the lever until resistance is perceptible
Measure play Specified value:
B = 1…2 mm (0.04...0.08 in) To adjust:
Push back flexible gaiter
5
Unfasten locknut 4
Turn adjusting screw 6 as
necessary
Retighten locknut 4
Check play, and adjust if nec-
essary
Pull flexible gaiter 5 back into
position over locknut 4 and
adjusting screw 6
Clutch lever, adjustingTurn knob A to set the most
comfortable span:
–Setting 1: minimum span
–Setting 3: maximum span
Handlebar levers
6
4
B
5
A
31
10K14bkg2.book Seite 28 Montag, 15. September 2003 5:30 17
Page 31 of 92
1
29
Safety check
2
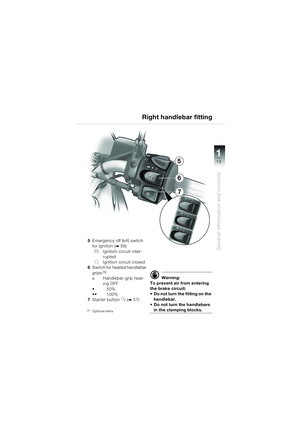
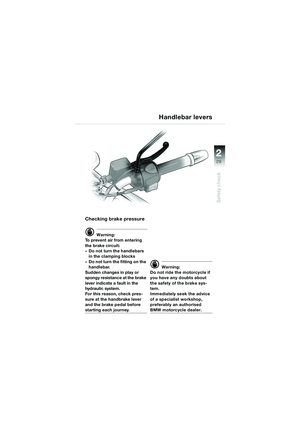
Checking brake pressure
d Warning:
To prevent air from entering
the brake circuit:
– Do not turn the handlebars in the clamping blocks
– Do not turn the fitting on the handlebar.
Sudden changes in play or
spongy resistance at the brake
lever indicate a fault in the
hydraulic system.
For this reason, check pres-
sure at the handbrake lever
and the brake pedal before
starting each journey.
d Warning:
Do not ride the motorcycle if
you have any doubts about
the safety of the brake sys-
tem.
Immediately seek the advice
of a specialist workshop,
preferably an authorised
BMW motorcycle dealer.
Handlebar levers
10K14bkg2.book Seite 29 Montag, 15. September 2003 5:30 17
Page 32 of 92
30
Safety check
2
Work on the brake system
d Warning:
To ensure reliability have all
work on the brake systems
carried out by a specialist
workshop, preferably an au-
thorised BMW motorcycle
dealer.
Brake system, checking
d Warning:
Sudden changes in play or
spongy action of the brake le-
ver indicate a fault in the
brake system.
Before riding off, therefore,
always check the resistance
of the front and rear brake le-
vers and test operation of the
brakes.
Do not ride the motorcycle if
you have any doubts about
the safety of the brake sys-
tem.
Do not, under any circum-
stances, adjust the screw in
the pedal of the footbrake.
Immediately seek the advice
of a specialist workshop,
preferably an authorised
BMW motorcycle dealer.
Brake system – general
10K14bkg2.book Seite 30 Montag, 15. September 2003 5:30 17


 24
Safety check
2
Engine oil
L Note:
The oil level varies with the tem-
perature of the oil. The higher
the temperature, the higher the
level of oil in the tank.
In order to avoid overfilling, it is")
 1
25
Safety check
2
MAX
MIN
1
34
2
A
Wipe off oil dipstick 4, using a
clean, lint-free cloth
To check the oil level, reinsert
plug 2 with oil dipstick 4 into
its bore, but do not engage
the th")
 26
Safety check
2
Refuelling
d Warning:
Fuel is flammable and explo-
sive. Do not smoke. Never
bring a naked flame near the
fuel tank.
Fuel expands when hot (for
instance if the fuel tank is in
th")
 1
27
Safety check
2
Prop the motorcycle on its side stand
– Make sure the ground is level and firm.
Open the fuel filler cap
Refuel
e Attention:
Add fuel only until the pump
nozzle automatical")
 28
Safety check
2
Clutch-lever play
e Attention:
The clutch will be damaged if
you ride the motorcycle without
play at the clutch lever.
The scope of the BMW Inspec-
tion includes basic adjustment")
 1
29
Safety check
2
Checking brake pressure
d Warning:
To prevent air from entering
the brake circuit:
– Do not turn the handlebars in the clamping blocks
– Do not turn the fitting on the hand")
 30
Safety check
2
Work on the brake system
d Warning:
To ensure reliability have all
work on the brake systems
carried out by a specialist
workshop, preferably an au-
thorised BMW motorcycle
deale")