Page 77 of 155
77n
OverviewControlsMaintenanceRepairsDataIndex
ComputerAfter three incorrect code entries,
or three attempts to start the engine
without a code entry, the alarm will
sound for 30 seconds on vehicles
equipped with an alarm system.
Setting the alarm in an emergency:
If you have forgotten the code, proceed
as follows:
1. Disconnect the battery, wait about
2 minutes, then reconnect it. Note
that on vehicles with an alarm
system, the alarm will sound
2. Turn the ignition key to position 1:
The time display will count down for
the next ten minutes
3. After ten minutes, start the engine.
If the code becomes available
again in the meantime, it can be
entered during the waiting period after
pressing the CODE button.<
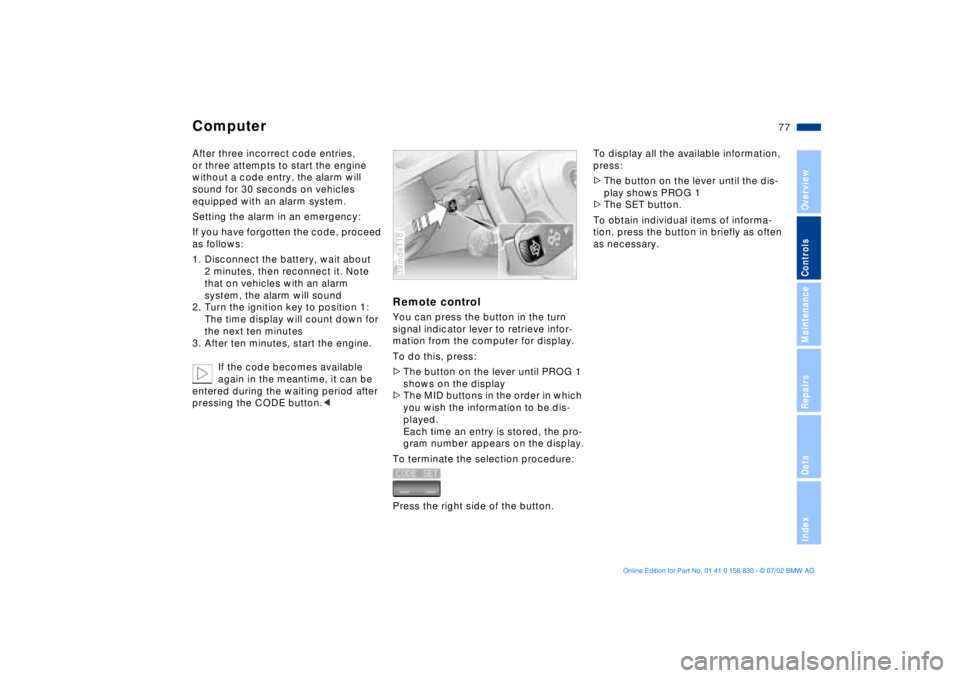
Remote controlYou can press the button in the turn
signal indicator lever to retrieve infor-
mation from the computer for display.
To do this, press:
>The button on the lever until PROG 1
shows on the display
>The MID buttons in the order in which
you wish the information to be dis-
played.
Each time an entry is stored, the pro-
gram number appears on the display.
To terminate the selection procedure:
Press the right side of the button.39mde118
To display all the available information,
press:
>The button on the lever until the dis-
play shows PROG 1
>The SET button.
To obtain individual items of informa-
tion, press the button in briefly as often
as necessary.
Page 85 of 155
85n
OverviewControlsMaintenanceRepairsDataIndex
Instrument lighting
High beams/Standing lamps
Fog lamps
Turn the rotary dial to adjust the illumi-
nation intensity. 390de733
1 High beams (blue indicator lamp)
2 Headlamp flasher (blue indicator
lamp)
3 Standing lampsStanding lamps, left or rightAs an additional feature, you can
illuminate your vehicle on either side
for parking, if you wish to do so:
With the ignition key in position 0, push
the lever in the appropriate direction.
The lever engages in the turn signal
indicator position.39mde135
Front fog lamps
The green indicator lamp in the
instrument cluster lights up to
indicate that the front fog lamps
are on.
If the high beams are switched on, the
fog lamps go out.
Always comply with the legal regula-
tions governing use of fog lamps.
If the automatic headlight control
is on, the low beams will come on
automatically whenever you activate
the fog lamps.<
390us735
Page 125 of 155
125n
OverviewControlsMaintenanceRepairsDataIndex
Lamps and bulbs Xenon lamps
The service life of these bulbs is very
long and the probability of a failure is
very low, provided that they are not
switched on and off an unusual number
of times. If one of these bulbs should
nevertheless fail, it is possible to con-
tinue driving with great caution using
the fog lamps, provided traffic laws in
your area do not prohibit this.
Never attempt to perform bulb
changes or any other service oper-
ations on the xenon lamps. Always have
them serviced by professional techni-
cians. The extremely high voltages at
which these lamps operate constitute a
potentially lethal safety hazard.<
When cleaning the headlamps,
please observe the following:
>Do not clean by wiping with a dry
cloth (this causes scratches). Never
use abrasives or strong solvents to
clean the covers
>Remove dirt and contamination (such
as insects) by soaking with BMW Car
Shampoo and then rinsing with
ample water
>Always use a deicer spray to remove
accumulated ice and snow Ð never
use a scraper.<
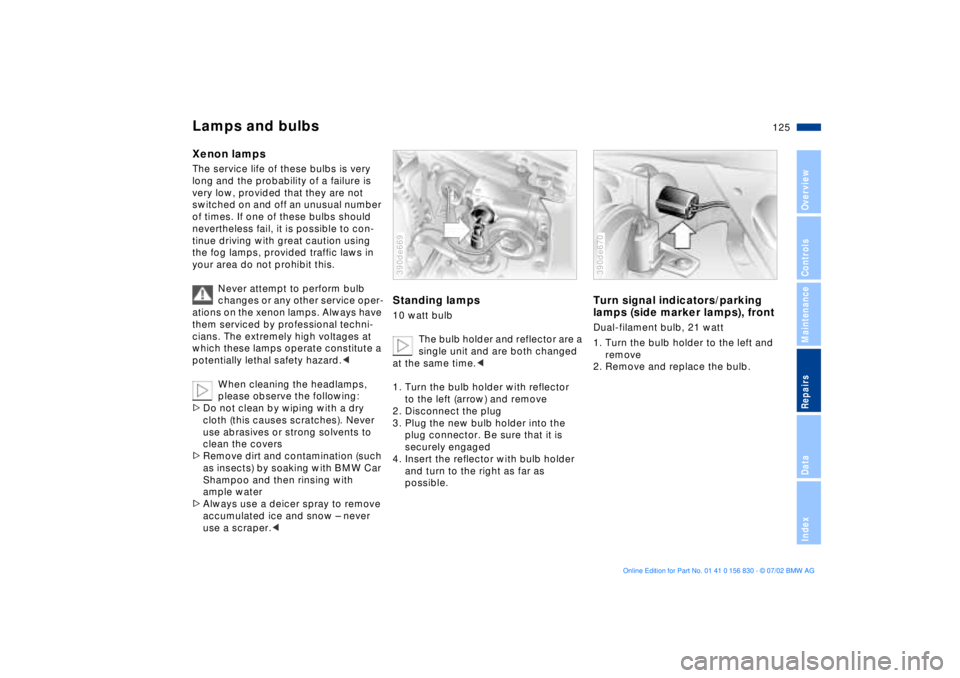
Standing lamps10 watt bulb
The bulb holder and reflector are a
single unit and are both changed
at the same time.<
1. Turn the bulb holder with reflector
to the left (arrow) and remove
2. Disconnect the plug
3. Plug the new bulb holder into the
plug connector. Be sure that it is
securely engaged
4. Insert the reflector with bulb holder
and turn to the right as far as
possible.390de669
Turn signal indicators/parking
lamps (side marker lamps), front Dual-filament bulb, 21 watt
1. Turn the bulb holder to the left and
remove
2. Remove and replace the bulb.390de670
Page 126 of 155
126n
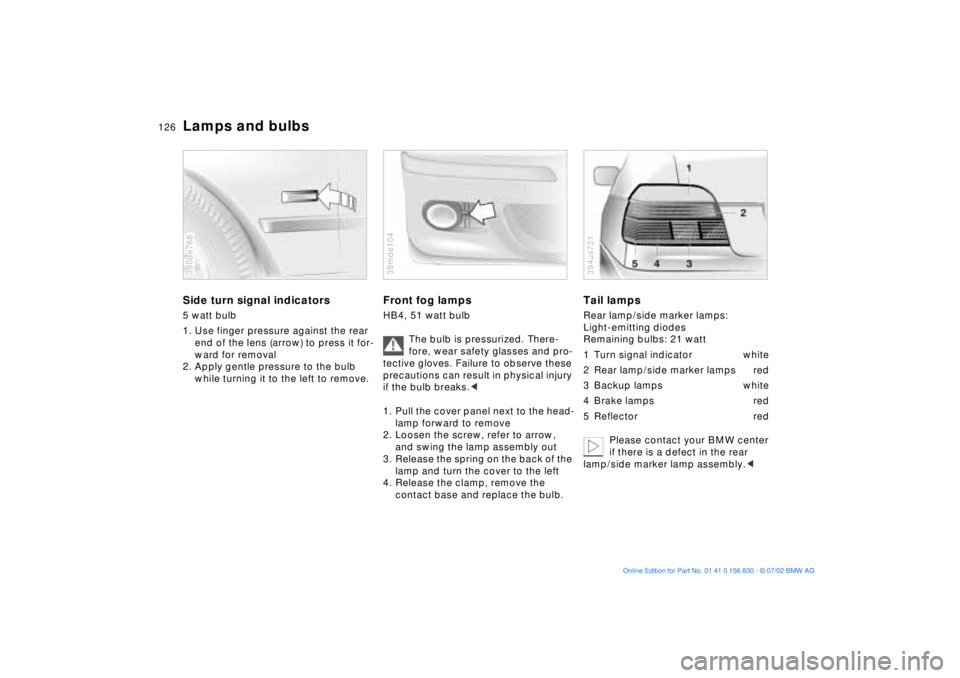
Lamps and bulbsSide turn signal indicators5 watt bulb
1. Use finger pressure against the rear
end of the lens (arrow) to press it for-
ward for removal
2. Apply gentle pressure to the bulb
while turning it to the left to remove.390de768
Front fog lamps HB4, 51 watt bulb
The bulb is pressurized. There-
fore, wear safety glasses and pro-
tective gloves. Failure to observe these
precautions can result in physical injury
if the bulb breaks.<
1. Pull the cover panel next to the head-
lamp forward to remove
2. Loosen the screw, refer to arrow,
and swing the lamp assembly out
3. Release the spring on the back of the
lamp and turn the cover to the left
4. Release the clamp, remove the
contact base and replace the bulb.39mde104
Tail lamps Rear lamp/side marker lamps:
Light-emitting diodes
Remaining bulbs: 21 watt
1 Turn signal indicator white
2 Rear lamp/side marker lamps red
3 Backup lamps white
4 Brake lamps red
5 Reflector red
Please contact your BMW center
if there is a defect in the rear
lamp/side marker lamp assembly.<394us721
Page 136 of 155
136n
Towing the vehicleTowing a vehicle1. Shift lever in neutral
2. Towing speed:
Max. 45 mph (70 km/h)
3. Towing distance:
Max. 95 miles (150 km/h)
4. Leave the ignition key in position 1
to ensure that the brake lamps, turn
signals, horn and windshield wipers
remain operative, and to prevent the
steering lock detent from engaging
5. Switch on the hazard-warning
system (comply with official regula-
tions).
Find some means of identifying the
vehicle in tow, for instance, place a sign
or warning triangle in the rear window.
Make sure that the ignition key
remains in position 1 even if the
electrical system has failed to prevent
the steering lock from engaging. The
steering and brakes are without power
assist when the engine is not running.
This means that increased effort is
required for steering and braking.<
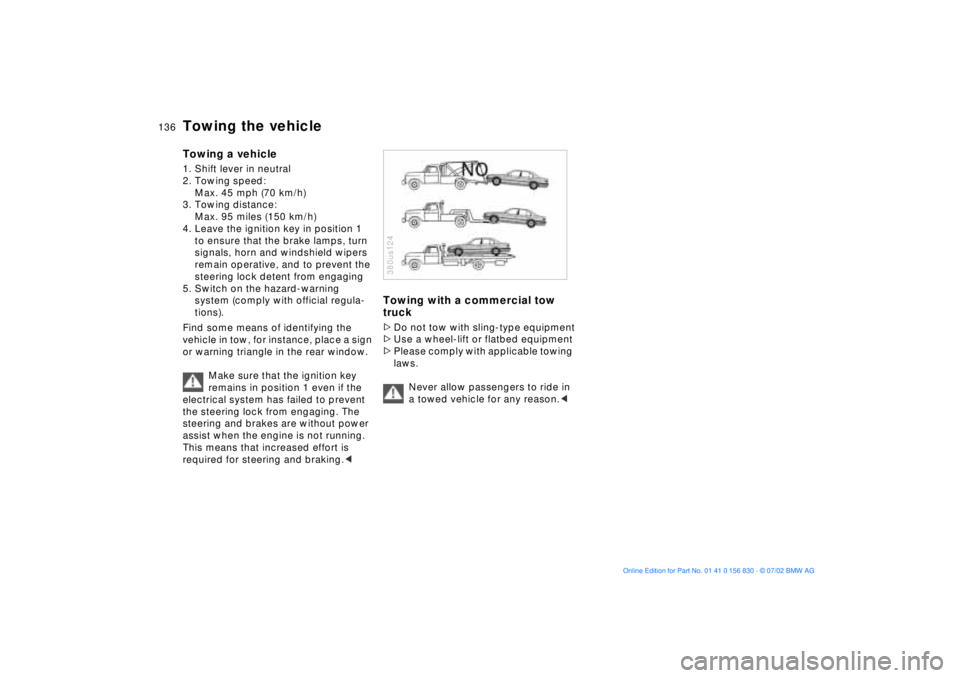
Towing with a commercial tow
truck>Do not tow with sling-type equipment
>Use a wheel-lift or flatbed equipment
>Please comply with applicable towing
laws.
Never allow passengers to ride in
a towed vehicle for any reason.<380us124
Page 151 of 155
Everything from A to Z
151n
OverviewControlsMaintenanceRepairsDataIndex
Time
calling up70
changing70
refer also to the "Owner's
Manual for Onboard
Computer"
Time of arrival,
estimated75
Timer70
Tire
condition109
damage109t
inflation
pressure22t, 109
labeling111
pressure monitor82
replacement110
tread109
Tire Quality Grading110
Tools124t
Torque140
Tow fittings135t
Towing the vehicle135t
Track141
Traction Control System,
refer to DSC80
Transmitter key26
Transporting children
safely51
Tread depth, tires109
Tread wear indicator109 Trip odometer63
Trunk, refer to Luggage
compartment32
Turn signal indicator18, 59
bulb replacement125t
Turning circle141
U
Uniform Tire Quality Grading
(UTQR)110
Universal Transmitter93
Use antifreeze,
radiator118t
Used batteries132 V
Vehicle battery131
Vehicle key26
Vehicle Memory55
Ventilation91
Ventilation in the rear91
Ventilation while parked
activating72
refer also to the "Owner's
Manual for Onboard
Computer"
Ventilation while parked,
refer to Parked-car venti-
lation system92
Ventilation, draft-free91
W
Warm feet Ð cool head91
Warning lamps16
Warning messages66
Warning triangle20
Warranty and Service Guide
Booklet (Canadian
models)119
Washer fluids115t
Washer reservoir,
filling115t
Washer system60
Water on the roads107
Wear indicator in the
tires109
Weights142
Wheel and tire
combinations111
Wheelbase141
Width141
Windows36
convenience operation27
defrosting89
Windshield washer60
reservoir, filling115t
Windshield wiper60
Winter tires112
Wiper system60
Working in the engine
compartment113t
X
Xenon lamp125