Page 8 of 166

Contents
Notes
About this Owner's Manual4
Symbols used4
Your individual vehicle4
Status at time of printing5
For your own safety5
Symbol on vehicle parts6
Service and warranty6
Reporting safety defects6
Overview
Cockpit14
Instrument cluster16
Indicator and warning lamps18
Steering wheel with multifunction
buttons22
Hazard warning triangle*23
First-aid kit*23
Refueling24
Fuel specifications25
Tire inflation pressure25
Controls and features
Opening and closing:
Keys30
Central locking system30
Opening and closing – via the
remote control31
Opening and closing – via the
door lock33
Opening and closing – from the
inside34
Luggage compartment lid35
Luggage compartment37
Alarm system*38
Electric power windows40
Convertible top41
Wind deflector*46
To adjust:
Safe seating position48
Seats49
Power seat adjustment49
Head restraints50
Entering the rear51
Safety belts52
Seat and mirror memory53
Seat heating*54
Steering wheel55
Mirrors55
handbook.book Page 8 Tuesday, July 30, 2002 9:28 AM
Page 44 of 166

44
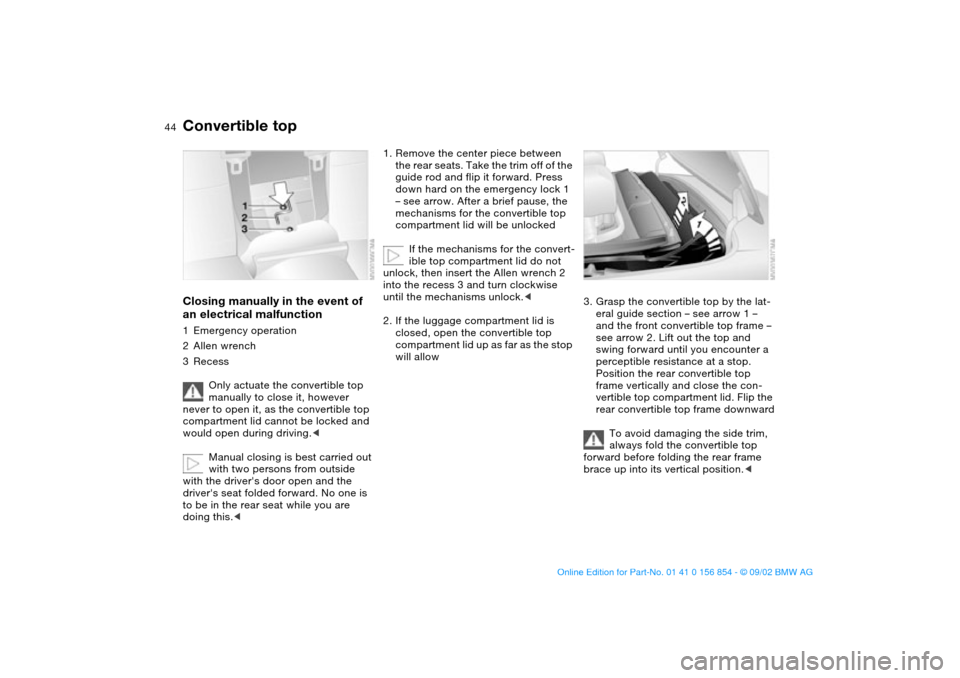
Closing manually in the event of
an electrical malfunction1Emergency operation
2Allen wrench
3Recess
Only actuate the convertible top
manually to close it, however
never to open it, as the convertible top
compartment lid cannot be locked and
would open during driving.<
Manual closing is best carried out
with two persons from outside
with the driver's door open and the
driver's seat folded forward. No one is
to be in the rear seat while you are
doing this.<
1. Remove the center piece between
the rear seats. Take the trim off of the
guide rod and flip it forward. Press
down hard on the emergency lock 1
– see arrow. After a brief pause, the
mechanisms for the convertible top
compartment lid will be unlocked
If the mechanisms for the convert-
ible top compartment lid do not
unlock, then insert the Allen wrench 2
into the recess 3 and turn clockwise
until the mechanisms unlock.<
2. If the luggage compartment lid is
closed, open the convertible top
compartment lid up as far as the stop
will allow
3. Grasp the convertible top by the lat-
eral guide section – see arrow 1 –
and the front convertible top frame –
see arrow 2. Lift out the top and
swing forward until you encounter a
perceptible resistance at a stop.
Position the rear convertible top
frame vertically and close the con-
vertible top compartment lid. Flip the
rear convertible top frame downward
To avoid damaging the side trim,
always fold the convertible top
forward before folding the rear frame
brace up into its vertical position.<
Convertible top
handbook.book Page 44 Tuesday, July 30, 2002 9:28 AM
Page 47 of 166
47
7. Close the convertible top compart-
ment lid via the convertible top con-
trol button. The wind deflector is now
attached so that it is theft-proof.
Operate the convertible top com-
partment lid from above only in
order to avoid any pinching.
With the wind deflector in place: never
push the front seats all the way back to
avoid damaging the wind deflector.
installing, just reverse the steps.Wind deflector*
OverviewControlsMaintenanceRepairsDataIndex
handbook.book Page 47 Tuesday, July 30, 2002 9:28 AM
Page 49 of 166

49
SeatsWhen adjusting your seat, always
observe the following precautions
Never try to adjust your seat while
operating the vehicle. The seat
could respond with an unexpected
movement, and the ensuing loss of
vehicle control could lead to an acci-
dent. Never ride with the backrest
reclined to an extreme horizontal angle
– important for front passengers to
remember. Keep the backrest relatively
upright to minimize the risk of sliding
under the safety belt and sustaining
injury in an accident.
With the wind deflector in place: never
push the front seats all the way back to
avoid damaging the wind deflector.<
Adjusting the seats>Power seat adjustment, refer to
page 49
>Head restraint, refer to page 50
>Entering the rear, refer to page 51.
Power seat adjustmentSeat adjustment1Tilt angle
2Forward/backward adjustment
3Height
4Backrest angle
You can manually adjust the thigh sup-
port.
Thigh support Pull the lever and adjust the position of
the cushion for thigh support as
desired.
OverviewControlsMaintenanceRepairsDataIndex
handbook.book Page 49 Tuesday, July 30, 2002 9:28 AM
Page 51 of 166

51
Rear head restraints
The rear head restraints may only
be lowered if there are no passen-
gers in the rear seats. If you do so, you
are in violation of the law. Raise the rear
head restraints before taking on any
passengers in the back.<
To completely lower the rear head
restraints:
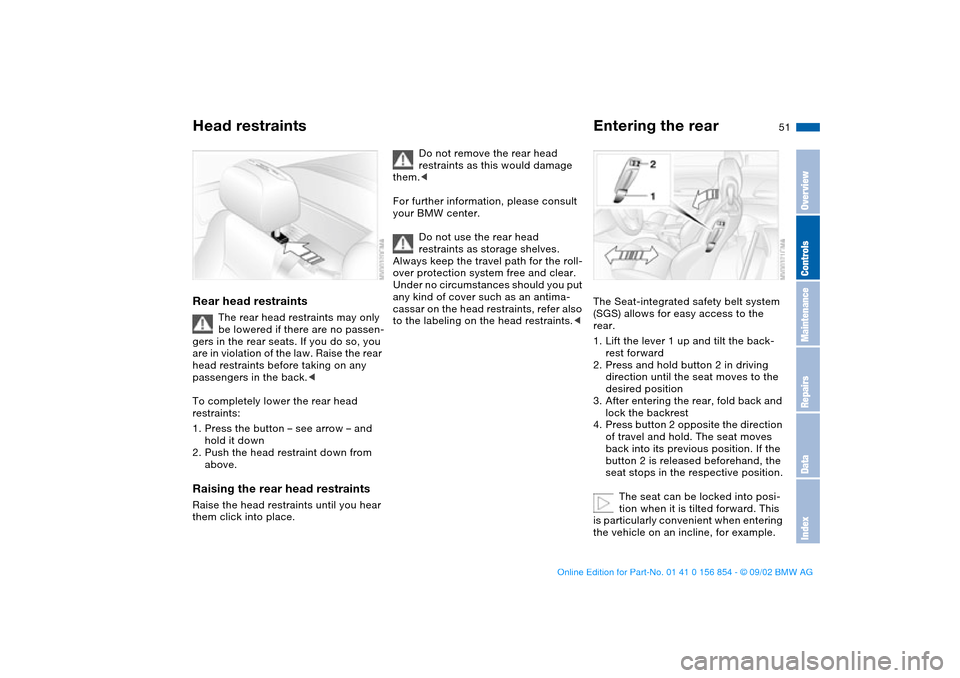
1. Press the button – see arrow – and
hold it down
2. Push the head restraint down from
above.
Raising the rear head restraintsRaise the head restraints until you hear
them click into place.
Do not remove the rear head
restraints as this would damage
them.<
For further information, please consult
your BMW center.
Do not use the rear head
restraints as storage shelves.
Always keep the travel path for the roll-
over protection system free and clear.
Under no circumstances should you put
any kind of cover such as an antima-
cassar on the head restraints, refer also
to the labeling on the head restraints.<
Entering the rearThe Seat-integrated safety belt system
(SGS) allows for easy access to the
rear.
1. Lift the lever 1 up and tilt the back-
rest forward
2. Press and hold button 2 in driving
direction until the seat moves to the
desired position
3. After entering the rear, fold back and
lock the backrest
4. Press button 2 opposite the direction
of travel and hold. The seat moves
back into its previous position. If the
button 2 is released beforehand, the
seat stops in the respective position.
The seat can be locked into posi-
tion when it is tilted forward. This
is particularly convenient when entering
the vehicle on an incline, for example.
Head restraints
OverviewControlsMaintenanceRepairsDataIndex
handbook.book Page 51 Tuesday, July 30, 2002 9:28 AM
Page 59 of 166

59
If there is a system malfunction, there is
a risk that the airbags will not be trig-
gered within their normal response
range, even if the level of impact would
normally have triggered them.
Have your BMW center inspect the sys-
tem immediately.
Transporting children safely
Leave the rear safety belts in the
holders if they are not needed to
avoid unwanted movement from the
safety belts at high speeds.<
Commercially available child seats
complying with the legal standard are
designed to be secured with a seat belt
or with the seat belt portion of a combi-
nation lap/shoulder belt. Improperly or
inadequately installed restraint sys-
tems can increase the risk of injury to
children. Always read and follow the
instructions that come with the system.
Child-restraint system with tether
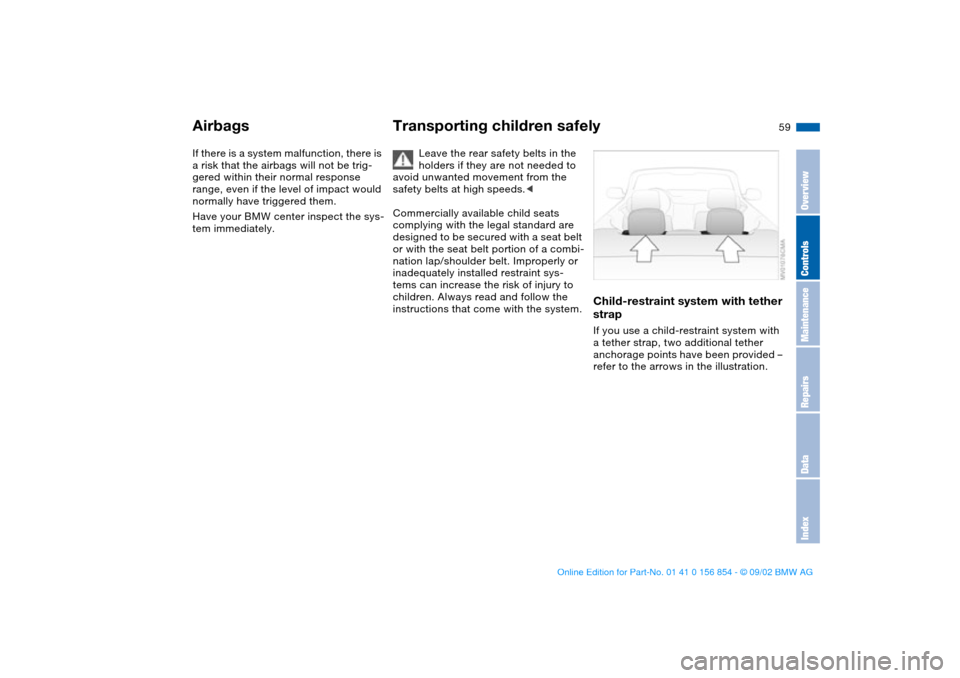
strapIf you use a child-restraint system with
a tether strap, two additional tether
anchorage points have been provided –
refer to the arrows in the illustration.
Airbags
OverviewControlsMaintenanceRepairsDataIndex
handbook.book Page 59 Tuesday, July 30, 2002 9:28 AM
Page 62 of 166

62
LATCH child-restraint mounting
systemLATCH: Lower Anchors and Tether for
CHildren
Canadian models only:
The LATCH anchorage points are iden-
tified by buttons.
The left and right rear seats are both
equipped with a LATCH child-restraint
mounting system.
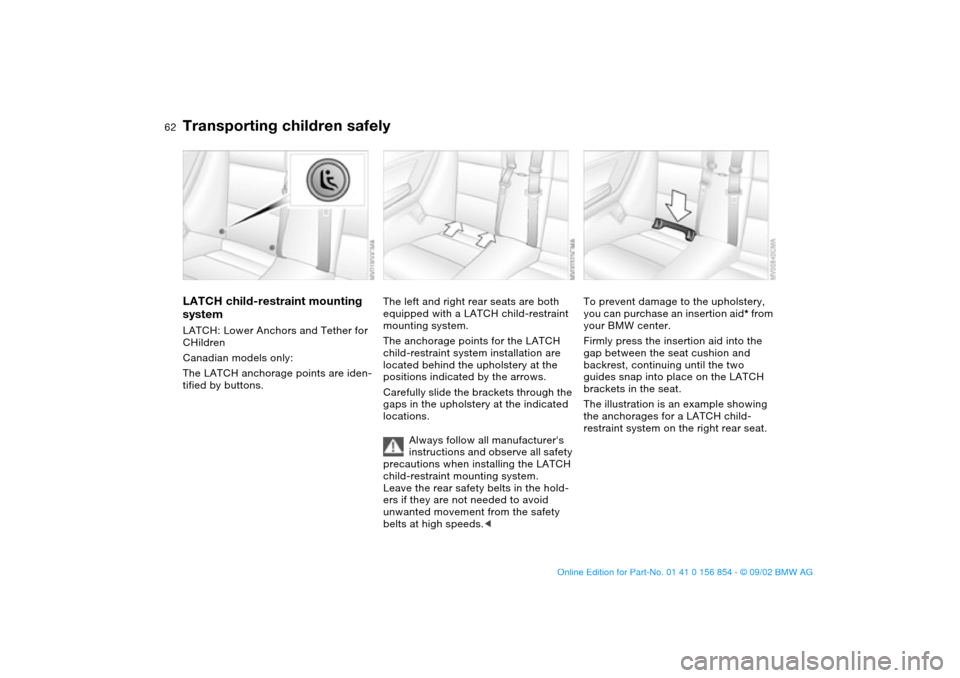
The anchorage points for the LATCH
child-restraint system installation are
located behind the upholstery at the
positions indicated by the arrows.
Carefully slide the brackets through the
gaps in the upholstery at the indicated
locations.
Always follow all manufacturer's
instructions and observe all safety
precautions when installing the LATCH
child-restraint mounting system.
Leave the rear safety belts in the hold-
ers if they are not needed to avoid
unwanted movement from the safety
belts at high speeds.<
To prevent damage to the upholstery,
you can purchase an insertion aid* from
your BMW center.
Firmly press the insertion aid into the
gap between the seat cushion and
backrest, continuing until the two
guides snap into place on the LATCH
brackets in the seat.
The illustration is an example showing
the anchorages for a LATCH child-
restraint system on the right rear seat.
Transporting children safely
handbook.book Page 62 Tuesday, July 30, 2002 9:28 AM
Page 101 of 166
101 Interior conveniences
Glove compartmentTo openPull the handle. The glove compartment
will light up.To closeFold up cover.
To prevent injury in the event of an
accident, close the glove com-
partment immediately after use.
master key can also be used for unlock-
ing.
If – for example for valet parking –
you turn over only your door and
ignition key, refer to page 30, then
access to the glove compartment and
the luggage compartment is not possi-
ble.<
Storage compartmentsFront center armrestTo open: press the button and lift
upward – see arrow.Other compartments and netsYou will find additional storage areas in
the doors and in the center console
above the ashtray. Storage nets are
located on the backrests of the front
seats.
OverviewControlsMaintenanceRepairsDataIndex
handbook.book Page 101 Tuesday, July 30, 2002 9:28 AM