Page 121 of 187
121n
OverviewControlsMaintenanceRepairsDataIndex
Through-loading system
*
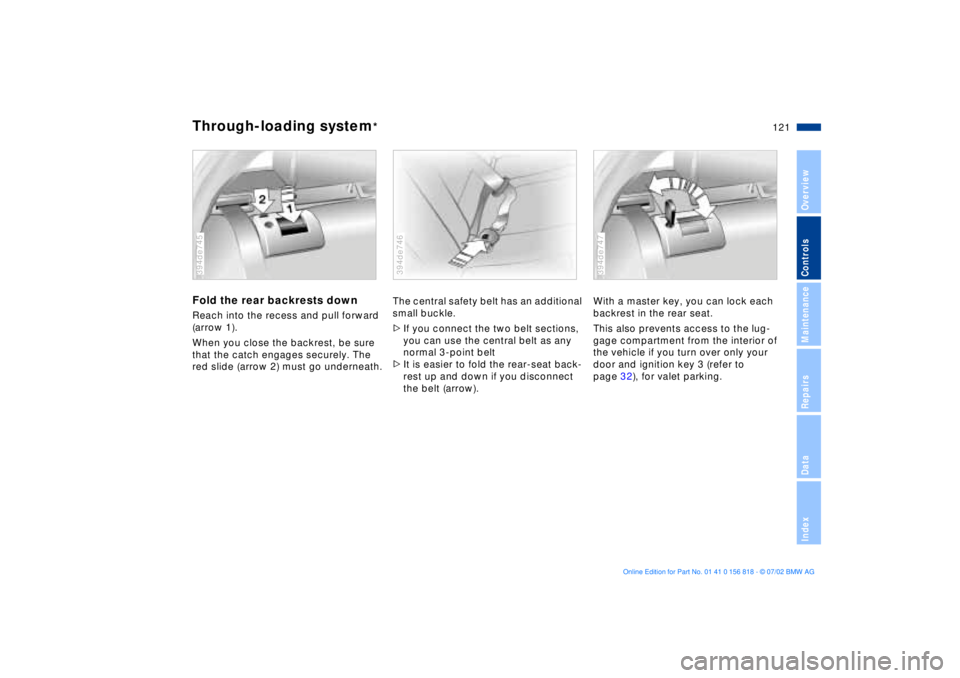
Fold the rear backrests downReach into the recess and pull forward
(arrow 1).
When you close the backrest, be sure
that the catch engages securely. The
red slide (arrow 2) must go underneath.394de745
The central safety belt has an additional
small buckle.
>If you connect the two belt sections,
you can use the central belt as any
normal 3-point belt
>It is easier to fold the rear-seat back-
rest up and down if you disconnect
the belt (arrow).394de746
With a master key, you can lock each
backrest in the rear seat.
This also prevents access to the lug-
gage compartment from the interior of
the vehicle if you turn over only your
door and ignition key 3 (refer to
page 32), for valet parking.394de747
Page 123 of 187
123n
OverviewControlsMaintenanceRepairsDataIndex
Ski bag
*
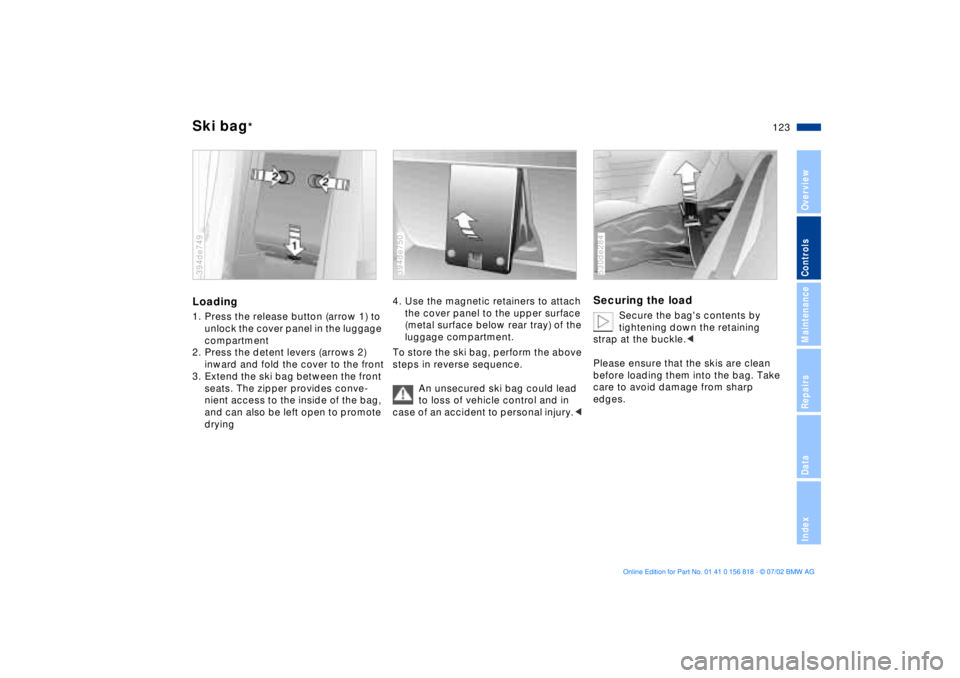
Loading1. Press the release button (arrow 1) to
unlock the cover panel in the luggage
compartment
2. Press the detent levers (arrows 2)
inward and fold the cover to the front
3. Extend the ski bag between the front
seats. The zipper provides conve-
nient access to the inside of the bag,
and can also be left open to promote
drying394de749
4. Use the magnetic retainers to attach
the cover panel to the upper surface
(metal surface below rear tray) of the
luggage compartment.
To store the ski bag, perform the above
steps in reverse sequence.
An unsecured ski bag could lead
to loss of vehicle control and in
case of an accident to personal injury.< 394de750
Securing the load
Secure the bag's contents by
tightening down the retaining
strap at the buckle.<
Please ensure that the skis are clean
before loading them into the bag. Take
care to avoid damage from sharp
edges.
530de284
Page 125 of 187
125n
OverviewControlsMaintenanceRepairsDataIndex
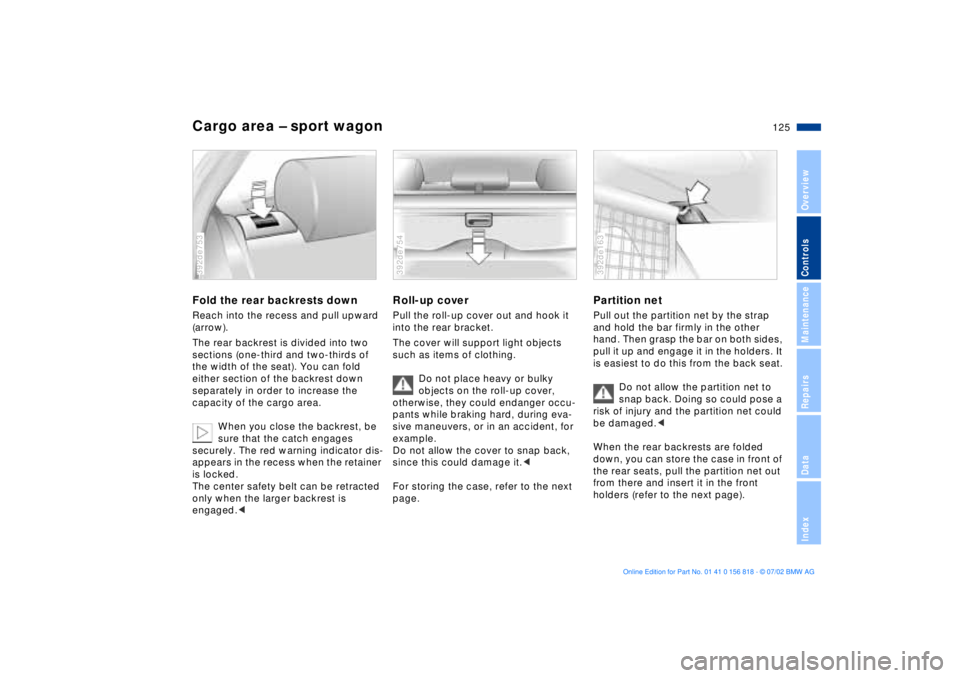
Cargo area Ð sport wagonFold the rear backrests downReach into the recess and pull upward
(arrow).
The rear backrest is divided into two
sections (one-third and two-thirds of
the width of the seat). You can fold
either section of the backrest down
separately in order to increase the
capacity of the cargo area.
When you close the backrest, be
sure that the catch engages
securely. The red warning indicator dis-
appears in the recess when the retainer
is locked.
The center safety belt can be retracted
only when the larger backrest is
engaged.<392de753
Roll-up coverPull the roll-up cover out and hook it
into the rear bracket.
The cover will support light objects
such as items of clothing.
Do not place heavy or bulky
objects on the roll-up cover,
otherwise, they could endanger occu-
pants while braking hard, during eva-
sive maneuvers, or in an accident, for
example.
Do not allow the cover to snap back,
since this could damage it.<
For storing the case, refer to the next
page.392de754
Partition netPull out the partition net by the strap
and hold the bar firmly in the other
hand. Then grasp the bar on both sides,
pull it up and engage it in the holders. It
is easiest to do this from the back seat.
Do not allow the partition net to
snap back. Doing so could pose a
risk of injury and the partition net could
be damaged.<
When the rear backrests are folded
down, you can store the case in front of
the rear seats, pull the partition net out
from there and insert it in the front
holders (refer to the next page).392de163
Page 127 of 187
127n
OverviewControlsMaintenanceRepairsDataIndex
Cargo area Ð sport wagonFloor compartmentTo release: press the handle in the
recess and fold the cover upward on
the handle (large arrow).
You can lock the cover with a master
key.
The dividers in the compartment can be
rearranged. If you remove the divider
and turn the divider retainer to the left
and remove it, you have a level storage
compartment.392de779
Fold the floor panel upLift up the black retainer on the lower
side of the panel and hook it into the
upper frame of the tailgate cutout.
Before you fold the floor panel down,
return the retainer to its original posi-
tion.392de168
Fold up the spare tire coverLift up the cover and hook it into the red
retainer on the floor panel (arrow).
Before you fold the cover down, return
the retainer to its original position.392de169
Page 129 of 187

129n
OverviewControlsMaintenanceRepairsDataIndex
Cargo loading Roof-mounted luggage rack
Always position and secure the
load correctly. If you do not, it can
endanger the passengers during
braking or evasive maneuvers.
Do not exceed the approved gross
vehicle weight or the permissible axle
loads (refer to page 173). If you do, the
operating safety of the vehicle is no
longer ensured and you are in violation
of the law.
Do not carry hard or heavy objects
unsecured in the passenger compart-
ment. If you do so, they may be pro-
jected through the air during braking
and evasive maneuvers, thus endan-
gering vehicle occupants.<
A special roof-rack system is available
as an optional extra for your BMW.
Please observe the precautions
included with the installation instruc-
tions.AnchoragesAccess to the anchorages:
To fold up the cover (arrow), please use
the tool provided with the roof-rack
system.Loading and driving notesRoof-mounted luggage racks raise the
center of gravity of the vehicle when
they are loaded. For this reason, they
exercise a major effect on the vehicle's
handling and steering response.394de757
You should therefore always remember
not to exceed the approved roof
weight, the approved gross vehicle
weight or the axle loads when loading
the rack. You will find the specifications
under "Technical data" on page 173.
Make sure that the load is not too bulky,
and attempt to distribute it evenly.
Always load the heaviest pieces first (on
the bottom). Ensure that adequate room
remains for the tilt sunroof to extend
upward and that no objects protrude
into the tailgate's travel range on the
sport wagon.
Always ensure that roof-mounted
loads are tightly secured, as loose
loads can shift or even fly off the roof,
posing a serious hazard for following
traffic.<
Drive smoothly and avoid sudden
acceleration and braking. Do not corner
at high speeds.
Page 131 of 187
131n
OverviewControlsMaintenanceRepairsDataIndex
Overview
Controls and features
Operation, maintenance
Owner service procedures
Index Technical data
Mainte-
Page 133 of 187
133n
OverviewControlsMaintenanceRepairsDataIndex
Driving notes Antilock Brake System
Brakes:
Do not drive with your foot resting
on the brake pedal. Even light but con-
sistent pedal pressure can lead to high
temperatures, brake wear and possibly
even brake failure.
Hydroplaning:
When driving on wet or slushy roads,
reduce vehicle speed. If you do not, a
wedge of water may form between the
tires and the road surface. This phe-
nomenon is referred to as aquaplaning
or hydroplaning. It is characterized by a
partial or complete loss of contact
between the tires and the road surface.
The ultimate results are loss of steering
and braking control.
Driving through water:
When there is water on the roads, do
not drive in it if it is deeper than
1 ft (30 cm), and even then, only at
walking speed, otherwise the vehicle
can sustain damage to the engine, the
electrical systems and the transmission.
Rear parcel tray:
Do not place heavy or hard objects on
the rear parcel tray. These objects
could endanger vehicle occupants
during heavy brake applications or eva-
sive maneuvers.
Clothes hooks:
Hang items of clothing from the hooks
so that they will not obstruct the driver's
vision. Do not hang heavy objects on
the hooks. If you do so, they could
cause personal injury during braking or
evasive maneuvers.<
The conceptThe Antilock Brake System (ABS) keeps
the wheels from locking during braking,
thereby enhancing active driving safety.
With ABS, the shortest possible braking
distances are achieved under most
conditions (on straight-aways and in
curves, on asphalt, ice, wet road sur-
faces, etc.).Braking with ABSIf you are in a situation that requires full
braking, you will exploit the full benefits
of the ABS system if you apply max-
imum pedal pressure ("panic stop").
Pulsation at the brake pedal combined
with sounds from the hydraulic circuits
indicates to the driver that ABS is in its
active mode.
Page 135 of 187
135n
OverviewControlsMaintenanceRepairsDataIndex
Information for your safetyThe factory-approved radial tires are
matched to the vehicle and have been
selected to provide optimum safety and
driving comfort.
It is not merely the tire's service life, but
also driving comfort and Ð above all else
Ð driving safety which depend on the
condition of the tires and the mainte-
nance of the specified tire inflation
pressure.
Incorrect inflation pressures are a
frequent cause of tire problems
and flat tires. Tire pressure also has a
major effect on your BMW's handling
response. We recommend that you
check the tire pressure Ð remember to
check the spare tire as well Ð before
every extended trip, as well as at least
every two weeks in normal use (refer to
page 26). Failure to observe these pre-
cautions can result in incorrect tire
pressures, which cause instable han-
dling response as well as tire damage,
and can ultimately lead to an acci-
dent.<
Tire tread Ð Tire damageInspect your tires frequently for tread
wear, signs of damage and for foreign
objects lodged in the tread. Check the
tread depth.
The tread depth should not drop
below 0.12 in (3 mm), even though, for
example the legally specified minimum
tread depth in Europe is only 0.063 in
(1.6 mm). Below a tread depth of
0.12 in (3 mm) there is an increased risk
of hydroplaning, even at relatively mod-
erate speeds and with only small
amounts of water on the road.
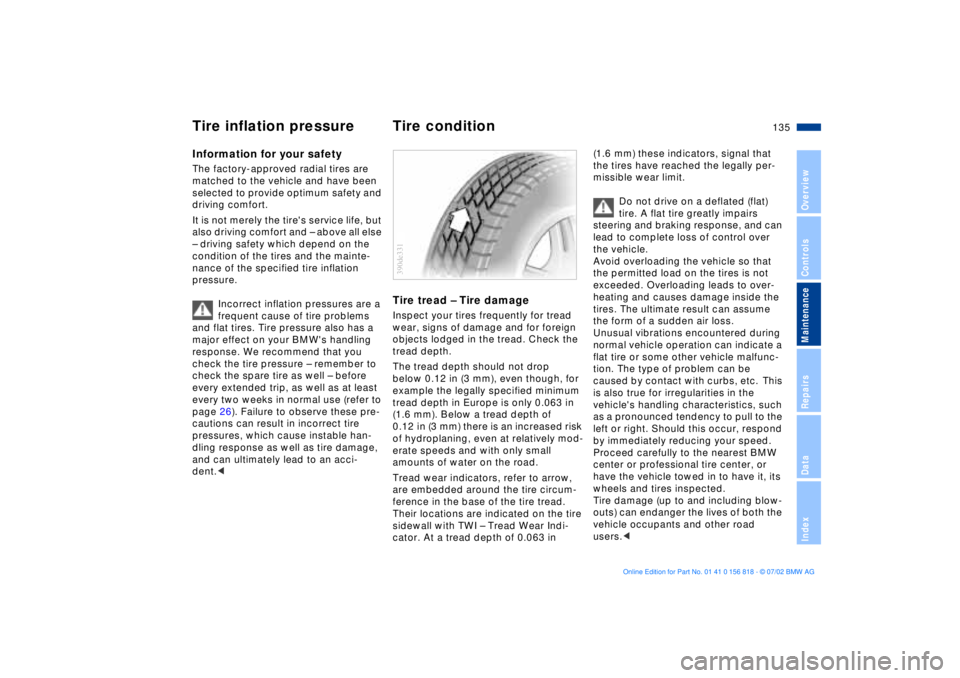
Tread wear indicators, refer to arrow,
are embedded around the tire circum-
ference in the base of the tire tread.
Their locations are indicated on the tire
sidewall with TWI Ð Tread Wear Indi-
cator. At a tread depth of 0.063 in 390de331
(1.6 mm) these indicators, signal that
the tires have reached the legally per-
missible wear limit.
Do not drive on a deflated (flat)
tire. A flat tire greatly impairs
steering and braking response, and can
lead to complete loss of control over
the vehicle.
Avoid overloading the vehicle so that
the permitted load on the tires is not
exceeded. Overloading leads to over-
heating and causes damage inside the
tires. The ultimate result can assume
the form of a sudden air loss.
Unusual vibrations encountered during
normal vehicle operation can indicate a
flat tire or some other vehicle malfunc-
tion. The type of problem can be
caused by contact with curbs, etc. This
is also true for irregularities in the
vehicle's handling characteristics, such
as a pronounced tendency to pull to the
left or right. Should this occur, respond
by immediately reducing your speed.
Proceed carefully to the nearest BMW
center or professional tire center, or
have the vehicle towed in to have it, its
wheels and tires inspected.
Tire damage (up to and including blow-
outs) can endanger the lives of both the
vehicle occupants and other road
users.<
Tire inflation pressure Tire condition