Page 129 of 166

129
Brake fluidIndicator lamp
The brake warning lamp comes
on when the parking brake is
not engaged: the brake fluid
level is too low, refer to page 18.
Parking brake warning lamp for
Canadian models.
Adding brake fluidFor adding brake fluid or for determin-
ing and correcting the cause of brake
fluid loss, consult your BMW center.
Your BMW center is familiar with the
specifications for factory-approved
brake fluids – DOT 4.
Brake fluid loss results in extended
pedal travel. Refer to the information on
page 116.
Brake fluid is hygroscopic, that is,
it absorbs moisture from the air
over time.
In order to ensure the brake system's
safety and reliability, have the brake
fluid changed every two years by a
BMW center. Refer to the Service and
Warranty Information Booklet for US
models or the Warranty and Service
Guide Booklet for Canadian models.
Brake fluid is toxic and damages the
vehicle's paint. You should always store
them in original containers and in a
location which is out of reach of chil-
dren.
Do not spill the brake fluid and do not
fill the brake fluid reservoir beyond the
MAX mark. The brake fluid could ignite
upon contact with hot engine parts and
cause serious burns.<
Comply with the applicable envi-
ronmental laws regulating
the disposal of brake fluid.<
OverviewControlsMaintenanceRepairsDataIndex
Page 130 of 166

130Maintenance
The BMW Maintenance SystemThe BMW Maintenance System has
been designed as a reliable means of
providing maximum driving and operat-
ing safety – and as cost-effectively as
possible for you.
Please keep in mind that regular main-
tenance is not only necessary for the
safety of your vehicle, but also plays a
significant role in maintaining the resale
value of the vehicle.Service interval displayWhile conventional systems rely on
milage alone to determine when service
is due, the BMW Maintenance System
reflects the actual conditions under
which the vehicle is operated: some
miles are more strenuous than others.
From a maintenance point of view,
62,000 miles/100,000 km accumulated
in short-distance urban driving are not
the equivalent of the same distance
covered at moderate cruising speeds in
long-distance highway travel.
The BMW Maintenance System
includes the Engine Oil Service and
Inspections I and II.
This service strategy accurately reflects
your own vehicle's specific needs by
defining maintenance intervals accord-
ing to individual operating conditions.
Minimal use drivers – significantly fewer
than 6,200 miles/10,000 km annually –
should have the engine oil changed at
least every 2 years since oil deterio-
rates over time, regardless of use.Service and Warranty Information
Booklet for US models/
Warranty and Service Guide
Booklet for Canadian modelsFor additional information on required
maintenance intervals and procedures,
please refer to the Service and War-
ranty Information Booklet for US mod-
els, or the Warranty and Service Guide
Booklet for Canadian models.As a precaution against corrosion, if
your vehicle is exposed to potential
damage from unimproved road sur-
faces we suggest that you have the
body checked for damage from stone
chips and gravel at the same time.
Have your BMW center perform
maintenance and repair.
Be sure that all maintenance work is
recorded in the Service and Warranty
Information Booklet for US models, or
in the Warranty and Service Guide
Booklet for Canadian models. These
entries confirm that your vehicle has
benefitted from regular maintenance,
and are also required for warranty
claims.<
CareYou can find everything you need to
know on this topic by consulting the
separate Caring for your vehicle bro-
chure.
Page 131 of 166

131 Laws and regulations
California Proposition 65 warningCalifornia laws require us to state the
following warning:
Engine exhaust, some of its con-
stituents, and certain vehicle com-
ponents contain or emit chemicals
known to the State of California to
cause cancer and birth defects and
reproductive harm. In addition, certain
fluids contained in vehicles and certain
products of component wear contain or
emit chemicals known to the State of
California to cause cancer and birth
defects or other reproductive harm.
Battery posts, terminals and related
accessories contain lead and lead com-
pounds. Wash your hands after hand-
ling.
Used engine oil contains chemicals that
have caused cancer in laboratory ani-
mals. Always protect your skin by
washing thoroughly with soap and
water.<
OBD interface socketThe interface socket for onboard diag-
nostics is located on the left-hand side
of the driver's side, behind a specially
marked cover located beneath the
instrument panel. The cover has the let-
ters OBD on it.
This interface makes it possible to
access data on emissions-related com-
ponents using special equipment.
An illuminated indicator informs
you of the need for service, not
that you need to stop the vehi-
cle. However, the systems should be
checked by your BMW center at the
earliest possible opportunity.
If the indicator blinks or flashes, this
indicates a high level of engine misfire.
Reduce speed and contact the nearest
BMW center immediately. Severe
OverviewControlsMaintenanceRepairsDataIndex
Page 132 of 166
132
engine misfiring for even a short period
of time can seriously damage emission
control system components, especially
the catalytic converter.
SERVICE ENGINE SOON warn-
ing lamp for Canadian models.
If the fuel filler cap is not on tight
enough, the OBD system can
detect leaking vapor and the indicator
will light up. If the fuel filler cap is then
tightened, the indicator will usually go
out after a short period of time.
Page 133 of 166
133
OverviewControlsMaintenanceRepairsDataIndex
Page 134 of 166
Page 135 of 166
135
Overview
Controls and features
Operation, maintenance
Owner service procedures
Technical data
Index
OverviewControlsMaintenanceRepairsDataIndex
Page 136 of 166
136Replacement procedures
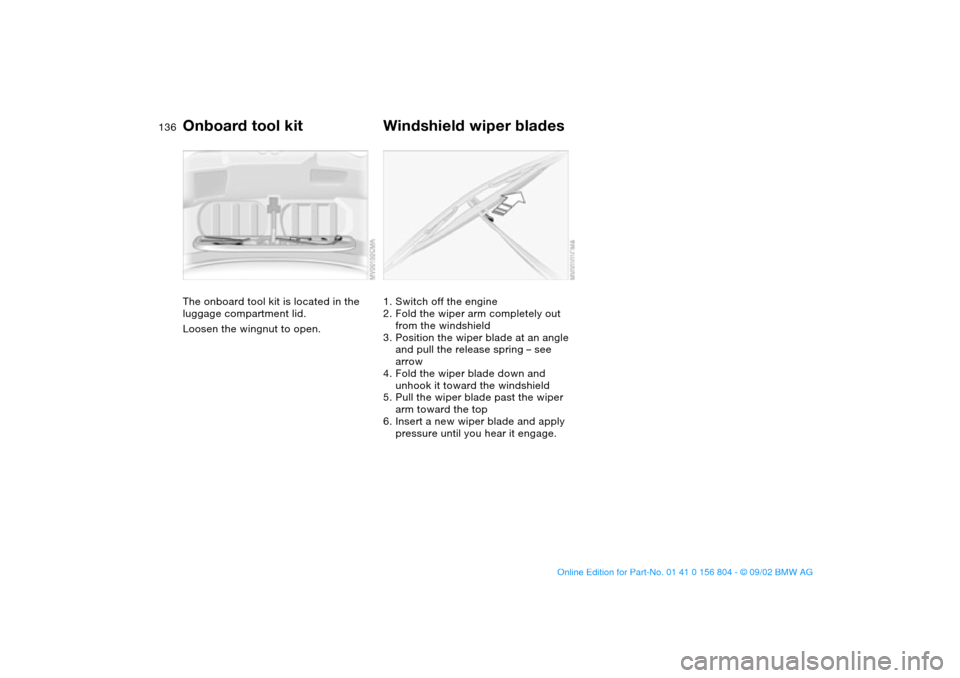
Onboard tool kitThe onboard tool kit is located in the
luggage compartment lid.
Loosen the wingnut to open.
Windshield wiper blades1. Switch off the engine
2. Fold the wiper arm completely out
from the windshield
3. Position the wiper blade at an angle
and pull the release spring – see
arrow
4. Fold the wiper blade down and
unhook it toward the windshield
5. Pull the wiper blade past the wiper
arm toward the top
6. Insert a new wiper blade and apply
pressure until you hear it engage.