2003 BMW 325XI light
[x] Cancel search: lightPage 91 of 166
91
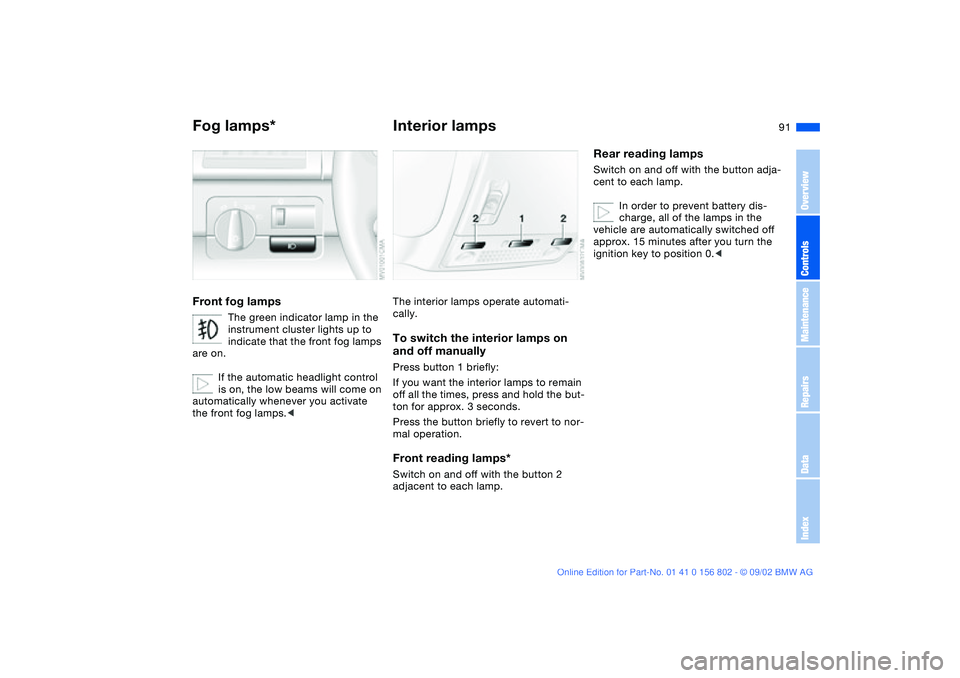
Fog lamps*Front fog lamps
The green indicator lamp in the
instrument cluster lights up to
indicate that the front fog lamps
are on.
If the automatic headlight control
is on, the low beams will come on
automatically whenever you activate
the front fog lamps.<
Interior lampsThe interior lamps operate automati-
cally.To switch the interior lamps on
and off manuallyPress button 1 briefly:
If you want the interior lamps to remain
off all the times, press and hold the but-
ton for approx. 3 seconds.
Press the button briefly to revert to nor-
mal operation.Front reading lamps*Switch on and off with the button 2
adjacent to each lamp.
Rear reading lampsSwitch on and off with the button adja-
cent to each lamp.
In order to prevent battery dis-
charge, all of the lamps in the
vehicle are automatically switched off
approx. 15 minutes after you turn the
ignition key to position 0.<
OverviewControlsMaintenanceRepairsDataIndex
handbook.book Page 91 Saturday, July 27, 2002 1:36 PM
Page 102 of 166
102
If – for example for valet parking –
you turn over only your door and
ignition key, refer to page 30, then
access to the glove compartment is not
possible.<
Rechargeable flashlightThe flashlight is located on the left side
of the glove compartment.
It features integral overload protection,
so it can be left in its holder continu-
ously.
To avoid completely discharging
and possibly damaging the lamp,
always ensure that it is switched off
before inserting it in the socket.<
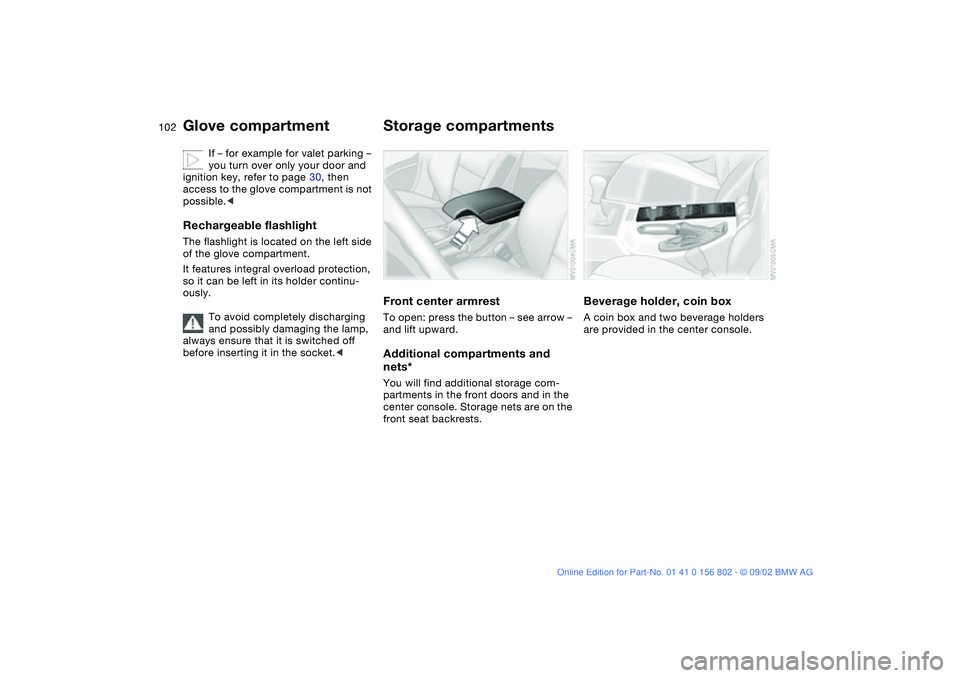
Storage compartmentsFront center armrestTo open: press the button – see arrow –
and lift upward.Additional compartments and
nets*You will find additional storage com-
partments in the front doors and in the
center console. Storage nets are on the
front seat backrests.
Beverage holder, coin boxA coin box and two beverage holders
are provided in the center console.
Glove compartment
handbook.book Page 102 Saturday, July 27, 2002 1:36 PM
Page 104 of 166
104
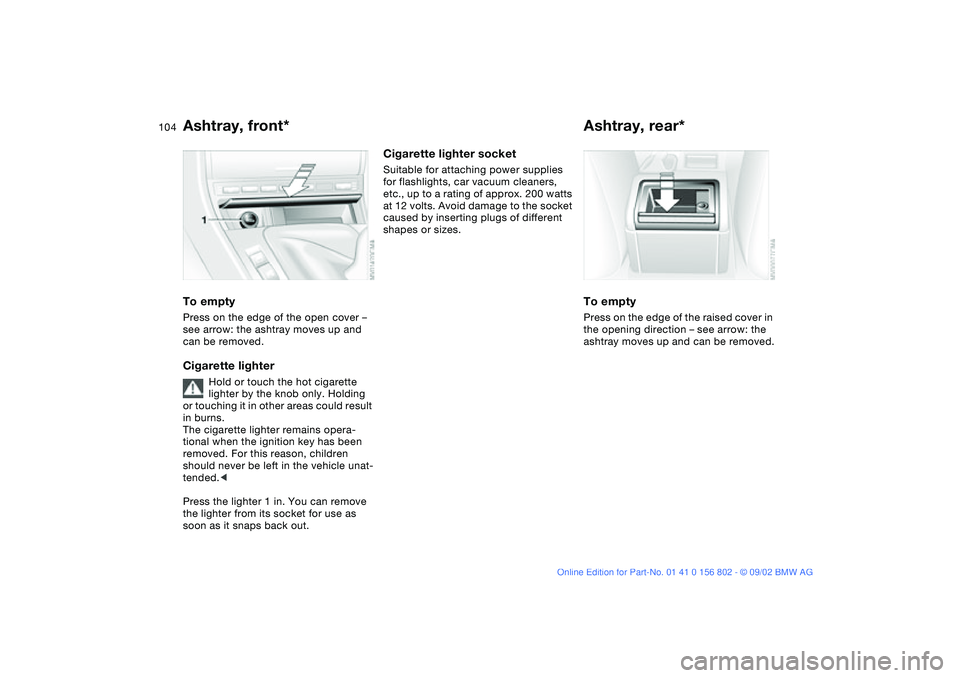
Ashtray, front*To emptyPress on the edge of the open cover –
see arrow: the ashtray moves up and
can be removed.Cigarette lighter
Hold or touch the hot cigarette
lighter by the knob only. Holding
or touching it in other areas could result
in burns.
The cigarette lighter remains opera-
tional when the ignition key has been
removed. For this reason, children
should never be left in the vehicle unat-
tended.<
Press the lighter 1 in. You can remove
the lighter from its socket for use as
soon as it snaps back out.
Cigarette lighter socketSuitable for attaching power supplies
for flashlights, car vacuum cleaners,
etc., up to a rating of approx. 200 watts
at 12 volts. Avoid damage to the socket
caused by inserting plugs of different
shapes or sizes.
Ashtray, rear*To emptyPress on the edge of the raised cover in
the opening direction – see arrow: the
ashtray moves up and can be removed.
handbook.book Page 104 Saturday, July 27, 2002 1:36 PM
Page 107 of 166
107
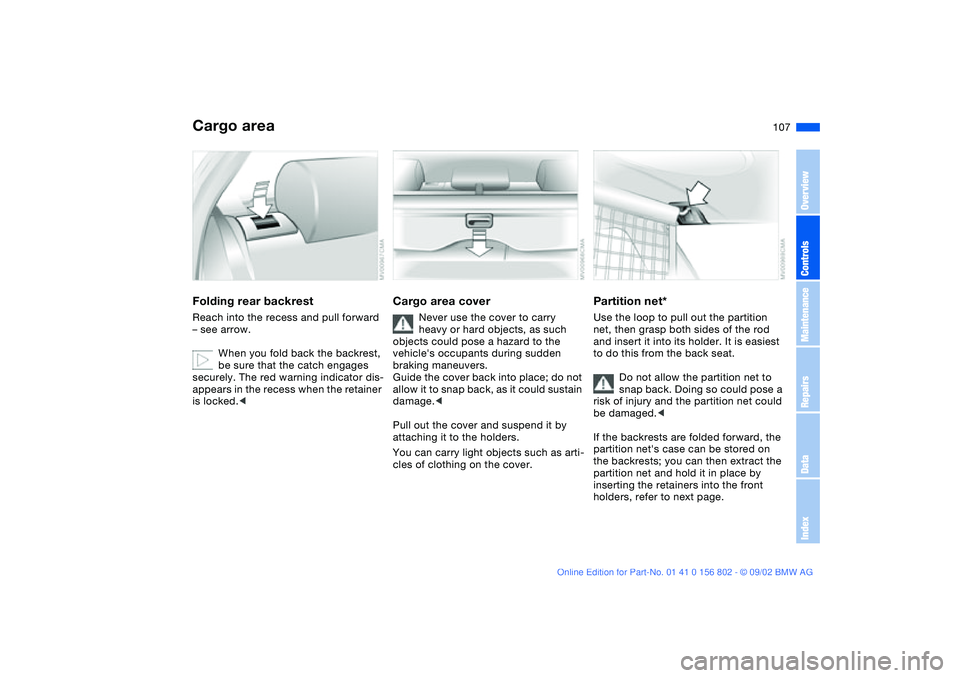
Cargo areaFolding rear backrestReach into the recess and pull forward
– see arrow.
When you fold back the backrest,
be sure that the catch engages
securely. The red warning indicator dis-
appears in the recess when the retainer
is locked.<
Cargo area cover
Never use the cover to carry
heavy or hard objects, as such
objects could pose a hazard to the
vehicle's occupants during sudden
braking maneuvers.
Guide the cover back into place; do not
allow it to snap back, as it could sustain
damage.<
Pull out the cover and suspend it by
attaching it to the holders.
You can carry light objects such as arti-
cles of clothing on the cover.
Partition net*Use the loop to pull out the partition
net, then grasp both sides of the rod
and insert it into its holder. It is easiest
to do this from the back seat.
Do not allow the partition net to
snap back. Doing so could pose a
risk of injury and the partition net could
be damaged.<
If the backrests are folded forward, the
partition net's case can be stored on
the backrests; you can then extract the
partition net and hold it in place by
inserting the retainers into the front
holders, refer to next page.
OverviewControlsMaintenanceRepairsDataIndex
handbook.book Page 107 Saturday, July 27, 2002 1:36 PM
Page 109 of 166
109
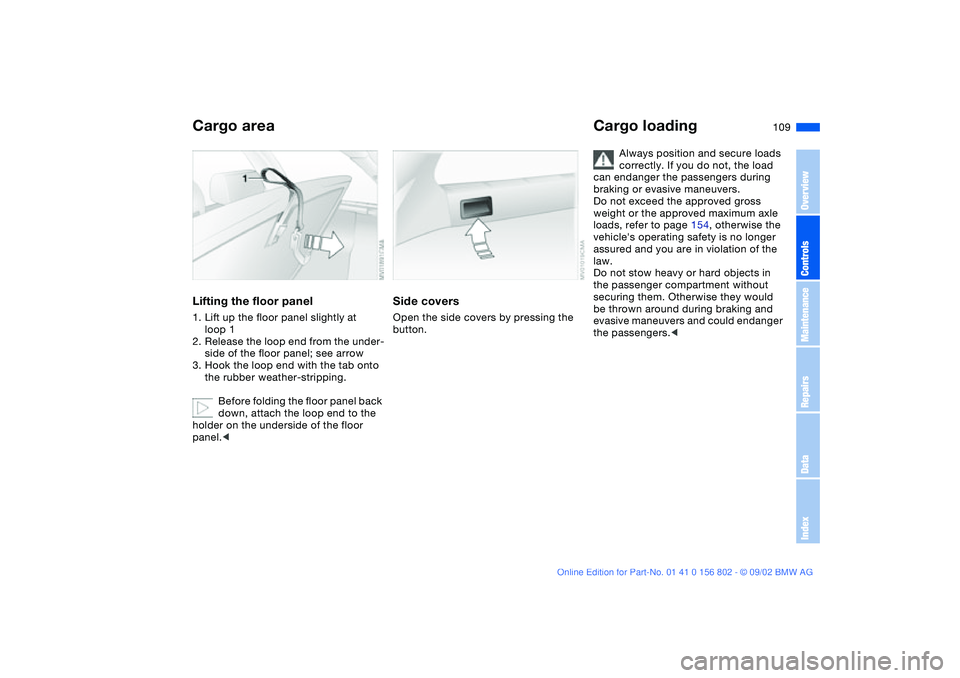
Lifting the floor panel1. Lift up the floor panel slightly at
loop 1
2. Release the loop end from the under-
side of the floor panel; see arrow
3. Hook the loop end with the tab onto
the rubber weather-stripping.
Before folding the floor panel back
down, attach the loop end to the
holder on the underside of the floor
panel.<
Side coversOpen the side covers by pressing the
button.
Cargo loading
Always position and secure loads
correctly. If you do not, the load
can endanger the passengers during
braking or evasive maneuvers.
Do not exceed the approved gross
weight or the approved maximum axle
loads, refer to page 154, otherwise the
vehicle's operating safety is no longer
assured and you are in violation of the
law.
Do not stow heavy or hard objects in
the passenger compartment without
securing them. Otherwise they would
be thrown around during braking and
evasive maneuvers and could endanger
the passengers.<
Cargo area
OverviewControlsMaintenanceRepairsDataIndex
handbook.book Page 109 Saturday, July 27, 2002 1:36 PM
Page 110 of 166
110
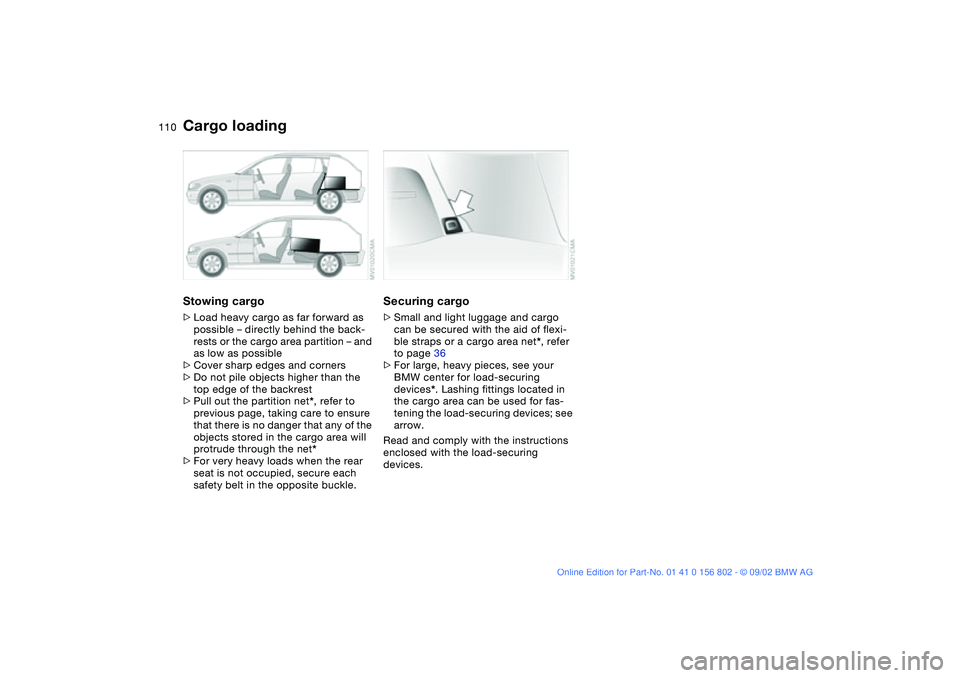
Stowing cargo>Load heavy cargo as far forward as
possible – directly behind the back-
rests or the cargo area partition – and
as low as possible
>Cover sharp edges and corners
>Do not pile objects higher than the
top edge of the backrest
>Pull out the partition net*, refer to
previous page, taking care to ensure
that there is no danger that any of the
objects stored in the cargo area will
protrude through the net*
>For very heavy loads when the rear
seat is not occupied, secure each
safety belt in the opposite buckle.
Securing cargo>Small and light luggage and cargo
can be secured with the aid of flexi-
ble straps or a cargo area net*, refer
to page 36
>For large, heavy pieces, see your
BMW center for load-securing
devices*. Lashing fittings located in
the cargo area can be used for fas-
tening the load-securing devices; see
arrow.
Read and comply with the instructions
enclosed with the load-securing
devices.
Cargo loading
handbook.book Page 110 Saturday, July 27, 2002 1:36 PM
Page 114 of 166
114Special operating instructions
Break-in proceduresTo ensure that your vehicle provides
maximum economy throughout a long
service life, we request that you
observe the following information.Engine and differentialUp to 1,250 miles/2,000 km:
Constantly vary both engine and vehicle
speeds, remembering not to exceed
4,500 rpm or 100 mph / 160 km/h dur-
ing this period.
Always obey all official speed limits.
Do not use full throttle, and avoid
pressing the accelerator beyond the
kickdown point during these initial
miles.
You can then proceed to increase both
engine and vehicle speeds once the ini-
tial 1,250 miles/2,000 km have elapsed.
You should also observe the same
break-in procedures if the engine or dif-
ferential should have to be replaced
later in the course of the vehicle's life.
TiresDue to technical factors associated
with their manufacture, tires do not
achieve their full traction potential until
after an initial break-in period. We thus
ask you to drive with extra care during
the first 200 miles/300 km.
Always obey all official speed limits.
When the vehicle is operated on
wet or slushy roads, a wedge of
water may form between the tire and
the road surface. This phenomenon is
referred to as hydroplaning and can
lead to partial or complete loss of trac-
tion, vehicle control and braking effec-
tiveness. Reduce your speed on wet
roads.
achieve the optimal pad-surface and
wear patterns required for trouble-free
operation and an extended service life
later on.
To break in the separate parking brake
drums, apply the parking brake lightly
when coasting to a standstill – at a traf-
fic signal, for instance – provided that
traffic conditions allow you to do so.
To avoid corrosion, repeat this proce-
dure from time to time.
The brake lamps do not come on
when the parking brake is set.
Vacuum for the brake system servo unit
on your BMW is available only when the
engine is running. When you move the
vehicle with the engine switched off –
when towing, for example – substan-
tially higher levels of pedal force will be
required to brake the vehicle.
optimum efficiency. Remember to
engage the clutch carefully during this
initial period.
handbook.book Page 114 Saturday, July 27, 2002 1:36 PM
Page 115 of 166
115
Driving notes
Brakes: do not drive with your foot
resting on the brake pedal. Even
light but consistent pressure on the
brake pedal can lead to high tempera-
tures, accelerated brake wear and pos-
sibly even brake failure.
Hydroplaning: when driving on wet or
slushy roads, reduce your speed. If you
do not, a wedge of water may form
between tires and road surface. This
phenomenon can lead to partial or
complete loss of contact between the
tires and road surface, as well as loss of
vehicle control and braking ability.
Driving through water: do not drive
through water on the road if it is deeper
than 1 ft/30 cm, and then only at walk-
ing speed. Otherwise, the vehicle's
engine, the electrical systems and the
transmission may be damaged.
Cargo area cover: never use it to store
heavy or hard objects, as otherwise
occupants could be injured during
braking maneuvers.
Clothes hooks: when hanging clothing
from the hooks, be sure that they will
not obstruct the driver's vision. Do not
hang heavy objects on the hooks. If you
do so, they could cause personal injury
during braking or evasive maneuvers.<
Antilock Brake System (ABS)The conceptABS keeps the wheels from locking
during braking, thereby enhancing
active driving safety.Braking with ABSIf you are in a situation that requires full
braking, you will exploit the full benefits
of ABS system if you apply maximum
pedal pressure – panic stop. Since the
vehicle maintains steering responsive-
ness, you can avoid possible obstacles
with a minimum of steering effort,
despite the full brake application.
Pulsation at the brake pedal combined
with sounds from the hydraulic circuits
indicates to the driver that ABS is in its
active mode.Dynamic Brake Control (DBC)DBC is included in the DSC, refer to
page 80.
The system responds to sudden, high-
intensity applications of force to the
brake pedal by automatically braking
the vehicle with maximum boost to
achieve the shortest-possible braking
distances during "panic stops". This
system exploits all the benefits of ABS.Do not reduce the pressure exerted
against the brake pedal until the brak-
ing maneuver has been completed.
DBC is deactivated when you release
the brake pedal.
Cornering Brake Control (CBC)CBC is an advanced engineering devel-
opment of ABS. When braking during
cornering with high lateral accelera-
tion, or when braking during a lane
change, vehicle stability is improved
and the steering response is enhanced.
OverviewControlsMaintenanceRepairsDataIndex
handbook.book Page 115 Saturday, July 27, 2002 1:36 PM