2003 BMW 325XI light
[x] Cancel search: lightPage 116 of 166
116
Brake systemBrake fluid levelIf the brake fluid level is too low and
brake pedal travel has become longer,
there may be a defect in one of the two
brake system's hydraulic circuits.
Proceed to the nearest BMW cen-
ter. It may be necessary to apply
higher levels of pressure to the pedal
when stopping and braking distances
may also be longer. Please remember
to adapt your driving style accord-
ingly.
and operating conditions in which brak-
ing is restricted to gentle, low-pressure
applications will all increase the ten-
dency for corrosion to form on the
rotors; this is often accompanied by a
simultaneous accumulation of contami-
nation on the brake pads. The pads
must exert a certain minimal level of
pressure against the rotors for the disc
brakes' inherent self-cleaning effect to
remain effective; the pressure available
under the above conditions may not
provide adequate cleansing.
If the brake rotors are corroded, they
will tend to respond to braking with a
pulsating effect that even extended
brake applications will fail to cure.
When driving in heavy rain and on wet
roads it is useful to apply light pressure
to the brake pedal every few miles.
Monitor traffic conditions to ensure that
this maneuver does not pose a hazard
to you or to other road users. The heat
generated in this process helps dry the
pads and rotors to ensure that your
brake system will respond with undi-
minished efficiency when you need it.
When descending steep hills and
extended grades, downshift to a gear
that will allow you to continue safely
with only a minimal amount of braking.
By minimizing the loads placed on the
brake system, this strategy helps
ensure that optimal brake system
response will remain available at all
times. Use care to avoid exceeding the
approved engine-speed range, refer to
page 71.
Do not coast with the clutch
depressed or with the transmis-
sion or selector lever in Neutral. Do not
coast with the engine shut off. The
engine provides no braking effect when
the clutch is depressed and there is no
power-assist for braking or steering
when the engine is not running.
BMW 325xi: always refer all brake
inspection and service work to your
BMW center, as failure to observe the
special procedures could result in dam-
age to components of the all-wheel
drive.
Never allow floor mats, carpets or any
other objects to protrude into the area
around the accelerator, clutch and
brake pedals and obstruct their move-
ment.
brake pads that BMW has
released for your particular vehicle
model. BMW cannot evaluate non-
approved brake pads to determine if
they are suitable for use, and therefore
cannot ensure the operating safety of
the vehicle if they are installed.<
handbook.book Page 116 Saturday, July 27, 2002 1:36 PM
Page 120 of 166
120
Wheel and tire combinationsThe right choice
BMW recommends using only
wheels and tires that have been
approved by BMW for your particular
vehicle model, as otherwise body con-
tact and serious accidents can result
despite the use of the same nominal
size, e.g. due to manufacturing toler-
ances. BMW cannot evaluate all tires
and wheels on the market, and is thus
unable to guarantee that the vehicle will
continue to perform safely if unap-
proved tires and/or wheels are
mounted.<
For each tire size, BMW has assessed
the safe performance of specific tire
brands and approved them for use.
Consult any BMW center for details.
Comply with any local/national regula-
tions, for example by recording the tire
type in the vehicle documents.
The correct wheel-tire combina-
tion affects different systems such
as ABS, ASC+T/DSC and ADB/
ADB-X/DBC. The function of these sys-
tems is impaired if improper wheel-tire
combinations are used. For this reason,
use only tires of the same manufacture
and tread configuration. In the event of
a flat tire, for example, remount the
approved wheel and tire combination
as soon as possible.
possible. Protect the tires against con-
tact with oil, grease and fuel.
Winter tiresChoosing the right tireBMW recommends winter tires – M+S
tires – for operation under inclement
winter driving conditions. While all-sea-
son tires – M+S designation – provide
better winter traction than the corre-
sponding summer tires, they generally
do not achieve the performance of win-
ter tires.
In the interest of safe tracking and
steering response, install winter tires
made by the same manufacturer and
having the same tread configuration on
all four wheels.
Never exceed the maximum
speed for which the winter tires
are rated.
Unprofessional attempts by laymen to
service tires can lead to damage and
accidents.
Have this work performed by trained
professionals only. Any BMW center
has the required technical knowledge
and the proper equipment and will be
happy to assist you.<
handbook.book Page 120 Saturday, July 27, 2002 1:36 PM
Page 128 of 166
128
Ask your BMW center for details
concerning the specific BMW
High Performance Synthetic Oil or syn-
thetic oils that have been approved.<
You can also call BMW of North Amer-
ica toll-free at 1-800-831-1117 or visit
this website: www.bmwusa.com to
obtain this information.
Viscosity ratingsViscosity is the oilflow rating as estab-
lished in SAE classes.
The selection of the correct SAE class
depends on the climatic conditions in
the area you drive your BMW.
Approved oils are in SAE classes
5W-40 and 5W-30.<
These kinds of oil may be used for driv-
ing in all ambient temperatures.
Coolant
Do not add coolant to the cooling
system when the engine is hot. If
you attempt to do so, escaping coolant
can cause burns.
Antifreeze and anti-corrosion agents
are hazardous to health. You should
always store them in their original con-
tainers and in a location which is out of
reach of children. Antifreeze and anti-
corrosion agents are inflammable. For
this reason, do not spill them on hot
engine parts. They could ignite and
cause burns. Comply with the instruc-
tions on the containers.<
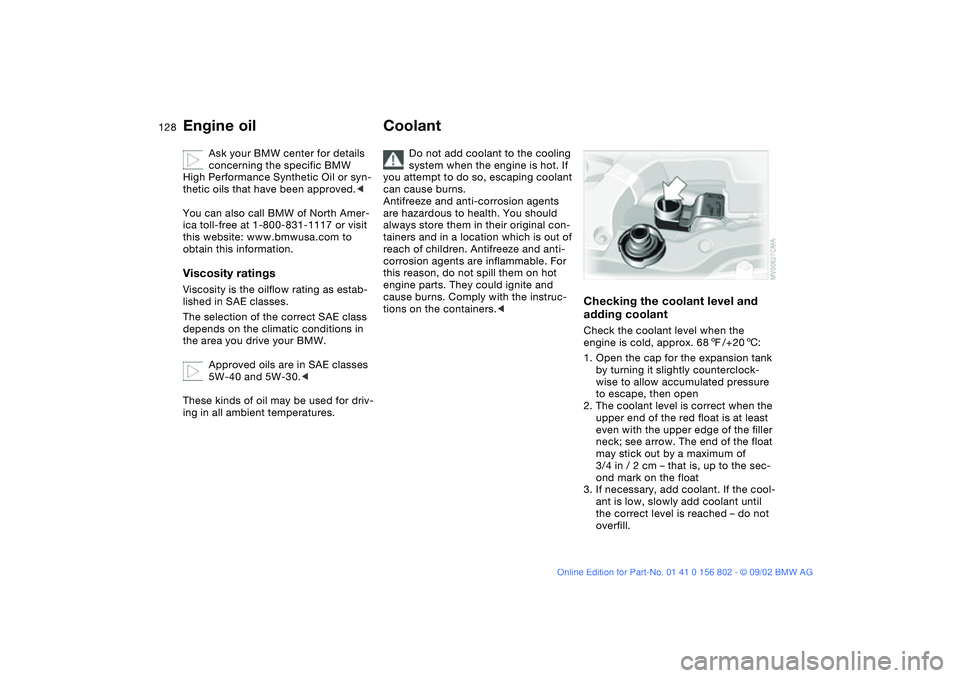
Checking the coolant level and
adding coolantCheck the coolant level when the
engine is cold, approx. 687/+206:
1. Open the cap for the expansion tank
by turning it slightly counterclock-
wise to allow accumulated pressure
to escape, then open
2. The coolant level is correct when the
upper end of the red float is at least
even with the upper edge of the filler
neck; see arrow. The end of the float
may stick out by a maximum of
3/4 in / 2 cm – that is, up to the sec-
ond mark on the float
3. If necessary, add coolant. If the cool-
ant is low, slowly add coolant until
the correct level is reached – do not
overfill.
Engine oil
handbook.book Page 128 Saturday, July 27, 2002 1:36 PM
Page 133 of 166
133
engine misfiring for even a short period
of time can seriously damage emission
control system components, especially
the catalytic converter.
SERVICE ENGINE SOON warn-
ing lamp for Canadian models.
If the fuel filler cap is not on tight
enough, the OBD system can
detect leaking vapor and the indicator
will light up. If the fuel filler cap is then
tightened, the indicator will usually go
out after a short period of time.
handbook.book Page 133 Saturday, July 27, 2002 1:36 PM
Page 137 of 166

137
Lamps and bulbsThe lamps and bulbs make essential
contributions to the safety of your vehi-
cle. Therefore, comply fully with the fol-
lowing instructions during bulb replace-
ment. If you are not familiar with any of
the procedures, consult your BMW
center.
Do not touch the glass portion of
a new bulb with your bare hands
since even small amounts of impurities
burn in to the surface and reduce the
service life of the bulb. Use a clean
cloth, paper napkin, or a similar mate-
rial, or hold the bulb by its metallic
base.<
A replacement bulb set is available from
your BMW center.
Before working on the electrical
system, switch off the electrical
accessory you are working on or dis-
connect the cable from the negative
terminal of the battery. Failure to
observe this precaution could result in
short circuits.
To prevent injuries and damage, com-
ply with any instructions provided by
the bulb manufacturer.<
Low beams and high beamsEngine compartment, left side:
1Low beams
2High beams
H7 bulb, 55 watts
The H7 bulb is pressurized. There-
fore, wear safety glasses and pro-
tective gloves. Failure to comply with
this precaution could lead to injury if the
bulb is damaged.<
1. Turn the two release catches at the
front to the left – see arrow – to
remove the bulb holder
2. Remove and replace the bulb.
When cleaning the headlamps,
please follow the instructions in
the Caring for your vehicle brochure.<
Xenon lampsThe service life of these bulbs is very
long and the probability of a failure is
very low, provided that they are not
switched on and off an unusual number
of times. If one of these bulbs should
nevertheless fail, it is possible to con-
tinue driving with great caution using
the fog lamps, provided local traffic
laws do not prohibit this.
Because of the extremely high
voltages involved, any work on the
xenon lighting system, including bulb-
changing, should be carried out by
technically-qualified personnel only.
Otherwise, there is a risk of fatal
injury.<
OverviewControlsMaintenanceRepairsDataIndex
handbook.book Page 137 Saturday, July 27, 2002 1:36 PM
Page 139 of 166
139
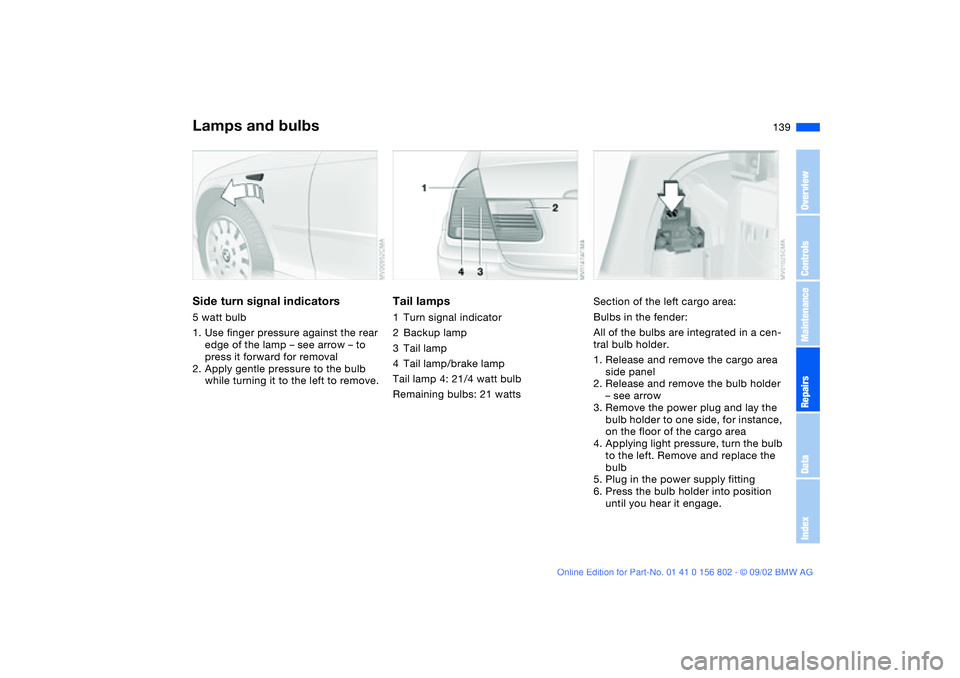
Side turn signal indicators5 watt bulb
1. Use finger pressure against the rear
edge of the lamp – see arrow – to
press it forward for removal
2. Apply gentle pressure to the bulb
while turning it to the left to remove.
Tail lamps1Turn signal indicator
2Backup lamp
3Tail lamp
4Tail lamp/brake lamp
Tail lamp 4: 21/4 watt bulb
Remaining bulbs: 21 watts
Section of the left cargo area:
Bulbs in the fender:
All of the bulbs are integrated in a cen-
tral bulb holder.
1. Release and remove the cargo area
side panel
2. Release and remove the bulb holder
– see arrow
3. Remove the power plug and lay the
bulb holder to one side, for instance,
on the floor of the cargo area
4. Applying light pressure, turn the bulb
to the left. Remove and replace the
bulb
5. Plug in the power supply fitting
6. Press the bulb holder into position
until you hear it engage.
Lamps and bulbs
OverviewControlsMaintenanceRepairsDataIndex
handbook.book Page 139 Saturday, July 27, 2002 1:36 PM
Page 140 of 166
140
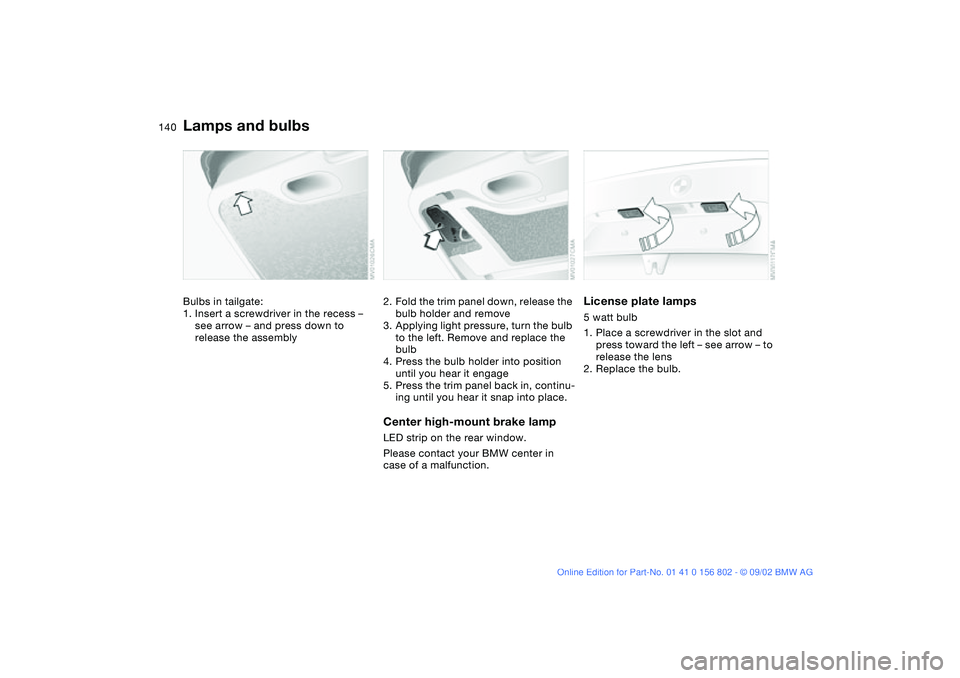
Bulbs in tailgate:
1. Insert a screwdriver in the recess –
see arrow – and press down to
release the assembly
2. Fold the trim panel down, release the
bulb holder and remove
3. Applying light pressure, turn the bulb
to the left. Remove and replace the
bulb
4. Press the bulb holder into position
until you hear it engage
5. Press the trim panel back in, continu-
ing until you hear it snap into place.Center high-mount brake lampLED strip on the rear window.
Please contact your BMW center in
case of a malfunction.
License plate lamps5 watt bulb
1. Place a screwdriver in the slot and
press toward the left – see arrow – to
release the lens
2. Replace the bulb.
Lamps and bulbs
handbook.book Page 140 Saturday, July 27, 2002 1:36 PM
Page 144 of 166
144
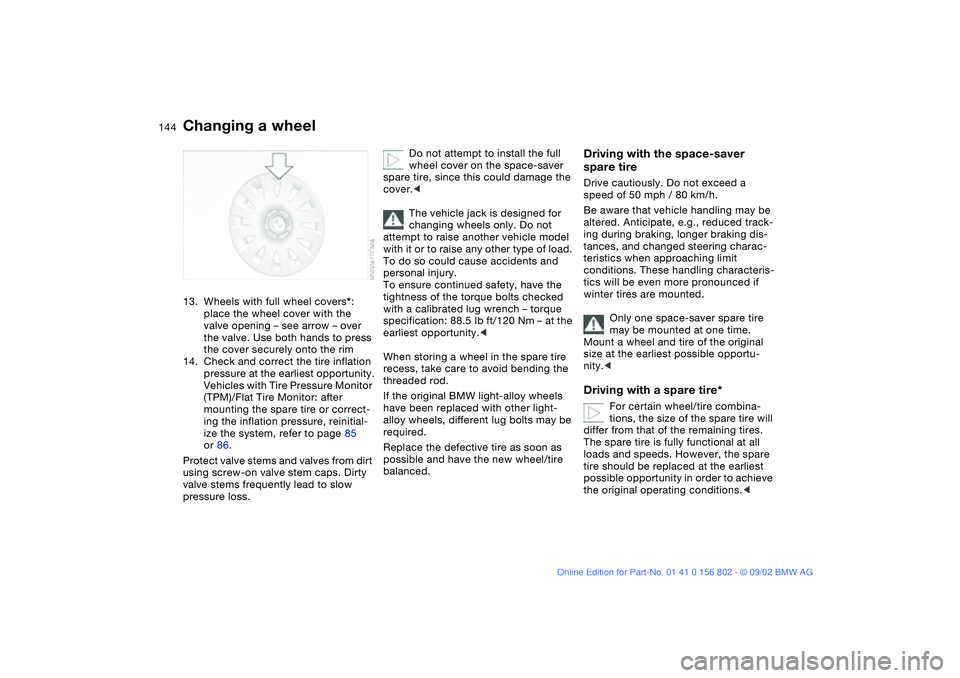
13. Wheels with full wheel covers*:
place the wheel cover with the
valve opening – see arrow – over
the valve. Use both hands to press
the cover securely onto the rim
14. Check and correct the tire inflation
pressure at the earliest opportunity.
Vehicles with Tire Pressure Monitor
(TPM)/Flat Tire Monitor: after
mounting the spare tire or correct-
ing the inflation pressure, reinitial-
ize the system, refer to page 85
or 86.
Protect valve stems and valves from dirt
using screw-on valve stem caps. Dirty
valve stems frequently lead to slow
pressure loss.
Do not attempt to install the full
wheel cover on the space-saver
spare tire, since this could damage the
cover.<
The vehicle jack is designed for
changing wheels only. Do not
attempt to raise another vehicle model
with it or to raise any other type of load.
To do so could cause accidents and
personal injury.
To ensure continued safety, have the
tightness of the torque bolts checked
with a calibrated lug wrench – torque
specification: 88.5 lb ft/120 Nm – at the
earliest opportunity.<
When storing a wheel in the spare tire
recess, take care to avoid bending the
threaded rod.
If the original BMW light-alloy wheels
have been replaced with other light-
alloy wheels, different lug bolts may be
required.
Replace the defective tire as soon as
possible and have the new wheel/tire
balanced.
Driving with the space-saver
spare tireDrive cautiously. Do not exceed a
speed of 50 mph / 80 km/h.
Be aware that vehicle handling may be
altered. Anticipate, e.g., reduced track-
ing during braking, longer braking dis-
tances, and changed steering charac-
teristics when approaching limit
conditions. These handling characteris-
tics will be even more pronounced if
winter tires are mounted.
Only one space-saver spare tire
may be mounted at one time.
Mount a wheel and tire of the original
size at the earliest possible opportu-
nity.
tions, the size of the spare tire will
differ from that of the remaining tires.
The spare tire is fully functional at all
loads and speeds. However, the spare
tire should be replaced at the earliest
possible opportunity in order to achieve
the original operating conditions.<
Changing a wheel
handbook.book Page 144 Saturday, July 27, 2002 1:36 PM