2003 BMW 3.0i ROADSTER automatic transmission
[x] Cancel search: automatic transmissionPage 4 of 106

Contents
Contents
Notes
6About this Owner's Manual
6Symbols used
6Symbol on vehicle parts
6Your individual vehicle
6Status at time of printing
7For your own safety
7Service and warranty
8Reporting safety defects
Overview
12Cockpit
13Instrument cluster
14Indicator and warning lamps
Opening and closing
18Keys
18Central locking system
18Remote control
20Door lock
20Interior
21Luggage compartment lid
22Luggage compartment
22Electric power windows
23Manual convertible top
24Fully automatic convertible top*
26Wind deflector*
27Alarm system*
Adjustments
29Safe seating position
29Seats
30Seat memory*
31Seat heating*
31Safety belts
32Steering wheel
32Mirrors
33Airbags
34Transporting children safely
37Vehicle Memory, Key Memory
Driving
38Ignition lock
38Engine
39Parking brake
40Manual transmission
40Automatic transmission with
Steptronic*
42Electric Power Steering EPS
42Drivelogic*
42Turn signal indicators/Headlamp
flasher
43Washer/wiper system and
rain sensor*
44Cruise control*
Lamps
45Parking lamps/Low beams
46High beams/Standing lamps
46Instrument lighting
46Fog lamps
46Interior lamps
© 2002 Bayerische Motoren Werke
Aktiengesellschaft
Munich, Germany
Reprinting, including excerpts, only with the
written consent of BMW AG, Munich.
Order No. 01 41 0 156 897
US English VIII/02
Printed in Germany
Printed on environmentally friendly paper –
bleached without chlorine, suitable for recycling.
Page 13 of 106
At a glance
Controls
Driving tips
Mobility
Reference
13
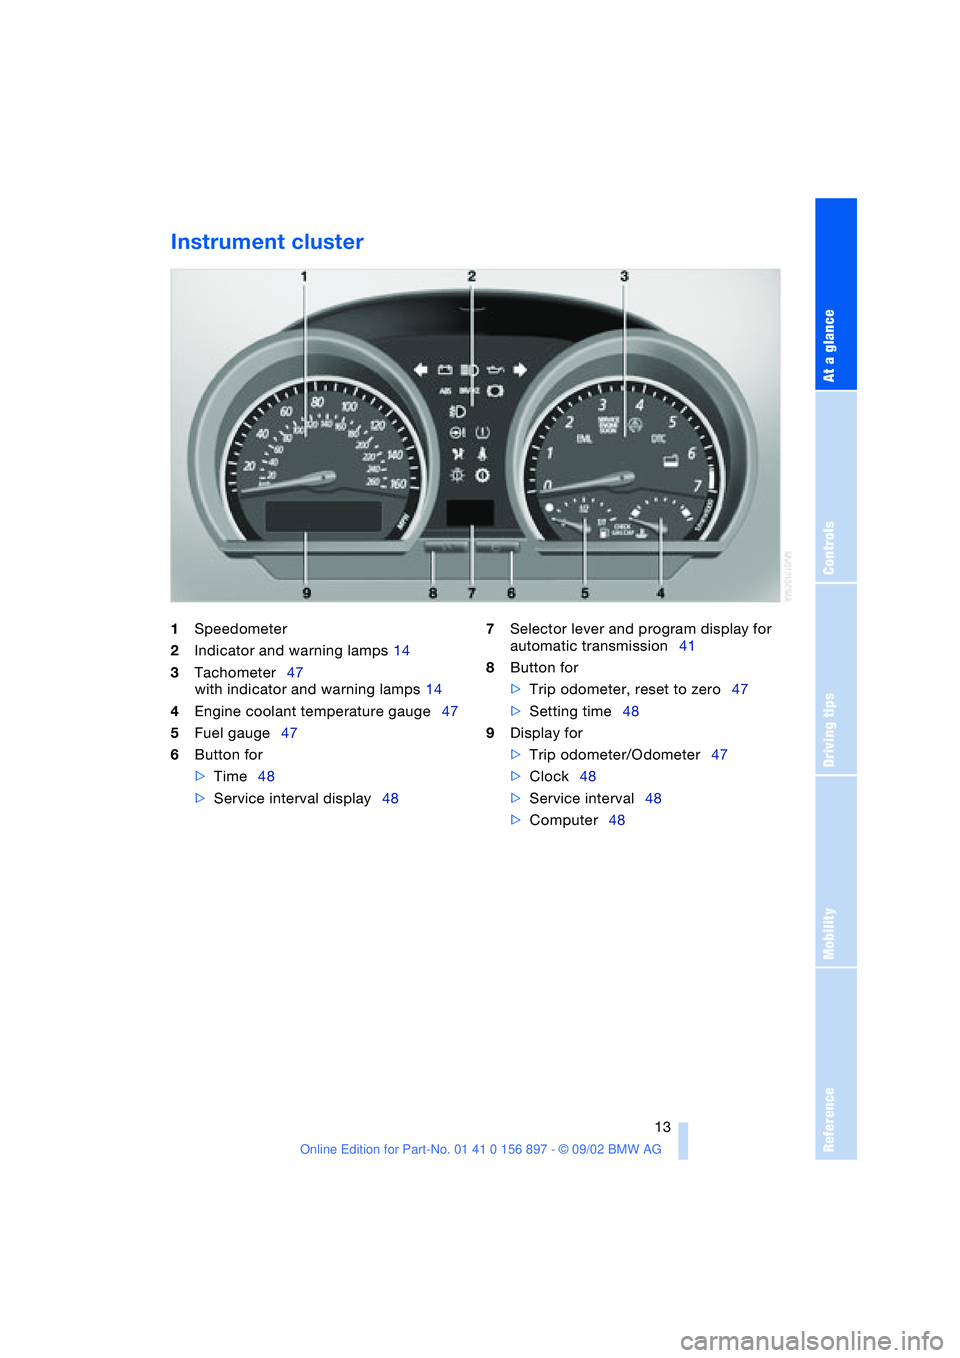
Instrument cluster
1Speedometer
2Indicator and warning lamps 14
3Tachometer47
with indicator and warning lamps 14
4Engine coolant temperature gauge47
5Fuel gauge47
6Button for
>Time48
>Service interval display48 7Selector lever and program display for
automatic transmission41
8Button for
>Trip odometer, reset to zero47
>Setting time48
9Display for
>Trip odometer/Odometer47
>Clock48
>Service interval48
>Computer48
Page 14 of 106

Overview
14
Indicator and warning
lamps
Technology that monitors itself
Indicator and warning lamps that are iden-
tified by
+ are tested for proper functioning
whenever the ignition key is turned. They
each light up once for different periods of
time.
If a fault should occur in one of these sys-
tems, the corresponding lamp does not go
out after the engine is started or it lights up
again while the vehicle is moving. The indi-
cated pages provide information on what
measures to take.
Please fasten safety belts
+31
Airbags
+33
Battery charge current
+87
Engine oil pressure/Engine oil level/
Engine oil sensor
+79
Parking brake/Chassis control sys-
tem/Dynamic Brake Control/Brake
fluid
+39/ 51/ 52/ 81
Brake warning lamp for Canadian
models
Antilock Brake System ABS/Chas-
sis control system
+53/ 51
Antilock Brake System ABS/Chas-
sis control system for Canadian
modelsDynamic Stability Control DSC
+51
Dynamic Traction Control DTC
+51
Flat Tire Monitor
+53
Automatic transmission
+41
Brake pads
+66
Add coolant80
Check Gas Cap
+
Service engine soon +83
Service engine soon
+
warning lamp for Canadian
models.
Defective bulbs45
Turn signal indicators42
Fog lamps46
Headlamp flasher/
High beams42/ 46
Page 38 of 106
Driving
38
Driving
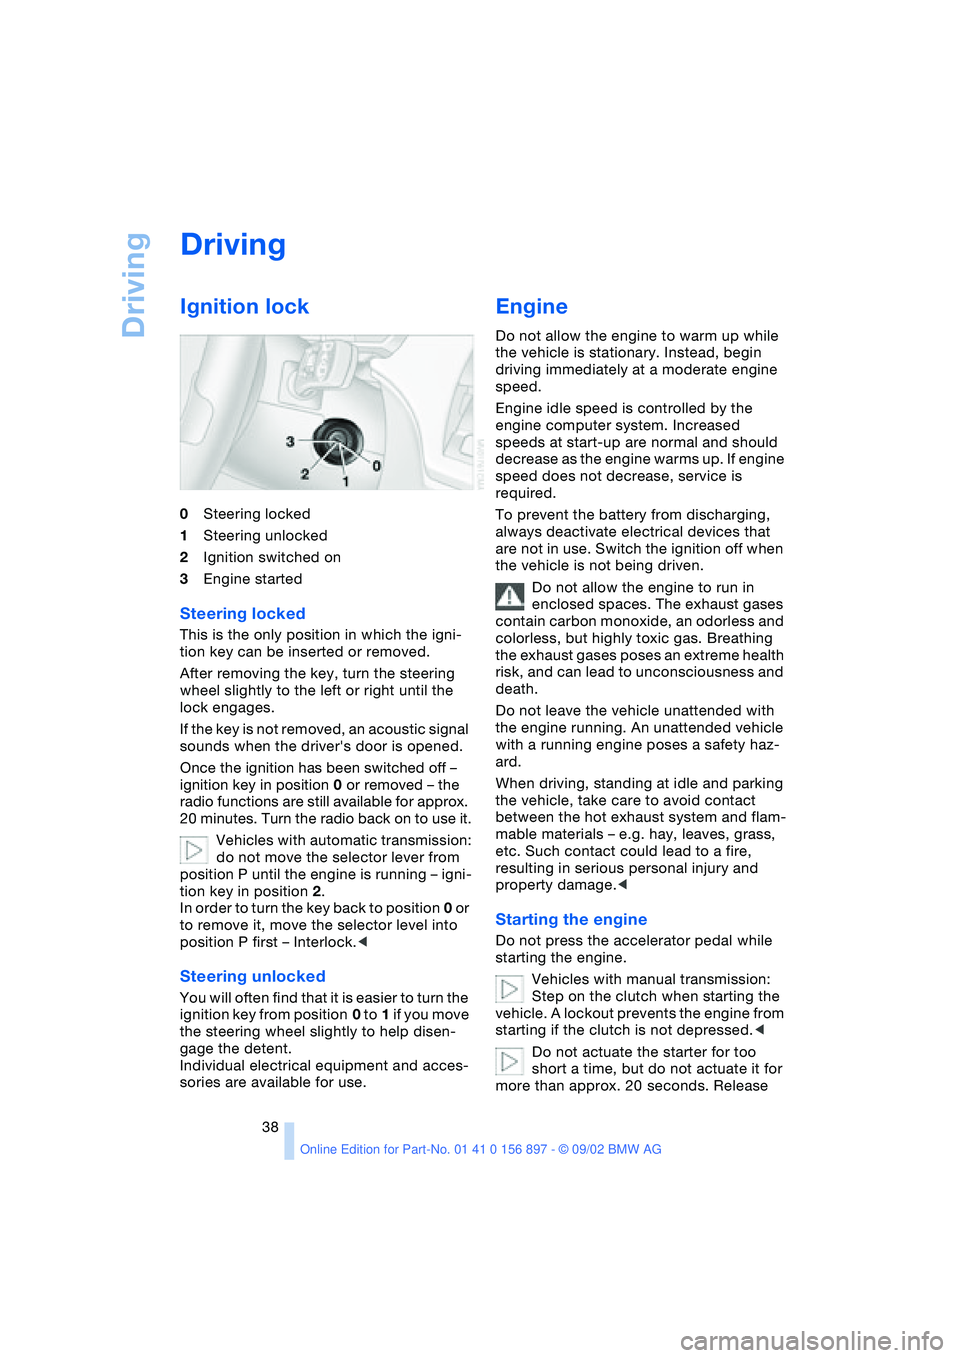
Ignition lock
0Steering locked
1Steering unlocked
2Ignition switched on
3Engine started
Steering locked
This is the only position in which the igni-
tion key can be inserted or removed.
After removing the key, turn the steering
wheel slightly to the left or right until the
lock engages.
If the key is not removed, an acoustic signal
sounds when the driver's door is opened.
Once the ignition has been switched off –
ignition key in position 0 or removed – the
radio functions are still available for approx.
20 minutes. Turn the radio back on to use it.
Vehicles with automatic transmission:
do not move the selector lever from
position P until the engine is running – igni-
tion key in position 2.
In order to turn the key back to position 0 or
to remove it, move the selector level into
position P first – Interlock.<
Steering unlocked
You will often find that it is easier to turn the
ignition key from position 0 to 1 if you move
the steering wheel slightly to help disen-
gage the detent.
Individual electrical equipment and acces-
sories are available for use.
Engine
Do not allow the engine to warm up while
the vehicle is stationary. Instead, begin
driving immediately at a moderate engine
speed.
Engine idle speed is controlled by the
engine computer system. Increased
speeds at start-up are normal and should
decrease as the engine warms up. If engine
speed does not decrease, service is
required.
To prevent the battery from discharging,
always deactivate electrical devices that
are not in use. Switch the ignition off when
the vehicle is not being driven.
Do not allow the engine to run in
enclosed spaces. The exhaust gases
contain carbon monoxide, an odorless and
colorless, but highly toxic gas. Breathing
the exhaust gases poses an extreme health
risk, and can lead to unconsciousness and
death.
Do not leave the vehicle unattended with
the engine running. An unattended vehicle
with a running engine poses a safety haz-
ard.
When driving, standing at idle and parking
the vehicle, take care to avoid contact
between the hot exhaust system and flam-
mable materials – e.g. hay, leaves, grass,
etc. Such contact could lead to a fire,
resulting in serious personal injury and
property damage.<
Starting the engine
Do not press the accelerator pedal while
starting the engine.
Vehicles with manual transmission:
Step on the clutch when starting the
vehicle. A lockout prevents the engine from
starting if the clutch is not depressed.<
Do not actuate the starter for too
short a time, but do not actuate it for
more than approx. 20 seconds. Release
Page 39 of 106
At a glance
Controls
Driving tips
Mobility
Reference
39
the ignition key immediately when the
engine starts.<
Extended starting attempts, charac-
terized by excessively frequent or
long periods with the starter engaged, can
damage the catalytic converter.<
If the engine fails to start on the first
attempt – if it is very hot or cold, for
instance:
>Press the accelerator pedal halfway
down.
Cold starts at very low temperatures –
starting at approx. +57 / –156
>Press the accelerator pedal halfway
down while engaging the starter
>On the first start attempt, engage the
starter for a longer period –
approx. 10 seconds.
Manual transmission
1.Engage the parking brake
2.Gearshift lever in idling position
3.Depress clutch pedal
4.Start the engine.
Automatic transmission
1.Depress footbrake
2.Place selector lever in position P or N
3.Start the engine.
Before leaving the vehicle with the
engine running, place the selector
lever in position P and pull the parking
brake.
Do not leave the vehicle unattended with
the engine running. An unattended vehicle
with a running engine poses a safety haz-
ard.<
Switching off the engine
Do not remove the ignition key while
the vehicle is still moving. If you did so,
the steering lock would engage when the
steering wheel is turned.
When you leave the vehicle, always remove
the ignition key and engage the steering lock.
Always engage the parking brake when park-
ing on downhill roads.<
Manual transmission
Turn the ignition key to position 1 or 0.
Automatic transmission
Place the selector lever in position P and
turn the ignition key to position 1 or 0.
Parking brake
The parking brake is designed primarily to
prevent the vehicle from rolling when
parked. It operates against the rear wheels.
The brake warning lamp lights up
when the parking brake is engaged;
if you start driving, an acoustic sig-
nal is heard as well.
Brake warning lamp for Canadian
models
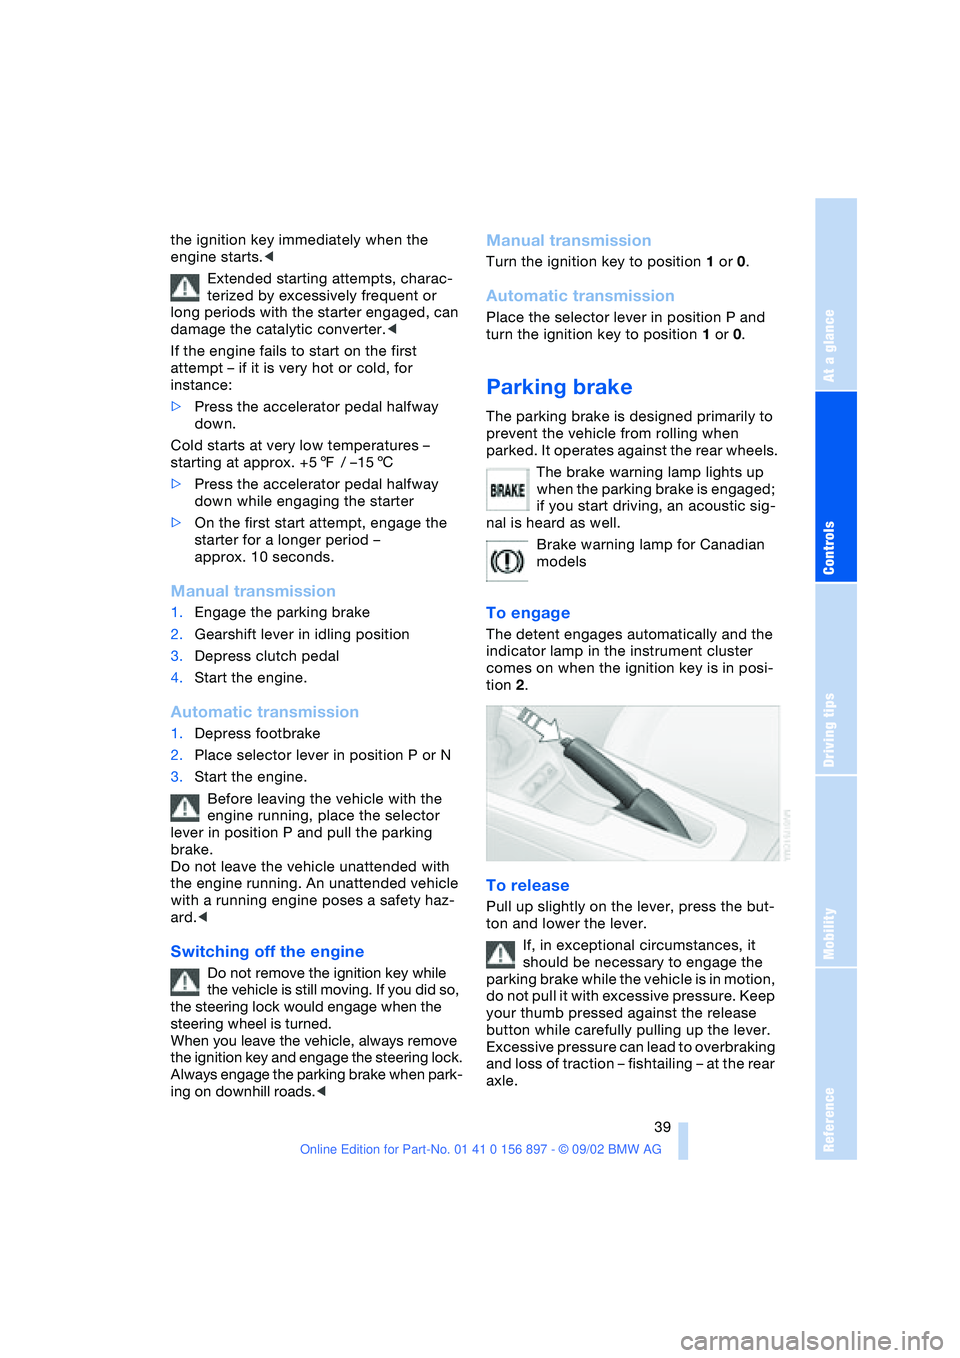
To engage
The detent engages automatically and the
indicator lamp in the instrument cluster
comes on when the ignition key is in posi-
tion 2.
To release
Pull up slightly on the lever, press the but-
ton and lower the lever.
If, in exceptional circumstances, it
should be necessary to engage the
parking brake while the vehicle is in motion,
do not pull it with excessive pressure. Keep
your thumb pressed against the release
button while carefully pulling up the lever.
Excessive pressure can lead to overbraking
and loss of traction – fishtailing – at the rear
axle.
Page 40 of 106
Driving
40 The brake lamps do not come on when the
parking brake is engaged.<
Vehicles with manual transmission:
Always engage the parking brake
when parking on slopes and inclined sur-
faces, since shifting into 1st gear or reverse
may not provide adequate resistance to
rolling. Vehicles with automatic transmis-
sion: place the selector lever in
position P.<
To avoid corrosion and one-sided
braking, apply the parking brake
lightly from time to time when coasting to a
standstill – at a traffic signal, for example –
provided that it is safe to do so.<
Manual transmission
6-gear transmission*
When shifting into 5th or 6th gear, it is
important to press the gear shift lever to the
right to avoid accidentally engaging 3rd or
4th gear.
Reverse
Select reverse only when the vehicle is sta-
tionary. Press the gearshift lever to the left
to overcome the resistance.
As you do this, the backup lamps will turn
on automatically when the ignition key is in
position 2.
Do not hold the vehicle in place on
slopes by slipping or "riding" the
clutch. Use the parking brake instead, oth-
erwise, the ensuing friction to the clutch
plates will cause a great deal of wear and
tear on the clutch.<
Automatic transmission
with Steptronic*
You can drive as with a normal automatic
transmission. In addition, you can also shift
manually.
When you move the selector lever from the
D position to the left into the M/S range, the
performance-oriented shift programs of the
automatic transmission are engaged. As
soon as you briefly tap the selector lever in
the "+" or "–" direction, Steptronic changes
the gear. The manual mode is engaged.
When you wish to use the automatic trans-
mission mode again, move the selector
lever to the right to position D.
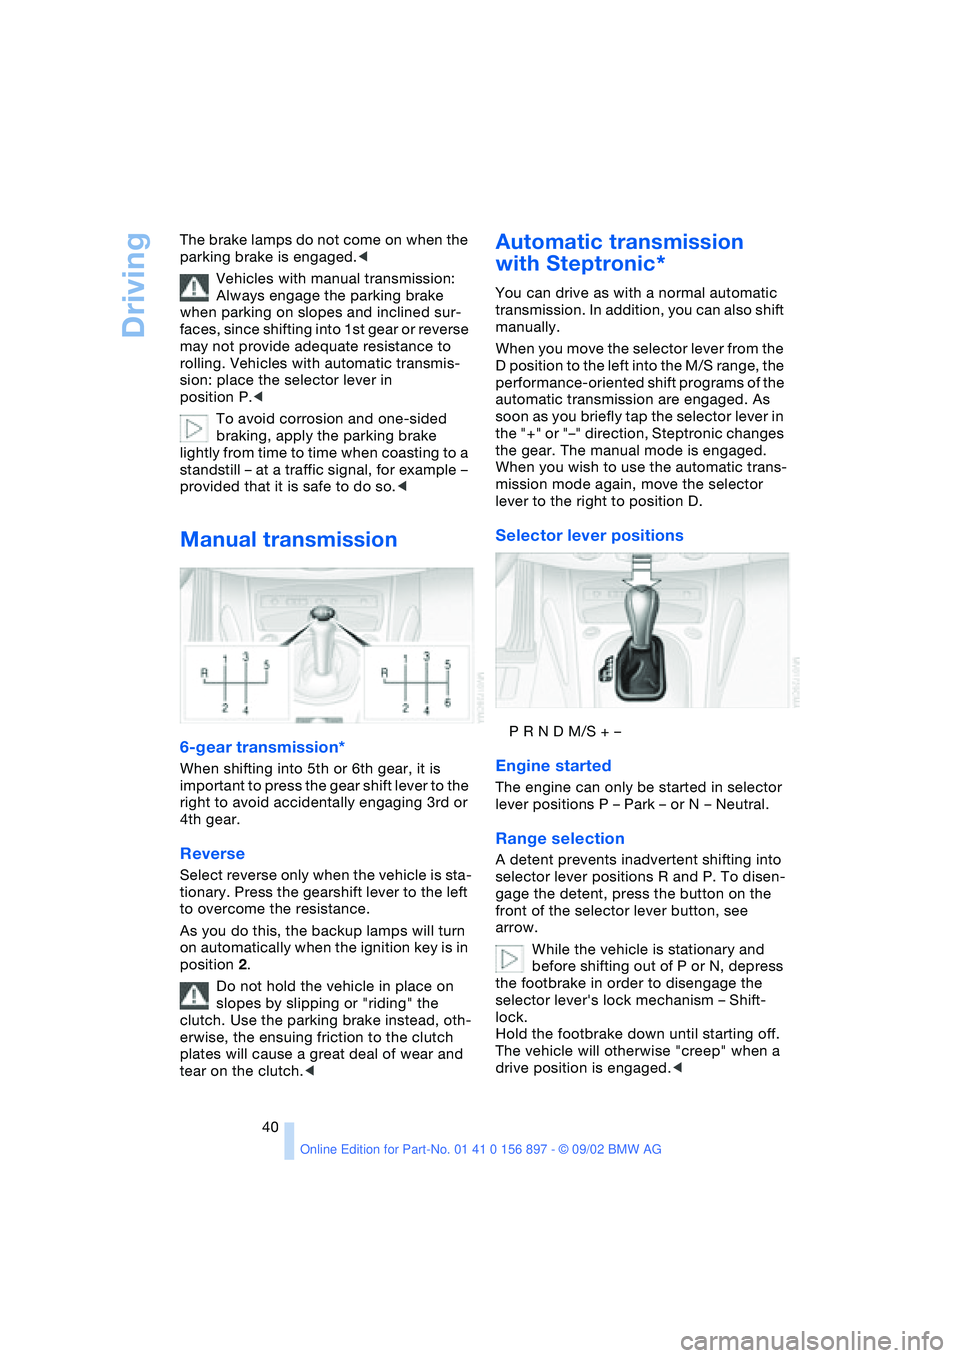
Selector lever positions
P R N D M/S + –
Engine started
The engine can only be started in selector
lever positions P – Park – or N – Neutral.
Range selection
A detent prevents inadvertent shifting into
selector lever positions R and P. To disen-
gage the detent, press the button on the
front of the selector lever button, see
arrow.
While the vehicle is stationary and
before shifting out of P or N, depress
the footbrake in order to disengage the
selector lever's lock mechanism – Shift-
lock.
Hold the footbrake down until starting off.
The vehicle will otherwise "creep" when a
drive position is engaged.<
Page 41 of 106
At a glance
Controls
Driving tips
Mobility
Reference
41
If you leave the vehicle with the
engine running, move the selector
lever to the P position and apply the park-
ing brake. If you fail to do this, the vehicle
could move.
Do not leave the vehicle unattended with
the engine running. An unattended vehicle
with a running engine poses a safety haz-
ard.<
PPark
Select reverse only when the vehicle is sta-
tionary. The transmission locks to prevent
the rear wheels from turning.
RReverse
Select reverse only when the vehicle is sta-
tionary.
NNeutral – idling
Select only when stopping for an extended
period.
DDrive – automatic shift program
This position is designed for driving under
all normal operating conditions. All forward
gears are available.
Kickdown
In the kickdown mode, you achieve maxi-
mum acceleration in position D.
Depress the accelerator pedal past the
increased resistance point at the full-throt-
tle position.
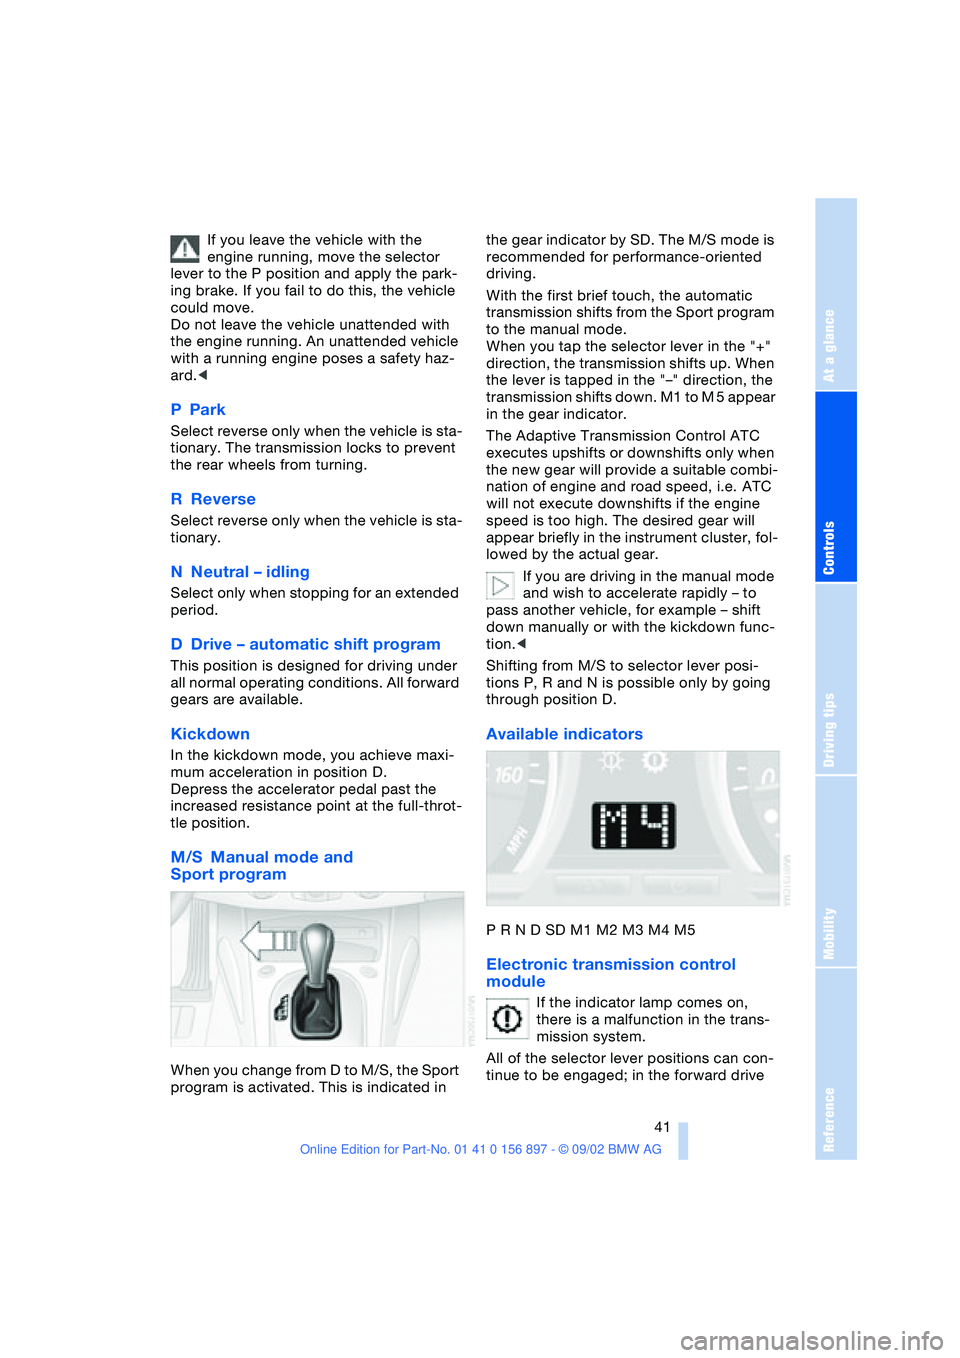
M/S Manual mode and
Sport program
When you change from D to M/S, the Sport
program is activated. This is indicated in the gear indicator by SD. The M/S mode is
recommended for performance-oriented
driving.
With the first brief touch, the automatic
transmission shifts from the Sport program
to the manual mode.
When you tap the selector lever in the "+"
direction, the transmission shifts up. When
the lever is tapped in the "–" direction, the
transmission shifts down. M1 to M 5 appear
in the gear indicator.
The Adaptive Transmission Control ATC
executes upshifts or downshifts only when
the new gear will provide a suitable combi-
nation of engine and road speed, i.e. ATC
will not execute downshifts if the engine
speed is too high. The desired gear will
appear briefly in the instrument cluster, fol-
lowed by the actual gear.
If you are driving in the manual mode
and wish to accelerate rapidly – to
pass another vehicle, for example – shift
down manually or with the kickdown func-
tion.<
Shifting from M/S to selector lever posi-
tions P, R and N is possible only by going
through position D.
Available indicators
P R N D SD M1 M2 M3 M4 M5
Electronic transmission control
module
If the indicator lamp comes on,
there is a malfunction in the trans-
mission system.
All of the selector lever positions can con-
tinue to be engaged; in the forward drive
Page 42 of 106
Driving
42 positions, however, the vehicle will be
operating in the fourth gear only.
If this happens, avoid extreme engine loads
and consult the nearest BMW center.
Never work in the engine compart-
ment when a drive gear – forward or
reverse – is engaged. If you do so, the vehi-
cle could move.<
For towing, tow-starting and jump-starting:
refer to the information beginning on
page 89.
Electric Power Steering EPS
The concept
The electric power steering is a direct,
sporting steering system that is speed-sen-
sitive.
Power support is reduced with an increase
in driving speed.
Indicator lamp
Electric Power Steering
The indicator lamp stays lit:
The system has malfunctioned or is
faulty.
Please have the system inspected by the
nearest BMW center.
Steering remains operational.
Drivelogic*
The Drivelogic feature lets you select
between the standard and sport program.
The sport program is recommended for
performance-oriented driving.
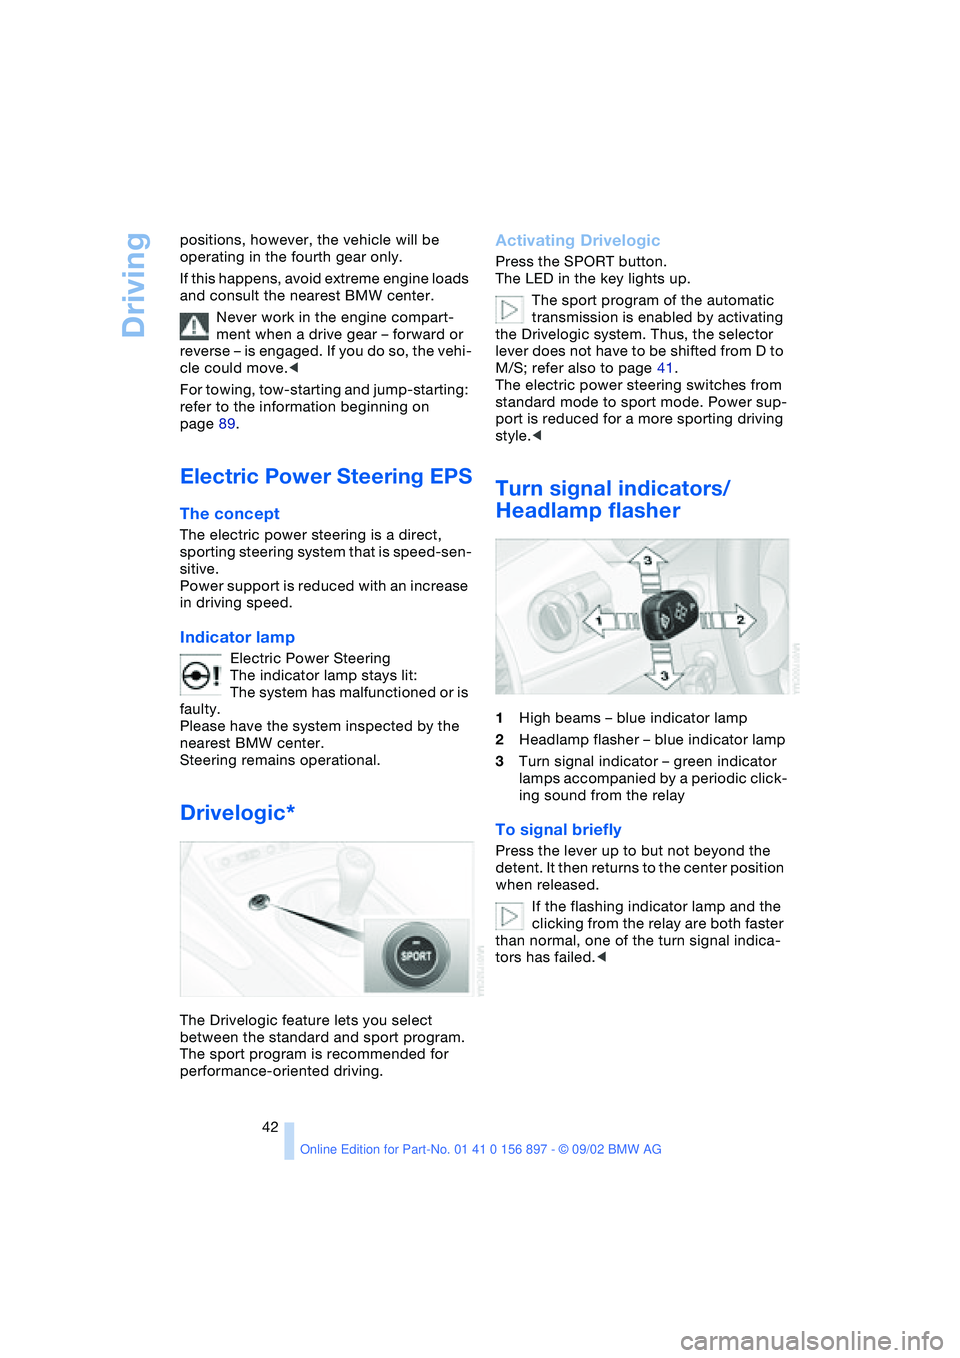
Activating Drivelogic
Press the SPORT button.
The LED in the key lights up.
The sport program of the automatic
transmission is enabled by activating
the Drivelogic system. Thus, the selector
lever does not have to be shifted from D to
M/S; refer also to page 41.
The electric power steering switches from
standard mode to sport mode. Power sup-
port is reduced for a more sporting driving
style.<
Turn signal indicators/
Headlamp flasher
1High beams – blue indicator lamp
2Headlamp flasher – blue indicator lamp
3Turn signal indicator – green indicator
lamps accompanied by a periodic click-
ing sound from the relay
To signal briefly
Press the lever up to but not beyond the
detent. It then returns to the center position
when released.
If the flashing indicator lamp and the
clicking from the relay are both faster
than normal, one of the turn signal indica-
tors has failed.<