2003 BMW 3.0i ROADSTER lights
[x] Cancel search: lightsPage 14 of 106

Overview
14
Indicator and warning
lamps
Technology that monitors itself
Indicator and warning lamps that are iden-
tified by
+ are tested for proper functioning
whenever the ignition key is turned. They
each light up once for different periods of
time.
If a fault should occur in one of these sys-
tems, the corresponding lamp does not go
out after the engine is started or it lights up
again while the vehicle is moving. The indi-
cated pages provide information on what
measures to take.
Please fasten safety belts
+31
Airbags
+33
Battery charge current
+87
Engine oil pressure/Engine oil level/
Engine oil sensor
+79
Parking brake/Chassis control sys-
tem/Dynamic Brake Control/Brake
fluid
+39/ 51/ 52/ 81
Brake warning lamp for Canadian
models
Antilock Brake System ABS/Chas-
sis control system
+53/ 51
Antilock Brake System ABS/Chas-
sis control system for Canadian
modelsDynamic Stability Control DSC
+51
Dynamic Traction Control DTC
+51
Flat Tire Monitor
+53
Automatic transmission
+41
Brake pads
+66
Add coolant80
Check Gas Cap
+
Service engine soon +83
Service engine soon
+
warning lamp for Canadian
models.
Defective bulbs45
Turn signal indicators42
Fog lamps46
Headlamp flasher/
High beams42/ 46
Page 25 of 106
At a glance
Controls
Driving tips
Mobility
Reference
25
Ignition key in position 1 or higher.
With the vehicle standing.
1.Read and comply with the preceding
safety precautions
2.Make sure that the convertible top com-
partment panel in the luggage compart-
ment is lowered; refer to page 22. Oth-
erwise the convertible top cannot be
opened
3.Ensure that the luggage compartment
lid is closed
4.Press and hold the corresponding but-
ton for convertible top operation.
If the convertible top should halt right
before the closing phase is completed,
press against the front part of the convert-
ible top frame from the outside to help the
closing process along. Keep pressing the
button while doing so until the top starts up
again on its own.
Indicator lamps
>The red indicator lamp will light up while
the convertible top is in motion. It goes
out as soon as the opening or closing
operation has been completed
>If the red indicator lamp flashes after
the button has been released, then the
opening or closing operation has not
yet been completed.
The sequence can be continued in the
desired direction by pressing this but-
ton
>If the yellow indicator lamp lights up
continuously with the button pressed,
then the convertible top compartment
panel is raised and the convertible top
cannot be moved.
The side windows will lower slightly when
you press the button for operating the con-
vertible top.
After the opening or closing operation, the
side windows will go back up if you keep
the button pressed for more than 2 sec-
onds after the indicator lamp has gone out.
The automatic sequence will be interrupted
immediately if you release the button that
operates the top. The sequence can be continued in the desired direction by press-
ing this button.
If the convertible top operation has
been interrupted, do not close the
side windows using the power window but-
tons. Otherwise the side windows may not
close properly against the rubber seal of
the convertible top.<
After the convertible top has been
stored for an extended period of time
in the convertible top compartment – e.g. in
the winter months because the hardtop
was being used – you may have to support
the convertible top by hand when closing it
for the first time.<
If the opening or closing procedure has
been interrupted due to an electrical mal-
function, the convertible top will remain in
that position for 15 minutes. The procedure
can be resumed in the desired direction by
pressing the button. After that, the convert-
ible top can be moved again and, if it is an
emergency situation, you may have to help
the top along manually. This can also be
done in ignition key position 0.
Convenience operation from the
driver's door lock
Refer to page 20.
To close manually in the event of
an electrical malfunction
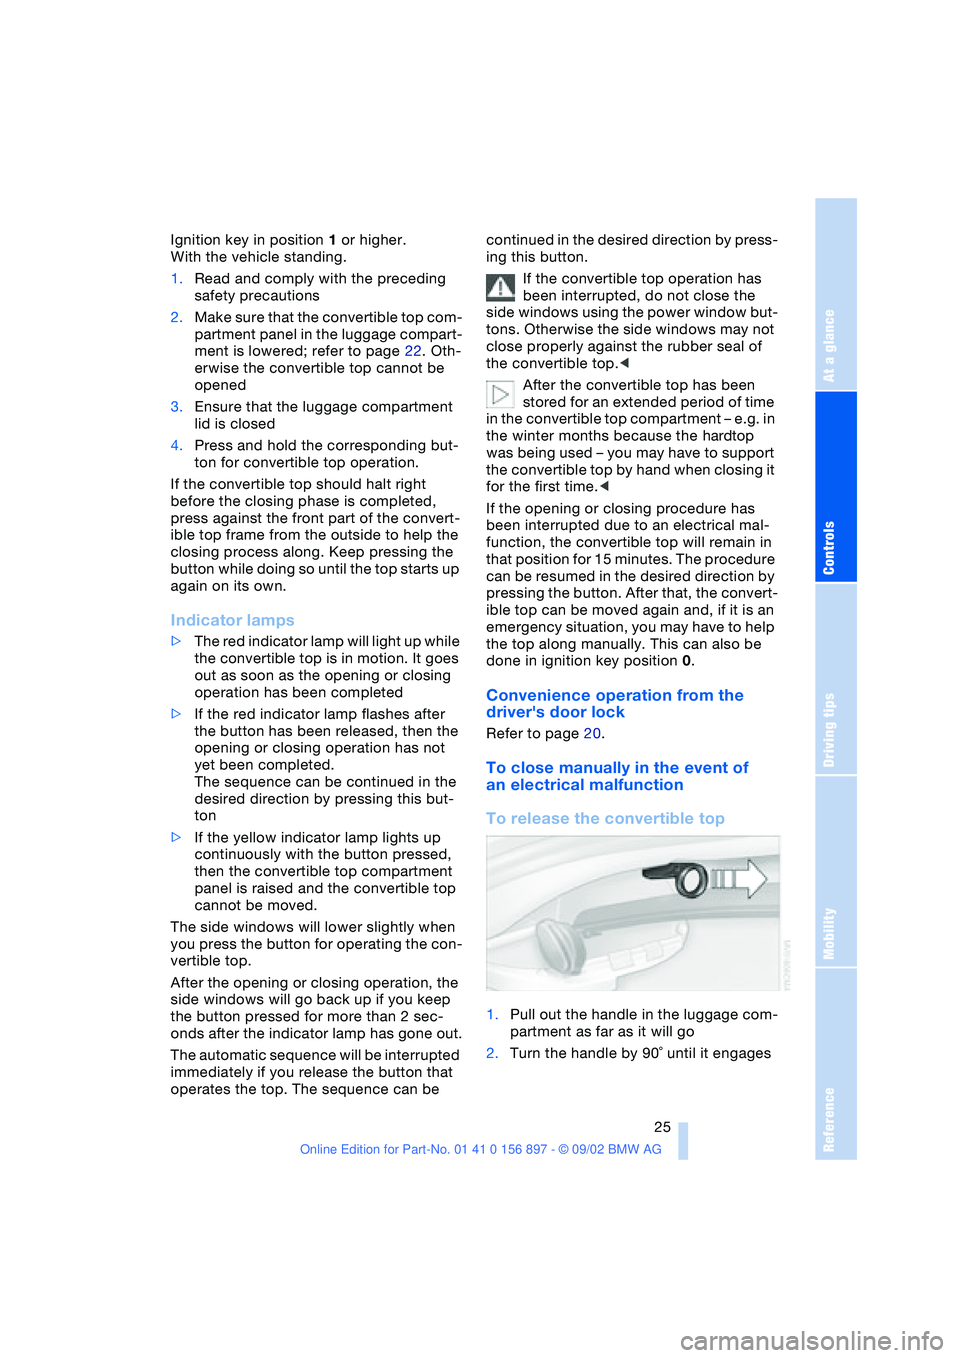
To release the convertible top
1.Pull out the handle in the luggage com-
partment as far as it will go
2.Turn the handle by 90˚ until it engages
Page 28 of 106

Opening and closing
28 >If the indicator lamp goes out as soon
as the system is disarmed:
No manipulation or attempted intru-
sions have been detected in the period
since the system was armed
>If the indicator lamp flashes for
10 seconds when the system is being
disarmed:
An attempted entry has been detected
in the period since the system was
armed.
After an alarm has been triggered, the indi-
cator lamp will flash continuously.
Interior motion sensor*
The system monitors the footwells and the
seating areas of the driver and passenger.
Deactivate the interior motion sensor
– refer to Avoiding unintentional
alarms – if children or animals are to remain
in the vehicle.<
Avoiding unintentional alarms
The tilt alarm sensor and interior motion
sensor can be deactivated at the same
time. You can do this to prevent a false
alarm from being triggered, for instance in
garages with elevator ramps or when the
vehicle is transported by train.
Lock the vehicle twice = arm the system:
Press the button on the remote control
twice in succession,
or
lock the vehicle twice with the key. Refer to
page 20.
The indicator lamp lights up briefly and
then flashes continuously. The tilt alarm
sensor and the interior motion sensor are
deactivated as long as the system is
armed.
Page 30 of 106
Adjustments
30 After releasing the lever, move the seat
backwards or forwards slightly to ensure
that the latch engages securely
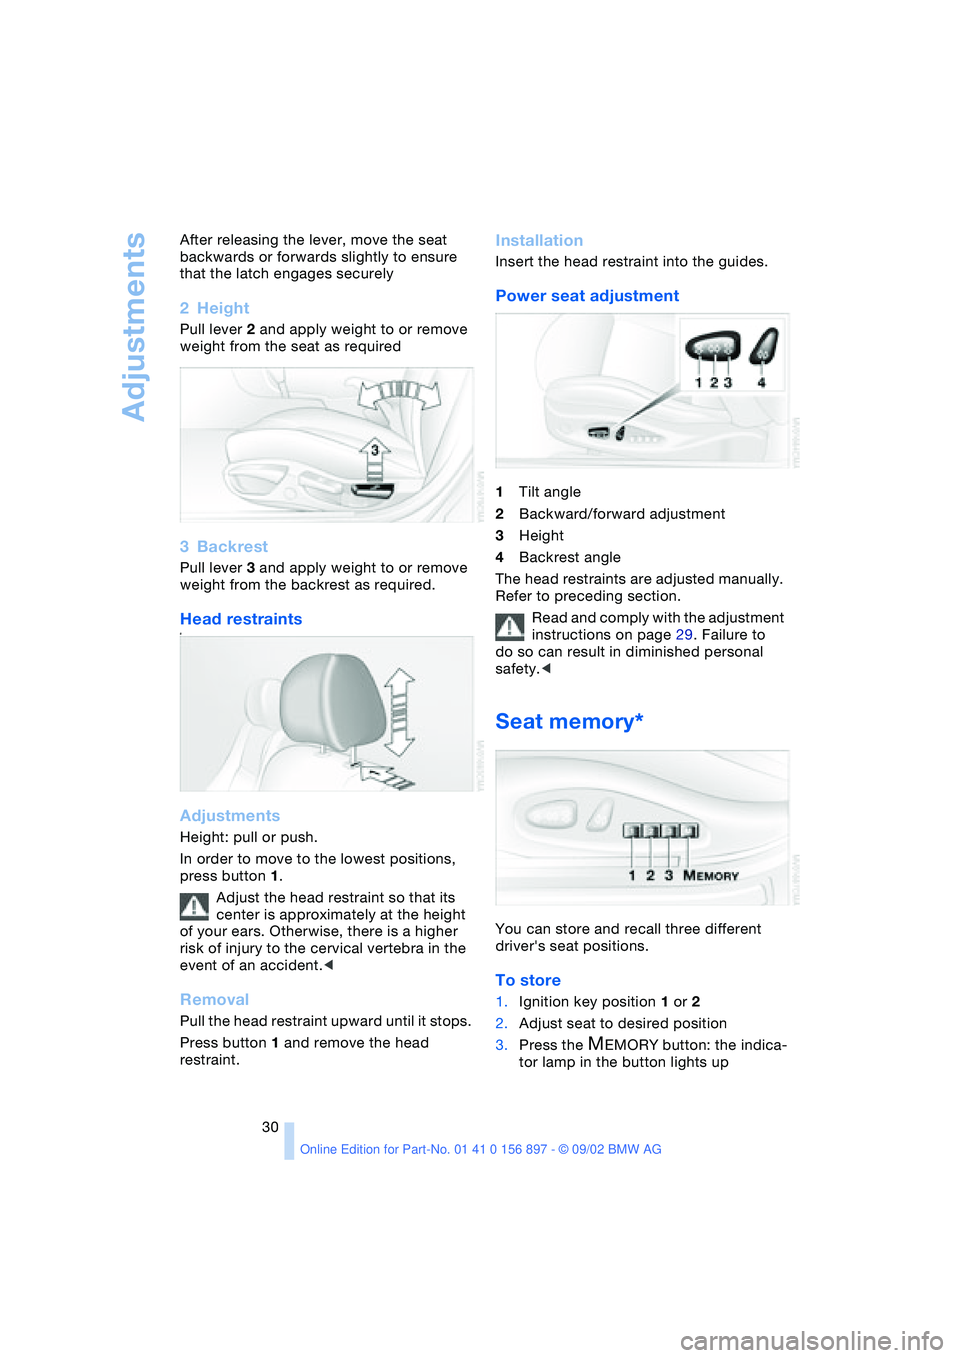
2Height
Pull lever 2 and apply weight to or remove
weight from the seat as required
3Backrest
Pull lever 3 and apply weight to or remove
weight from the backrest as required.
Head restraints#
Adjustments
Height: pull or push.
In order to move to the lowest positions,
press button 1.
Adjust the head restraint so that its
center is approximately at the height
of your ears. Otherwise, there is a higher
risk of injury to the cervical vertebra in the
event of an accident.<
Removal
Pull the head restraint upward until it stops.
Press button 1 and remove the head
restraint.
Installation
Insert the head restraint into the guides.
Power seat adjustment
1Tilt angle
2Backward/forward adjustment
3Height
4Backrest angle
The head restraints are adjusted manually.
Refer to preceding section.
Read and comply with the adjustment
instructions on page 29. Failure to
do so can result in diminished personal
safety.<
Seat memory*
You can store and recall three different
driver's seat positions.
To store
1.Ignition key position 1 or 2
2.Adjust seat to desired position
3.Press the
MEMORY button: the indica-
tor lamp in the button lights up
Page 31 of 106
At a glance
Controls
Driving tips
Mobility
Reference
31
4.Press memory button 1, 2 or 3, as
desired. The indicator lamp goes out.
To select a stored setting
Do not select a memory position while
the vehicle is moving. If you do so,
there is a risk of accident due to unex-
pected seat movement.<
Ignition key position 1:
>Briefly press memory button 1, 2 or 3,
as desired.
Movement stops immediately when one
of the seat adjustment or memory but-
tons is operated during the adjustment
process.
With the driver's door closed and the igni-
tion key either removed or in position 0
or 2:
>Press and hold the desired memory
button – 1, 2 or 3 – until the adjustment
process is completed.
If you press the
MEMORY button
accidentally: press the button again;
the indicator lamp goes out.<
You can have your vehicle adjusted in
such a way that your personal set-
tings are automatically set for the seat
positions when you unlock the vehicle with
your personal remote control.<
If you make use of this method of
adjustment, be sure that the space
behind the driver's seat is unobstructed
before unlocking the vehicle. If you fail to
do so, objects behind the seat could be
damaged by a rearward movement of the
seat.<
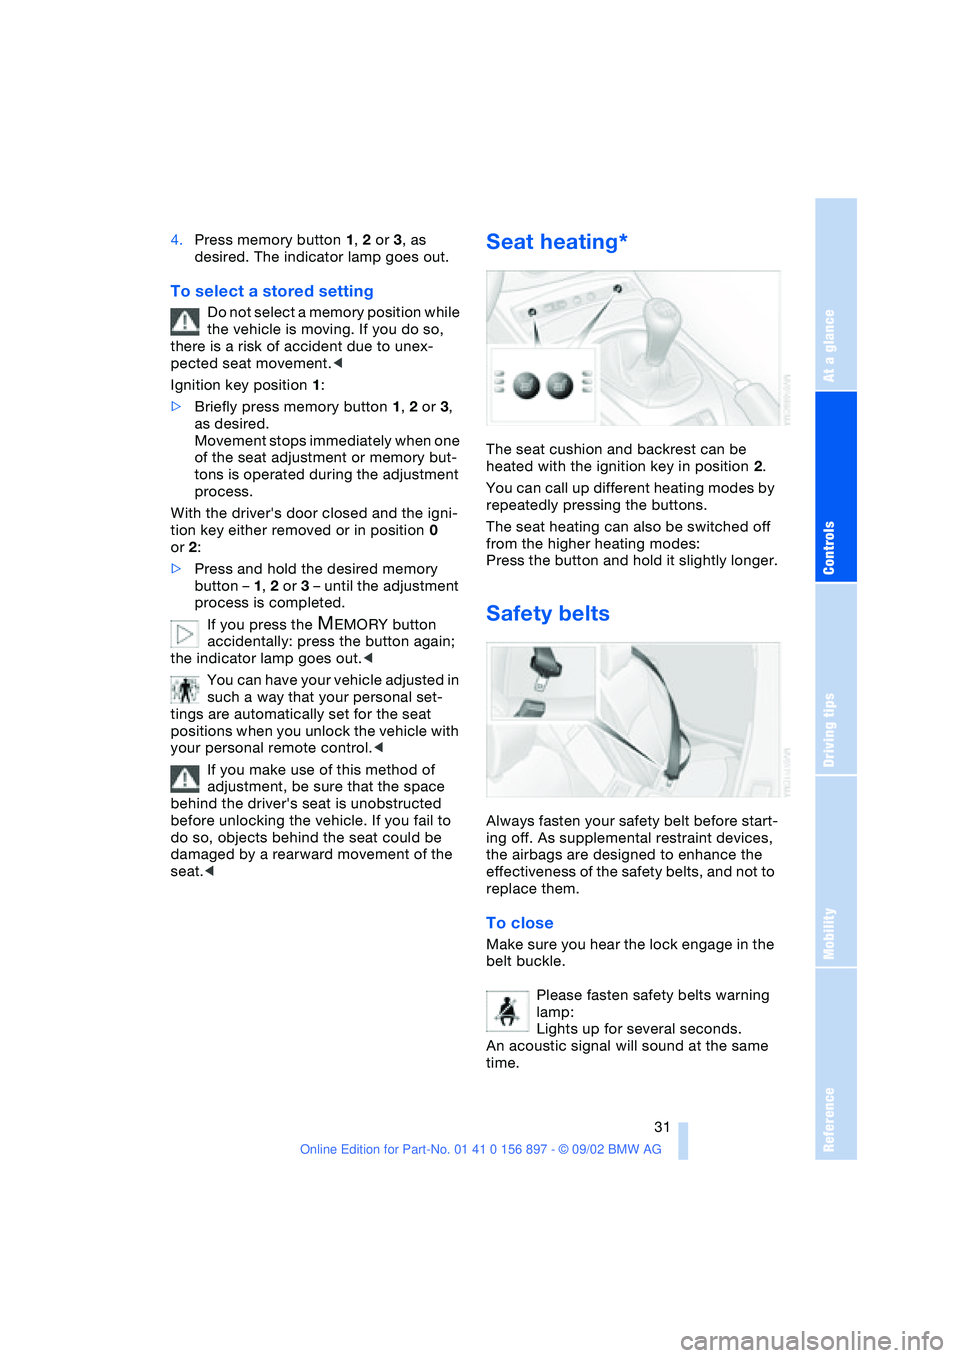
Seat heating*
The seat cushion and backrest can be
heated with the ignition key in position 2.
You can call up different heating modes by
repeatedly pressing the buttons.
The seat heating can also be switched off
from the higher heating modes:
Press the button and hold it slightly longer.
Safety belts
Always fasten your safety belt before start-
ing off. As supplemental restraint devices,
the airbags are designed to enhance the
effectiveness of the safety belts, and not to
replace them.
To close
Make sure you hear the lock engage in the
belt buckle.
Please fasten safety belts warning
lamp:
Lights up for several seconds.
An acoustic signal will sound at the same
time.
Page 35 of 106
At a glance
Controls
Driving tips
Mobility
Reference
35
The concept
Passenger airbags can be deactivated/
reactivated with the vehicle ignition key.
The key switch is located on the outer pas-
senger's side of the instrument panel.
The passenger airbags can only be deacti-
vated or reactivated with the vehicle stand-
ing still, ignition off and the passenger door
open.
Deactivation
Deactivation of the passenger airbags sys-
tem deactivates the passenger front, knee
and side airbag. The airbags on the driver
side remain active.
Using the vehicle ignition key, turn the key
switch to the "OFF" position. Note, the pas-
senger airbags will remain deactivated with
the switch in this position.
As soon as the reason for the deacti-
vation of the passenger airbags no
longer exists, you must reactivate these air-
bags so that they can deploy in an accident
within their normal deployment range.<
Reactivating
Using the vehicle ignition key, turn the key
switch to the "ON" position.
All airbags in the vehicle are activated and
will be triggered under appropriate condi-
tions.
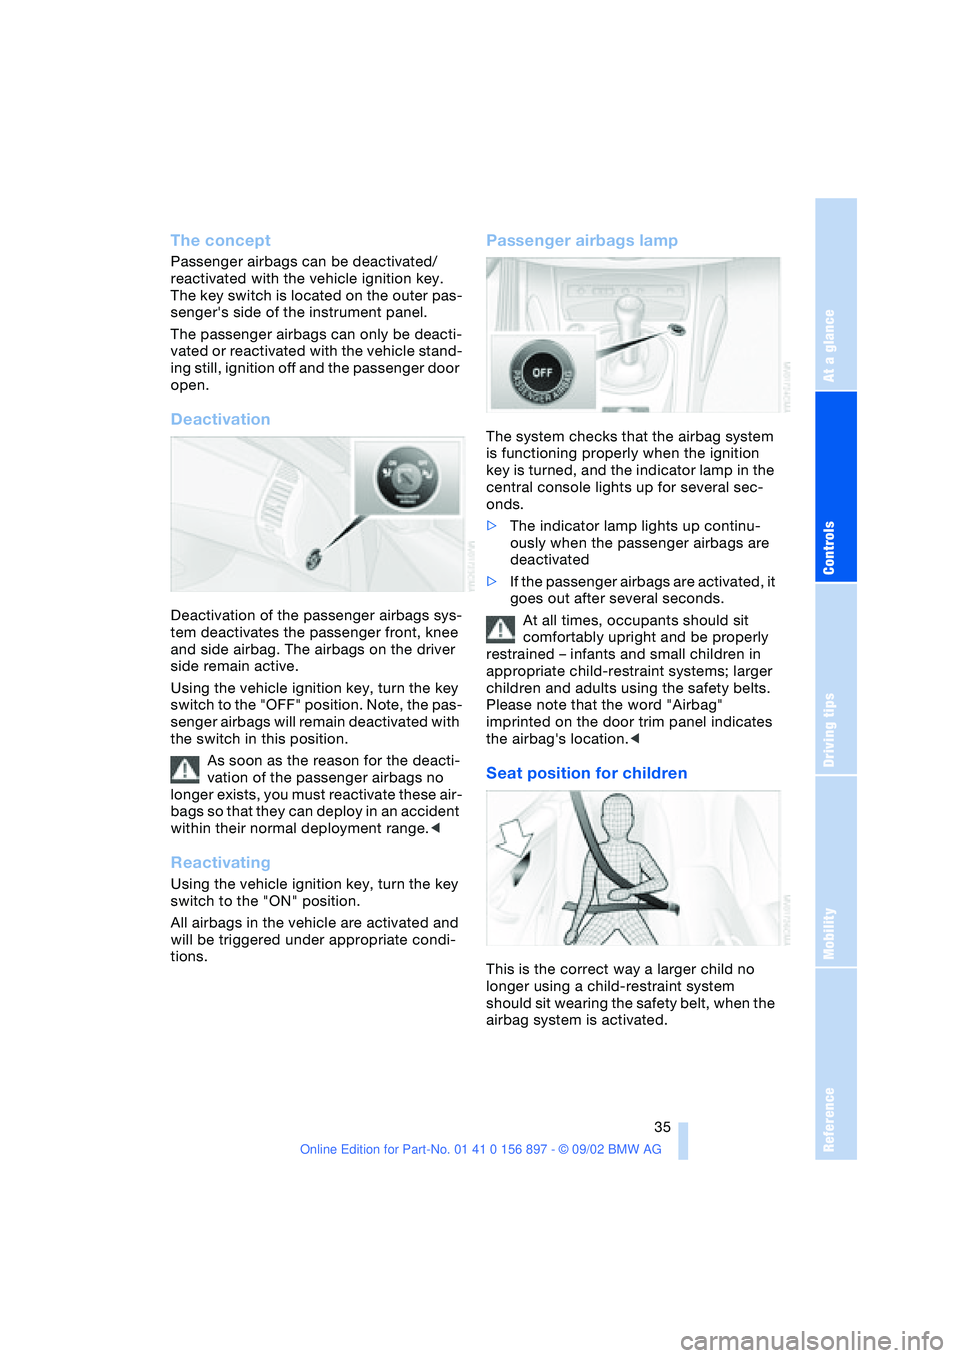
Passenger airbags lamp
The system checks that the airbag system
is functioning properly when the ignition
key is turned, and the indicator lamp in the
central console lights up for several sec-
onds.
>The indicator lamp lights up continu-
ously when the passenger airbags are
deactivated
>If the passenger airbags are activated, it
goes out after several seconds.
At all times, occupants should sit
comfortably upright and be properly
restrained – infants and small children in
appropriate child-restraint systems; larger
children and adults using the safety belts.
Please note that the word "Airbag"
imprinted on the door trim panel indicates
the airbag's location.<
Seat position for children
This is the correct way a larger child no
longer using a child-restraint system
should sit wearing the safety belt, when the
airbag system is activated.
Page 39 of 106
At a glance
Controls
Driving tips
Mobility
Reference
39
the ignition key immediately when the
engine starts.<
Extended starting attempts, charac-
terized by excessively frequent or
long periods with the starter engaged, can
damage the catalytic converter.<
If the engine fails to start on the first
attempt – if it is very hot or cold, for
instance:
>Press the accelerator pedal halfway
down.
Cold starts at very low temperatures –
starting at approx. +57 / –156
>Press the accelerator pedal halfway
down while engaging the starter
>On the first start attempt, engage the
starter for a longer period –
approx. 10 seconds.
Manual transmission
1.Engage the parking brake
2.Gearshift lever in idling position
3.Depress clutch pedal
4.Start the engine.
Automatic transmission
1.Depress footbrake
2.Place selector lever in position P or N
3.Start the engine.
Before leaving the vehicle with the
engine running, place the selector
lever in position P and pull the parking
brake.
Do not leave the vehicle unattended with
the engine running. An unattended vehicle
with a running engine poses a safety haz-
ard.<
Switching off the engine
Do not remove the ignition key while
the vehicle is still moving. If you did so,
the steering lock would engage when the
steering wheel is turned.
When you leave the vehicle, always remove
the ignition key and engage the steering lock.
Always engage the parking brake when park-
ing on downhill roads.<
Manual transmission
Turn the ignition key to position 1 or 0.
Automatic transmission
Place the selector lever in position P and
turn the ignition key to position 1 or 0.
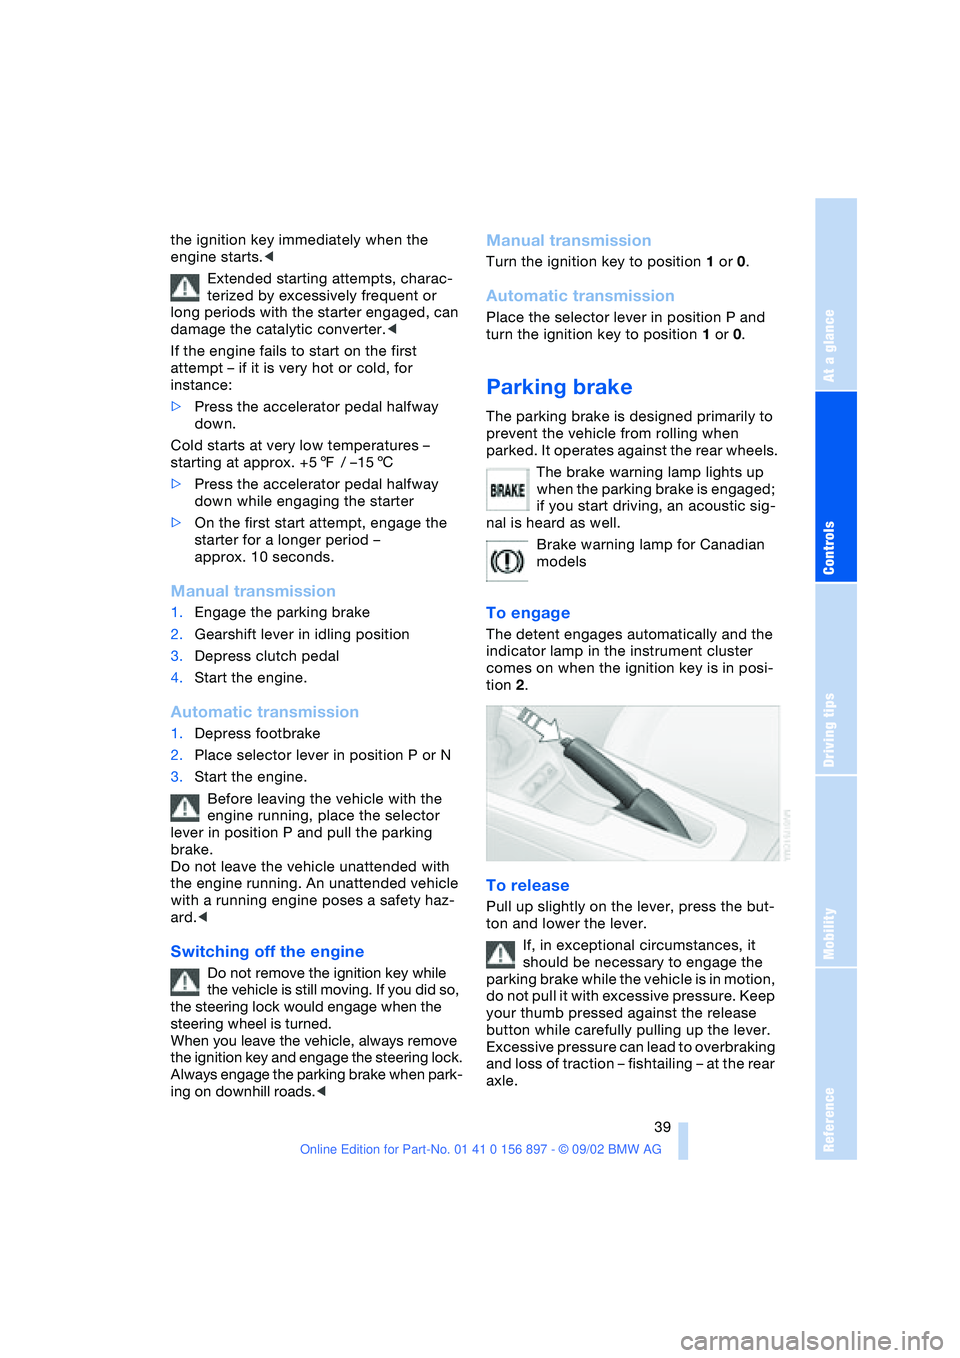
Parking brake
The parking brake is designed primarily to
prevent the vehicle from rolling when
parked. It operates against the rear wheels.
The brake warning lamp lights up
when the parking brake is engaged;
if you start driving, an acoustic sig-
nal is heard as well.
Brake warning lamp for Canadian
models
To engage
The detent engages automatically and the
indicator lamp in the instrument cluster
comes on when the ignition key is in posi-
tion 2.
To release
Pull up slightly on the lever, press the but-
ton and lower the lever.
If, in exceptional circumstances, it
should be necessary to engage the
parking brake while the vehicle is in motion,
do not pull it with excessive pressure. Keep
your thumb pressed against the release
button while carefully pulling up the lever.
Excessive pressure can lead to overbraking
and loss of traction – fishtailing – at the rear
axle.
Page 42 of 106
Driving
42 positions, however, the vehicle will be
operating in the fourth gear only.
If this happens, avoid extreme engine loads
and consult the nearest BMW center.
Never work in the engine compart-
ment when a drive gear – forward or
reverse – is engaged. If you do so, the vehi-
cle could move.<
For towing, tow-starting and jump-starting:
refer to the information beginning on
page 89.
Electric Power Steering EPS
The concept
The electric power steering is a direct,
sporting steering system that is speed-sen-
sitive.
Power support is reduced with an increase
in driving speed.
Indicator lamp
Electric Power Steering
The indicator lamp stays lit:
The system has malfunctioned or is
faulty.
Please have the system inspected by the
nearest BMW center.
Steering remains operational.
Drivelogic*
The Drivelogic feature lets you select
between the standard and sport program.
The sport program is recommended for
performance-oriented driving.
Activating Drivelogic
Press the SPORT button.
The LED in the key lights up.
The sport program of the automatic
transmission is enabled by activating
the Drivelogic system. Thus, the selector
lever does not have to be shifted from D to
M/S; refer also to page 41.
The electric power steering switches from
standard mode to sport mode. Power sup-
port is reduced for a more sporting driving
style.<
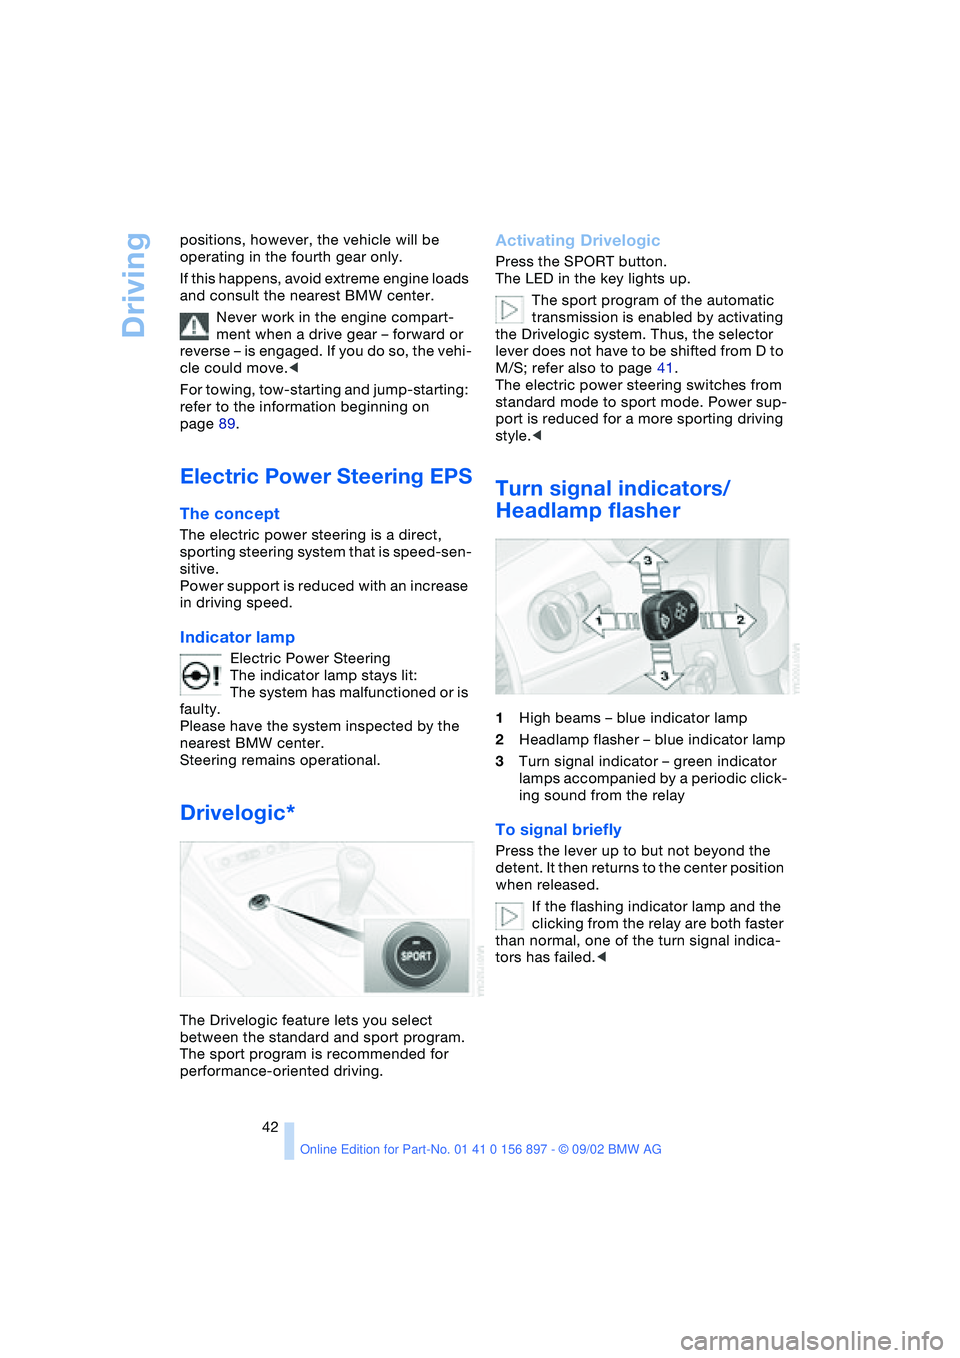
Turn signal indicators/
Headlamp flasher
1High beams – blue indicator lamp
2Headlamp flasher – blue indicator lamp
3Turn signal indicator – green indicator
lamps accompanied by a periodic click-
ing sound from the relay
To signal briefly
Press the lever up to but not beyond the
detent. It then returns to the center position
when released.
If the flashing indicator lamp and the
clicking from the relay are both faster
than normal, one of the turn signal indica-
tors has failed.<