2003 BMW 3.0i ROADSTER clock
[x] Cancel search: clockPage 5 of 106
At a glance
Controls
Driving tips
Mobility
Reference
Everything under control
47Odometer
47Tachometer
47Fuel gauge
47Coolant temperature gauge
48Service interval display
48Outside temperature
48Clock
49Computer*
Technology for safety and driving
convenience
51Dynamic Stability Control DSC
52Brake Force Display
53Antilock Brake System ABS
53Flat Tire Monitor
Controlling the climate for pleasant
driving
55Air conditioning
57Automatic climate control*
Interior conveniences
60Glove compartment
60Storage compartments
61Beverage holder
61Preparations for the cellular phone*
61Ashtray*
Special operating instructions
64Break-in procedures
65Driving notes
65Brake system
66Cargo loading
67Hardtop preparation*
Refueling
70Fuel filler door
70Fuel specifications
Wheels and tires
71Tire inflation pressure
73Tire condition
73Tire replacement
74Wheel and tire combinations
75Run Flat tires
76Winter tires
76Snow chains*
In the engine compartment
77Hood
78Engine compartment
79Washer fluids for washer systems
79Engine oil
80Coolant
81Brake fluid
Maintenance
82The BMW Maintenance System
82Care
Laws and regulations
83California Proposition 65 warning
83OBD interface socket
Replacement procedures
84Onboard tool kit
84Windshield wiper blades
84Lamps and bulbs
87Changing a wheel
87Battery
Giving and receiving assistance
89Warning triangle*
89First-aid kit*
89Jump-starting
90Towing and tow-starting the vehicle
Technical data
94Engine data
94Weights
95Dimensions
96Capacities
Everything from A - Z
97Index
Page 13 of 106
At a glance
Controls
Driving tips
Mobility
Reference
13
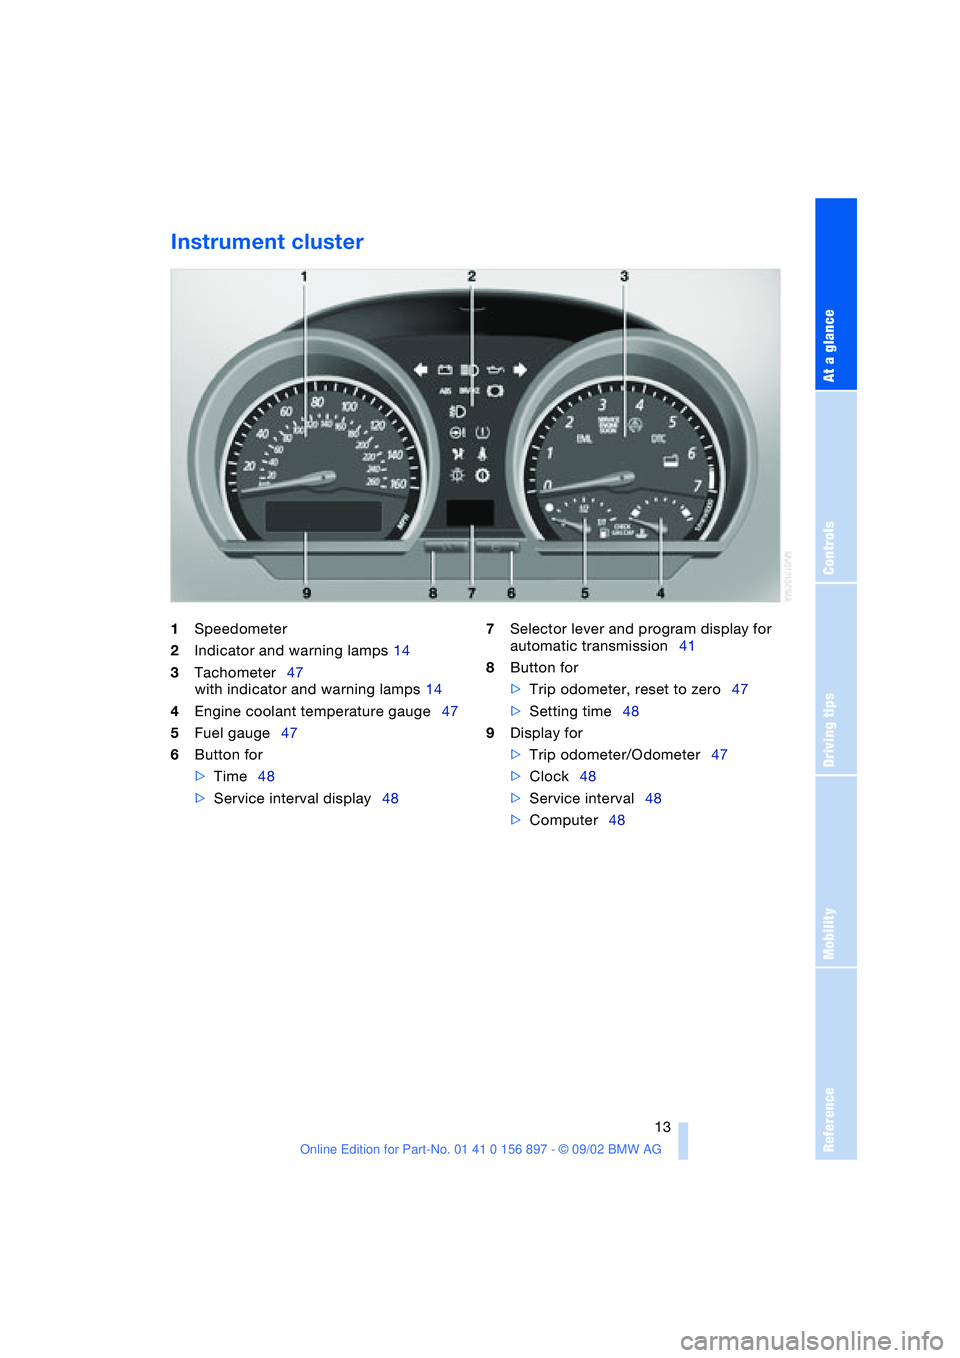
Instrument cluster
1Speedometer
2Indicator and warning lamps 14
3Tachometer47
with indicator and warning lamps 14
4Engine coolant temperature gauge47
5Fuel gauge47
6Button for
>Time48
>Service interval display48 7Selector lever and program display for
automatic transmission41
8Button for
>Trip odometer, reset to zero47
>Setting time48
9Display for
>Trip odometer/Odometer47
>Clock48
>Service interval48
>Computer48
Page 29 of 106
At a glance
Controls
Driving tips
Mobility
Reference
29
Adjustments
Safe seating position
For relaxed and fatigue-free driving you
should select a seating position that
reflects your personal requirements. The
correct seating position combines with
safety belts and airbags to enhance occu-
pant safety in the event of an accident. To
ensure that the vehicle's safety systems
provide you with optimal protection, we
request that you direct your careful atten-
tion to the following section.
For supplementary information on trans-
porting children, refer to page 34.
Sitting safely with airbags
Always maintain an adequate dis-
tance between yourself and the air-
bags.
Always hold the steering wheel by its rim
with hands at the 9 and 3 o'clock positions,
to minimize the risk of injuries to your
hands or arms in the event of airbag
deployment. Never allow any objects, indi-
viduals or animals to obstruct the areas
between passengers and airbags. Never
use the front airbag's cover as a storage
tray or support for objects of any kind.
Never allow front passengers to rest their
feet or legs on the airbag cover.<
For airbag locations and additional infor-
mation on airbags, refer to page 33.
Sitting safely with safety belts
Never allow more than one person to
wear a single safety belt. Never allow
infants or small children to ride in a passen-
ger's lap. Avoid twisting the belt while rout-
ing it firmly across the pelvis and shoulder,
wear it as snugly against your body as pos-
sible. Do not allow the belt to rest against
hard or fragile objects. Do not route the belt
across your neck, or run it across sharp
edges. Be sure that the belt does not
become caught or jammed. Avoid wearing
bulky clothing and pull on the lap belt peri-odically to retension it over your shoulders.
In the event of a frontal impact, a loose lap
belt could slide over your hips, leading to
abdominal injury. In addition, the safety
belt's restraint effectiveness is reduced if
the belt is worn loosely. Expectant mothers
should always wear their safety belts, tak-
ing care to position the lap belt against the
lower hips, where it will not exert pressure
against the abdominal area.<
For information on using the safety belts,
refer to page 31.
Seats
Before adjusting your seat, always
observe the following precautions
Never try to adjust your seat while
operating the vehicle. The seat could
respond with an unexpected movement,
and the ensuing loss of vehicle control
could result in an accident. Never ride with
the backrest inclined to an extreme angle –
especially important for the front passen-
ger to remember. If you do so, there is a
risk that you will slide under the safety belt
in the event of an accident, thus reducing
the protection provided by the safety belt.<
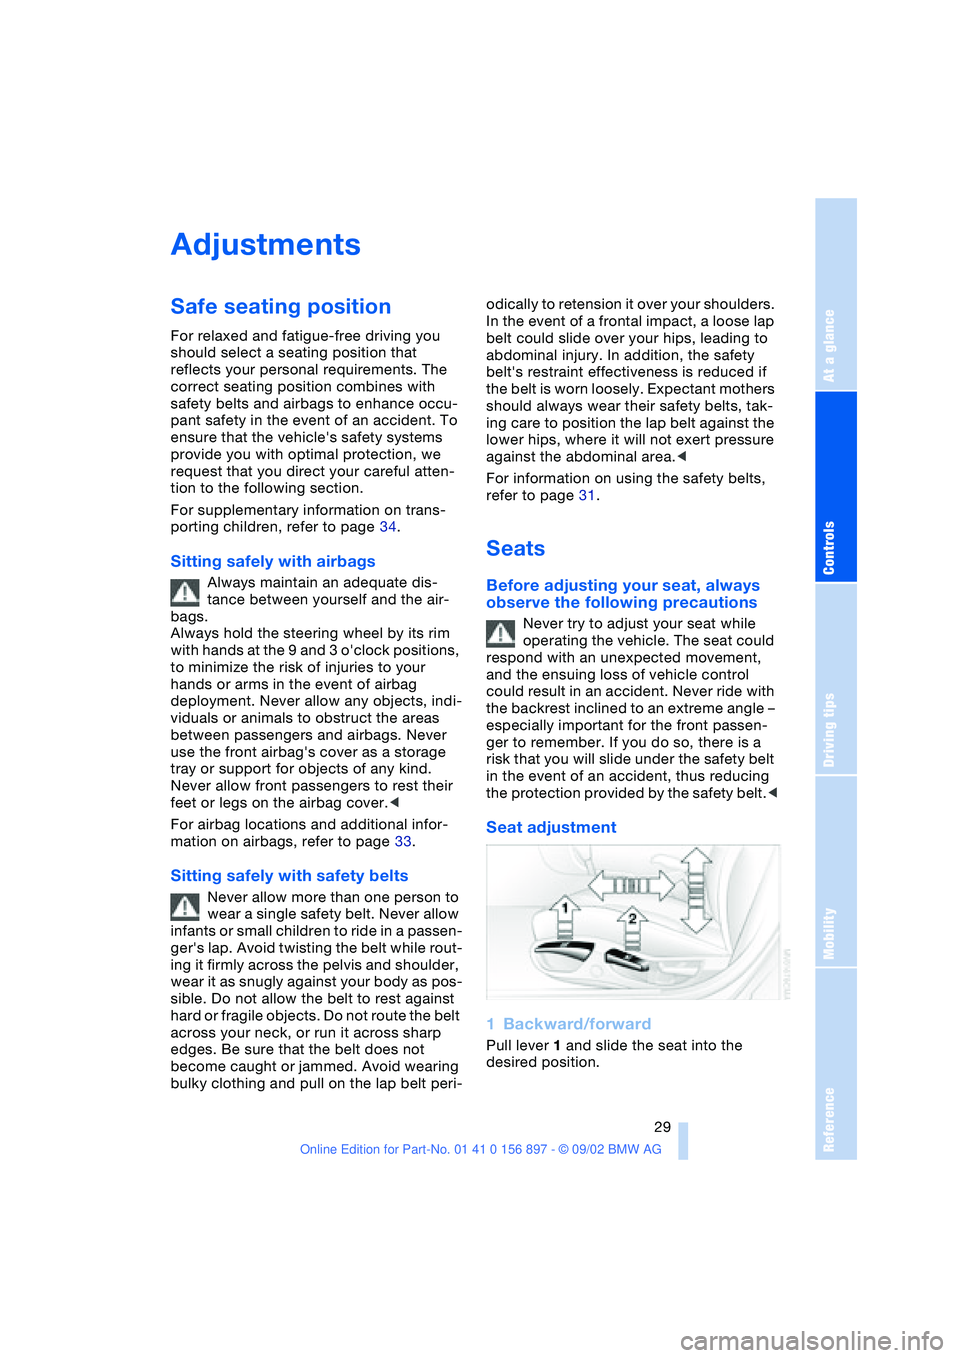
Seat adjustment
1Backward/forward
Pull lever 1 and slide the seat into the
desired position.
Page 34 of 106
Adjustments
34 gered in every type of collision, e.g. in the
event of minor accidents, certain vehicle
roll-over situations or collisions from the
rear. In these instances, the safety belt pro-
vides sufficient protection.
Adjust your seat to a position that provides
maximum distance between you and the
steering wheel and the instrument panel
while still allowing comfortable and safe
access to all vehicle controls.
To minimize the risk of sustaining hand and
arm injuries, always hold the steering wheel
on the rim with the hands at or near the
9 and 3 o'clock positions. Do not place
your hands on the center pad.
Never allow any objects to obstruct the
area between the airbags and an occupant.
Do not use the cover panel above the pas-
senger side airbags as a storage area.
Never allow front passengers to lean
against or rest their feet or legs on the air-
bag cover panel.
Do not apply adhesive materials to the
cover panels of the airbags, cover them or
modify them in any other way.
Never install a rear-facing child-restraint
system in the passenger seat of this vehi-
cle, unless the passenger airbags have
been turned off and the indicator lamp in
the center console indicates that the pas-
senger airbags are deactivated.
If you transport children, carefully read and
comply with the instructions in the follow-
ing section.
Be sure that child-restraints are mounted
correctly and as far as possible towards the
rear and in the lowest position. <
Even when all these guidelines are
observed, there is still a small residual risk
of injuries resulting from contact with
deploying airbags in isolated instances.
The ignition and inflation noise from the air-
bags may induce a mild temporary hearing
loss in sensitive individuals.
Transporting children safely
Deactivating/reactivating passenger
airbags
The passenger airbags must be deac-
tivated before using a rear-facing
child-restraint system on the passenger
seat, refer also to page 36 for explanation.
BMW also recommends that the passenger
airbags be deactivated if a child is trans-
ported in a front-facing child-restraint sys-
tem, regardless of the age of the child. If
you transport a child in the passenger seat
– not an infant in a rear-facing seat – who is
properly seated and seat-belted at all
times, the potential benefits of airbags
deploying in an accident generally out-
weigh the risks of the child being injured by
the force of a deploying airbag.
Therefore, you should deactivate the pas-
senger airbags only if you find it difficult to
ensure that the child will remain properly
seated and seat-belted at all times.
Always position the passenger seat as far
back as possible and at the lowest level.
The above warning and recommendations
are compatible with regulations estab-
lished by the National Highway Traffic
Safety Administration – NHTSA – permitting
the deactivation of front passenger airbags
by means of an on-off switch for members
of certain "at risk" groups.
Specifically, the 'at risk' groups are:
>Infants in rear-facing infant seats
>Persons with certain medical conditions
>Children aged 12 and under in the front
passenger seat.
NHTSA provides this information via their
website – www.nhtsa.dot.gov – or via their
Auto Safety Hotline toll-free at 1-800-424-
9393 or 366-0123 in Washington, D.C.
area.<
Page 48 of 106
Everything under control
48
Between the blue and red zones
Normal operating range. The needle may
rise as far as the edge of the red sector dur-
ing normal operation.
Red
When you switch on the ignition, warning
lamp 1 comes on briefly to indicate an
operational check.
Comes on while driving:
The engine has overheated. Switch off the
engine immediately and allow it to cool
down.
For checking the coolant level, refer to
page 80.
Service interval display
Remaining distance to next service
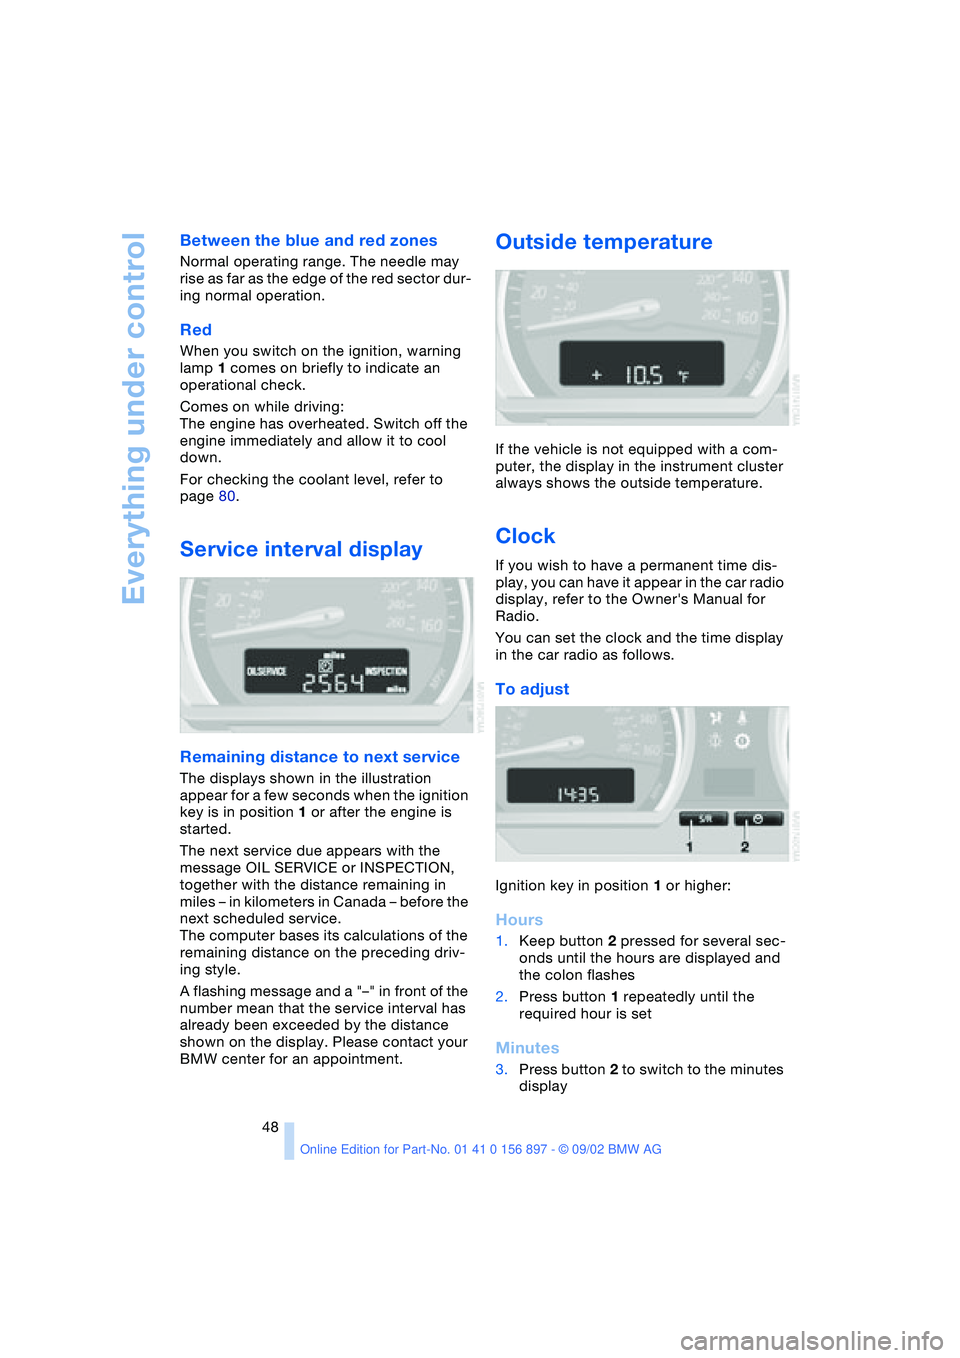
The displays shown in the illustration
appear for a few seconds when the ignition
key is in position 1 or after the engine is
started.
The next service due appears with the
message OIL SERVICE or INSPECTION,
together with the distance remaining in
miles – in kilometers in Canada – before the
next scheduled service.
The computer bases its calculations of the
remaining distance on the preceding driv-
ing style.
A flashing message and a "–" in front of the
number mean that the service interval has
already been exceeded by the distance
shown on the display. Please contact your
BMW center for an appointment.
Outside temperature
If the vehicle is not equipped with a com-
puter, the display in the instrument cluster
always shows the outside temperature.
Clock
If you wish to have a permanent time dis-
play, you can have it appear in the car radio
display, refer to the Owner's Manual for
Radio.
You can set the clock and the time display
in the car radio as follows.
To adjust
Ignition key in position 1 or higher:
Hours
1.Keep button 2 pressed for several sec-
onds until the hours are displayed and
the colon flashes
2.Press button 1 repeatedly until the
required hour is set
Minutes
3.Press button 2 to switch to the minutes
display
Page 49 of 106
At a glance
Controls
Driving tips
Mobility
Reference
49
4.Press button 1 repeatedly until the
required minutes are set
5.Press button 2 to confirm the settings.
The set time of day is transferred to the car
radio display or appears in the instrument
cluster display.
Display mode
In ignition key position 0:
Press button 1.
The time of day is displayed for several
seconds.
Computer*
Mode selection
With the ignition key in position 1 or higher,
you can use the button in the turn signal
lever to retrieve information from the com-
puter for display in the instrument cluster.
Every time you press the button briefly in
the direction of the steering column, a new
function is called up for display.
The displays appear in the following order:
time of day, outside temperature, average
fuel consumption, cruising range, average
vehicle speed.
With the ignition key in position 1 or higher,
the last active setting is displayed.
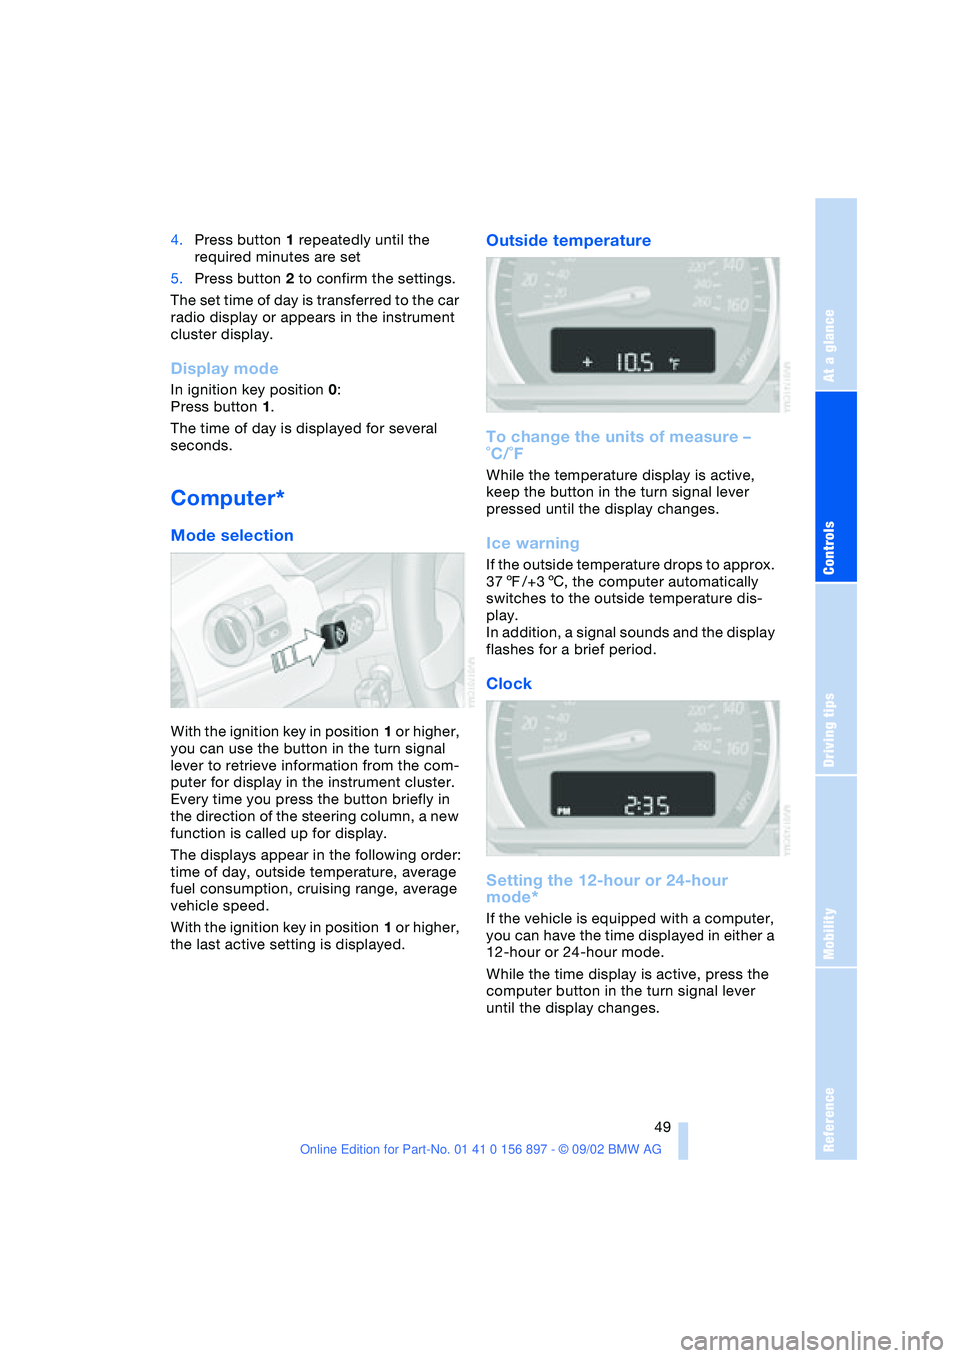
Outside temperature
To change the units of measure –
˚C/˚F
While the temperature display is active,
keep the button in the turn signal lever
pressed until the display changes.
Ice warning
If the outside temperature drops to approx.
377/+36, the computer automatically
switches to the outside temperature dis-
play.
In addition, a signal sounds and the display
flashes for a brief period.
Clock
Setting the 12-hour or 24-hour
mode*
If the vehicle is equipped with a computer,
you can have the time displayed in either a
12-hour or 24-hour mode.
While the time display is active, press the
computer button in the turn signal lever
until the display changes.
Page 70 of 106

Refueling
70
Refueling
Fuel filler door
1.Open fuel filler door
2.Turn the filler cap in a counter-clock-
wise direction
3.Place the filler cap in the bracket on the
filler door.
Releasing manually
If an electrical malfunction occurs, you can
unlock the fuel filler door manually.
1.Remove the covers of the tail lamps by
turning the lock to the right; refer also to
page 87
2.Pull the luggage compartment trim
panel slightly toward the interior.
The green button with the fuel pump
symbol is revealed
3.Undo the adhesive strip and pull off
4.Pull on the knob
Fuel filler cap is released.
Fuel gas cap
Close the gas cap carefully after refu-
eling until a "click" is heard. While closing, be sure not to squeeze the strap
which is fastened to the cap. A loose or
missing cap will activate the "Check gas
cap" lamp.<
Check gas cap
This indicator lamp comes on when
the fuel gas cap is loose or missing.
Close the gas cap tightly as described
above.
Tank capacity: approx. 14.5 gallons /
55 liters, of which approx. 2.1 gallons /
8 liters are reserve capacity.
Simple and environmentally friendly
When handling fuels, comply with all
of the applicable safety precautions
posted at the service station.<
When refueling, insert the filler nozzle com-
pletely into the filler pipe. Pulling the nozzle
out of the pipe during refueling
>results in premature shutoff
>and will reduce the effect of the vapor
recovery system on the pump.
The fuel tank is full when the filler nozzle
shuts off the first time.
Fill the fuel tank before it is com-
pletely empty. Driving to the last drop
of fuel can prevent the engine from operat-
ing properly and result in damage.<
Fuel specifications
The engine uses lead-free gasoline only.
Required fuel:
>Premium Unleaded Gasoline,
min. 91 AKI.
AKI = Anti Knock Index.
Do not use leaded fuels. The use of
leaded fuels will cause permanent
damage to the system's oxygen sensor and
the catalytic converter.<
Page 80 of 106

In the engine compartment
80 The oil volume between the two marks on
the dipstick corresponds to approx.
1.1 US quarts / 1 liter. Do not fill beyond
the upper mark on the dipstick. Excess oil
will damage the engine.
Adding engine oil
While you should wait until the level has
dropped to just above the lower mark
before adding oil, you should never allow
the oil level to fall below this mark.
BMW engines are designed to oper-
ate without oil additives; the use of
additives could even lead to damage in
some cases. This also applies to manual
and automatic transmissions and to the dif-
ferential.<
Continuous exposure to used oil has
caused cancer in laboratory tests. For
this reason, thoroughly wash any areas of
skin that come into contact with oil using
soap and water.
Always store oils, grease and similar mate-
rials so that they are inaccessible to chil-
dren. Comply with warning labels and the
information on the containers.<
Comply with the applicable environ-
mental laws regulating the disposal of
used oil.<
Approved engine oils
The quality of the engine oil is extremely
important for the function and life of an
engine. Based on extensive testing, BMW
has approved certain grades of engine oil.
Use approved "BMW High Performance
Synthetic Oil".
If you are unable to obtain an approved
BMW High Performance Synthetic Oil, you may use small volumes of other synthetic
oils for topping up between oil changes.
Use only oils with the specification API SH
or higher.
Ask your BMW center for details con-
cerning the specific BMW High Per-
formance Synthetic Oil or synthetic oils that
have been approved.<
You can also call BMW of North America
toll-free at 1-800-831-1117 or visit this
website: www.bmwusa.com to obtain this
information.
Coolant
The yellow coolant indicator lamp
lights up:
The coolant level is too low: top up
as soon as possible.
Do not add coolant to the cooling sys-
tem when the engine is hot. If you do,
escaping coolant can cause burns.
Antifreeze and anti-corrosion agents are
hazardous to health. You should always
store them in their original containers and
in a location inaccessible to children.
Antifreeze and anti-corrosion agents are
flammable. For this reason, do not spill
them on hot engine parts. They could ignite
and cause burns. Comply with the instruc-
tions on the containers.<
Checking the coolant level
Correct coolant level when the engine is
cold – at approx. 687 / 206:
1.Open the cap of the expansion tank by
turning it slightly counterclockwise to