2003 BMW 3.0i ROADSTER ECU
[x] Cancel search: ECUPage 3 of 106
Z4 roadster 2.5i
Z4 roadster 3.0iCongratulations, and thank you for choosing a BMW.
Thorough familiarity with your vehicle will provide you with
enhanced control and security when you drive it. There-
fore, we have one request:
Please take the time to read this Owner's Manual and
familiarize yourself with the information that we have com-
piled for you before starting off in your new BMW. The
manual contains important data and instructions intended
to assist you in obtaining maximum satisfaction from your
BMW's unique array of advanced technical features. It also
contains information on vehicle maintenance designed to
enhance operating safety while simultaneously helping you
to maintain your BMW's value throughout an extended ser-
vice life. For additional information refer to the supplemen-
tal manuals.
This Owner's Manual should be considered a permanent
part of this vehicle. It should stay with the vehicle when
sold to provide the next owner with important operating,
safety and maintenance information.
We wish you an enjoyable driving experience.
BMW AG
Page 19 of 106

At a glance
Controls
Driving tips
Mobility
Reference
19
Whenever you unlock or lock the vehicle,
you simultaneously deactivate/activate
the anti-theft system, disarm/arm the alarm
system and switch the interior lamps on/
off.
You can have a signal set to confirm
that the vehicle's locks have engaged
securely.<
Since persons or animals in the vehi-
cle could lock the doors from the
inside, always take the vehicle keys with
you so that the vehicle can be opened
again from the outside at any time.<
If it is no longer possible to lock the
vehicle via the remote control, the
battery is discharged. Use this key while
driving for an extended period in order to
recharge the battery.
In the event of a system malfunction,
please contact your BMW center. You can
also obtain replacement keys there.<
1To unlock
2To lock and secure, activate interior
lamps, disarm tilt alarm sensor and inte-
rior motion sensor
3To open the luggage compartment
To unlock
1.Press the button to unlock the driver's
door and the fuel filler door
2.Press the button a second time to dis-
engage all vehicle locks.
To lock and secure
Press the button.
To switch on the interior lamps
With the vehicle locked:
Press the button.
To deactivate the tilt alarm* and
interior motion sensors*
Press the button a second time immedi-
ately after locking.
For additional information, refer to
page 28.
To open the luggage compartment
Press the button.
The luggage compartment lid will open
slightly, regardless of whether it was
locked or unlocked.
Before and after a trip, be sure that
the luggage compartment lid has not
been opened unintentionally.<
Panic mode – triggering alarm
By pressing the button for 2 to 5 seconds,
the alarm can be sounded in the event of
danger. The alarm is turned off by pressing
button 1 again – for unlocking.
External systems
External systems or devices may cause
local interference in the functions of the
remote control.
Should this occur, you can still open and
close the vehicle using the master key in
either the door or luggage compartment
locks.
Page 20 of 106
Opening and closing
20
For US owners only
The transmitter and receiver units comply
with part 15 of the FCC – Federal Commu-
nications Commission – regulations. Oper-
ation is governed by the following:
FCC ID: LX8EWS
LX8FZVS
LX8FZVE
Compliance statement:
This device complies with part 15 of the
FCC Rules. Operation is subject to the fol-
lowing two conditions:
>This device may not cause harmful
interference, and
>this device must accept any interfer-
ence received, including interference
that may cause undesired operation.
Any unauthorized modifications to
these devices could void the user's
authority to operate the equipment.<
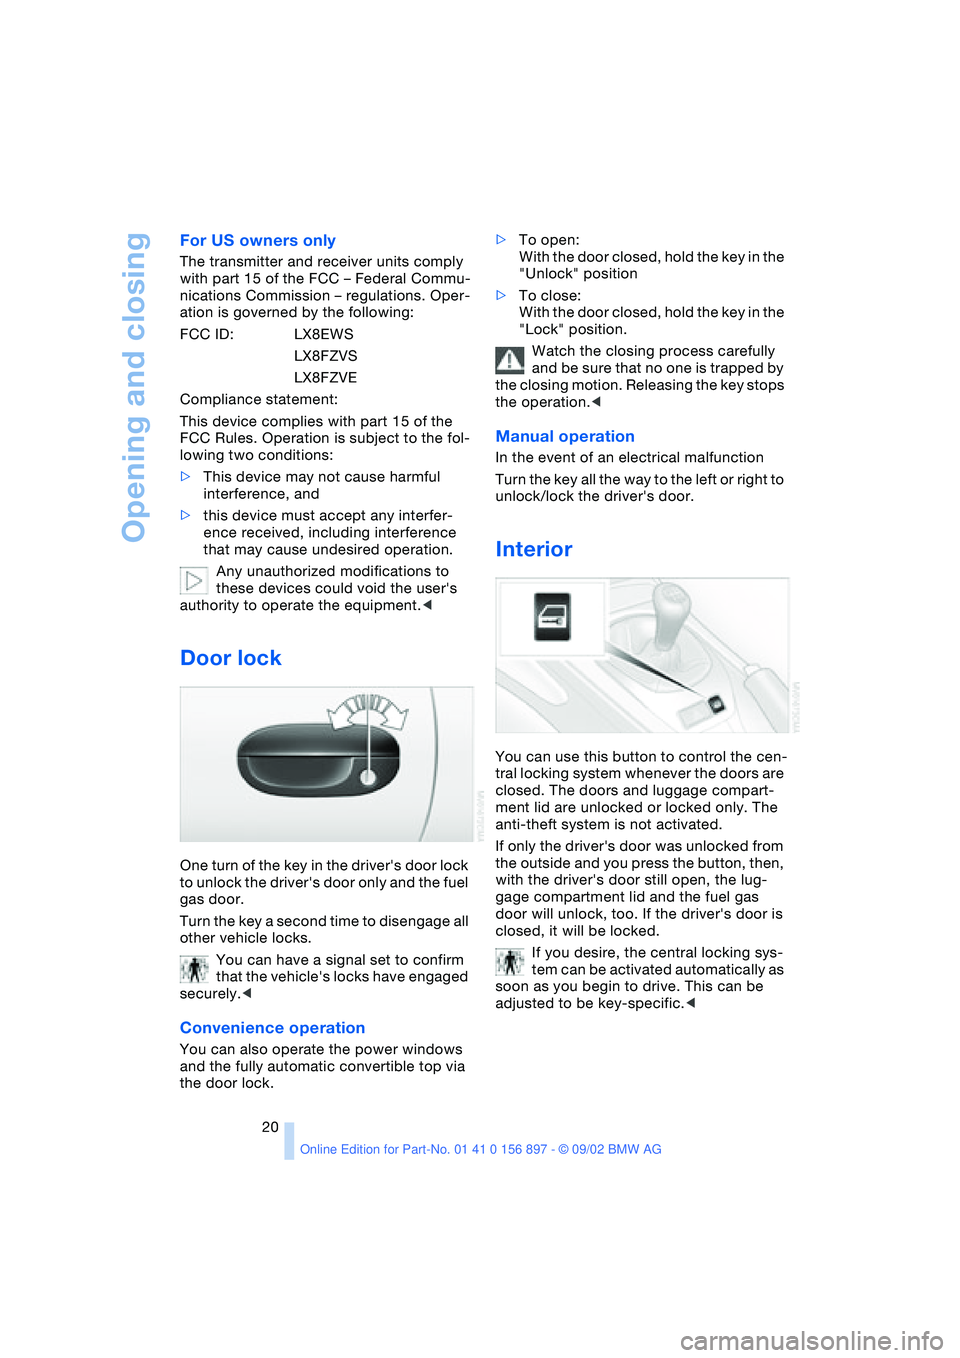
Door lock
One turn of the key in the driver's door lock
to unlock the driver's door only and the fuel
gas door.
Turn the key a second time to disengage all
other vehicle locks.
You can have a signal set to confirm
that the vehicle's locks have engaged
securely.<
Convenience operation
You can also operate the power windows
and the fully automatic convertible top via
the door lock.>To open:
With the door closed, hold the key in the
"Unlock" position
>To close:
With the door closed, hold the key in the
"Lock" position.
Watch the closing process carefully
and be sure that no one is trapped by
the closing motion. Releasing the key stops
the operation.<
Manual operation
In the event of an electrical malfunction
Turn the key all the way to the left or right to
unlock/lock the driver's door.
Interior
You can use this button to control the cen-
tral locking system whenever the doors are
closed. The doors and luggage compart-
ment lid are unlocked or locked only. The
anti-theft system is not activated.
If only the driver's door was unlocked from
the outside and you press the button, then,
with the driver's door still open, the lug-
gage compartment lid and the fuel gas
door will unlock, too. If the driver's door is
closed, it will be locked.
If you desire, the central locking sys-
tem can be activated automatically as
soon as you begin to drive. This can be
adjusted to be key-specific.<
Page 27 of 106

At a glance
Controls
Driving tips
Mobility
Reference
27
Installation
Insert the wind deflector in the guides pro-
vided on the rollover bars.
The wind deflector panels inserted in the
rollover bars cannot be removed.
Clothes hooks
Located on the wind deflector panel in the
rollover bars.
Do not hang heavy objects on the
hooks. If you do so, personal injury
could result during braking or evasive
maneuvers, for example.<
Alarm system*
The concept
The vehicle alarm system responds:
>When a door, the hood or the luggage
compartment lid is opened
>When attempts are made to start the
vehicle
>To movement inside the vehicle – inte-
rior motion sensor
>To alterations in the vehicle tilt, e.g. as
would occur during attempts to steal
the wheels or tow the vehicle
>To interruption of battery voltage.
The alarm produced by the system in the
event of unauthorized vehicle entry and
attempted theft depends on the country
version:
>Sounding of an acoustical alarm for
30 seconds
>Activation of the hazard warning flash-
ers for approx. five minutes.
Arming and disarming the alarm sys-
tem
When the vehicle is locked or unlocked
either via the driver's door lock or with the
remote control, the alarm system is simul-
taneously armed or disarmed.The hazard warning flashers blink once
when the alarm system has been properly
armed.
You can have different acknowledg-
ment signals set to confirm arming
and disarming.<
You can open the luggage compartment lid
when the system is armed by pressing the
remote control button. Refer to page 19.
When it is closed, the lid is once again
secured.
Manual operation of the luggage
compartment lid triggers the alarm.
Refer to page 21.<
To cancel an alarm:
Press the button on the remote control,
refer to page 18, or turn the ignition key to
position 1. Refer to page 38.
Indicator lamp displays
>The indicator lamp beneath the interior
mirror flashes continuously:
The system is armed
>The indicator lamp flashes when it is
being armed:
A door, the hood or luggage compart-
ment lid is not completely closed. Even
if you do not close the area causing the
alert, the remaining areas are secured
and the indicator lamp flashes continu-
ously after 10 seconds.
However, the interior motion sensor is
not activated
Page 30 of 106
Adjustments
30 After releasing the lever, move the seat
backwards or forwards slightly to ensure
that the latch engages securely
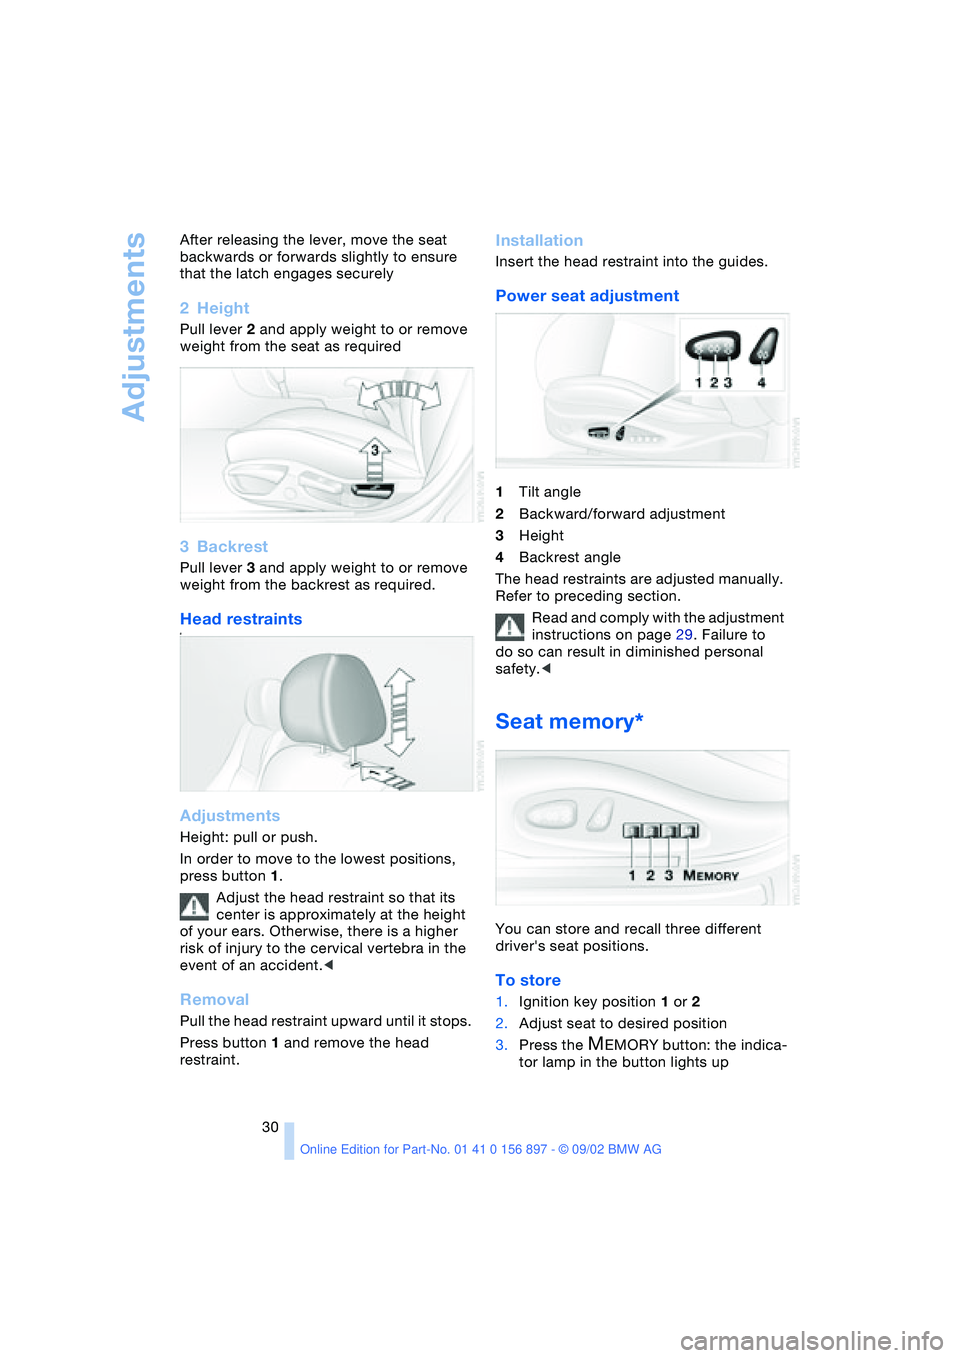
2Height
Pull lever 2 and apply weight to or remove
weight from the seat as required
3Backrest
Pull lever 3 and apply weight to or remove
weight from the backrest as required.
Head restraints#
Adjustments
Height: pull or push.
In order to move to the lowest positions,
press button 1.
Adjust the head restraint so that its
center is approximately at the height
of your ears. Otherwise, there is a higher
risk of injury to the cervical vertebra in the
event of an accident.<
Removal
Pull the head restraint upward until it stops.
Press button 1 and remove the head
restraint.
Installation
Insert the head restraint into the guides.
Power seat adjustment
1Tilt angle
2Backward/forward adjustment
3Height
4Backrest angle
The head restraints are adjusted manually.
Refer to preceding section.
Read and comply with the adjustment
instructions on page 29. Failure to
do so can result in diminished personal
safety.<
Seat memory*
You can store and recall three different
driver's seat positions.
To store
1.Ignition key position 1 or 2
2.Adjust seat to desired position
3.Press the
MEMORY button: the indica-
tor lamp in the button lights up
Page 36 of 106
Adjustments
36
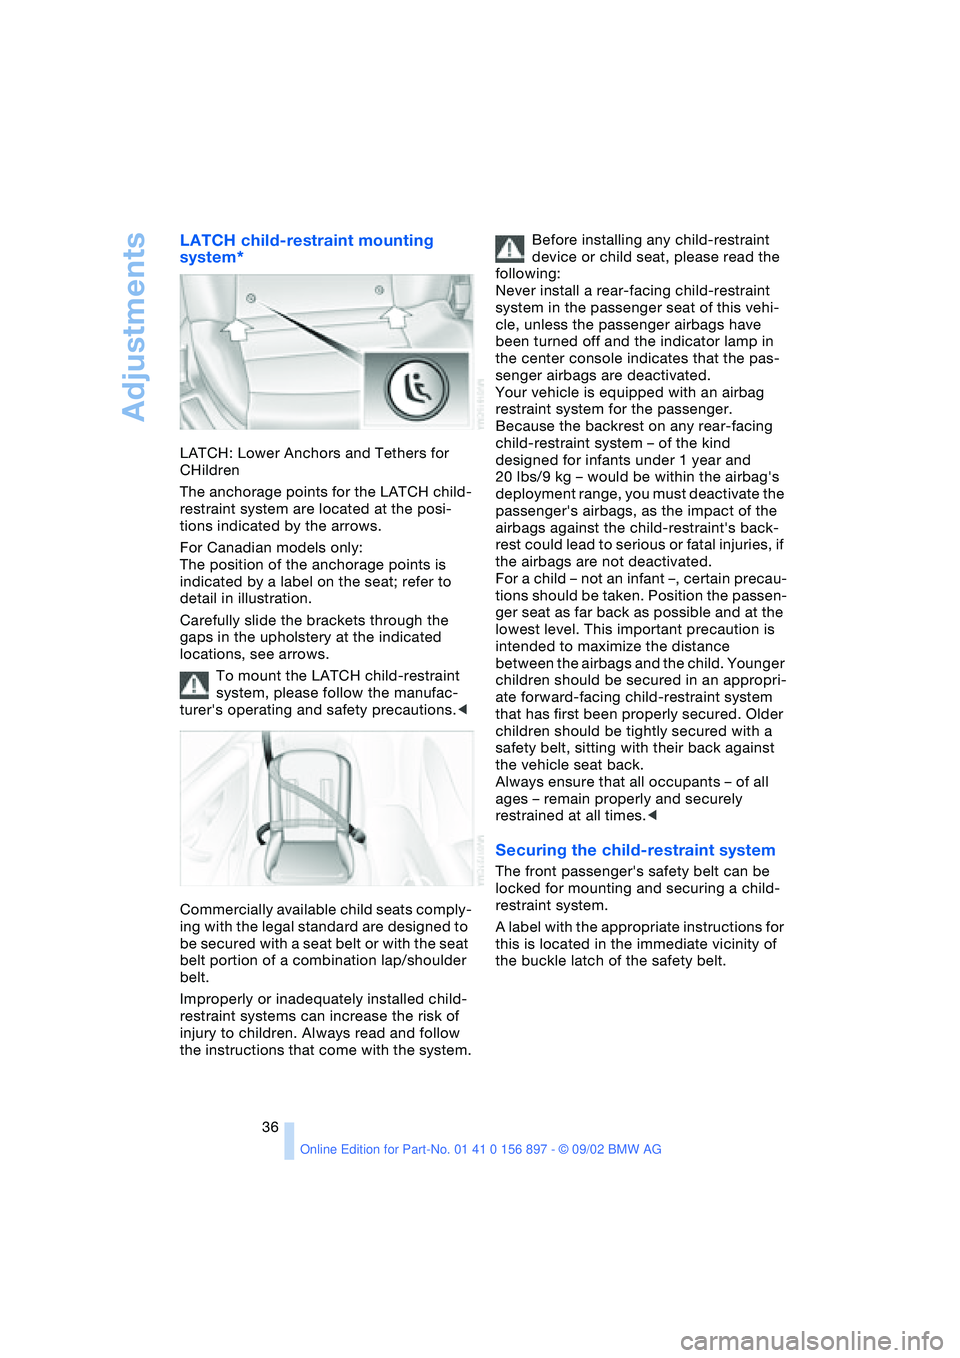
LATCH child-restraint mounting
system*
LATCH: Lower Anchors and Tethers for
CHildren
The anchorage points for the LATCH child-
restraint system are located at the posi-
tions indicated by the arrows.
For Canadian models only:
The position of the anchorage points is
indicated by a label on the seat; refer to
detail in illustration.
Carefully slide the brackets through the
gaps in the upholstery at the indicated
locations, see arrows.
To mount the LATCH child-restraint
system, please follow the manufac-
turer's operating and safety precautions.<
Commercially available child seats comply-
ing with the legal standard are designed to
be secured with a seat belt or with the seat
belt portion of a combination lap/shoulder
belt.
Improperly or inadequately installed child-
restraint systems can increase the risk of
injury to children. Always read and follow
the instructions that come with the system.Before installing any child-restraint
device or child seat, please read the
following:
Never install a rear-facing child-restraint
system in the passenger seat of this vehi-
cle, unless the passenger airbags have
been turned off and the indicator lamp in
the center console indicates that the pas-
senger airbags are deactivated.
Your vehicle is equipped with an airbag
restraint system for the passenger.
Because the backrest on any rear-facing
child-restraint system – of the kind
designed for infants under 1 year and
20 lbs/9 kg – would be within the airbag's
deployment range, you must deactivate the
passenger's airbags, as the impact of the
airbags against the child-restraint's back-
rest could lead to serious or fatal injuries, if
the airbags are not deactivated.
For a child – not an infant –, certain precau-
tions should be taken. Position the passen-
ger seat as far back as possible and at the
lowest level. This important precaution is
intended to maximize the distance
between the airbags and the child. Younger
children should be secured in an appropri-
ate forward-facing child-restraint system
that has first been properly secured. Older
children should be tightly secured with a
safety belt, sitting with their back against
the vehicle seat back.
Always ensure that all occupants – of all
ages – remain properly and securely
restrained at all times.<
Securing the child-restraint system
The front passenger's safety belt can be
locked for mounting and securing a child-
restraint system.
A label with the appropriate instructions for
this is located in the immediate vicinity of
the buckle latch of the safety belt.
Page 41 of 106
At a glance
Controls
Driving tips
Mobility
Reference
41
If you leave the vehicle with the
engine running, move the selector
lever to the P position and apply the park-
ing brake. If you fail to do this, the vehicle
could move.
Do not leave the vehicle unattended with
the engine running. An unattended vehicle
with a running engine poses a safety haz-
ard.<
PPark
Select reverse only when the vehicle is sta-
tionary. The transmission locks to prevent
the rear wheels from turning.
RReverse
Select reverse only when the vehicle is sta-
tionary.
NNeutral – idling
Select only when stopping for an extended
period.
DDrive – automatic shift program
This position is designed for driving under
all normal operating conditions. All forward
gears are available.
Kickdown
In the kickdown mode, you achieve maxi-
mum acceleration in position D.
Depress the accelerator pedal past the
increased resistance point at the full-throt-
tle position.
M/S Manual mode and
Sport program
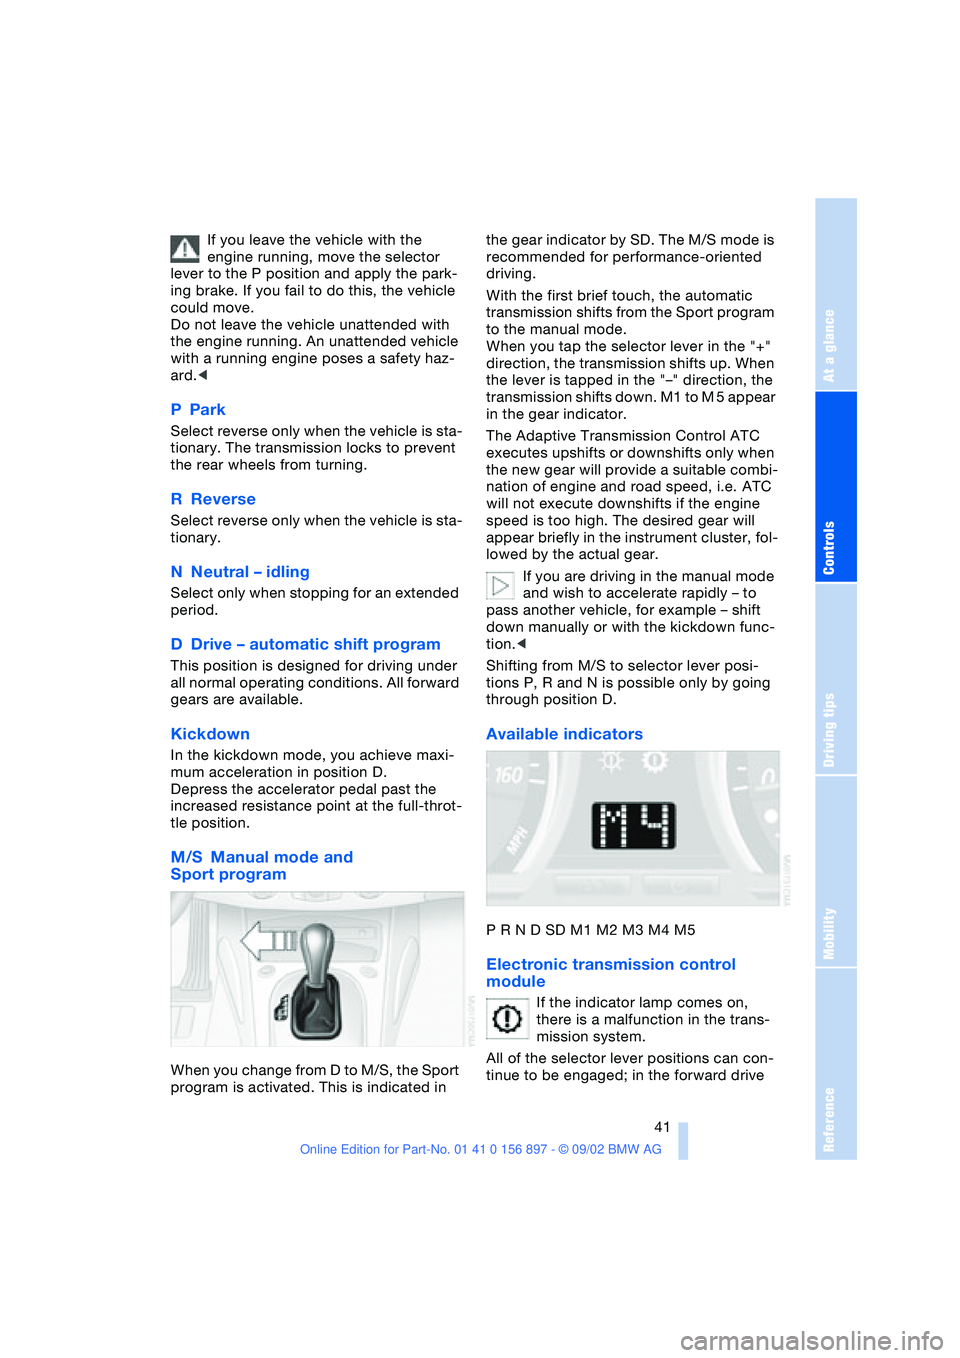
When you change from D to M/S, the Sport
program is activated. This is indicated in the gear indicator by SD. The M/S mode is
recommended for performance-oriented
driving.
With the first brief touch, the automatic
transmission shifts from the Sport program
to the manual mode.
When you tap the selector lever in the "+"
direction, the transmission shifts up. When
the lever is tapped in the "–" direction, the
transmission shifts down. M1 to M 5 appear
in the gear indicator.
The Adaptive Transmission Control ATC
executes upshifts or downshifts only when
the new gear will provide a suitable combi-
nation of engine and road speed, i.e. ATC
will not execute downshifts if the engine
speed is too high. The desired gear will
appear briefly in the instrument cluster, fol-
lowed by the actual gear.
If you are driving in the manual mode
and wish to accelerate rapidly – to
pass another vehicle, for example – shift
down manually or with the kickdown func-
tion.<
Shifting from M/S to selector lever posi-
tions P, R and N is possible only by going
through position D.
Available indicators
P R N D SD M1 M2 M3 M4 M5
Electronic transmission control
module
If the indicator lamp comes on,
there is a malfunction in the trans-
mission system.
All of the selector lever positions can con-
tinue to be engaged; in the forward drive
Page 66 of 106
Special operating instructions
66 the engine switched off. Otherwise the
engine provides no braking effect and there
is no power-assist for braking or steering
when the engine is off.<
Brake pads
The yellow indicator lamp for the
brake pads lights up:
Have the condition of the brake
pads inspected.<
For your own safety: use brake pads
which the manufacturer has approved
for your specific vehicle model. The manu-
facturer cannot evaluate non-approved
brake pads to determine if they are suitable
for use, and therefore cannot ensure the
operating safety of the vehicle in the event
of their use.<
Cargo loading
Stowing cargo
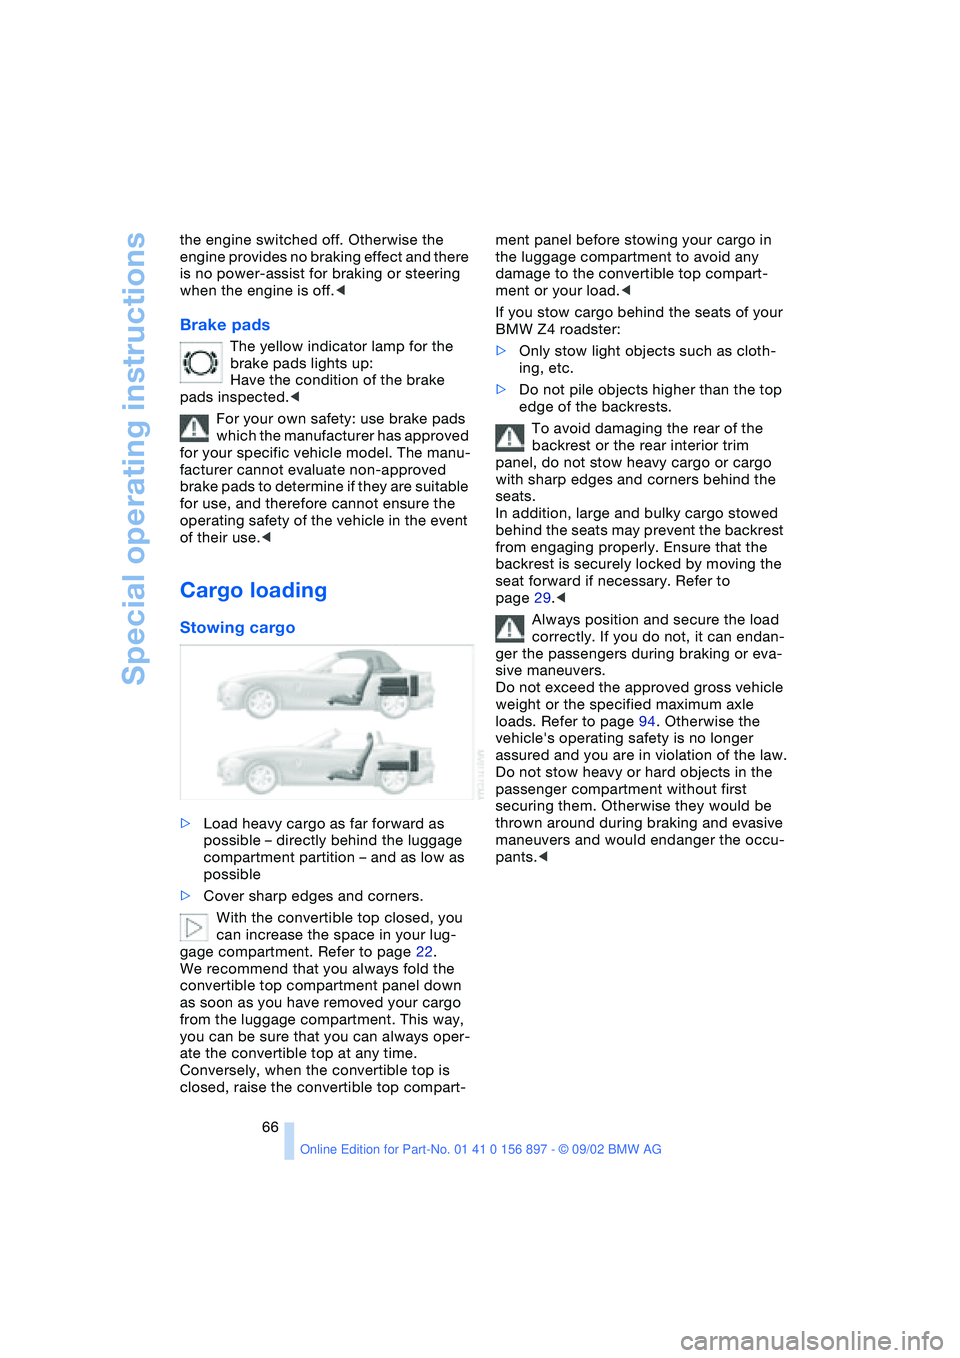
>Load heavy cargo as far forward as
possible – directly behind the luggage
compartment partition – and as low as
possible
>Cover sharp edges and corners.
With the convertible top closed, you
can increase the space in your lug-
gage compartment. Refer to page 22.
We recommend that you always fold the
convertible top compartment panel down
as soon as you have removed your cargo
from the luggage compartment. This way,
you can be sure that you can always oper-
ate the convertible top at any time.
Conversely, when the convertible top is
closed, raise the convertible top compart-ment panel before stowing your cargo in
the luggage compartment to avoid any
damage to the convertible top compart-
ment or your load.<
If you stow cargo behind the seats of your
BMW Z4 roadster:
>Only stow light objects such as cloth-
ing, etc.
>Do not pile objects higher than the top
edge of the backrests.
To avoid damaging the rear of the
backrest or the rear interior trim
panel, do not stow heavy cargo or cargo
with sharp edges and corners behind the
seats.
In addition, large and bulky cargo stowed
behind the seats may prevent the backrest
from engaging properly. Ensure that the
backrest is securely locked by moving the
seat forward if necessary. Refer to
page 29.<
Always position and secure the load
correctly. If you do not, it can endan-
ger the passengers during braking or eva-
sive maneuvers.
Do not exceed the approved gross vehicle
weight or the specified maximum axle
loads. Refer to page 94. Otherwise the
vehicle's operating safety is no longer
assured and you are in violation of the law.
Do not stow heavy or hard objects in the
passenger compartment without first
securing them. Otherwise they would be
thrown around during braking and evasive
maneuvers and would endanger the occu-
pants.<