Page 39 of 694

GEN
INFO
1 - 8
SPECIAL TOOLS
YU-33975, 90890-01403 Steering nut wrench
This tool is used when tighten the steering ring nut to
specification.YU-33975 90890-01403
YM-1423, 90890-01423 Damper rod holder
Use this tool to remove and install the damper rod.YM-1423 90890-01423
YM-01442, 90890-01442 Fork seal driver
This tool is used when install the fork oil seal.YM-01442 90890-01442
YU-3112-C, 90890-03112 Pocket tester
Use this tool to inspect the coil resistance, output
voltage and amperage.YU-3112-C 90890-03112
YU-8036-B
90890-03113Inductive tachometer
Engine tachometer
This tool is needed for observing engine rpm.YU-8036-B 90890-03113
YM-33277-A, 90890-03141 Timing light
This tool is necessary for checking ignition timing.YM-33277-A 90890-03141
YM-4019, 90890-04019 Valve spring compressor
This tool is needed to remove and install the valve
assemblies.YM-4019 90890-04019
YM-91042, 90890-04086 Clutch holding tool
This tool is used to hold the clutch when removing or
installing the clutch boss securing nut.YM-91042 90890-04086
YM-4111, 90890-04111
YM-4116, 90890-04116Valve guide remover
Intake 4.0 mm (0.16 in)
Exhaust 4.5 mm (0.18 in)
This tool is needed to remove and install the valve
guide.YM-4111
YM-411690890-04111
90890-04116
Part number Tool name/How to use Illustration
Page 180 of 694

3 - 7
INSP
ADJ
RADIATOR CAP INSPECTION
CAUTION:
�Do not mix more than one type of ethyl-
ene glycol antifreeze containing corro-
sion inhibitors for aluminum engine.
�Do not use water containing impurities or oil.
10. Install:
�Radiator cap
11. Fill:
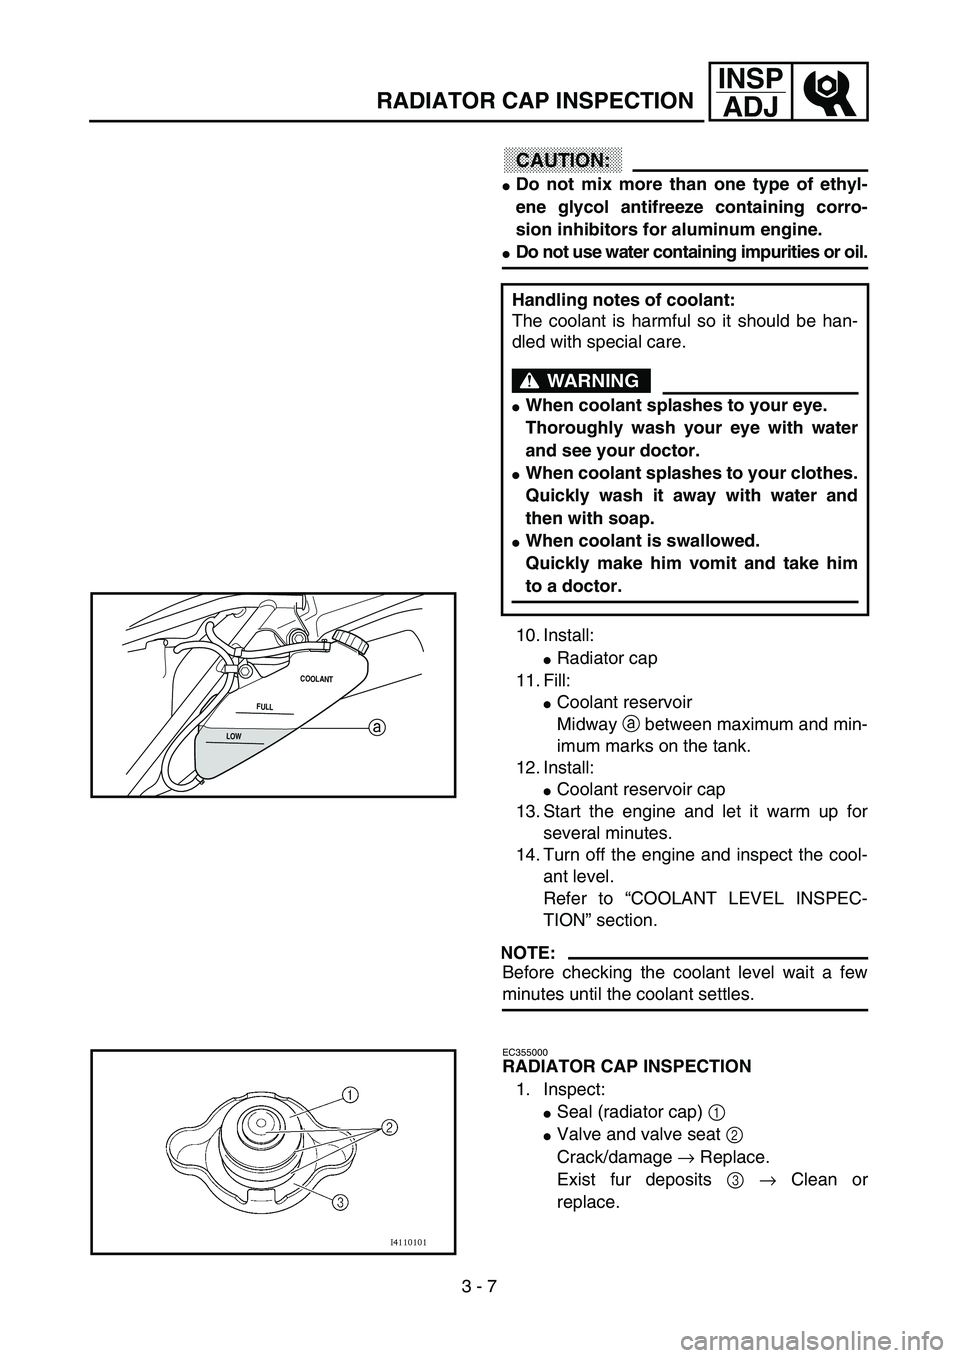
�Coolant reservoir
Midway a between maximum and min-
imum marks on the tank.
12. Install:
�Coolant reservoir cap
13. Start the engine and let it warm up for
several minutes.
14. Turn off the engine and inspect the cool-
ant level.
Refer to “COOLANT LEVEL INSPEC-
TION” section.
NOTE:
Before checking the coolant level wait a few
minutes until the coolant settles.Handling notes of coolant:
The coolant is harmful so it should be han-
dled with special care.
WARNING
�When coolant splashes to your eye.
Thoroughly wash your eye with water
and see your doctor.
�When coolant splashes to your clothes.
Quickly wash it away with water and
then with soap.
�When coolant is swallowed.
Quickly make him vomit and take him
to a doctor.
LOWFULLCOOLANTa
EC355000
RADIATOR CAP INSPECTION
1. Inspect:
�Seal (radiator cap) 1
�Valve and valve seat 2
Crack/damage → Replace.
Exist fur deposits 3 → Clean or
replace.
Page 202 of 694

3 - 18
INSP
ADJ
OIL PRESSURE INSPECTION
1. Check:
�Oil pressure
Checking steps:
�Slightly loosen the oil pressure check bolt
1.
�Start the engine and keep it idling until oil
starts to seep from the oil pressure check
bolt. If no oil comes out after one minute,
turn the engine off so it will not seize.
�Check oil passages and oil pump for dam-
age or leakage.
�Start the engine after solving the prob-
lem(s) and recheck the oil pressure.
�Tighten the oil pressure check bolt.
T R..
Oil pressure check bolt:
10 Nm (1.0 m • kg, 7.2 ft • lb)
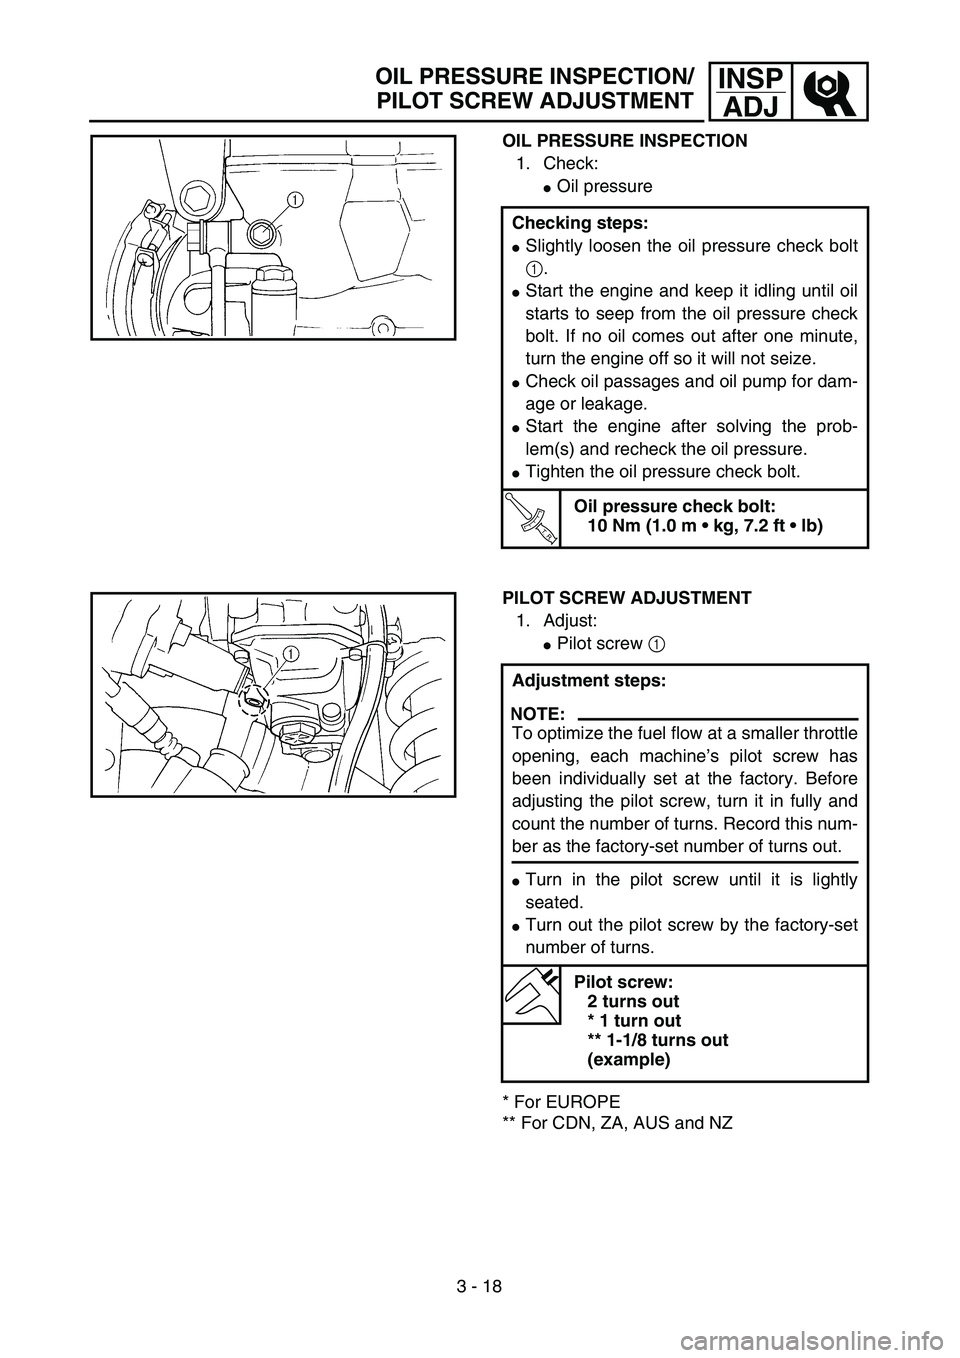
PILOT SCREW ADJUSTMENT
1. Adjust:
�Pilot screw 1
* For EUROPE
** For CDN, ZA, AUS and NZAdjustment steps:
NOTE:
To optimize the fuel flow at a smaller throttle
opening, each machine’s pilot screw has
been individually set at the factory. Before
adjusting the pilot screw, turn it in fully and
count the number of turns. Record this num-
ber as the factory-set number of turns out.
�Turn in the pilot screw until it is lightly
seated.
�Turn out the pilot screw by the factory-set
number of turns.
Pilot screw:
2 turns out
* 1 turn out
** 1-1/8 turns out
(example)
OIL PRESSURE INSPECTION/
PILOT SCREW ADJUSTMENT
Page 544 of 694

5 - 37
CHASFRONT FORK
19. Wait ten minutes until the air bubbles
have been removed from the front fork,
and the oil has dispense evenly in system
before setting recommended oil level.
NOTE:
Fill with the fork oil up to the top end of the
outer tube, or the fork oil will not spread over to
every part of the front forks, thus making it
impossible to obtain the correct level.
Be sure to fill with the fork oil up to the top of
the outer tube and bleed the front forks.
20. Measure:
�Oil level (left and right) a
Out of specification → Adjust.
* For EUROPE
NOTE:
Be sure to install the spring guide 2 when
checking the oil level.
WARNING
Never fail to make the oil level adjustment
between the maximum and minimum level
and always adjust each front fork to the
same setting. Uneven adjustment can
cause poor handling and loss of stability.
Standard oil level:
140 mm (5.51 in)
* 130 mm (5.12 in)
Extent of adjustment:
80 ~ 150 mm (3.15 ~ 5.91 in)
From top of outer tube with
inner tube and damper rod 1
fully compressed without
spring.
Page 612 of 694
–+ELEC
6 - 3
IGNITION SYSTEM
EC620000
IGNITION SYSTEM
INSPECTION STEPS
Use the following steps for checking the possibility of the malfunctioning engine being attributable to
ignition system failure and for checking the spark plug which will not spark.
*marked: Only when the ignition checker is used.
NOTE:
�
Remove the following parts before inspection.
1) Seat
2) Fuel tank
�
Use the following special tools in this inspection.
Dynamic spark tester:
YM-34487
Ignition checker:
90890-06754
Pocket tester:
YU-3112-C/90890-03112
Spark gap test*Clean or replace
spark plug.
Check entire ignition
system for connection.Repair or replace.
Check engine stop switch. Replace.
Check ignition coil. Primary coil Replace.
Secondary coil Replace.
Check CDI magneto. Pickup coil Replace.
Charging coil Replace.
Check neutral switch. Repair or replace.
Replace CDI unit.
No spark
OK
OK
OK
OK
OK
Spark
No good
No good
No good
No good
No good
No good
No good