Page 84 of 334
02 SIENNA_U (L/O 0107)
802002 MY SIENNA_U (OM45407U)
�Do not modify or remove any wir-
ing. Do not modify, remove, strike
or open any components such as
the steering wheel pad, steering
wheel, column cover, front passen-
ger airbag cover, front passenger
airbag or airbag sensor assembly.
Doing any of these may cause sud-
den SRS front airbag inflation or
disable the system, which could re-
sult in death or serious injury.
Failure to follow these instructions
can result in death or serious injury.NOTICE
Do not perform any of the following
changes without consulting your
Toyota dealer. Such changes can
interfere with proper operation of the
SRS front airbag system in some
cases.
� Installation of electronic devices
such as a mobile two�way radio,
cassette tape player or compact
disc player
� Modification of the suspension sys-
tem
� Modification of the front end struc-
ture
� Attachment of a grille guard (bull
bar, kangaroo bar, etc.), snowplow,
winches or any other equipment to
the front end
� Repairs made on or near the front
fenders, front end structure, con-
sole, steering column, steering
wheel or dashboard near the front
passenger airbag
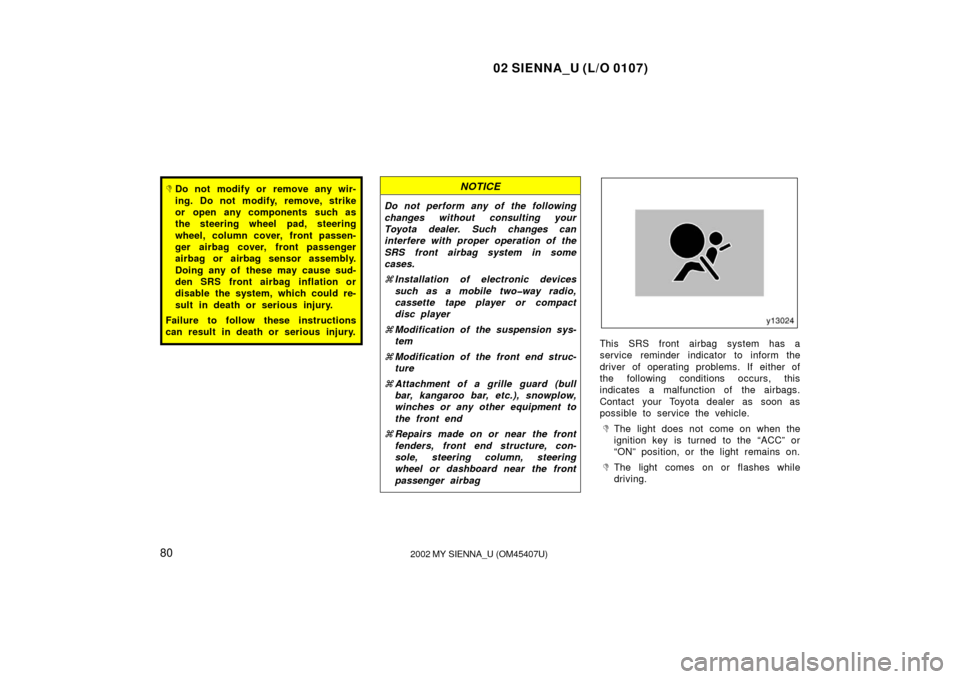
This SRS front airbag system has a
service reminder indicator to inform the
driver of operating problems. If either of
the following conditions occurs, this
indicates a malfunction of the airbags.
Contact your Toyota dealer as soon as
possible to service the vehicle.
�The light does not come on when the
ignition key is turned to the “ACC” or
“ON” position, or the light remains on.
�The light comes on or flashes while
driving.
Page 90 of 334
02 SIENNA_U (L/O 0107)
862002 MY SIENNA_U (OM45407U)
This SRS side airbag system has a
service reminder indicator to inform the
driver of operating problems. If either of
the following conditions occurs, this
indicates a malfunction of the airbags.
Contact your Toyota dealer as soon as
possible to service the vehicle.
�The light does not come on when the
ignition key is turned to the “ACC” or
“ON” position, or the light remains on.
�The light comes on or flashes while
driving.
In the following cases, contact your Toyota
dealer as soon as possible:
�The SRS side airbags have been in-
flated.
�The portion of the doors (shaded in the
illustration) were involved in an acci-
dent that was not severe enough to
cause the SRS side airbags to inflate.
�The surface of the seats with the side
airbag (shaded in the illustration) is
scratched, cracked, or otherwise dam-
aged.
NOTICE
Do not disconnect the battery cables
before contacting your Toyota dealer.
Page 121 of 334
02 SIENNA_U (L/O 0107)
11 72002 MY SIENNA_U (OM45407U)
CAUTION
Do not adjust the mirror while the
vehicle is moving. It may cause the
driver to mishandle the vehicle and
an accident may occur resulting in
death or serious injuries.
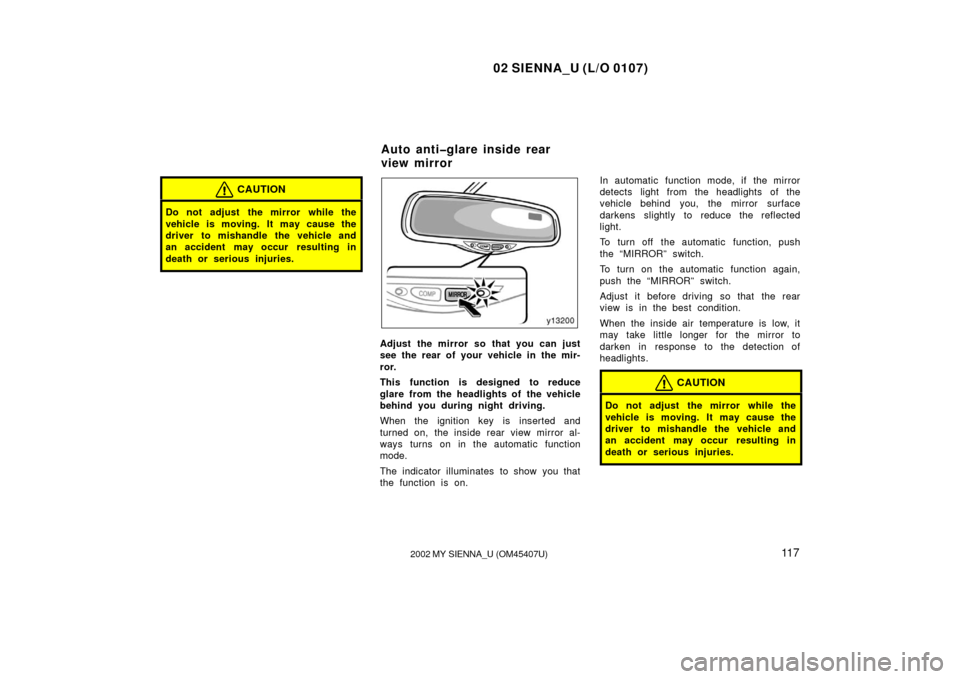
Adjust the mirror so that you can just
see the rear of your vehicle in the mir-
ror.
This function is designed to reduce
glare from the headlights of the vehicle
behind you during night driving.
When the ignition key is inserted and
turned on, the inside rear view mirror al-
ways turns on in the automatic function
mode.
The indicator illuminates to show you that
the function is on. In automatic function mode, if the mirror
detects light from the headlights of the
vehicle behind you, the mirror surface
darkens slightly to reduce the reflected
light.
To turn off the automatic function, push
the “MIRROR” switch.
To turn on the automatic function again,
push the “MIRROR” switch.
Adjust it before driving so that the rear
view is in the best condition.
When the inside air temperature is low, it
may take little longer for the mirror to
darken in response to the detection of
headlights.
CAUTION
Do not adjust the mirror while the
vehicle is moving. It may cause the
driver to mishandle the vehicle and
an accident may occur resulting in
death or serious injuries.
Auto anti�glare inside rear
view mirror
Page 122 of 334
02 SIENNA_U (L/O 0107)
11 82002 MY SIENNA_U (OM45407U)
To block out glare, move the sun visor.
To block out glare from the front—Swing
down the sun visor (position 1).
To block out glare from the side—Swing
down the sun visor, remove it from the
hook and swing it to the lateral side (posi-
tion 2).
If glare comes from obliquely behind you,
extend the plate at the end of the visor
(to position 3).
CAUTION
Do not extend the plate at the end of
the sun visor when the visor is in the
position 1. It can cover the anti�glare
inside rear view mirror and obstruct
the rear view.
To use the vanity mirrors, swing down
the sun visor and open the cover.
On some models, the vanity light comes
on when you open the cover.
VANITY LIGHTS CUT OFF OPERATION
When the ignition switch is “OFF” and
vanity light in the vehicle stays lighting
on, the light will cut off automatically after
30 minutes.
Sun visors— —Vanity mirrors
Page 125 of 334

02 SIENNA_U (L/O 0107)
1212002 MY SIENNA_U (OM45407U)
OPERATION OF INSTRUMENTS AND
CONTROLS
Lights, Wipers and Defogger
Headlights and turn signals 122
. . . . . . . . . . . . . . . . . . . . . . . . . . . . . . . . . .
Emergency flashers 125
. . . . . . . . . . . . . . . . . . . . . . . . . . . . . . . . . . . . \
. . . . .
Instrument panel light control 125
. . . . . . . . . . . . . . . . . . . . . . . . . . . . . . . .
Front fog lights 126
. . . . . . . . . . . . . . . . . . . . . . . . . . . . . . . . . . . . \
. . . . . . . . .
Personal lights 126
. . . . . . . . . . . . . . . . . . . . . . . . . . . . . . . . . . . . \
. . . . . . . . .
Interior light 128
. . . . . . . . . . . . . . . . . . . . . . . . . . . . . . . . . . . . \
. . . . . . . . . . . .
Ignition switch light 129
. . . . . . . . . . . . . . . . . . . . . . . . . . . . . . . . . . . . \
. . . . .
Luggage compartment light 130
. . . . . . . . . . . . . . . . . . . . . . . . . . . . . . . . . .
Windshield wipers and washer 131
. . . . . . . . . . . . . . . . . . . . . . . . . . . . . . .
Rear window wiper and washer 131
. . . . . . . . . . . . . . . . . . . . . . . . . . . . . .
Rear window and outside rear view mirror defoggers 132
. . . . . . . . . . .
SECTION 1� 4
Page 126 of 334
02 SIENNA_U (L/O 0107)
1222002 MY SIENNA_U (OM45407U)
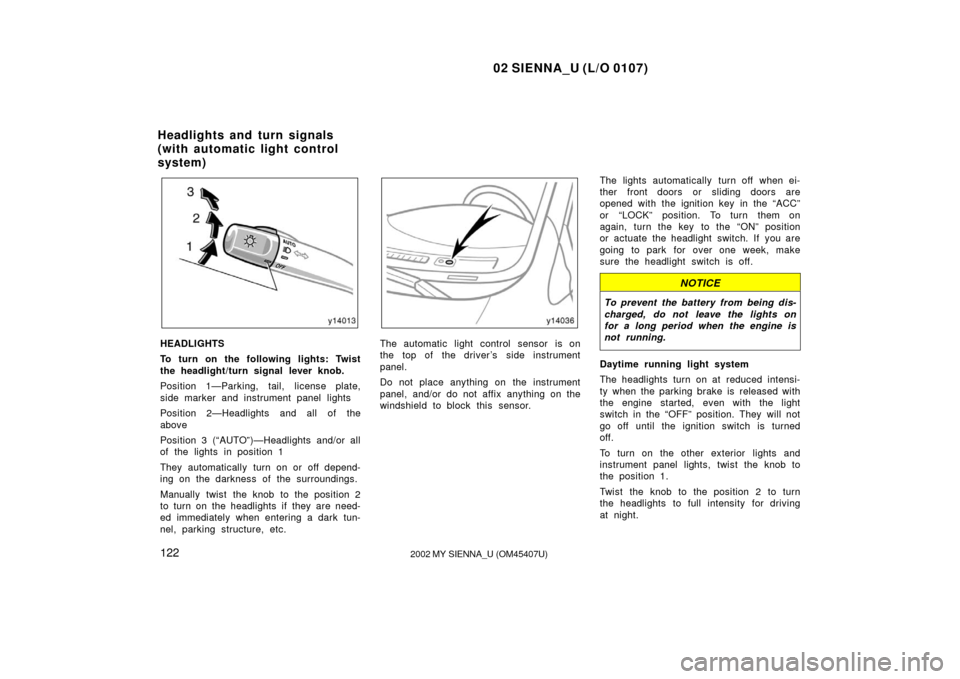
HEADLIGHTS
To turn on the following lights: Twist
the headlight/turn signal lever knob.
Position 1—Parking, tail, license plate,
side marker and instrument panel lights
Position 2—Headlights and all of the
above
Position 3 (“AUTO”)—Headlights and/or all
of the lights in position 1
They automatically turn on or off depend-
ing on the darkness of the surroundings.
Manually twist the knob to the position 2
to turn on the headlights if they are need-
ed immediately when entering a dark tun-
nel, parking structure, etc.The automatic light control sensor is on
the top of the driver’s side instrument
panel.
Do not place anything on the instrument
panel, and/or do not affix anything on the
windshield to block this sensor. The lights automatically turn off when ei-
ther front doors or sliding doors are
opened with the ignition key in the “ACC”
or “LOCK” position. To turn them on
again, turn the key to the “ON” position
or actuate the headlight switch. If you are
going to park for over one week, make
sure the headlight switch is off.
NOTICE
To prevent the battery from being dis-
charged, do not leave the lights on
for a long period when the engine is
not running.
Daytime running light system
The headlights turn on at reduced intensi-
ty when the parking brake is released with
the engine started, even with the light
switch in the “OFF” position. They will not
go off until the ignition switch is turned
off.
To turn on the other exterior lights and
instrument panel lights, twist the knob to
the position 1.
Twist the knob to the position 2 to turn
the headlights to full intensity for driving
at night.
Headlights and turn signals
(with automatic light control
system)
Page 127 of 334
02 SIENNA_U (L/O 0107)
1232002 MY SIENNA_U (OM45407U)
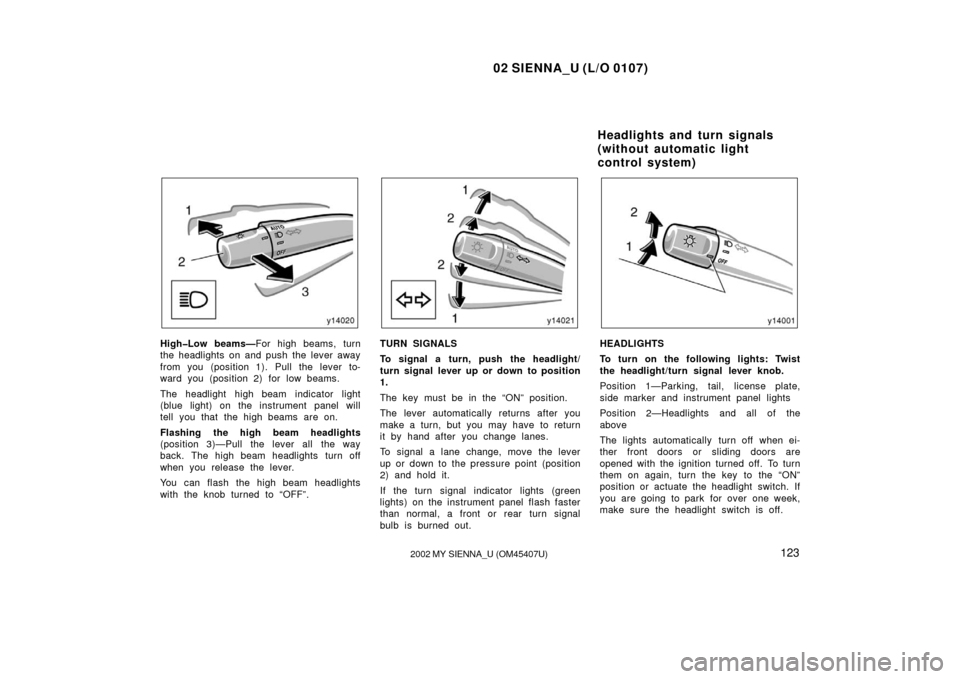
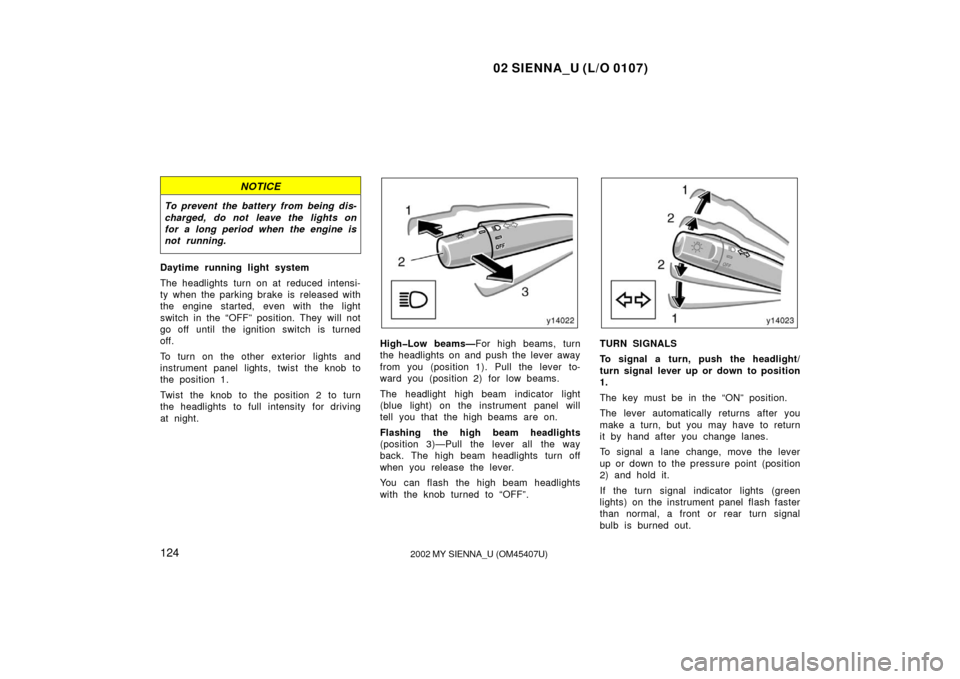
High�Low beams— For high beams, turn
the headlights on and push the lever away
from you (position 1). Pull the lever to-
ward you (position 2) for low beams.
The headlight high beam indicator light
(blue light) on the instrument panel will
tell you that the high beams are on.
Flashing the high beam headlights
(position 3)—Pull the lever all the way
back. The high beam headlights turn off
when you release the lever.
You can flash the high beam headlights
with the knob turned to “OFF”.TURN SIGNALS
To signal a turn, push the headlight/
turn signal lever up or down to position
1.
The key must be in the “ON” position.
The lever automatically returns after you
make a turn, but you may have to return
it by hand after you change lanes.
To signal a lane change, move the lever
up or down to the pressure point (position
2) and hold it.
If the turn signal indicator lights (green
lights) on the instrument panel flash faster
than normal, a front or rear turn signal
bulb is burned out.HEADLIGHTS
To turn on the following lights: Twist
the headlight/turn signal lever knob.
Position 1—Parking, tail, license plate,
side marker and instrument panel lights
Position 2—Headlights and all of the
above
The lights automatically turn off when ei-
ther front doors or sliding doors are
opened with the ignition turned off. To turn
them on again, turn the key to the “ON”
position or actuate the headlight switch. If
you are going to park for over one week,
make sure the headlight switch is off.
Headlights and turn signals
(without automatic light
control system)
Page 128 of 334
02 SIENNA_U (L/O 0107)
1242002 MY SIENNA_U (OM45407U)
NOTICE
To prevent the battery from being dis-
charged, do not leave the lights on
for a long period when the engine is
not running.
Daytime running light system
The headlights turn on at reduced intensi-
ty when the parking brake is released with
the engine started, even with the light
switch in the “OFF” position. They will not
go off until the ignition switch is turned
off.
To turn on the other exterior lights and
instrument panel lights, twist the knob to
the position 1.
Twist the knob to the position 2 to turn
the headlights to full intensity for driving
at night.
High�Low beams— For high beams, turn
the headlights on and push the lever away
from you (position 1). Pull the lever to-
ward you (position 2) for low beams.
The headlight high beam indicator light
(blue light) on the instrument panel will
tell you that the high beams are on.
Flashing the high beam headlights
(position 3)—Pull the lever all the way
back. The high beam headlights turn off
when you release the lever.
You can flash the high beam headlights
with the knob turned to “OFF”.TURN SIGNALS
To signal a turn, push the headlight/
turn signal lever up or down to position
1.
The key must be in the “ON” position.
The lever automatically returns after you
make a turn, but you may have to return
it by hand after you change lanes.
To signal a lane change, move the lever
up or down to the pressure point (position
2) and hold it.
If the turn signal indicator lights (green
lights) on the instrument panel flash faster
than normal, a front or rear turn signal
bulb is burned out.