Page 183 of 258

170
50p002
5. Remove the positive terminal cover ofthe auxiliary battery.
6. If the booster battery is installed in another vehicle, make sure the ve-
hicles are not touching. Turn off all
unnecessary lights and accessories.
7. If required, remove all the vent plugs from the booster batteries. Lay a cloth
over the open vents on the batteries.
(This helps reduce the explosion haz-
ard, personal injuries and burns.) 8. If the engine in the vehicle with the
booster battery is not running, start it
and let it run for a few minutes. During
jump starting, run the engine at about
2000 rpm with the accelerator pedal
lightly depressed.
50p044a
Discharged
battery
Booster
battery
Positive
terminal (“+” mark)
Jumper
cable Positive
terminal
(“+” mark)
9. Connect the jumper cables in the order a, b, c, d.
a. Connect the clamp of the positive(red) jumper cable to the positive
(+) terminal on the discharged bat-
tery.
b. Connect the clamp at the other end of the positive (red) jumper cable to
the positive (+) terminal on the
booster battery.
Page 184 of 258

171
50p045a
Booster
battery
Negative
terminal
(“−
” mark) Jumper
cable
Discharged battery
Positive
terminal
(“+” mark)
c. Connect the clamp of the negative (black) jumper cable to the negative
(–) terminal on the booster battery.
d. Connect the clamp at the other end of the negative (black) jumper cable
to a solid, stationary, unpainted, me-
tallic point of the vehicle with the
discharged battery.
The recommended connecting point is
shown in the following illustrations:
50p043a
Connecting point
CAUTION
When making the connections, to
avoid serious injury, do not lean over
the battery or accidentally let the
jumper cables or clamps touch any-
thing except the correct battery termi-
nals or the ground.
10. Start the hybrid system. Make sure the “READY” light is on. If the hybrid ve-
hicle battery warning light comes on in
the multi −information display, the hybrid
vehicle battery is also discharged. Con-
tact your Toyota dealer.
11. Carefully disconnect the cables in the exact reverse order: the negative cable
and then the positive cable.
12. Carefully dispose of the battery cover cloths—they may now contain sulfuric
acid.
13. If removed, replace all the battery vent plugs.
If the cause of your auxiliary battery dis-
charging is not apparent (for example,
lights left on), you should have it checked.
Page 213 of 258
200
Engine compartment overview
1. Engine coolant reservoir
2. Fuse blocks
3. Brake fluid reservoir
4. Engine oil filler cap
5. Inverter reservoir tank
6. Windshield washer fluid tank
7. Radiator and condenser
8. Engine oil level dipstick
9. Auxiliary battery
81p001f
Page 218 of 258

205
Parts and tools
Here is a list of parts and tools you will
need on performing do−it−yourself mainte-
nance. Remember all Toyota parts are de-
signed in metric sizes, so your tools must
be metric.
CHECKING THE ENGINE OIL LEVEL
Parts (if level is low):
�Engine oil API grade SJ “Energy −Con-
serving”, SL “Energy −Conserving” or IL-
SAC multigrade having viscosity proper
for your climate
Tools:
�Rag or paper towel
�Funnel (only for adding oil)
CHECKING THE COOLANT LEVEL
Parts (if level is low):
�”TOYOTA Long Life Coolant” or equiva-
lent
See page 210 in Section 8 −2 for de-
tails about coolant type selection.
�Demineralized or distilled water
Tools:
�Funnel (only for adding coolant) CHECKING BRAKE FLUID
Parts (if level is low):
�SAE J1703 or FMVSS No.116 DOT 3
brake fluid
Tools:
�Rag or paper towel
�Funnel (only for adding fluid)
CHECKING AUXILIARY BATTERY CON-
DITION
Tools:
�Warm water
�Baking soda
�Grease
�Conventional wrench (for terminal
clamp bolts)
CHECKING AND REPLACING FUSES
Parts (if replacement is necessary):
�Fuse with same amperage rating as
original
ADDING WASHER FLUID
Parts:
�Water
�Washer fluid containing antifreeze (for
winter use) Tools:
�Funnel
REPLACING LIGHT BULBS
Parts:
�Bulb with same number and wattage
rating as original (See charts in ”Re-
placing light bulbs–” on page 225 in
Section 8 −3.)
Tools:
�Screwdriver
Page 234 of 258
221
DO�IT�YOURSELF MAINTENANCE
Electrical components
Checking auxiliary battery condition 222
. . . . . . . . . . . . . . . . . . . . . . . . . .
Auxiliary battery recharging precautionss 223
. . . . . . . . . . . . . . . . . . . . .
Checking and replacing fuses 223
. . . . . . . . . . . . . . . . . . . . . . . . . . . . . . . .
Adding washer fluid 225
. . . . . . . . . . . . . . . . . . . . . . . . . . . . . . . . . . . . \
. . . . .
Replacing light bulbs 225
. . . . . . . . . . . . . . . . . . . . . . . . . . . . . . . . . . . . \
. . . .
SECTION 8– 3
Page 235 of 258

222
CAUTION
AUXILIARY BATTERY PRECAUTIONS
When the auxiliary battery must be
replaced, use the Prius designated
battery.
The auxiliary battery produces flam-
mable and explosive hydrogen gas.
�Do not cause a spark from the bat-
tery with tools.
�Do not smoke or light a match near
the battery.
The electrolyte contains poisonous
and corrosive sulfuric acid.
�Avoid contact with eyes, skin or
clothes.
�Never ingest electrolyte.
�Wear protective safety glasses when
working near the battery.
�Keep children away from the bat-
tery.
EMERGENCY MEASURES
�If electrolyte gets in your eyes,
flush your eyes with clean water
and get immediate medical atten-
tion. If possible, continue to apply
water with a sponge or cloth while
en route to the medical office.
�If electrolyte gets on your skin,
thoroughly wash the contact area. If
you feel pain or burn, get medical
attention immediately.
�If electrolyte gets on your clothes,
there is a possibility of its soaking
through to your skin, so immediate-
ly take off the exposed clothing and
follow the procedure above, if nec-
essary.
�If you accidentally swallow electro-
lyte, drink a large quantity of water
or milk. Follow with milk of magne-
sia, beaten raw egg or vegetable
oil. Then go immediately for emer-
gency help.
�Warning: Battery posts, terminals and
related accessories contain lead and
lead compounds, chemicals known to
the State of California to cause can-
cer and reproductive harm. Wash
hands after handling.
Terminals
Ground cable
Hold−down clamp
Check the battery for corroded or loose
terminal connections, cracks, or loose
hold�down clamp.
a. If the battery is corroded, wash it off with a solution of warm water and bak-
ing soda. Coat the outside of the termi-
nals with grease to prevent further cor-
rosion.
b. If the terminal connections are loose, tighten their clamp nuts—but do not
overtighten.
c. Tighten the hold− down clamp only
enough to keep the battery firmly in
place. Overtightening may damage the
battery case.
Checking auxiliary battery
condition—
—Precautions —Checking auxiliary battery
exterior
Page 236 of 258

223
NOTICE
�Be sure the hybrid system and all
accessories are off before perform-
ing maintenance.
� When checking the battery, remove
the ground cable from the negative
terminal (“—” mark) first and rein-
stall it last.
� Be careful not to cause a short cir-
cuit with tools.
� Take care no solution gets into the
battery when washing it.
During recharging, the battery is pro-
ducing hydrogen gas.
Therefore, before recharging:
1. If recharging with the battery installed on the vehicle, be sure to disconnect
the ground cable.
2. Make sure the power switch on the recharger is off when connecting the
charger cables to the battery and when
disconnecting them.
CAUTION
�Always charge the battery in an un-
confined area. Do not charge the
battery in a garage or closed room
where there is not sufficient ventila-
tion.
�Only do a slow charge (3.5A or
less). Charging at a quicker rate is
dangerous. The battery may ex-
plode, causing personal injuries.
NOTICE
Never recharge the battery with the
hybrid system on. Also, be sure all
accessories are turned off.
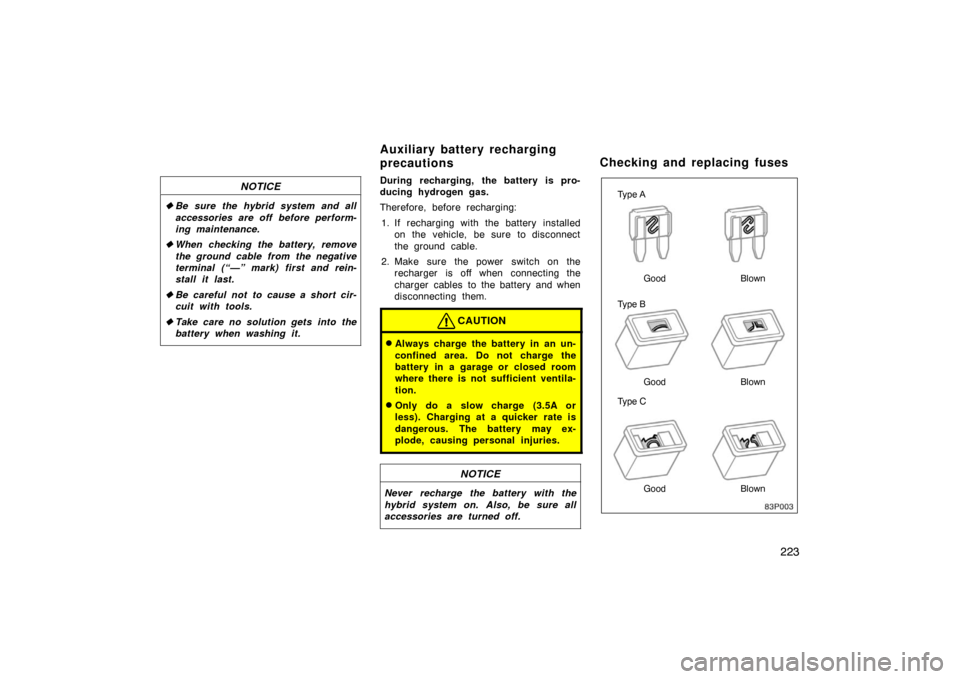
83p003
Type A
Type B
Type C Good Blown
Good Blown
Good Blown
Auxiliary battery recharging
precautions
Checking and replacing fuses
Page 249 of 258

236
ENGINE LUBRICATION
Oil capacity (drain and refill), L (qt, lmp.
qt.):
With filter 3.7 (3.9, 3.3)
Without filter 3.4 (3.6, 3.0)
Oil grade: API grade SJ “Energy −Conserving”, SL
“Energy −Conserving” or ILSAC
multigrade engine oil is recommended.
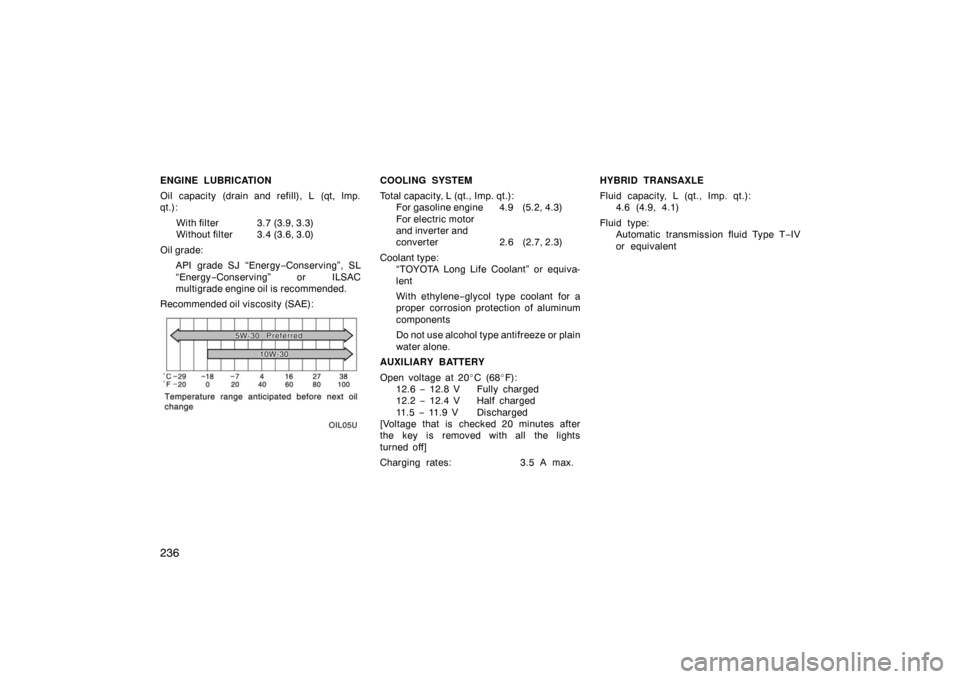
Recommended oil viscosity (SAE):
oil05u
COOLING SYSTEM
Total capacity, L (qt., Imp. qt.): For gasoline engine 4.9 (5.2, 4.3)
For electric motor
and inverter and
converter 2.6 (2.7, 2.3)
Coolant type: “TOYOTA Long Life Coolant” or equiva-
lent
With ethylene− glycol type coolant for a
proper corrosion protection of aluminum
components
Do not use alcohol type antifreeze or plain
water alone.
AUXILIARY BATTERY
Open voltage at 20 �C (68 �F):
12.6 − 12.8 V Fully charged
12.2 − 12.4 V Half charged
11 . 5 − 11.9 V Discharged
[Voltage that is checked 20 minutes after
the key is removed with all the lights
turned off]
Charging rates: 3.5 A max.HYBRID TRANSAXLE
Fluid capacity, L (qt., Imp. qt.):
4.6 (4.9, 4.1)
Fluid type: Automatic transmission fluid Type T −IV
or equivalent