Page 8 of 238
’02MY CELICA U (L/O 0108)
42002 MY CELICA_U (OM20792U)
1. Tachometer
2. Service reminder indicators andindicator lights
3. Speedometer 4. Fuel gauge
5. Engine coolant temperature gauge
6. Odometer and two trip meters
7. Trip meter reset knob
8. Gear position indicators
Instrument cluster overview
Page 10 of 238
’02MY CELICA U (L/O 0108)
62002 MY CELICA_U (OM20792U)
∗1: For details, see “Service reminder indicators and warning
buzzers” in Section 1�5.
∗2: If this light flashes, see “Automatic transmission” in Section
1�6.
∗3: If this light flashes, see “Cruise control” in Section 1�6. Cruise control indicator light
∗
3
Overdrive�off indicator light
Automatic transmission indicator lights
M mode indicator light
∗2
Turn signal indicator lights
Page 14 of 238
’02MY CELICA U (L/O 0108)
102002 MY CELICA_U (OM20792U)
CAUTION
Before driving, be sure that the side
doors are closed and locked, espe-
cially when small children are in the
vehicle. Along with the proper use of
seat belts, locking the side doors
helps prevent the driver and passen-
gers from being thrown out from the
vehicle during an accident. It also
helps prevent the side doors from be-
ing opened unintentionally.
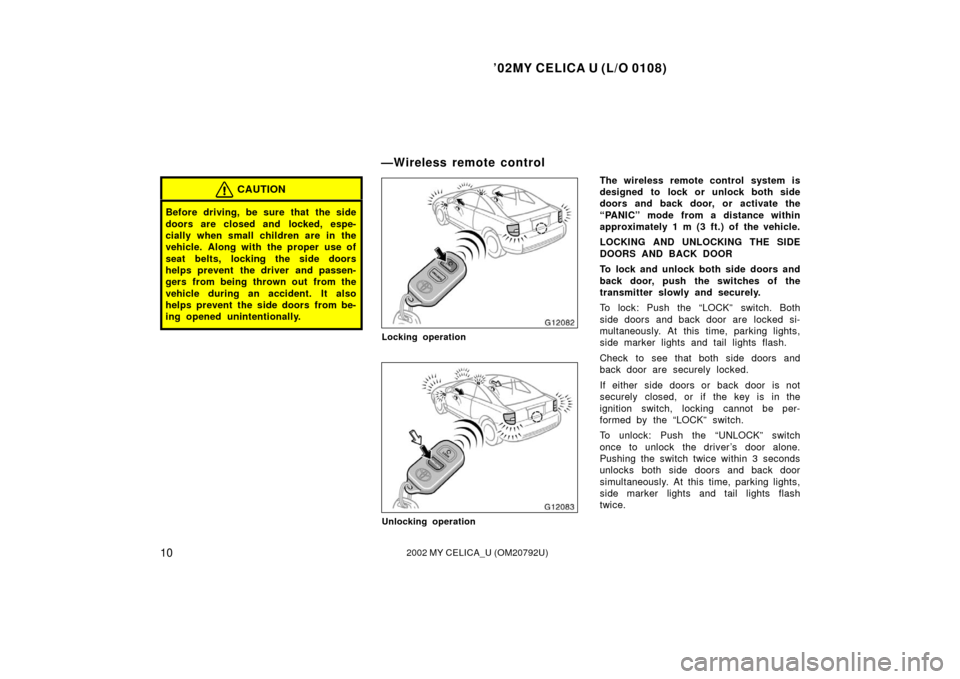
Locking operation
Unlocking operation
The wireless remote control system is
designed to lock or unlock both side
doors and back door, or activate the
“PANIC” mode from a distance within
approximately 1 m (3 ft.) of the vehicle.
LOCKING AND UNLOCKING THE SIDE
DOORS AND BACK DOOR
To lock and unlock both side doors and
back door, push the switches of the
transmitter slowly and securely.
To lock: Push the “LOCK” switch. Both
side doors and back door are locked si-
multaneously. At this time, parking lights,
side marker lights and tail lights flash.
Check to see that both side doors and
back door are securely locked.
If either side doors or back door is not
securely closed, or if the key is in the
ignition switch, locking cannot be per-
formed by the “LOCK” switch.
To unlock: Push the “UNLOCK” switch
once to unlock the driver ’s door alone.
Pushing the switch twice within 3 seconds
unlocks both side doors and back door
simultaneously. At this time, parking lights,
side marker lights and tail lights flash
twice.
—Wireless remote control
Page 15 of 238
’02MY CELICA U (L/O 0108)
112002 MY CELICA_U (OM20792U)
When both side doors and back door are
unlocked simultaneously with a wireless
remote control transmitter, the interior light
comes on for about 15 seconds and then
fades out, even if the door is not opened.
(For further information, see “Interior light”
in Section 1�4.)
You have 30 seconds to open a door after
using the wireless remote unlock feature.
If a door is not opened by then, both side
doors and back door will be automatically
locked again.
If the “LOCK” or “UNLOCK” switch is kept
pressed in, the locking or unlocking opera-
tion is not repeated. Release the button
and then push again.
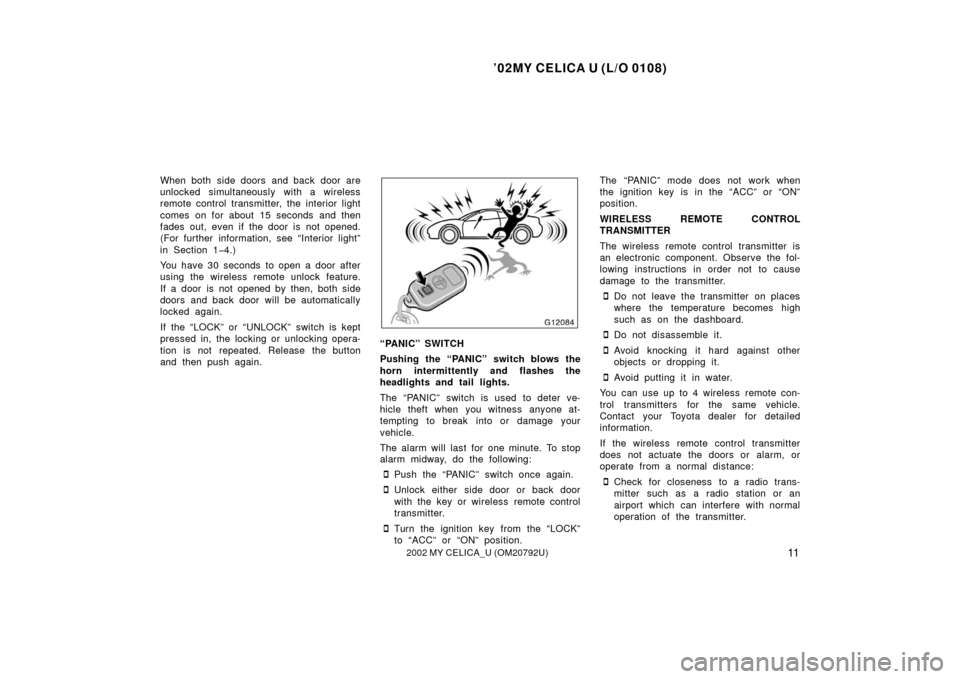
“PANIC” SWITCH
Pushing the “PANIC” switch blows the
horn intermittently and flashes the
headlights and tail lights.
The “PANIC” switch is used to deter ve-
hicle theft when you witness anyone at-
tempting to break into or damage your
vehicle.
The alarm will last for one minute. To stop
alarm midway, do the following:
�Push the “PANIC” switch once again.
�Unlock either side door or back door
with the key or wireless remote control
transmitter.
�Turn the ignition key from the “LOCK”
to “ACC” or “ON” position.The “PANIC” mode does not work when
the ignition key is in the “ACC” or “ON”
position.
WIRELESS REMOTE CONTROL
TRANSMITTER
The wireless remote control transmitter is
an electronic component. Observe the fol-
lowing instructions in order not to cause
damage to the transmitter.
�Do not leave the transmitter on places
where the temperature becomes high
such as on the dashboard.
�Do not disassemble it.
�Avoid knocking it hard against other
objects or dropping it.
�Avoid putting it in water.
You can use up to 4 wireless remote con-
trol transmitters for the same vehicle.
Contact your Toyota dealer for detailed
information.
If the wireless remote control transmitter
does not actuate the doors or alarm, or
operate from a normal distance:
�Check for closeness to a radio trans-
mitter such as a radio station or an
airport which can interfere with normal
operation of the transmitter.
Page 66 of 238
’02MY CELICA U (L/O 0108)
622002 MY CELICA_U (OM20792U)
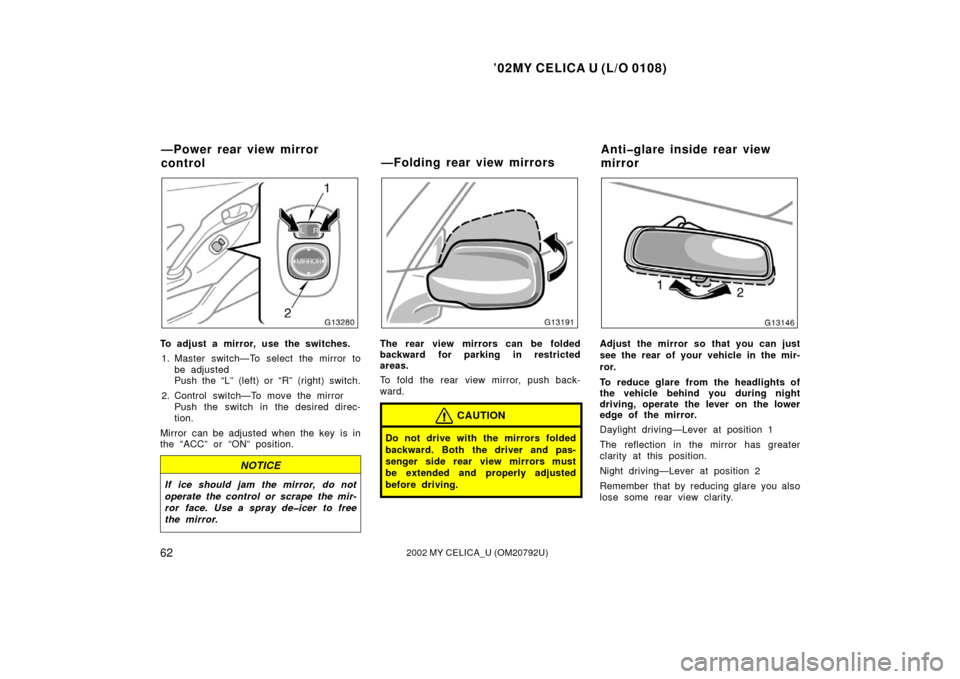
To adjust a mirror, use the switches.1. Master switch—To select the mirror to be adjusted
Push the “L” (left) or “R” (right) switch.
2. Control switch—To move the mirror Push the switch in the desired direc-
tion.
Mirror can be adjusted when the key is in
the “ACC” or “ON” position.
NOTICE
If ice should jam the mirror, do not
operate the control or scrape the mir-
ror face. Use a spray de�icer to free
the mirror.
The rear view mirrors can be folded
backward for parking in restricted
areas.
To fold the rear view mirror, push back-
ward.
CAUTION
Do not drive with the mirrors folded
backward. Both the driver and pas-
senger side rear view mirrors must
be extended and properly adjusted
before driving.
Adjust the mirror so that you can just
see the rear of your vehicle in the mir-
ror.
To reduce glare from the headlights of
the vehicle behind you during night
driving, operate the lever on the lower
edge of the mirror.
Daylight driving—Lever at position 1
The reflection in the mirror has greater
clarity at this position.
Night driving—Lever at position 2
Remember that by reducing glare you also
lose some rear view clarity.
—Power rear view mirror
control —Folding rear view mirrorsAnti�glare inside rear view
mirror
Page 69 of 238

’02MY CELICA U (L/O 0108)
652002 MY CELICA_U (OM20792U)
OPERATION OF INSTRUMENTS AND
CONTROLS
Lights, Wipers and Defogger
Headlights and turn signals66
. . . . . . . . . . . . . . . . . . . . . . . . . . . . . . . . . . .
Emergency flashers 68
. . . . . . . . . . . . . . . . . . . . . . . . . . . . . . . . . . . . \
. . . . . .
Instrument panel light control 68
. . . . . . . . . . . . . . . . . . . . . . . . . . . . . . . . .
Front fog lights 69
. . . . . . . . . . . . . . . . . . . . . . . . . . . . . . . . . . . . \
. . . . . . . . . .
Interior light 69
. . . . . . . . . . . . . . . . . . . . . . . . . . . . . . . . . . . . \
. . . . . . . . . . . . .
Luggage compartment light 70
. . . . . . . . . . . . . . . . . . . . . . . . . . . . . . . . . . .
Windshield wipers and washer 71
. . . . . . . . . . . . . . . . . . . . . . . . . . . . . . . .
Rear window wiper and washer 71
. . . . . . . . . . . . . . . . . . . . . . . . . . . . . . .
Rear window defogger 72
. . . . . . . . . . . . . . . . . . . . . . . . . . . . . . . . . . . . \
. . .
SECTION 1� 4
Page 70 of 238
’02MY CELICA U (L/O 0108)
662002 MY CELICA_U (OM20792U)
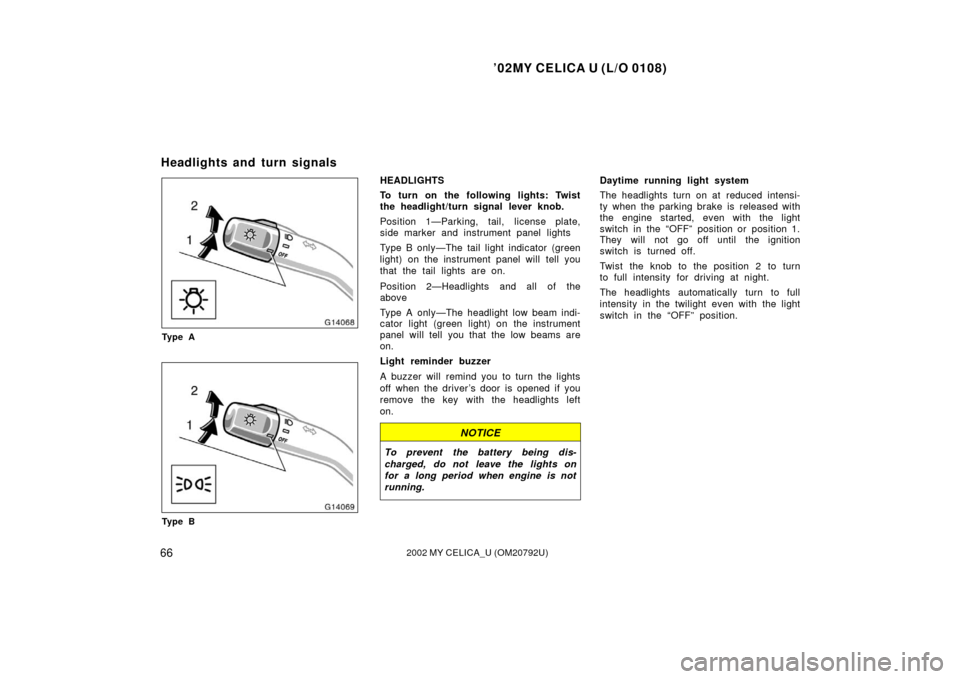
Ty p e A
Ty p e B
HEADLIGHTS
To turn on the following lights: Twist
the headlight/turn signal lever knob.
Position 1—Parking, tail, license plate,
side marker and instrument panel lights
Type B only—The tail light indicator (green
light) on the instrument panel will tell you
that the tail lights are on.
Position 2—Headlights and all of the
above
Type A only—The headlight low beam indi-
cator light (green light) on the instrument
panel will tell you that the low beams are
on.
Light reminder buzzer
A buzzer will remind you to turn the lights
off when the driver ’s door is opened if you
remove the key with the headlights left
on.
NOTICE
To prevent the battery being dis-
charged, do not leave the lights on
for a long period when engine is not
running.
Daytime running light system
The headlights turn on at reduced intensi-
ty when the parking brake is released with
the engine started, even with the light
switch in the “OFF” position or position 1.
They will not go off until the ignition
switch is turned off.
Twist the knob to the position 2 to turn
to full intensity for driving at night.
The headlights automatically turn to full
intensity in the twilight even with the light
switch in the “OFF” position.
Headlights and turn signals
Page 71 of 238
’02MY CELICA U (L/O 0108)
672002 MY CELICA_U (OM20792U)
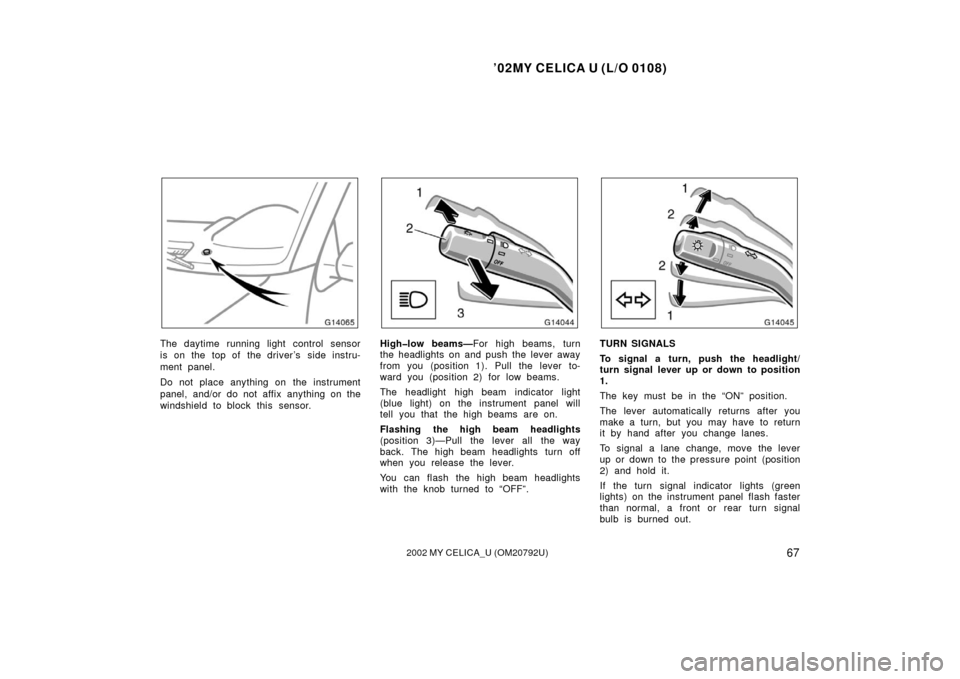
The daytime running light control sensor
is on the top of the driver’s side instru-
ment panel.
Do not place anything on the instrument
panel, and/or do not affix anything on the
windshield to block this sensor.High�low beams—For high beams, turn
the headlights on and push the lever away
from you (position 1). Pull the lever to-
ward you (position 2) for low beams.
The headlight high beam indicator light
(blue light) on the instrument panel will
tell you that the high beams are on.
Flashing the high beam headlights
(position 3)—Pull the lever all the way
back. The high beam headlights turn off
when you release the lever.
You can flash the high beam headlights
with the knob turned to “OFF”.TURN SIGNALS
To signal a turn, push the headlight/
turn signal lever up or down to position
1.
The key must be in the “ON” position.
The lever automatically returns after you
make a turn, but you may have to return
it by hand after you change lanes.
To signal a lane change, move the lever
up or down to the pressure point (position
2) and hold it.
If the turn signal indicator lights (green
lights) on the instrument panel flash faster
than normal, a front or rear turn signal
bulb is burned out.