Page 266 of 390

Driving tips
8-35
– CONTINUED –
WARNING
Never tow a trailer when the temporary spare tire is used. The temporary spare tire is not
designed to sustain the towing load. Use ofthe temporary spare tire when towing can result in failure of the spare tire and/or less
stability of the vehicle.
� Trailer towing tips
CAUTION
�Never exceed 45 mph (72 km/h) when tow-
ing a trailer in hilly country on hot days. � When towing a trailer, steering, stability,
stopping distance and braking performancewill be different from normal operation. For
safety’ s sake, you should employ extra cau-
tion when towing a trailer and you should
never speed. You should also keep the follow-ing tips in mind:
� Before starting out on a trip
� Check that the vehicle and vehicle-to-hitch mount-
ing are in good condition. If any problems are apparent, do not tow the trailer.�
Check that the vehicle sits horizontally with the
trailer attached. If the vehicle is tipped sharply up at
the front and down at the rear, check the total trailer
weight, GVW, GAWs and tongue load again, then
confirm that the load and its distribution are accept- able. � Check that the tire pressures are correct.
� Check that the vehicle and trailer are connected
properly. Confirm that. –the trailer tongue is connected properly to the
hitch ball. – the trailer lights connector is connected prop-
erly and trailer ’s brake lights illuminate when the
vehicle’ s brake pedal is pressed, and that the trail-
er’ s turn signal lights flash when the vehicle ’s turn
signal lever is operated. – the safety chains are connected properly.
– all cargo in the trailer is secured safety in posi-
tion.– the side mirrors provide a good rearward field of
view without a significant blind spot.
� Sufficient time should be taken to learn the “feel”
of the vehicle/trailer combination before starting out
on a trip. In an area free of traffic, practice turning, stopping and backing up.
Page 274 of 390

In case of emergency
9-5
– CONTINUED –
Flat tires
If you have a flat tire while driving, never brake sud- denly; keep driving straight ahead while gradually
reducing speed. Then slowly pull off the road to asafe place. �Changing a flat tire
WARNING
�Do not jack up the vehicle on an incline or a
loose road surface. The jack can come out of
the jacking point or sink into the ground and this can result in a severe accident.� Use only the jack provided with your ve-
hicle. The jack supplied with the vehicle is de-signed only for changing a tire. Never get un-der the vehicle while supporting the vehicle with this jack. � Always turn the engine off before raising the
flat tire off the ground using the jack. Neverswing or push the vehicle supported with the
jack. The jack can come out of the jackingpoint due to a jolt and this can result in a
severe accident. 1. Park on a hard, level surface, whenever possible,
then stop the engine.
2. Set the parking brake securely and shift a manual
transmission vehicle in reverse or an automatictransmission vehicle in the
“P” (Park) position.
3. Turn on the hazard warning flasher and have ev-
eryone get out of the vehicle.
HGS038BA
4. Put wheel blocks at the front and rear of the tire
diagonally opposite the flat tire.
Page 280 of 390

In case of emergency
9-11
– CONTINUED –
OM-H0377
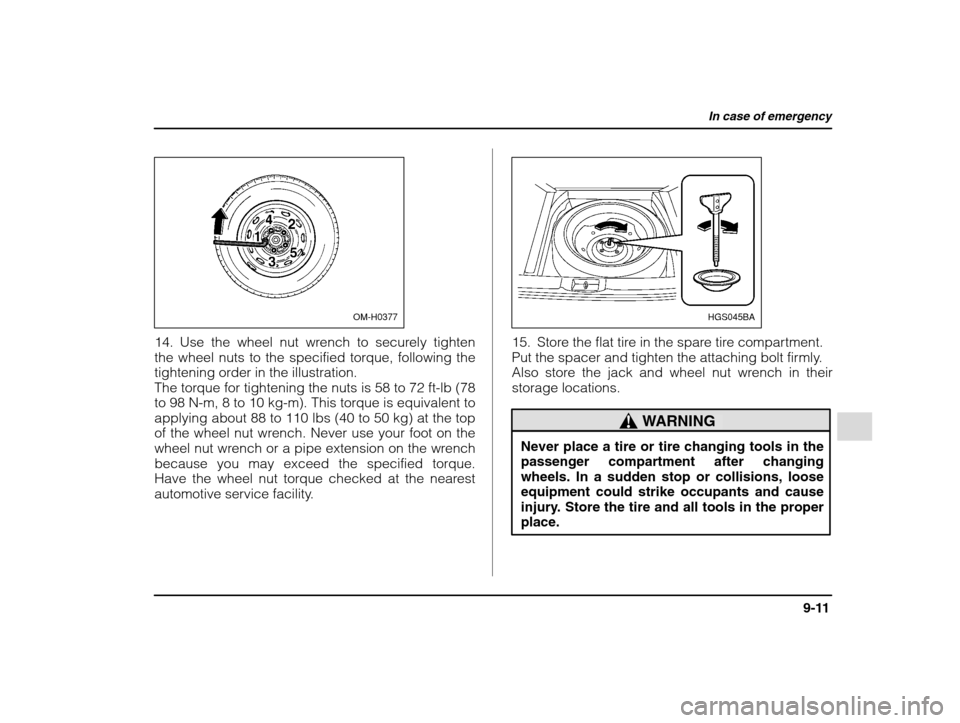
14. Use the wheel nut wrench to securely tighten
the wheel nuts to the specified torque, following the
tightening order in the illustration.
The torque for tightening the nuts is 58 to 72 ft-lb (78
to 98 N-m, 8 to 10 kg-m). This torque is equivalent toapplying about 88 to 110 lbs (40 to 50 kg) at the top
of the wheel nut wrench. Never use your foot on the
wheel nut wrench or a pipe extension on the wrench
because you may exceed the specified torque.
Have the wheel nut torque checked at the nearest
automotive service facility.
HGS045BA
15. Store the flat tire in the spare tire compartment.
Put the spacer and tighten the attaching bolt firmly.
Also store the jack and wheel nut wrench in theirstorage locations.
WARNING
Never place a tire or tire changing tools in the
passenger compartment after changing
wheels. In a sudden stop or collisions, looseequipment could strike occupants and cause
injury. Store the tire and all tools in the proper place.
Page 286 of 390
In case of emergency
9-17
– CONTINUED –
1. Take out the towing eye, screwdriver and wheel
nut wrench from the on board tool bag.
2. Pry off the cover on the front bumper using a
screwdriver, and you will find a threaded hole for at-
taching the towing eye.
3. Screw the towing eye into the threaded hole until
its thread can no longer be seen.
4. Tighten the towing eye securely with a wheel nut
wrench.
After towing, remove the towing eye from the vehicle
and stow it in the tool bag. Put the threaded hole
cover on the front bumper.
WARNING
�Do not use the towing eye except when tow-
ing your vehicle. � Be sure to remove the towing eye after tow-
ing. Leaving the towing eye mounted on the
vehicle could interfere with proper operationof the SRS airbag system in a frontal collision. Rear towing eye:
HG9004CA
CAUTION
Do not apply excessive lateral load to the tow- ing eyes.
Page 288 of 390

In case of emergency
9-19
– CONTINUED –
3. Secure the vehicle onto the carrier properly with safety chains. Each of safety chain should be
equally tightened and care must be taken not to pull
the chains so tightly that the suspension bottomsout.
CAUTION
If your vehicle has a front underspoiler and rear underspoiler (both optional), be carefulnot to scrape them when placing the vehicleon the carrier and when removing the vehicle
from the carrier.
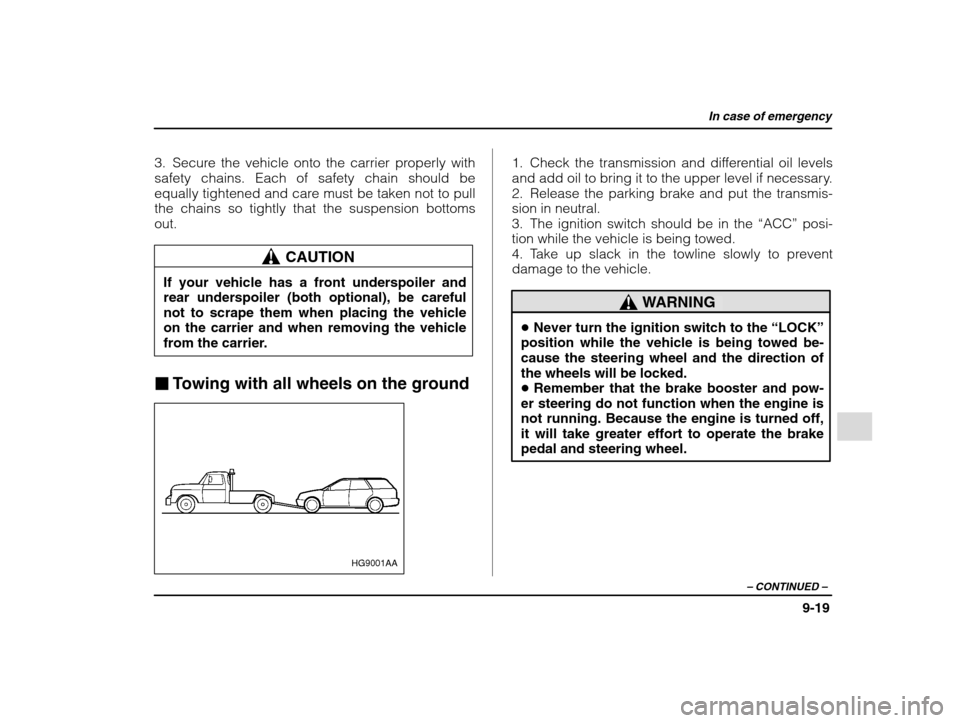
� Towing with all wheels on the ground
HG9001AA
1. Check the transmission and differential oil levels
and add oil to bring it to the upper level if necessary.
2. Release the parking brake and put the transmis-sion in neutral.
3. The ignition switch should be in the “ACC” posi-
tion while the vehicle is being towed.
4. Take up slack in the towline slowly to prevent
damage to the vehicle.
WARNING
� Never turn the ignition switch to the “LOCK”
position while the vehicle is being towed be-
cause the steering wheel and the direction ofthe wheels will be locked.� Remember that the brake booster and pow-
er steering do not function when the engine is not running. Because the engine is turned off,
it will take greater effort to operate the brakepedal and steering wheel.
Page 303 of 390
Maintenance and service
11-6
HGB000BA
2. Release the secondary hood release located
under the front grille by moving the lever toward theleft.
HBB003BA
Lift up the hood, release the hood prop from its
retainer and put the end of the hood prop into theslot in the hood.
To close the hood:
1. Lift the hood slightly and remove the hood prop
from the slot in the hood and return the prop to its
retainer.
2. Lower the hood until it approaches about 6 in.
(15 cm) from the closed position and let it drop.
3. After closing the hood, be sure the hood is
securely locked.
If this does not close the hood, release it from a
slightly higher position. Do not push the hood forci-
bly to close it. It could deform the metal.
WARNING
Always check that the hood is properly locked before you start driving. If it is not, it might flyopen while the vehicle is moving and block
your view, which may cause an accident and
serious bodily injury.
Page 308 of 390

Maintenance and service
11-11
– CONTINUED –
5. Wipe the seating surface of the drain plug with a
clean cloth and tighten it securely with a new seal-ing washer after the oil has completely drained out.
HS0176
1) Oil filter
6. Remove the oil filter with an oil filter wrench.
7. Before installing a new oil filter, apply a thin coat of engine oil to the seal.
8. Clean the rubber seal seating area of the lower
crank case and install the oil filter by hand turning.
Be careful not to twist or damage the seal.
9. Tighten it approximately two-thirds of a turn afterthe seal makes contact with the lower crank case.
CAUTION
Never over tighten the oil filter because that can result in an oil leak.
10. Pour the specified amount of engine oil throughthe filler neck.
Oil capacity: Non-turbo models: 4.2 US qt (4.0 liters, 3.5 Imp qt)
Turbo models: 4.8 US qt (4.5 liters, 4.0 Imp qt)
11. Start the engine and make sure that no oil leaks
appear around the filter ’s rubber seal.
12. Run the engine until it reaches the normal oper-
ating temperature. Then stop the engine and wait a
few minutes to allow the oil drain back. Check the oil
level again and if necessary, add more engine oil. � Recommended grade and viscosity
CAUTION
Use only engine oil with the recommended
grade and viscosity.
Page 312 of 390
Maintenance and service
11-15
– CONTINUED –
HG0115
1) Rubber gaskets
3. After refilling the reserve tank and the radiator, re- install the caps and check that the rubber gaskets
inside the radiator cap are in the proper position. � Changing the coolant
Change the engine coolant using the following pro-
cedures according to the maintenance schedule.
1. Remove the under cover.
2. Place a proper container under the drain plugand loosen the drain plug.
HGA000BD
1) Drain plug
3. Loosen the radiator cap to drain the coolant from
the radiator. Then drain the coolant from the reserve
tank. Tighten the drain plug securely.