2002 SAAB 9-3 spare wheel
[x] Cancel search: spare wheelPage 4 of 256

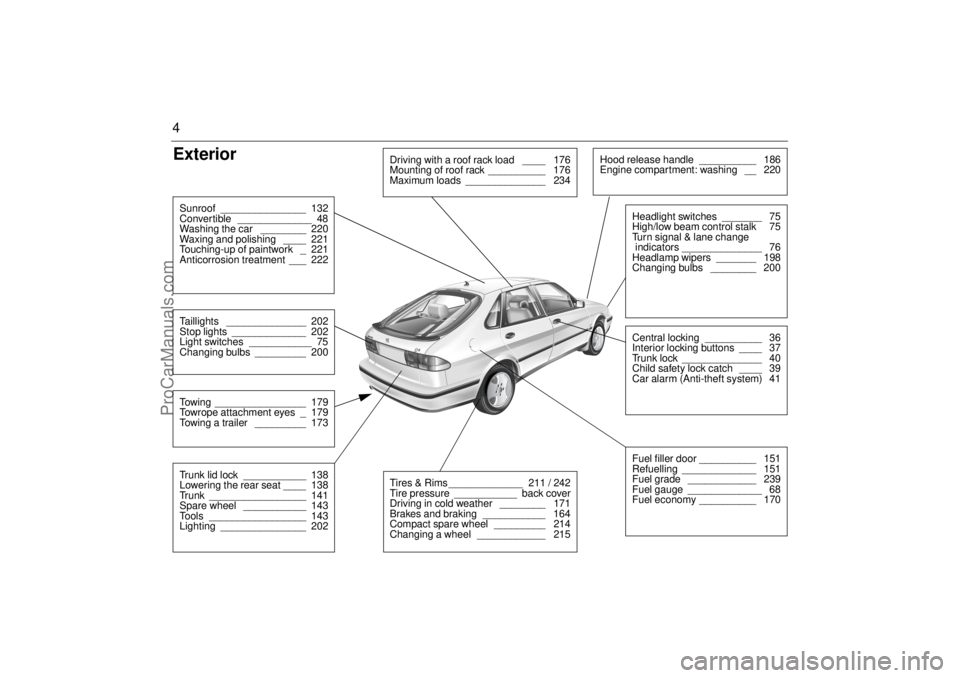
4Exterior Sunroof _______________ 132
Convertible _____________ 48
Washing the car ________ 220
Waxing and polishing ____ 221
Touching-up of paintwork _ 221
Anticorrosion treatment ___ 222Taillights ______________ 202
Stop lights _____________ 202
Light switches ___________ 75
Changing bulbs _________ 200Towing ________________ 179
Towrope attachment eyes _ 179
Towing a trailer _________ 173Trunk lid lock ___________ 138
Lowering the rear seat ____ 138
Trunk _________________ 141
Spare wheel ___________ 143
Tools _________________ 143
Lighting _______________ 202
Driving with a roof rack load ____ 176
Mounting of roof rack __________ 176
Maximum loads ______________ 234
Hood release handle __________ 186
Engine compartment: washing __ 220
Central locking __________ 36
Interior locking buttons ____ 37
Trunk lock ______________ 40
Child safety lock catch ____ 39
Car alarm (Anti-theft system) 41Headlight switches _______ 75
High/low beam control stalk 75
Turn signal & lane change
indicators ______________ 76
Headlamp wipers _______ 198
Changing bulbs ________ 200Fuel filler door __________ 151
Refuelling _____________ 151
Fuel grade ____________ 239
Fuel gauge _____________ 68
Fuel economy __________ 170
Tires & Rims _____________ 211 / 242
Tire pressure ___________ back cover
Driving in cold weather ________ 171
Brakes and braking ___________ 164
Compact spare wheel _________ 214
Changing a wheel ____________ 215
ProCarManuals.com
Page 9 of 256

9
Jack– The jack is designed only for changing a tire or mount-
ing tire snow chains.
– Car must be level and jack must be placed on firm and
level ground.
– Never crawl under car while it is jacked up.
JACKING INSTRUCTIONS
1 Set parking brake and shift transmission to park.
2 Fit top of jack into jacking point next to wheel that to
be changed (See illustration).
3 Crank jack until so that car begins to lift.
4 Remove center cap by inser ting a screw driver under
cap prying up.
5 Using socket wrench in tool kit, loosen wheels bolts
one-half turn.
6 Raise car so that tire clears ground. Loosen wheel
bolts completely and remove wheel.
7 Mount spare wheel and tighten bolts enough so
wheel is not loose.
8 Lower car. Tighten wheel bolts in crosswise order
(See illustration).
Observe max. speed limit for spare tire.
IB934
Soft top, Saab 9-3
Convertible Push the handle in before
driving away.
There would otherwise be
a risk of injury.
Soft top, Saab 9-3 ConvertibleDo not lean over top or sit in the rear seat
while activated.
Brake fluidClean filler cap before removing. Use only Dot
4 fluid from sealed container.
ProCarManuals.com
Page 123 of 256

123 Interior equipment, trunk
Interior equipment,
trunkSeats ................................. 124
Steering-wheel adjust-
ment ................................ 131
Electrical windows ........... 130
Sunroof ............................. 132
Interior lighting................. 133
Cup holder ........................ 134
Ashtrays (accessory)....... 135
Glove compartment ......... 135
Rearview mirrors.............. 137
Trunk, Coupé and 5-door 138
Tools and spare wheel .... 143
Manually opening the fuel
filler door ........................ 144
IB941
ProCarManuals.com
Page 143 of 256

143 Interior equipment, trunk
Trunk Release HandleThere is a glow-in-the-dark trunk release
handle located inside the trunk on the latch.
This handle will glow following exposure to
light. Pull the release handle down to open
the trunk from the inside.
Tools and spare wheelThe tool kit and compact spare wheel are
kept beneath the carpeting in the trunk.
The screwdriver handle has a "button" for
removing a certain type of plastic rivet.
NOTEThe trunk release handle was not
designed to be used to tie down the trunk
lid or as a an anchor point when securing
items in the trunk. Improper use of the
trunk release could damage it.
WARNING
After use, return tools and the spare
wheel to their designated locations to
reduce the risk of personal injury in the
event of a crash.
WARNING
Saab 9-3 Viggen Coupé: Avoid placing
your hands on the upper part of the rear
fender when the tailgate is to be closed
because of the risk of getting finger
caught between the spoiler and the
fender.
IB1890
IB1259
Rear spoiler, Saab 9-3 Viggen.
IB1932
Trunk Release Handle
ProCarManuals.com
Page 145 of 256

145 Starting and driving
IB943
Starting and driving
Ignition switch ................. 146
Starting the engine .......... 147
Important considerations
for driving....................... 148
Refueling .......................... 151
Engine Break-in Period... 155
Manual transmission ...... 155
Automatic transmission . 156
Cruise Control ................. 163
Braking ............................. 164
Traction Control System 166
Parking ............................. 168
Economical motoring ..... 170 Driving in cold weather ... 171
Driving in hot weather ..... 173
Towing a trailer ................ 173
Driving with a roof rack
load .................................. 176
Driving with the trunk lid
open ................................ 179
Driving in deep water....... 179
Towing the car.................. 179
Jump starting ................... 181
Driving considerations
with compact spare
wheel/tire fitted............... 184
For long trips .................... 184
ProCarManuals.com
Page 180 of 256

180 Starting and driving
Saab 9-3 ViggenThe front towing eye is stored in a storage
bag beside the spare wheel. Remove the
plastic cover with a screwdriver from the
car’s toolkit, and screw in the towing eye.
Towing a car with manual gearboxThe gear lever must be in neutral. Switch
hazard lights on.
Drive carefully and do not exceed the
speed limit for vehicles in tow.
Always try to keep the towrope taut by
gently applying the brake as necessary.
This will avoid the towrope being jerked vio-
lently.
NOTEThe design of the underside of the rear
bumper means that the rear towing eye
must not be used. This is to prevent dam-
aging the bumper.
NOTEIf the car is to be towed with the front
wheels off the ground, make sure the
parking brake is off, as this acts on the
rear wheels.
IB885
Rear towing eye
IB1331
Front towing eye, Saab 9-3 Viggen
ProCarManuals.com
Page 184 of 256

184 Starting and drivingDriving considerations
with compact spare
wheel/tire fitted The following should be observed when the
compact spare wheel (T115/70 R16) is
installed:
The compact spare is light and easy to
handle when changing the wheel. Do not
drive farther than necessary with the com-
pact spare fitted – the maximum life of the
wheel is only just over 2000 miles
(3,500 km). Have the standard wheel
repaired and reinstalled as soon as possi-
ble.Points to bear in mind when driving with a
compact spare wheel:
The car’s ground clearance is reduced
with the compact spare fitted.
Only one compact spare wheel may be
used at any time.
Take care not to hit the curb.
Do not fit snow chains.
Leave the wheel cover off, so that the
warning text is readily visible.
For long tripsBefore starting off on a long journey, it is
advisable to have your car inspected by
your Saab dealer.
Obtain a few important items to take along
on your journey such as spare bulbs, wiper
blades, fuses, a Poly-V belt and the like.
You can check some points yourself before-
hand:
Make sure that the engine is in good con-
dition.
Check that no oil or fuel leaks out of the
engine or gearbox/transmission.
Check the coolant and power steering
fluid levels. Check also for leaks.
Inspect the Poly-V belt and replace it if it
shows any signs of wear.
Check the battery charge.
Check the tires for tread pattern and air
pressure, including the compact spare
wheel.
Take an extra car key/remote control and
keep it separate, see also page 36.
Check the brakes.
Check all bulbs.
Check for the presence of the tool kit and
the jack in the car.
WARNING
Do not exceed 50 mph (80 km/h) as the
tire can overheat and adversely affect the
handling of the car.
The tire should be inflated to 60 psi
(420 kPa).
NOTETo avoid damaging a punctured alloy
wheel this can be placed outside up in the
spare-wheel well but only while driving to
the closest dealer.
A general rule is that all heavy loads must
be well secured in the luggage compart-
ment, see page 142.
ProCarManuals.com
Page 194 of 256

194 Car careBrake- clutch fluid and
brake padsChecking the fluid level The combined brake and clutch-fluid reser-
voir is transparent to facilitate checking of
the fluid level.
The level should be between the MAX and
MIN marks. Top up, as necessary, with
DOT 4 fluid. Do
not
use DOT 5 brake fluid.
Use only new brake fluid from a sealed con-
tainer.
Check that there are no leaks in the brake
system.
Changing of the brake fluid should be
carried out by an authorized Saab dealer.The vehicle´s regular braking system is
adjusted automatically, but the parking
brake has to be adjusted manually. This
work, involving adjustment of the parking
brake cables and brake pads, must only be
carried out by an authorized Saab dealer.
It is not possible to detect, through abnormal
pedal or parking brake-lever travel, whether
brake pads are worn and need replacing. It
is therefore essential that brake pads be
checked regularly, as specified in the ser-
vice program..
Brake pad wear indicators The outboard brake pads on the front
wheels incorporate pad-wear indicators.
When the lining is down to 0.11 in (3 mm),
the pad will produce a screeching, squeal-
ing or scraping noise when the brakes are
applied. New pads should be installed with-
out delay.
Brake pads should only be changed by
an authorized Saab dealer. To ensure
optimum brake performance, use only
Saab original brake pads.
WARNING
Brake fluid deteriorates as it becomes
old. Because it is hygroscopic, it absorbs
water from the air and, in time, could allow
vapor to form in the brake system, thus
reducing its performance. It is therefore
important that brake fluid be changed reg-
ularly, as specified in the service pro-
gram.
NOTEAvoid spilling brake fluid onto paintwork,
since it can cause the paint to bubble and
lift. If any brake fluid is spilled, the area
should be flushed with large quantities of
water as quickly as possible.
IB894
ProCarManuals.com