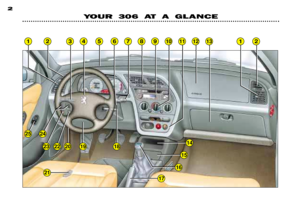
Page 57 of 127
YOUR 306 IN DETAIL51
Ventilation 1 - Windscreen demisting or de-icing vents.
2 - Front windows demisting or de-icing vents.
3 - Side vents.
4 - Central vents.
5 - Air outlet to front footwells.
6 - Air outlet to rear footwells.
Advice on use
- Position the air flow control at a sufficient level to ensure correct renewal of air inside the vehicle.
- Select the most suitable air distribution for your requirements and the climatic conditions.
- Select a suitable temperature setting and only modify it gradually for your comfort.
Page 58 of 127
321
YOUR 306 IN DETAIL
52
To quickly de-ice or demist the windscreen and the side windows, set the heating and air flow controls to maximum.
To obtain even air distribution, ensure that the external air intake vent and the ven- tilation vents are not blocked and that the air can move freely under the front seats. 2 - Adjusting the temperature
Turn the knob
2to the blue zone
(outside temperature) or to the red zone (hot).
3 - Adjusting the air flow
Turn the knob 3to the required flow
position.
This position prevents the
entry of outside air. It mustonly be used for a short timeto prevent the entry ofunpleasant odours or dust.
1 - Adjusting the air distribution
To direct hot or cold air, turn knob 1to the desired position.
Windscreen and side windows. Windscreen, side windows and footwells. Footwells only. Side and central vents.
HEATING
Page 59 of 127
 or to the red zone (hot).
3 - Adjusting the air di")
43
21
53
1 - Switching on Press the switch 1, the operating light will come on.
2 - Adjusting the temperature
Turn the knob 2to the blue zone (cold) or to the red zone (hot).
3 - Adjusting the air distribution
To direct the hot or cold air, turn the knob 3to the desired position. 4 - Adjusting the air flow
Turn the knob
4to obtain the desired
flow.
Entry of outside air This is the normal operating position. Recirculation of interior air This position prevents the
entry of outside air. Used at the same time as the
air conditioning, this will improve air conditioning performance. Used on its own, it prevents the entry of outside air (dust, unpleasantodours) but there is a risk of misting ofthe windows.
Avoid continuous operation in interior air recirculation mode. Important precautions: Operate the air conditioning system for 5 to 10 minutes once or twice amonth to keep it in good working
order. It is advisable to change the air condi- tioning system fluid every two years.
If the system is not producing cold air, stop using it and contact a
PEUGEOT dealer.
Windscreen and side windows. Windscreen, side windows and footwells. Footwells only. Side and central vents.
YOUR 306 IN DETAIL
AIR CONDITIONING
Page 60 of 127
23
4
1
5
543 - Adjusting the air distribution
To direct the hot or cold air, turn the knob 3to the desired position.
This provides optimum comfort as well as dehumidifying the air inside the vehicle.
In particular, it allows the temperature to be lowered in summer and the effective-
ness of the demisting to be increased in winter. 1 - Switching onPress the switch 1, the operating light will come on.
2 - Adjusting the temperature:
Turn the knob 2to the blue zone (cold) or to the red zone (hot).
On positioning the knob in the white zone the system automatically controls the ope-
ration of the air conditioning. This ensures a comfortable temperature whatever the climatic conditions may be.
Temperature selection in auto mode requires 12 to 15 seconds before the required temperature is reached. Windscreen and side windows. Windscreen, side windows and footwells.
Footwells only. Side and central vents.
YOUR 306 IN DETAIL
AUTOMATIC AIR CONDITIONING
Page 61 of 127

55
4 - Adjusting the air flow
In the AUTO position the flow is controlled automatically in accordancewith the temperature selected.
You can, however, adjust the flow manually by turning the knob 4accor-
ding to the desired flow.
In AUTO mode, this automatically adjusts the temperature inside thevehicle according to your wishes (pre-
set temperature). To do this, the elec-tronic control unit adjusts the tempe-rature and the flow of air at the ventsand operates the air conditioning
system if necessary. 5 - Recirculation of interior air Press the switch 5, the indicator light
comes on.The air conditioning comes into ope-
ration automatically. This position must only be used in exceptional circumstances to:
- improve the performance of the air conditioning,
- prevent the entry of external air (dust, unpleasant odours),
- speed up heating inside the vehicle with a risk of misting of the windows. Special features If the air distribution control is in the windscreen de-icing position, the airconditioning system will start opera-ting automatically when the engine isswitched on.
If the air flow control is in the AUTO position, and air recirculation is selec-ted, air conditioning will start automa-tically in order to prevent condensa-tion on the windows. When you switch on the ignition, the air conditioning will automaticallyreturn to the operating mode it was inwhen it was last used. If the inside
temperature is greatly different fromthe required temperature displayedand the outside temperature is above5 ¡C the air conditioning will switch onautomatically regardless of the posi-tion of the air flow control. When the ignition is switched on, if the system had been in air recirculationmode, the system will automaticallyallow entry of outside air unless thetemperature inside the vehicle is over30 ¡C.
Important precautions Operate the air conditioning system for 5 to 10 minutes once or twice amonth to keep it in good working
order. It is advisable to change the air condi- tioning system fluid every 2 years.
If the system is not producing cold air, stop using it and contact a
PEUGEOT dealer.
YOUR 306 IN DETAIL
Page 62 of 127
64
5
2
1
3
YOUR 306 IN DETAIL 83
SEATS
1 - Forward-backwards adjustment Lift the lever and slide the seat forwards or backwards.
2 - Adjusting the driver Õs seat height
Pull the telescopic handle forwards andpivot it up or down.
3 - Adjusting the seat back angle Turrn the knob to obtain the best angle(4/5-door and estate). Lift the handle to obtain the best angle (3-door).
4 - Lumbar adjustment* Turn the knob.
5 - Access to the rear seats (3-door) Lift the handle, tilt the seat-back andslide the seat forwards. When it slidesback, the seat will return to its originalposition.
6 - Head restraint Height adjustment: slide the headrestraint. Adjustment is correct when the top of the head restraint is level with the top of thehead. The angle of the head restraint can also be adjusted.
To remove the head restraint, press the tab and pull the head restraint upwards.
* According to specification.
Page 63 of 127

84
YOUR 306 IN DETAIL
Heated seat controls* Press the switch.The temperature is controlled auto-
matically. Pressing a second time stops opera- tion.Isofix mounting** The Isofix mountings available on the two rear seats allow for the installa-tion of
special child seats** , appro-
ved by UTAC for Peugeot vehiclesand marketed within the network.The fixings are available as anaccessory and must be fitted by an
approved PEUGEOT dealer. The locks incorporated in the child seat fit onto the mounting and ensu-re quick, reliable and safe installation
of the seats. The combined use ofthe seat belt is compulsoryfor a for-
ward-facing child seat. In the front, it is compulsoryto fit the
child seat in the rear-facing posi- tion*** (in this instance it is imperati-ve to disarm the passenger airbag if
your vehicle is fitted with one). Theforward-facing position is permitted
in the rear.
* According to specification.
** During the model year.
*** According to current legislation.
For maximum safety, it is
essential
to adjust the corresponding front seat to the intermediate longitudinal posi-tion, seat back upright, Follow the instructions for fitting the child seat in the leaflet providedwhen the child seat is purchased.
Page 64 of 127

To fold the rear seats:
- insert the seat belt stalks in the hooks A.
- pull the strap 1.
- tilt the seat cushion 2against the front")
1
1
3
5
2
A4
85
YOUR 306 IN DETAIL
REAR SEATS (3 and 5 doors)
To fold the rear seats:
- insert the seat belt stalks in the hooks A.
- pull the strap 1.
- tilt the seat cushion 2against the front seats.
- position the seat belt under the lever 3(5-door) or under the strap guide
(3-door).
- unlock the seat back using the controls on the side 3(5-door) or on the seat
back 4(3-door).
- tilt the seat back 5.
To tilt the rear seats, always start with the seat cushion, never with the seat back (risk of damage). When repositioning, take care to avoid trapping the seat belts under the seat cushion or behind the seat back.
To remove the rear seat cushion, tilt the seat cushion through 90¡ and remove it.
To replace the seat cushion: position it on the front securing plates and lower it into its normal position. Rear parcel shelf Rear parcel shelf with integral speakers
To remove:
- Turn the speaker connector to the
left then disconnect it.
- Unhook the two cords.
- Raise the shelf.
- Remove the shelf.Storage: turn the shelf over and lay it flat in the boot. Rear parcel shelf without integral speakers
To remove:
- Unhook the two cords.
- Raise the shelf.
- Remove the shelf.
 1
1 2
2 3
3 4
4 5
5 6
6 7
7 8
8 9
9 10
10 11
11 12
12 13
13 14
14 15
15 16
16 17
17 18
18 19
19 20
20 21
21 22
22 23
23 24
24 25
25 26
26 27
27 28
28 29
29 30
30 31
31 32
32 33
33 34
34 35
35 36
36 37
37 38
38 39
39 40
40 41
41 42
42 43
43 44
44 45
45 46
46 47
47 48
48 49
49 50
50 51
51 52
52 53
53 54
54 55
55 56
56 57
57 58
58 59
59 60
60 61
61 62
62 63
63 64
64 65
65 66
66 67
67 68
68 69
69 70
70 71
71 72
72 73
73 74
74 75
75 76
76 77
77 78
78 79
79 80
80 81
81 82
82 83
83 84
84 85
85 86
86 87
87 88
88 89
89 90
90 91
91 92
92 93
93 94
94 95
95 96
96 97
97 98
98 99
99 100
100 101
101 102
102 103
103 104
104 105
105 106
106 107
107 108
108 109
109 110
110 111
111 112
112 113
113 114
114 115
115 116
116 117
117 118
118 119
119 120
120 121
121 122
122 123
123 124
124 125
125 126
126


