Page 133 of 235
SPECIAL WINTER EQUIPMENT
It is recommended that the following items
be carried in the vehicle during winter:
1. A scraper and stiff-bristled brush to re-
move ice and snow from the windows
and wiper blades.
2. A sturdy, flat board to be placed under
the jack to give it firm support.
3. A shovel to dig the vehicle out of snow-
drifts.
4. Extra window washer fluid to refill the
reservoir tank.
DRIVING ON SNOW OR ICE
WARNING
cWet ice (32ÉF, 0ÉC and freezing rain),
very cold snow or ice can be slick
and very hard to drive on. The ve-
hicle will have much less traction or
``grip'' under these conditions. Try to
avoid driving on wet ice until the
road is salted or sanded.cWhatever the condition, drive with
caution. Accelerate and slow down
with care. If accelerating or down-
shifting too fast, the drive wheels
will lose even more traction.
c
Allow more stopping distance under
these conditions. Braking should be
started sooner than on dry pavement.
cAllow greater following distances on
slippery roads.
cWatch for slippery spots (glare ice).
These may appear on an otherwise
clear road in shaded areas. If a patch
of ice is seen ahead, brake before
reaching it. Try not to brake while on
the ice, and avoid any sudden steer-
ing maneuvers.
cDo not use cruise control on slippery
roads.
cSnow can trap dangerous exhaust
gases under your vehicle. Keep
snow clear of the exhaust pipe and
from around your vehicle.
ENGINE BLOCK HEATER
(if so equipped)
An engine block heater to assist extreme
cold temperature starting is available
through an authorized NISSAN dealer.
WARNING
Do not use your heater with an un-
grounded electrical system or two-
pronged (cheater) adapters. You can be
injured by an electrical shock if you use
an ungrounded connection.
5-22Starting and driving
ZX
Page 135 of 235
CHANGING A FLAT TIRE
If you have a flat tire, follow the instructions
below.
Stopping the vehicle
1. Safely move the vehicle off the road and
away from traffic.
2. Turn on the hazard warning flashers.
3. Park on a level surface and apply the
parking brake. Shift the manual transmis-
sion into R (Reverse), or the automatic
transmission into P (Park).
4. Turn off the engine.
5. Raise the hood to warn other traffic, and
to signal professional road assistance
personnel that you need assistance.
6. Have all passengers get out of the ve-
hicle and stand in a safe place, away
from traffic and clear of the vehicle.
WARNING
cMake sure the parking brake is se-
curely applied and the manual trans-
mission is shifted into R (Re-verse), or the automatic transmis-
sion into P (Park).
cNever change tires when the vehicle
is on a slope, ice or slippery areas.
This is hazardous.
cNever change tires if oncoming traf-
fic is close to your vehicle. Wait for
professional road assistance.
Blocking wheels
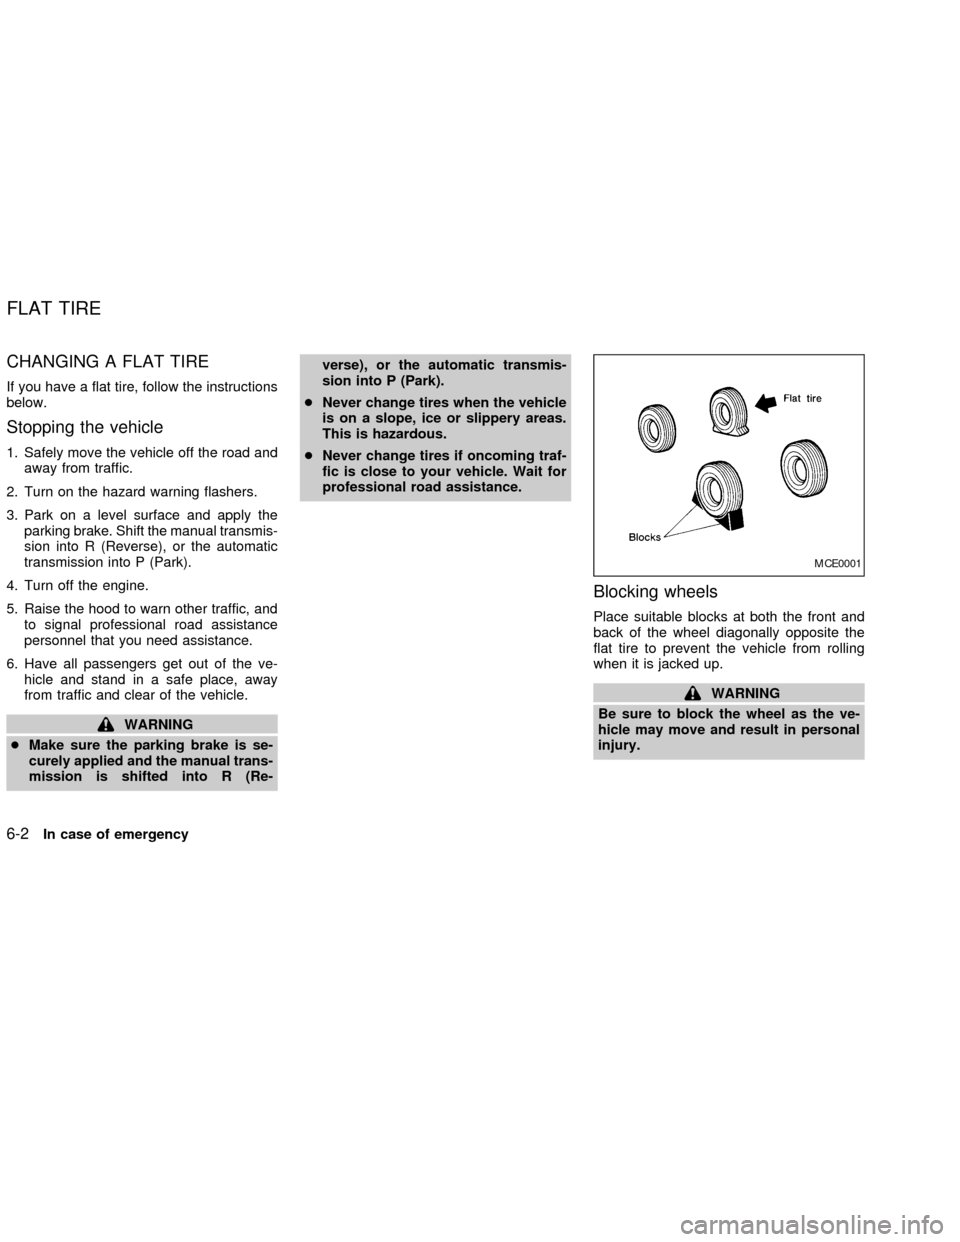
Place suitable blocks at both the front and
back of the wheel diagonally opposite the
flat tire to prevent the vehicle from rolling
when it is jacked up.
WARNING
Be sure to block the wheel as the ve-
hicle may move and result in personal
injury.
MCE0001
FLAT TIRE
6-2In case of emergency
ZX
Page 136 of 235
Getting the spare tire and tools
1. Open the trunk. Lift the trunk floor carpet-
ing and spare tire cover. Remove the tool
bag (which contains the jack rod and
wheel nut wrench) and the spare tire. If
necessary, use the flat end of the jack
rod as shown to loosen the spare tire
hold-down bolt.2. To remove the jack, turn the jack screw
counterclockwise. Use the tapered end
of the jack rod to loosen the jack from its
storage position.
WCE0012WCE0009
In case of emergency6-3
ZX
Page 137 of 235
Removing wheel covers
Remove the wheel covers as shown.
CAUTION
Do not use your hands to pry off wheel
caps or wheel covers. Doing so could
result in personal injury.
WCE0018
6-4In case of emergency
ZX
Page 138 of 235
Bolt-on wheel covers
Wheel cover attachment to the wheel is
made by one of the wheel lug nuts. This
wheel lug nut needs to be removed before
the wheel cover can be removed from the
wheel.
Jacking up vehicle and removing the
damaged tire
WARNING
cNever get under the vehicle while it
is supported only by the jack.
cUse only the jack provided with your
vehicle. Do not use the jack provided
with your vehicle on other vehicles.
The jack is designed for lifting only
your vehicle during a tire change.
cUse the correct jack-up points.
Never use any other part of the ve-
hicle for jack support.
LCE0010WCE0006
In case of emergency6-5
ZX
Page 139 of 235
cNever jack up the vehicle more than
necessary.
cNever use blocks on or under the
jack.
cDo not start or run engine while
vehicle is on the jack. It may cause
the vehicle to move.
cDo not allow passengers to stay in
the vehicle while it is on the jack.cNever run the engine with a wheel off
the ground. It may cause the vehicle
to move.
Carefully read the caution label attached
to the jack body and the following in-
structions.
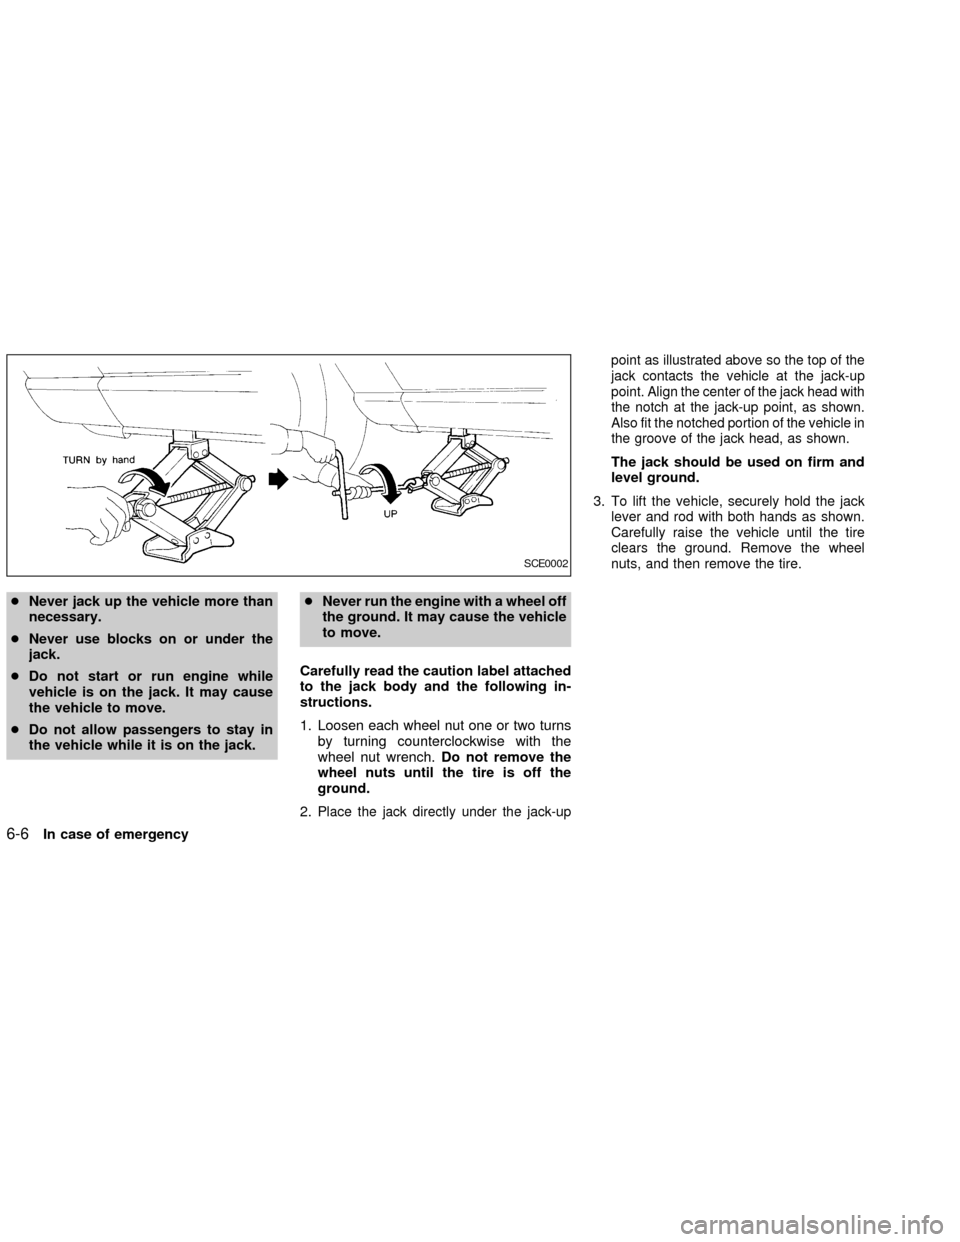
1. Loosen each wheel nut one or two turns
by turning counterclockwise with the
wheel nut wrench.Do not remove the
wheel nuts until the tire is off the
ground.
2.
Place the jack directly under the jack-uppoint as illustrated above so the top of the
jack contacts the vehicle at the jack-up
point. Align the center of the jack head with
the notch at the jack-up point, as shown.
Also fit the notched portion of the vehicle in
the groove of the jack head, as shown.
The jack should be used on firm and
level ground.
3.
To lift the vehicle, securely hold the jack
lever and rod with both hands as shown.
Carefully raise the vehicle until the tire
clears the ground. Remove the wheel
nuts, and then remove the tire.
SCE0002
6-6In case of emergency
ZX
Page 140 of 235
Installing the spare tire
The TEMPORARY USE ONLY spare tire
is designed for emergency use. See spe-
cific instructions under the heading
``Wheels and tires'' in the ``Maintenance
and do-it- yourself'' section of this own-
er's manual.
1. Clean any mud or dirt from the surface
between the wheel and hub.
2. Carefully put the spare tire on and tighten
the wheel nuts finger tight.
3. With the wheel nut wrench, tighten wheelnuts alternately and evenly until they are
tight.
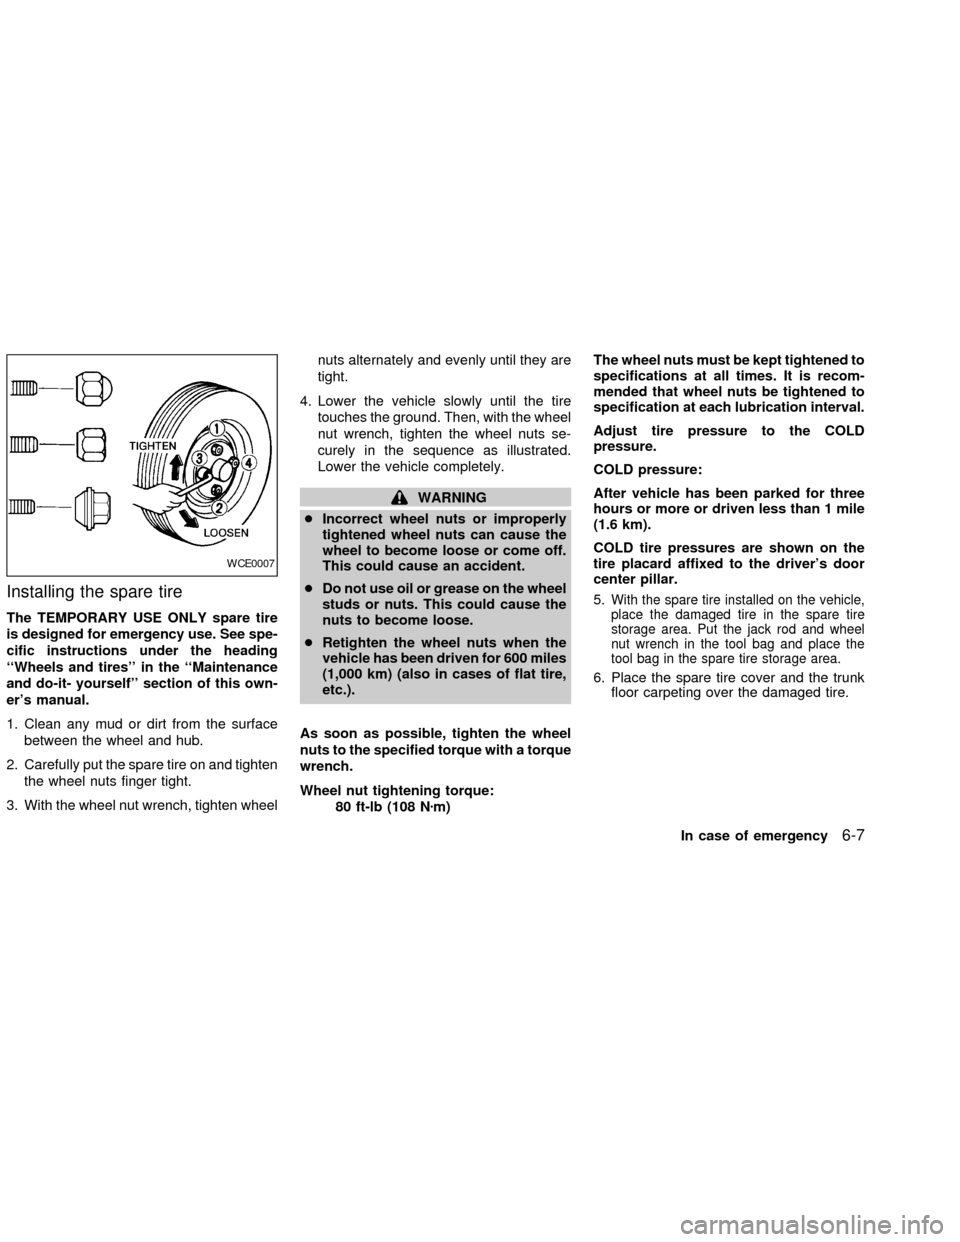
4. Lower the vehicle slowly until the tire
touches the ground. Then, with the wheel
nut wrench, tighten the wheel nuts se-
curely in the sequence as illustrated.
Lower the vehicle completely.
WARNING
cIncorrect wheel nuts or improperly
tightened wheel nuts can cause the
wheel to become loose or come off.
This could cause an accident.
cDo not use oil or grease on the wheel
studs or nuts. This could cause the
nuts to become loose.
cRetighten the wheel nuts when the
vehicle has been driven for 600 miles
(1,000 km) (also in cases of flat tire,
etc.).
As soon as possible, tighten the wheel
nuts to the specified torque with a torque
wrench.
Wheel nut tightening torque:
80 ft-lb (108 Nzm)The wheel nuts must be kept tightened to
specifications at all times. It is recom-
mended that wheel nuts be tightened to
specification at each lubrication interval.
Adjust tire pressure to the COLD
pressure.
COLD pressure:
After vehicle has been parked for three
hours or more or driven less than 1 mile
(1.6 km).
COLD tire pressures are shown on the
tire placard affixed to the driver's door
center pillar.
5.
With the spare tire installed on the vehicle,
place the damaged tire in the spare tire
storage area. Put the jack rod and wheel
nut wrench in the tool bag and place the
tool bag in the spare tire storage area.
6. Place the spare tire cover and the trunk
floor carpeting over the damaged tire.
WCE0007
In case of emergency6-7
ZX
Page 141 of 235
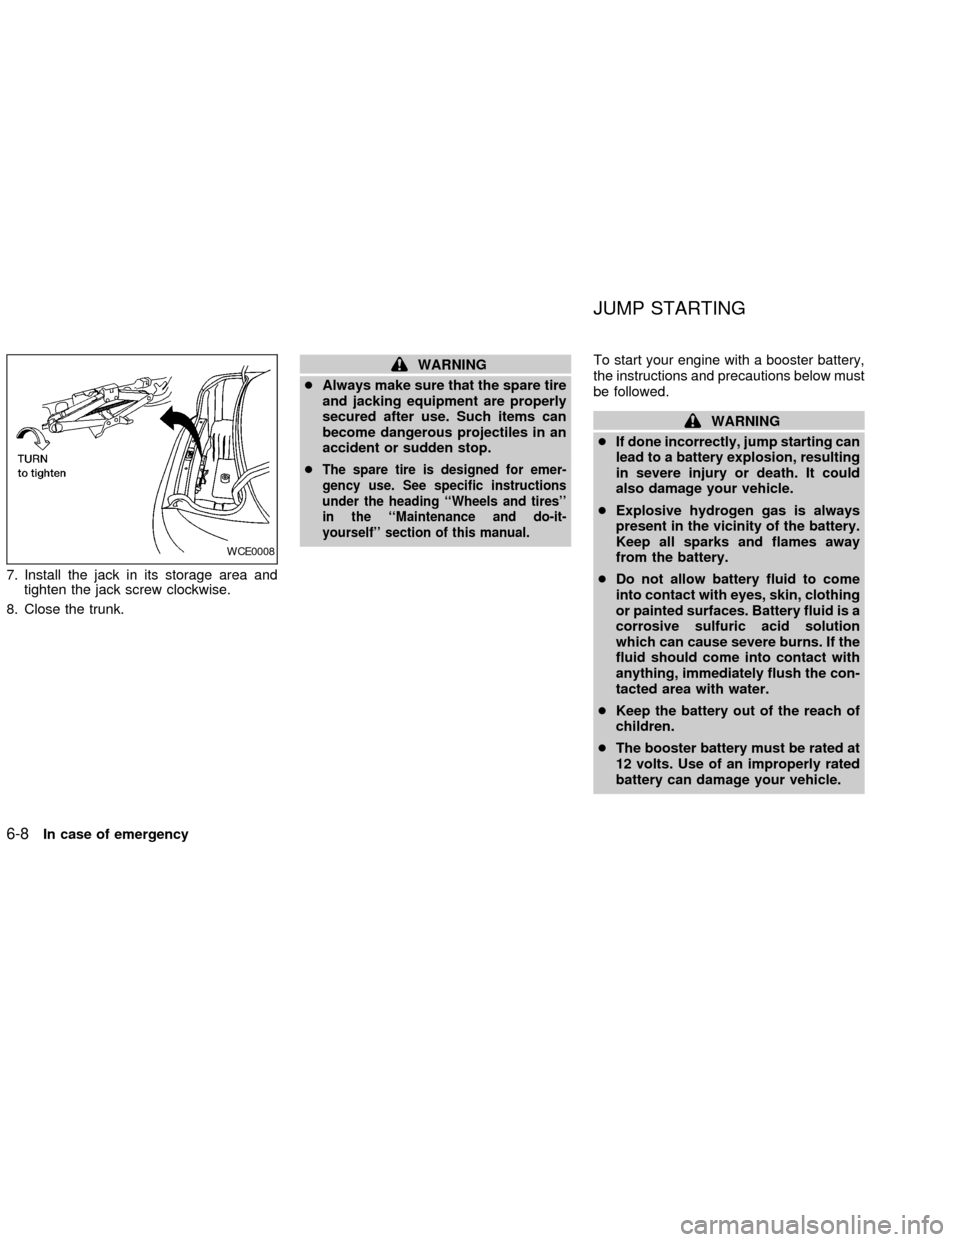
7. Install the jack in its storage area and
tighten the jack screw clockwise.
8. Close the trunk.
WARNING
cAlways make sure that the spare tire
and jacking equipment are properly
secured after use. Such items can
become dangerous projectiles in an
accident or sudden stop.
c
The spare tire is designed for emer-
gency use. See specific instructions
under the heading ``Wheels and tires''
in the ``Maintenance and do-it-
yourself'' section of this manual.
To start your engine with a booster battery,
the instructions and precautions below must
be followed.
WARNING
cIf done incorrectly, jump starting can
lead to a battery explosion, resulting
in severe injury or death. It could
also damage your vehicle.
cExplosive hydrogen gas is always
present in the vicinity of the battery.
Keep all sparks and flames away
from the battery.
cDo not allow battery fluid to come
into contact with eyes, skin, clothing
or painted surfaces. Battery fluid is a
corrosive sulfuric acid solution
which can cause severe burns. If the
fluid should come into contact with
anything, immediately flush the con-
tacted area with water.
cKeep the battery out of the reach of
children.
cThe booster battery must be rated at
12 volts. Use of an improperly rated
battery can damage your vehicle.
WCE0008
JUMP STARTING
6-8In case of emergency
ZX