2002 NISSAN QUEST warning
[x] Cancel search: warningPage 140 of 294
completely closed before opening the
fuel door.
WARNING
cGasoline is extremely flammable and
highly explosive under certain con-
ditions. You could be burned or se-
riously injured if it is misused or
mishandled. Always stop the engine
and do not smoke or allow open
flames or sparks near the vehicle
when refueling.
c
Fuel may be under pressure. Turn the
cap one-half turn, and wait for any
``hissing'' sound to stop to prevent
fuel from spraying out and possibly
causing personal injury. Then re-
move the cap.
cDo not attempt to top off the fuel
tank after the fuel pump nozzle shuts
off automatically. Continued refuel-
ing may cause fuel overflow, result-
ing in fuel spray and possibly a fire.
cUse only an original equipment type
fuel filler cap as a replacement. It has
a built-in safety valve needed for
proper operation of the fuel system
and emission control system. Anincorrect cap can result in a serious
malfunction and possible injury.
cNever pour fuel into the throttle body
to attempt to start your vehicle.
CAUTION
cIf fuel is spilled on the vehicle body,
flush it away with water to avoid
paint damage.
cTighten until the fuel filler cap clicks.
Failure to tighten the fuel filler cap
properly may cause the
mal-
function indicator lamp (MIL) to illu-
minate. If the
lamp illuminates
because the fuel filler cap is loose or
missing, tighten or install the cap
and continue to drive the vehicle.
The
lamp should turn off after
a few driving trips. If thelamp
does not turn off after a few driving
trips, have the vehicle inspected by
an authorized NISSAN dealer.
cFor additional information, see the
``Malfunction indicator lamp (MIL)''
in the ``Instrument and controls''
section earlier in this manual.
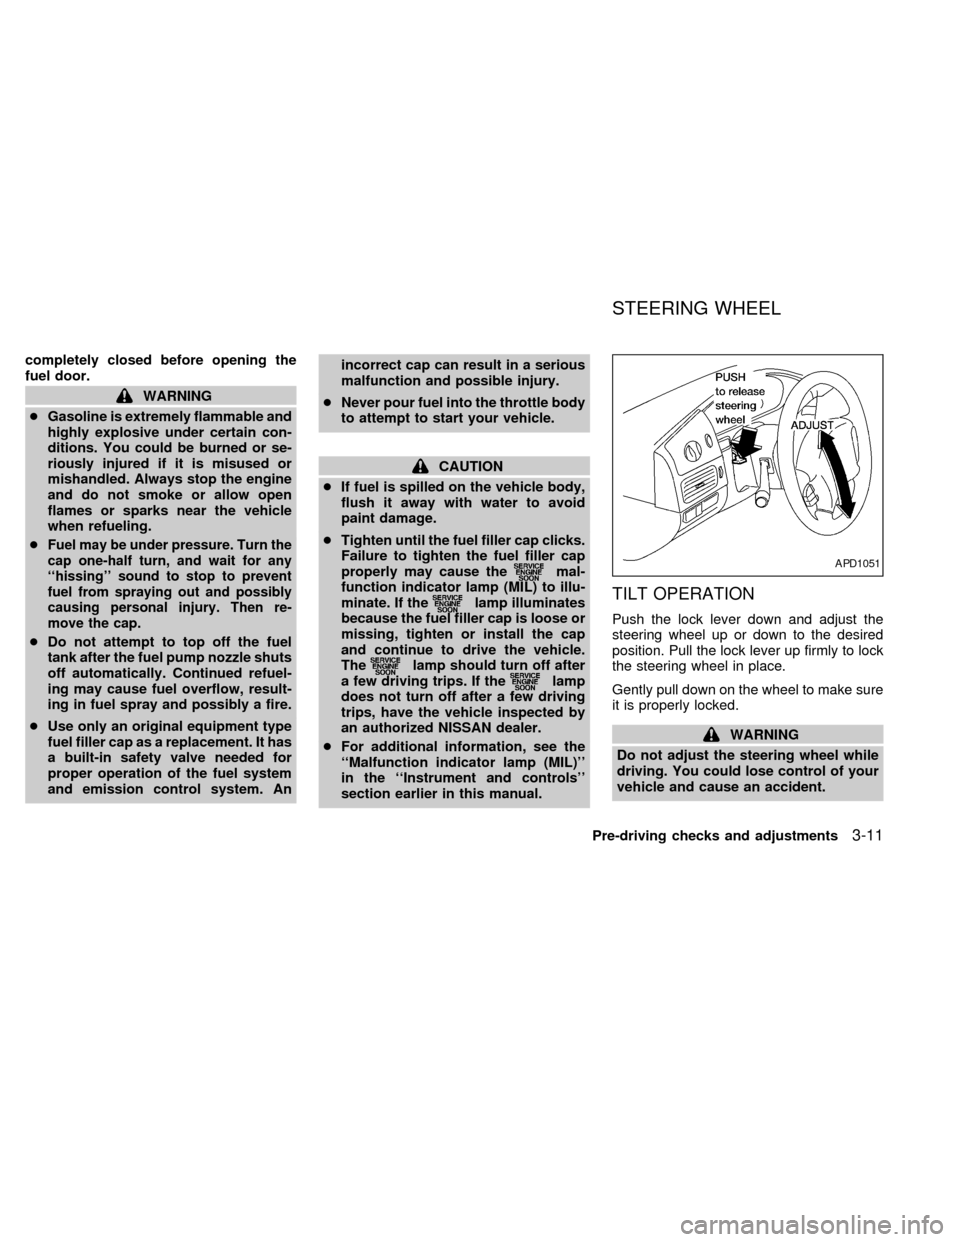
TILT OPERATION
Push the lock lever down and adjust the
steering wheel up or down to the desired
position. Pull the lock lever up firmly to lock
the steering wheel in place.
Gently pull down on the wheel to make sure
it is properly locked.
WARNING
Do not adjust the steering wheel while
driving. You could lose control of your
vehicle and cause an accident.
APD1051
STEERING WHEEL
Pre-driving checks and adjustments3-11
ZX
Page 142 of 294
2. Push and hold the memory seat and
mirror position 1 or position 2 button for
at least 3 seconds.
cThe indicator light will illuminate and re-
main illuminated until the position is pro-
grammed.
cAfter the position has been programmed
the indicator light will flash to indicate the
position is set.
The driver seat and/or outside mirrors must
be adjusted before programming position 1
or position 2.
Programming a keyfob
1. Move the driver seat and outside mirrors
by pressing the desired position 1 or
position 2 button.
2. Press and hold the same (position 1 or
position 2) button.
3. Within 10 seconds press the
button on
the keyfob.
The keyfob is now programmed for that
(position 1 or position 2) button.
After the keyfob has been programmed, the
memory seat and mirror button indicator
light will flash to indicate the keyfob isprogrammed. If the memory seat button is
pressed and held the indicator light will
remain illuminated for as long as the button
is held or 10 seconds which ever is shorter.
To remove a keyfob from the memory seat
system press and hold both memory seat
and mirror position buttons 1 and 2 and then
press the
button on the keyfob.
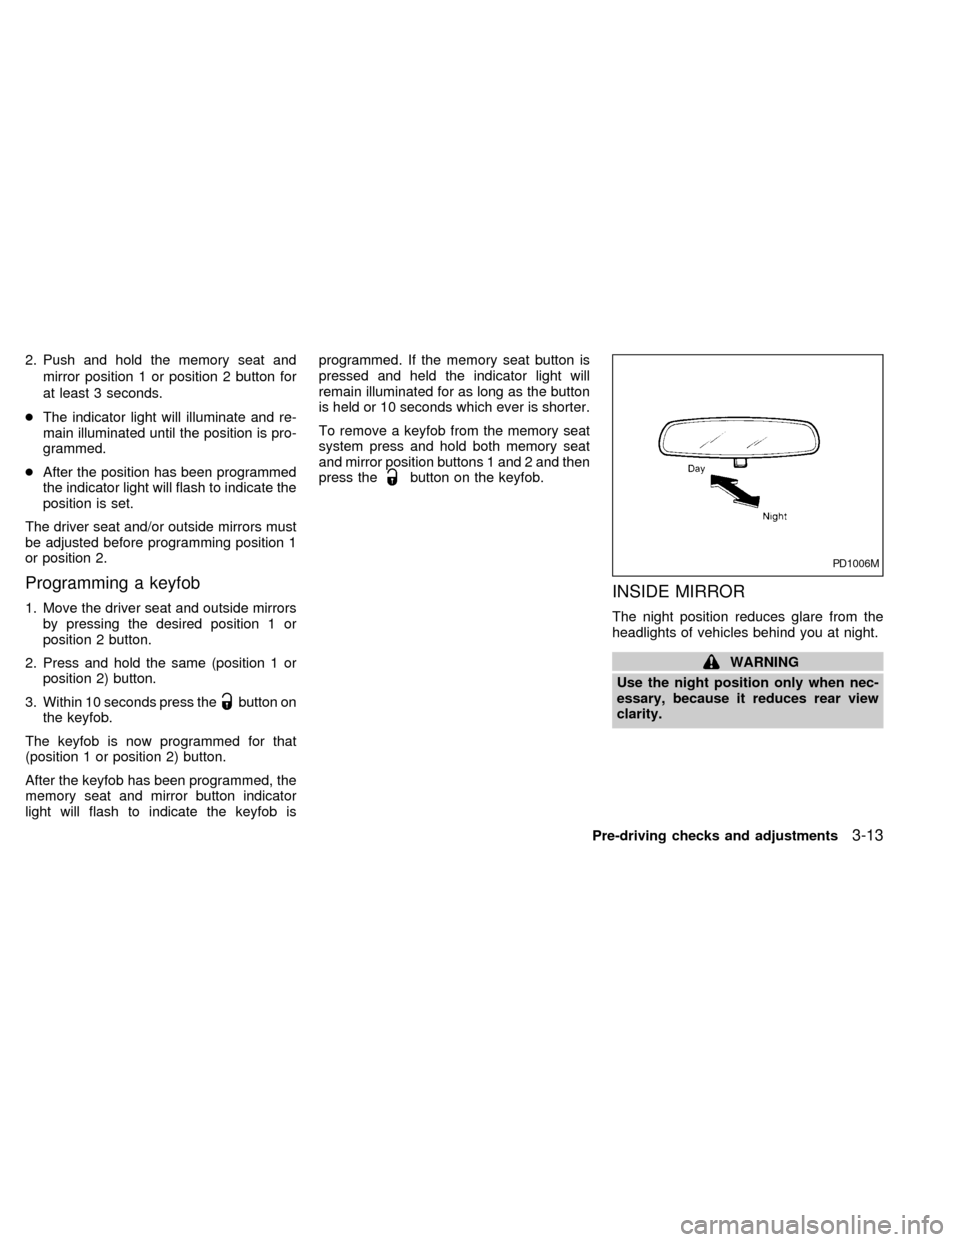
INSIDE MIRROR
The night position reduces glare from the
headlights of vehicles behind you at night.
WARNING
Use the night position only when nec-
essary, because it reduces rear view
clarity.
PD1006M
Pre-driving checks and adjustments3-13
ZX
Page 143 of 294
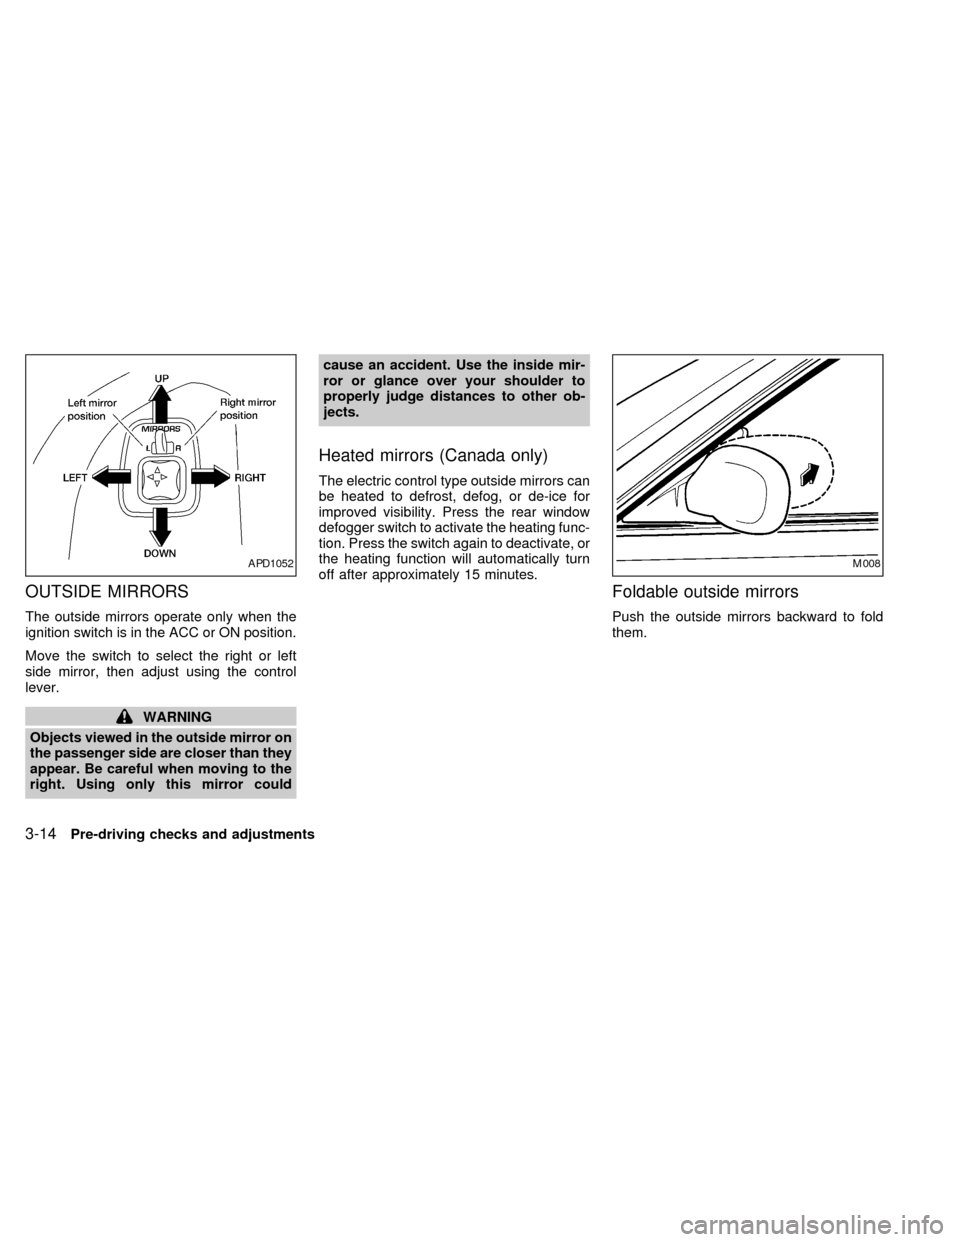
OUTSIDE MIRRORS
The outside mirrors operate only when the
ignition switch is in the ACC or ON position.
Move the switch to select the right or left
side mirror, then adjust using the control
lever.
WARNING
Objects viewed in the outside mirror on
the passenger side are closer than they
appear. Be careful when moving to the
right. Using only this mirror couldcause an accident. Use the inside mir-
ror or glance over your shoulder to
properly judge distances to other ob-
jects.
Heated mirrors (Canada only)
The electric control type outside mirrors can
be heated to defrost, defog, or de-ice for
improved visibility. Press the rear window
defogger switch to activate the heating func-
tion. Press the switch again to deactivate, or
the heating function will automatically turn
off after approximately 15 minutes.
Foldable outside mirrors
Push the outside mirrors backward to fold
them.
APD1052M008
3-14Pre-driving checks and adjustments
ZX
Page 146 of 294
WARNING
cThe air conditioner cooling function
operates only when the engine is
running.
cDo not leave children, impaired
adults, or pets alone in your vehicle.
On hot, sunny days, temperatures in
a closed vehicle could quickly be-
come high enough to cause severe
or possibly fatal injuries to people or
animals.
cDo not use the recirculation mode
for long periods as it may cause the
interior air to become stale and the
windows to fog up.
cPositioning of the heater and air con-
ditioner controls should not be done
while driving, so full attention may
be given to vehicle operation.
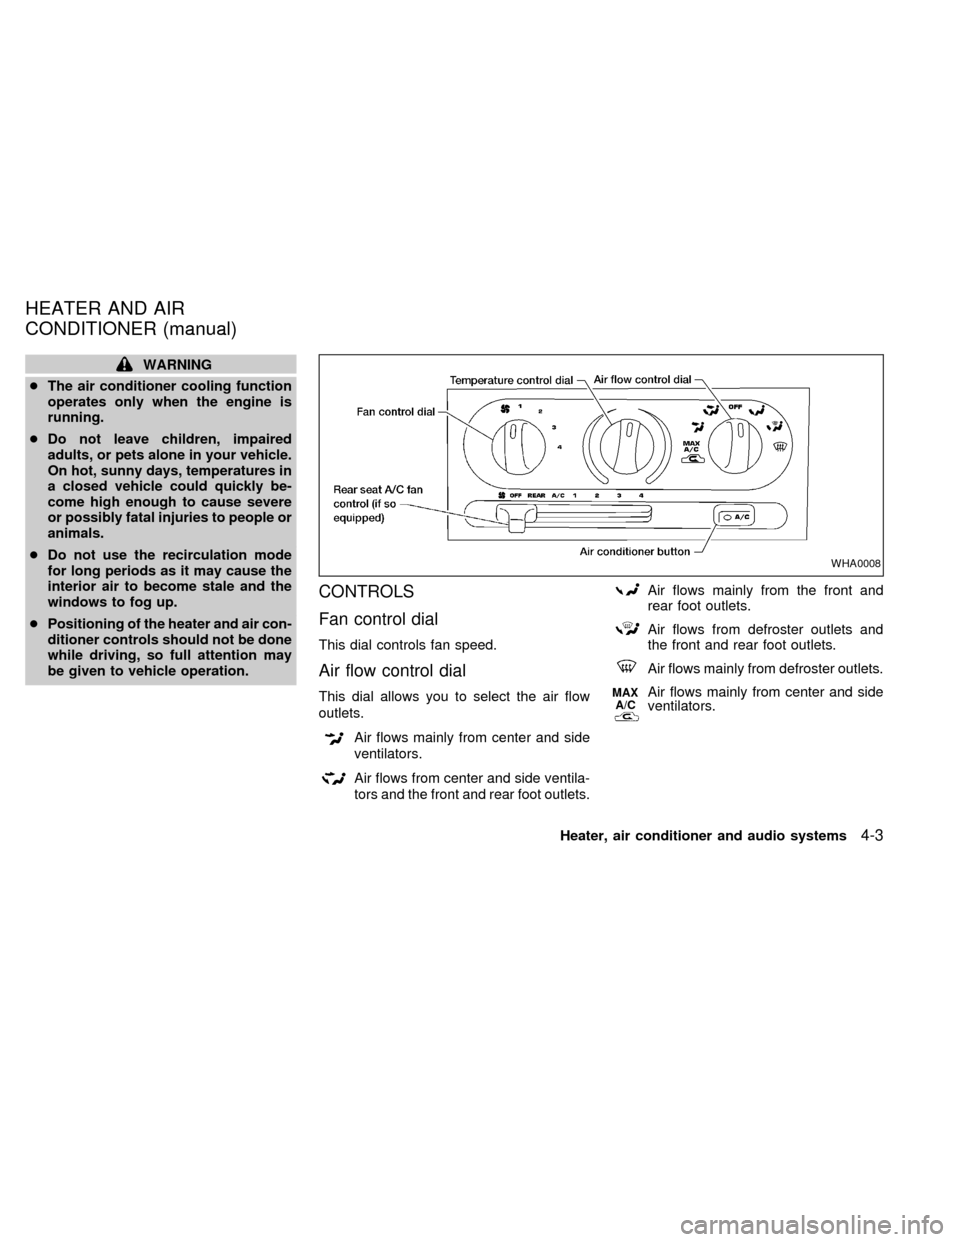
CONTROLS
Fan control dial
This dial controls fan speed.
Air flow control dial
This dial allows you to select the air flow
outlets.
Air flows mainly from center and side
ventilators.
Air flows from center and side ventila-
tors and the front and rear foot outlets.
Air flows mainly from the front and
rear foot outlets.
Air flows from defroster outlets and
the front and rear foot outlets.
Air flows mainly from defroster outlets.
MAX
A/CAir flows mainly from center and side
ventilators.
WHA0008
HEATER AND AIR
CONDITIONER (manual)
Heater, air conditioner and audio systems4-3
ZX
Page 148 of 294

into the passenger compartment which
helps defog the windshield.
Bi-level heating/cooling
The bi-level mode directs air to the side and
center vents and to the front and rear floor
outlets.
Bi-level is also a cooling mode when high
sun load conditions are present with cool
temperatures.
With the A/C system in operation, this mode
can be used to cool the passenger's or
driver's feet under high temperature condi-
tions.
With the A/C system in operation under high
temperature conditions, improved cooling
can be obtained by moving the air control
dial to the MAX A/C position.
1. Move the air control dial to the
po-
sition.
2. Turn the fan control dial to the desired
position.
3. Move the temperature control dial to the
desired position.
Heating and defogging
This mode heats the interior and defogs the
windshield. This mode directs air to the
defroster and the front and rear floor outlets.
Rear passenger heat is provided by the
front system through floor outlets located
under both front seats.
1. Move the air control dial to the
po-
sition.
2. Turn the fan control dial to the desired
position.
3. Move the temperature control dial to the
desired position.
When the
position is selected, the
air conditioner automatically turns on
(however, the indicator light will not illu-
minate) if the outside temperature is
more than 45ÉF (7ÉC). This dehumidifies
the air which helps defog the windshield.
The air recirculation mode automatically
turns off, allowing outside air to be drawn
into the passenger compartment which
helps defog the windshield.
Operating tips
cClear snow and ice from the wiper
blades and air inlet in front of thewindshield. This improves heater op-
eration.
cTo defog the side windows more effec-
tively when in bi-level or ventilation
mode, close the center vent and direct
the side vents toward the side windows.
cA slight delay may be experienced when
changing air control buttons. The system
is not malfunctioning. It is only the sys-
tem motors and solenoids switching from
one outlet to another.
AIR CONDITIONER OPERATION
Start the engine, move the fan control dial to
the desired (one to four) position, and select
an air control position before pushing in the
air conditioner button to activate the air
conditioner. When the air conditioner is on,
cooling and dehumidifying functions are
added to the heater operation.
WARNING
The air conditioner cooling function op-
erates only when the engine is running.
Heater, air conditioner and audio systems4-5
ZX
Page 154 of 294
WARNING
cThe air conditioner cooling function
operates only when the engine is
running.
cDo not leave children, impaired
adults, or pets alone in your vehicle.
On hot, sunny days, temperatures in
a closed vehicle could quickly be-
come high enough to cause severe
or possibly fatal injuries to people or
animals.
cDo not use the recirculation mode
for long periods as it may cause theinterior air to become stale and the
windows to fog up.
cPositioning of the heater and air con-
ditioner controls should not be done
while driving, so full attention may
be given to vehicle operation.
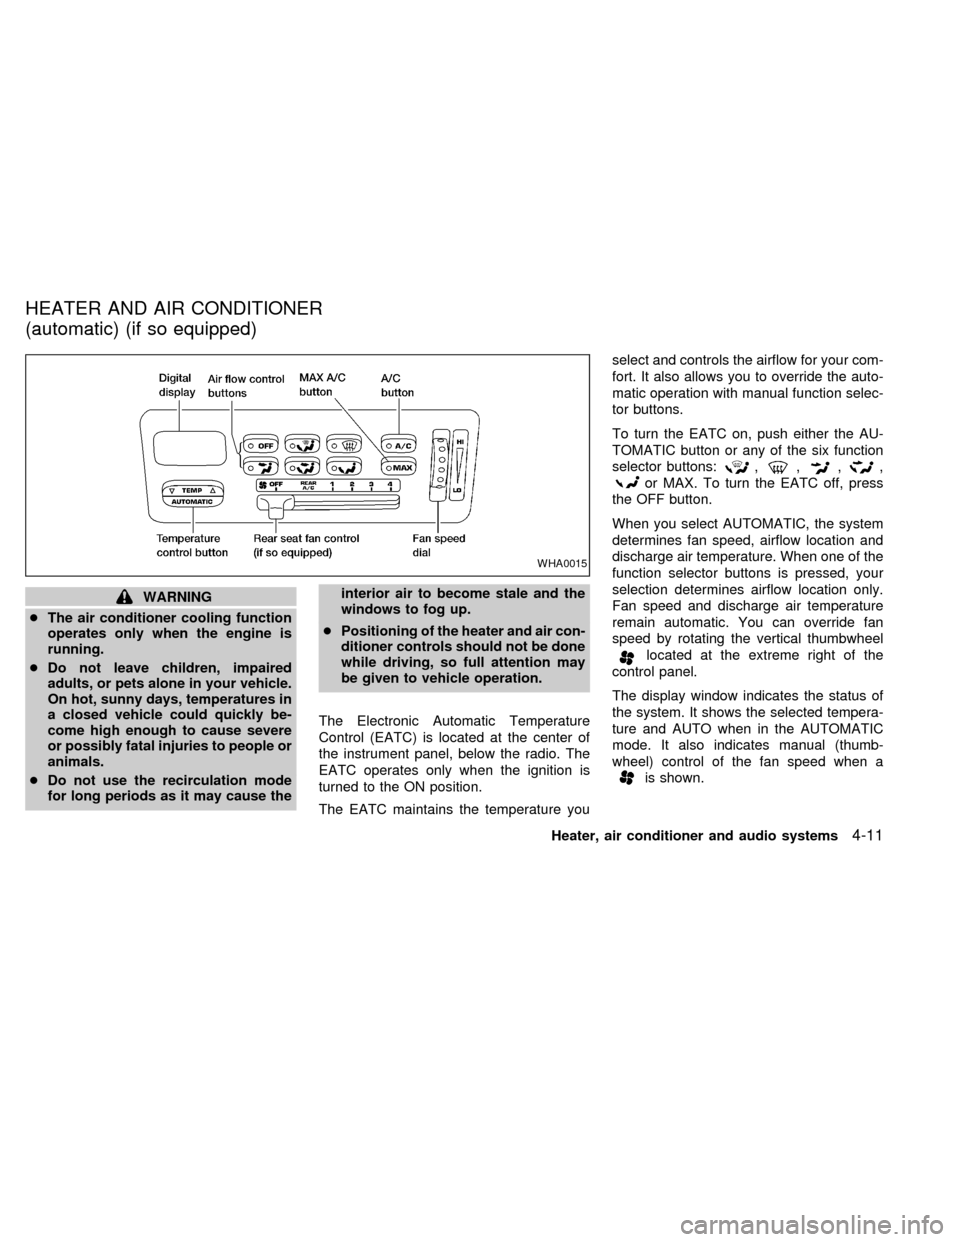
The Electronic Automatic Temperature
Control (EATC) is located at the center of
the instrument panel, below the radio. The
EATC operates only when the ignition is
turned to the ON position.
The EATC maintains the temperature youselect and controls the airflow for your com-
fort. It also allows you to override the auto-
matic operation with manual function selec-
tor buttons.
To turn the EATC on, push either the AU-
TOMATIC button or any of the six function
selector buttons:
,,,,
or MAX. To turn the EATC off, press
the OFF button.
When you select AUTOMATIC, the system
determines fan speed, airflow location and
discharge air temperature. When one of the
function selector buttons is pressed, your
selection determines airflow location only.
Fan speed and discharge air temperature
remain automatic. You can override fan
speed by rotating the vertical thumbwheel
located at the extreme right of the
control panel.
The display window indicates the status of
the system. It shows the selected tempera-
ture and AUTO when in the AUTOMATIC
mode. It also indicates manual (thumb-
wheel) control of the fan speed when a
is shown.
WHA0015
HEATER AND AIR CONDITIONER
(automatic) (if so equipped)
Heater, air conditioner and audio systems4-11
ZX
Page 156 of 294
the instrument panel registers. The
indicator light comes on, and the
display window shows the set temperature.
The EATC heats the air if the selected
temperature is warmer than the outside air
coming into the vehicle. However, the air is
not cooled regardless of the temperature
setting, unless the A/C button is selected.
Push this button to get air from the front and
rear floor outlets and instrument panel ven-
tilators at the same time. The
indicator
light comes on and the display window
shows the set temperature. The EATC
heats the air if the selected temperature is
warmer than the outside air coming into the
vehicle. However, the air is not cooled re-
gardless of the temperature setting, unless
the A/C button is selected.
Push this button to direct airflow to the front
and rear floor outlets. Theindicator
light comes on, and the display window
shows the set temperature. The EATC
heats the air if the selected temperature is
warmer than the outside air coming into the
vehicle. However, the air is not cooled re-gardless of the temperature setting, unless
the A/C button is selected.
Push the MAX button to choose air recircu-
lation. In this mode the EATC system recir-
culates the air inside the vehicle rather than
drawing air from outside. Air is distributed
through the instrument panel ventilators
similar to
mode. Use this mode to rap-
idly cool the inside of the vehicle, or to
dehumidify the air inside the vehicle.
Activate the air conditioner in any of the
override modes listed above by pressing the
A/C button. The A/C indicator light comes
on to verify activation, and cooled air flows
from the vents. Fan speed continues to be
controlled by the EATC unless the fan
speed thumbwheel is used to override.English/metric mode
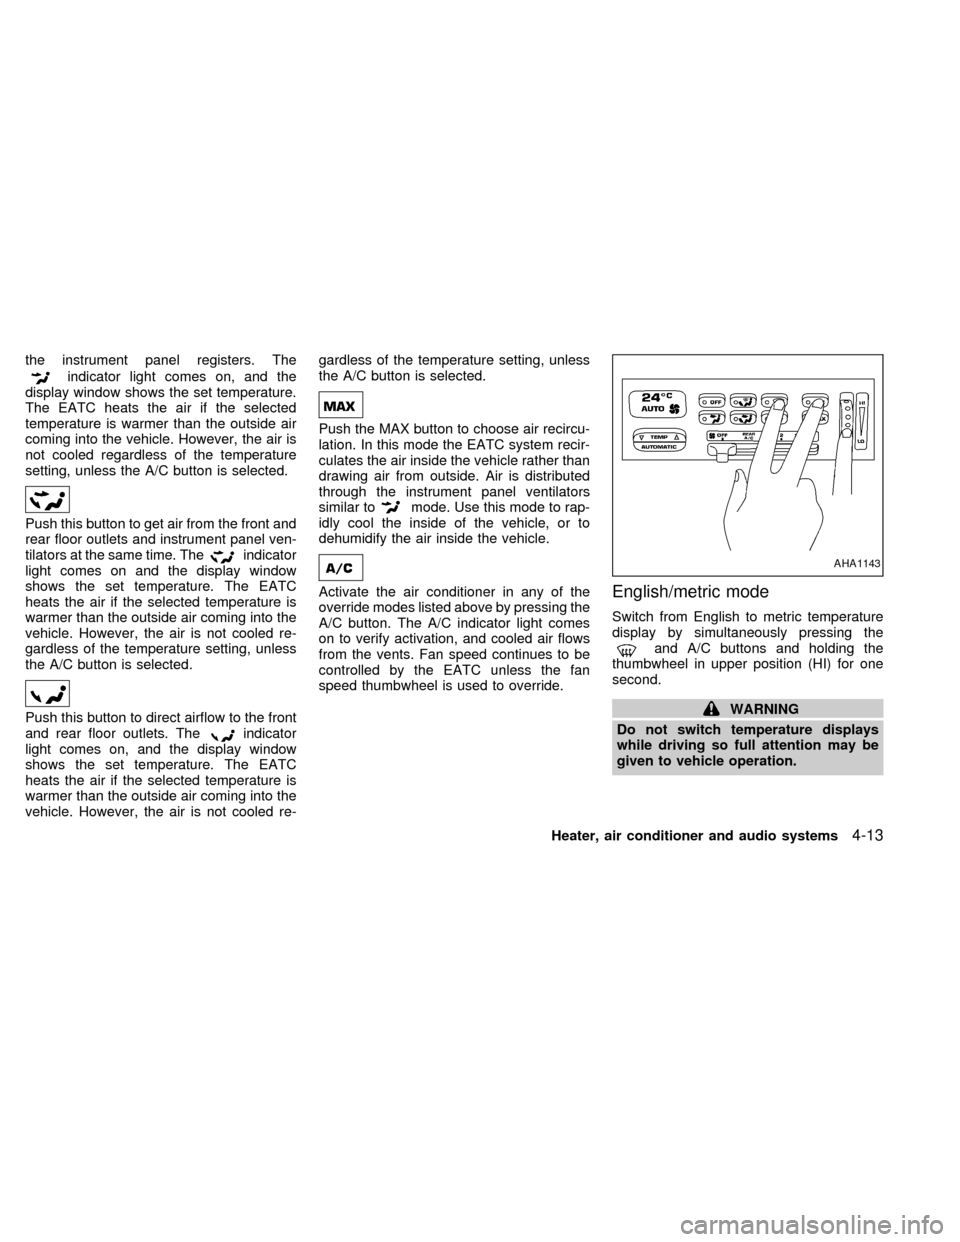
Switch from English to metric temperature
display by simultaneously pressing the
and A/C buttons and holding the
thumbwheel in upper position (HI) for one
second.
WARNING
Do not switch temperature displays
while driving so full attention may be
given to vehicle operation.
AHA1143
Heater, air conditioner and audio systems4-13
ZX
Page 158 of 294
The air conditioning system in your NISSAN
vehicle is charged with a refrigerant de-
signed with the environment in mind.
This refrigerant does not harm the
earth's ozone layer.
Special charging equipment and lubricant
are required when servicing your NISSAN
air conditioner. Using improper refrigerants
or lubricants causes severe damage to your
air conditioning system. See ``Air condition-
ing system refrigerant and lubricant recom-
mendations'' in the ``Technical and con-
sumer information'' section of this manual.
An authorized NISSAN dealer is able to
service your environmentally ``friendly'' air
conditioning system.WARNING
The air conditioner system contains
refrigerant under high pressure. To
avoid personal injury, any air condi-
tioner service should be done by an
experienced technician with proper
equipment.
SERVICING AIR
CONDITIONING
Heater, air conditioner and audio systems4-15
ZX