2002 NISSAN QUEST light
[x] Cancel search: lightPage 160 of 294

power lines, electric signs and even traffic
lights.
AUDIO OPERATION PRECAU-
TIONS
Cassette player
cTo maintain good quality sound,
NISSAN recommends that you use
cassette tapes of 60 minutes or
shorter in length.
cCassette tapes should be removed
from the player when not in use.
Store cassettes in their protective
cases and away from direct sunlight,
heat, dust, moisture or magnetic
sources.
cDirect sunlight can cause the cas-
sette to become deformed. The use of
deformed cassettes may cause the
cassette to jam in the player.
cDo not use cassettes that have peel-
ing or loose labels. If used, the label
could jam in the player.
cIf a cassette has loose tape, insert a
pencil through one of the cassette
hubs and rewind the tape firmly.Loose tape may cause jamming and
wavering sound quality.
cOver a period of time, the playback
head, capstan and pinch roller may
gather a tape coating residue as the
tape passes over the head. This resi-
due accumulation can cause a weak
or wavering sound and should be
removed periodically with a head
cleaning tape.
If the residue is not removed periodi-
cally, the player may need to be dis-
assembled for cleaning.
Compact Disc (CD) Player
cOnly use high quality 4.7 inches (12
cm) round discs that have the ``COM-
PACT disc DIGITAL AUDIO'' logo on
the disc or packaging.
LHA0099
Heater, air conditioner and audio systems4-17
ZX
Page 161 of 294

cDuring cold weather or rainy days, the
player may malfunction due to the
humidity. If this occurs, remove the
CD and dehumidify or ventilate the
player completely.
cThe player may skip while driving on
rough roads.
cThe CD player sometimes cannot
function when the compartment tem-
perature is extremely high. Decrease
the temperature before use.
cDo not expose the CD to direct sun-
light.
cCDs that are of poor quality, dirty,
scratched, covered with fingerprints,
or that have pin holes may not work
properly.
cDo not use the following CDs as they
may cause the CD player to malfunc-
tion:
c8 cm (3.1 in) discs with an adapter
cRecordable compact discs (CD-R)
cRewritable compact discs (CD-RW)
cCDs that are not roundcCDs with a paper label
cCDs that are warped, scratched, or
have abnormal edges
4-18Heater, air conditioner and audio systems
ZX
Page 169 of 294

FM-AM RADIO WITH CASSETTE
PLAYER AND COMPACT DISC
(CD) PLAYER
Audio main operation
To turn the radio on, turn the ignition key to
ACC or ON. If you listen to the radio with the
engine not running, turn the key to the ACC
position.
Radio reception is affected by station signal
strength, distance from radio transmitter,
buildings, bridges, mountains, and other
external influences. Intermittent changes in
reception quality normally are caused by
external influences.
Using a cellular phone in or near the
vehicle may influence radio reception
quality.
Power/Volume control
Push the VOL knob to turn the radio on.
Push the VOL knob once more to turn the
radio OFF.
The control buttons are illuminated when
the parking lamps or headlamps are on.
Only the text for the active controls will
illuminate for each specific type of media.No bulbs or lights have malfunctioned. For
example when a cassette tape is being
played, SHUFFLE will not illuminate.
Turn the knob to the right to increase vol-
ume or to the left to decrease volume. If the
knob is set above a certain volume level and
the ignition is turned off, the volume will
come back on at a nominal listening level
when the ignition is turned back on.
Adjusting tone quality and speaker bal-
ance
Bass
Bass control allows you to adjust the lower,
bass frequencies to your preference.
Push the BASS button and the setting indi-
cator bar appears in the display window.
Pressing the SELECT button either
orincreases or decreases the level of
bass, as indicated by the number of bar
segments showing in the display window.
Following bass adjustment, the display win-
dow shows the current setting for three
seconds, then returns to the display prior to
adjustment.Treble
Treble control allows you to adjust the higher,
treble frequencies to your preference.
Push the TREB button and the setting indi-
cator bar appears in the display window.
Pressing the SELECT button either
increases or decreases the level of
treble, as indicated by the number of bar
segments showing in the display window.
Following treble adjustment, the display
window shows the current setting for three
seconds, then returns to the display prior to
adjustment.
Balance
Balance control allows you to adjust the
sound distribution between the right and left
speakers.
Push the BAL button and the setting indica-
tor bar appears in the display window. Press
the SELECT button
to shift the sound
to the right speakers. The single indicator
bar moves to the right of the display win-
dow. Press the SELECT button
to shift
the sound to the left speakers. The single
indicator bar moves to the left of the display
window. When the indicator bar is in the
center position the sound is equally distrib-
4-26Heater, air conditioner and audio systems
ZX
Page 174 of 294

position and carefully insert the compact
disc into the slot with the label side up. The
compact disc is automatically pulled into the
slot and starts to play.
If the radio or cassette tape is already
operating, it automatically turns off and the
compact disc begins to play.
CAUTION
Do not force the compact disc into the
slot. This could damage the player.
TAPE/CD
When the CD side of the TAPE/CD button is
pushed with the compact disc loaded and
the tape or the radio playing, the tape or
radio turns off and the compact disc starts to
play.
FF (Fast Forward), REW (Rewind)
When the FF or REW button is pushed
while the compact disc is playing, the com-
pact disc plays at an increased speed while
fast forwarding or rewinding. When the but-
ton is released, the compact disc returns to
normal play speed.SEEK
or
When the SEEKbutton is pushed while the
compact disc is playing, the next selection
following the present one starts to play from
the beginning. Push the SEEK
button sev-
eral times to skip several selections. Each
time the button is pushed, the CD advances
one additional selection. The number appears
in the display window. (When the last selec-
tion on the compact disc is skipped, the first
selection is played.)
When the SEEKbutton is pushed, the se-
lection being played returns to the beginning.
Push the SEEK
button several times to skip
back several selections. Each time the button
is pushed, the CD moves back one selection.
SHUFFLE
When the SHUFFLE button is pressed the
tracks on the CD are played at random, not
following the sequence on the compact disc.
The same program may be repeated twice.
CD EJECT
When the EJ button is pushed with a com-
pact disc loaded, the compact disc ejects.
When the EJ button is pushed while the
compact disc is playing, the disc ejects and
the system turns off.If the compact disc ejects and is not re-
moved within 10 seconds, it is pulled back
into the slot.
DISC indicator light
DISC illuminates when a compact disc is
loaded into the player.
Heater, air conditioner and audio systems
4-31
ZX
Page 186 of 294

also be connected to the auxiliary jacks.
The auxiliary jacks are color coded for iden-
tification purposes.
cYellow - video input
cWhite - left channel audio input
cRed - right channel audio input
DUAL PLAY mode
Dual Play Mode allows the rear seat pas-
sengers to listen to one media source while
the front seat passengers listen to another.
To activate, press the speaker control but-
ton and plug a headphone into the head-
phone jack. With the headphones ON, the
rear speaker will not operate. Select the
desired media and adjust as necessary.
Press the speaker control button again to
operate the rear speakers and disengage
Dual Play Mode.
IN-HOME use
Your AutovisionTFamily Entertainment
System is UL registered for in-home use.
To use the FES system in your home, you
will need:c12V DC power converter rated for 1.5
amps/minute
cPatch cords with RCA style connectors
CARE AND MAINTENANCE
Use a lightly dampened, lint free cloth to
clean the surfaces of your Family Entertain-
ment System. (VCP face, monitor screen,
remote control, etc.)
CAUTION
cDo not use any solvents or cleaning
solutions when cleaning the video
system.
cDo not use excessive force on the
monitor screen.
cAvoid touching or scratching the
monitor screen as it may become
dirty or damaged.
Your Family Entertainment System is com-
patible with any cassette tape bearing the
VHS mark. We recommend storing your
video cassettes in a moisture free, dust free
container.
CAUTION
cDo not attempt to operate the system
in extreme temperature conditions
(below 30É and above 113É Fahren-
heit).
cDo not attempt to operate the system
in extreme humidity conditions (less
than 10% or more than 75%).
Tape head cleaning
Normally the VCP will not require frequent
head cleaning. However, after long periods
of usage dirt can collect on the video heads,
causing the picture to become blurred or
interrupted. In this case, head cleaning may
be required.
To clean the video heads, obtain a head
cleaning tape from your local video store.
Be sure to completely follow the instructions
included with the cleaning tape. Excessive
cleaning can shorten video head life.
Heater, air conditioner and audio systems
4-43
ZX
Page 193 of 294

vehicle is impaired by alcohol, drugs, or
some other physical condition.
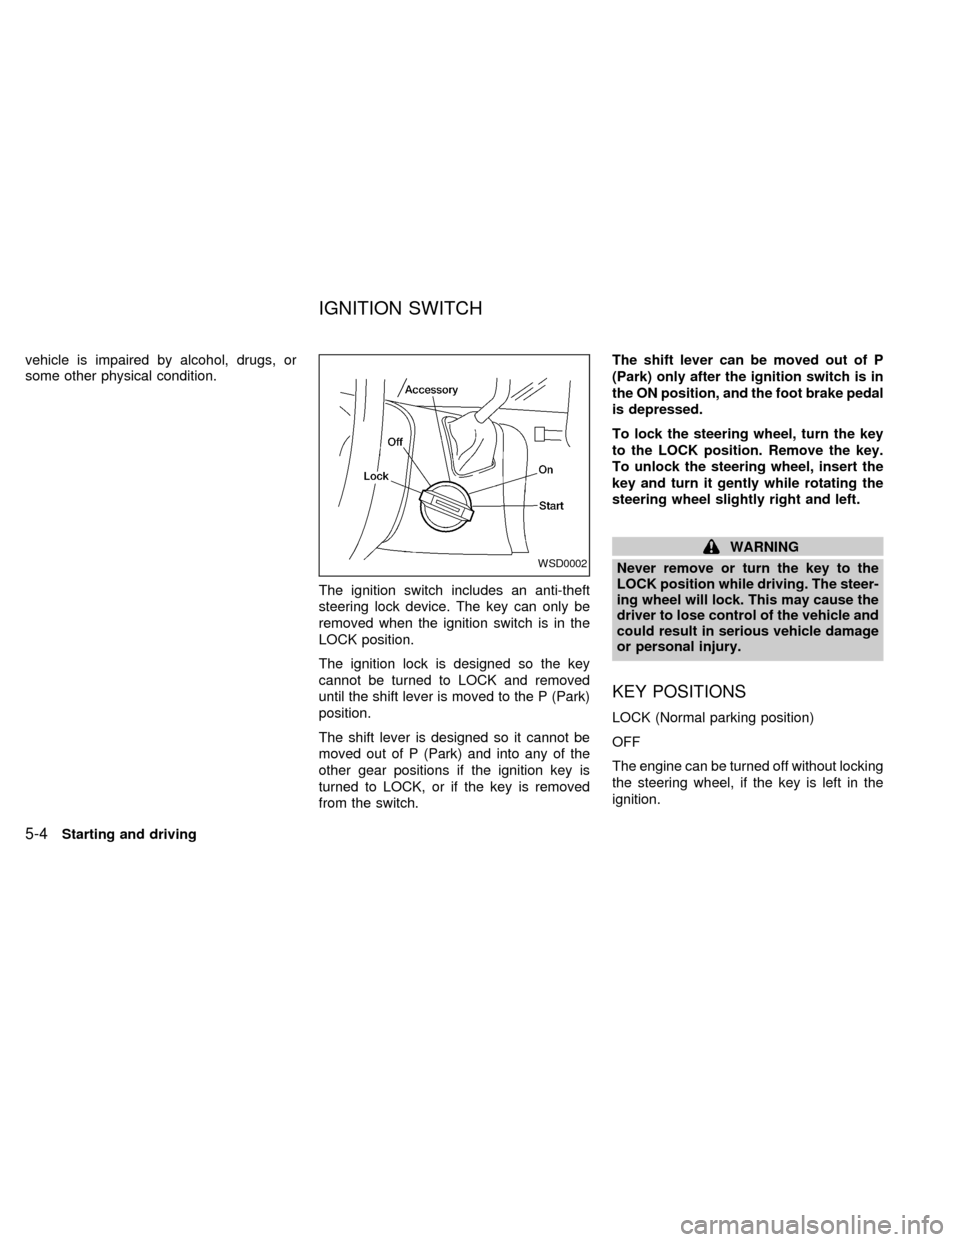
The ignition switch includes an anti-theft
steering lock device. The key can only be
removed when the ignition switch is in the
LOCK position.
The ignition lock is designed so the key
cannot be turned to LOCK and removed
until the shift lever is moved to the P (Park)
position.
The shift lever is designed so it cannot be
moved out of P (Park) and into any of the
other gear positions if the ignition key is
turned to LOCK, or if the key is removed
from the switch.The shift lever can be moved out of P
(Park) only after the ignition switch is in
the ON position, and the foot brake pedal
is depressed.
To lock the steering wheel, turn the key
to the LOCK position. Remove the key.
To unlock the steering wheel, insert the
key and turn it gently while rotating the
steering wheel slightly right and left.
WARNING
Never remove or turn the key to the
LOCK position while driving. The steer-
ing wheel will lock. This may cause the
driver to lose control of the vehicle and
could result in serious vehicle damage
or personal injury.
KEY POSITIONS
LOCK (Normal parking position)
OFF
The engine can be turned off without locking
the steering wheel, if the key is left in the
ignition.
WSD0002
IGNITION SWITCH
5-4Starting and driving
ZX
Page 194 of 294

ACC (Accessories)
This position activates electrical accesso-
ries such as the radio when the engine is
not running.
ON (Normal operating position)
This position turns on the ignition system
and the electrical accessories.
START
This position activates the starter motor,
which starts the engine.cMake sure the area around the vehicle is
clear.
cMaintenance items listed here should be
checked periodically (for example, each
time you check engine oil).
cCheck that all windows and lights are
clean.
cVisually inspect tires for their appearance
and condition. Also check tires for proper
inflation.
cLock all doors.
cPosition seat and adjust head restraints.
cAdjust inside and outside mirrors.
cFasten seat belts and ask all passengers
to do likewise.
cCheck the operation of warning lights
when key is turned to the ON position.
See ``Warning/Indicator lights and audible
reminders'' in the ``Instrument and con-
trols'' section.
1. Apply the parking brake.
2. Move the selector lever to P (Park) or N
(Neutral) (P is recommended).
The shift selector lever cannot be
moved out of P and into any of the
other gear positions under the follow-
ing conditions:
cThe ignition key is turned to the
LOCK position.
cThe ignition key is turned to the ON
position without depressing the
foot brake pedal.
The starter will not operate if the shift
selector lever is in one of the driving
positions.
3. Crank the enginewith your foot off the
accelerator pedalby turning the ignition
key to START. Release the key when the
engine starts. If the engine starts, but
fails to run, repeat the above procedure.
Ð If the engine is very hard to start in
extremely cold or hot weather, de-
press the accelerator pedal to the
floor and hold it to help start the
engine.
BEFORE STARTING THE
ENGINESTARTING THE ENGINE
Starting and driving5-5
ZX
Page 195 of 294

Ð In the summer, when restarting the
engine within 30 minutes after it has
been stopped, keep the accelerator
pedal slightly depressed while start-
ing.
CAUTION
Do not operate the starter for more than
15 seconds at a time. If the engine does
not start, turn the key off and wait 10
seconds before cranking again, other-
wise the starter could be damaged.
4. Warm-up
Allow the engine to idle for at least 30
seconds after starting. Drive at moderate
speeds for a short distance first, espe-
cially in cold weather.
WARNING
cDo not depress the accelerator pedal
while shifting from P (Park) or N
(Neutral) to: R (Reverse), D (Drive),
2 or 1. Always depress the brake
pedal until shifting is completed.
Failure to do so could cause you to
lose control and have an accident.
cCold engine idle speed is high, so
use caution when shifting into a for-
ward or reverse gear before the en-
gine has warmed up.
cNever shift to P (Park) or R (Reverse)
while the vehicle is moving. This
could cause an accident.
CAUTION
cWhen stopping the vehicle on an
uphill grade, do not hold the vehicle
by depressing the accelerator pedal.
The foot brakes should be used for
this purpose.cDo not downshift abruptly on slip-
pery roads. This may cause a loss of
control.
The automatic transmission in your vehicle
is electronically controlled by a transmission
control module to produce maximum power
and smooth operation.
Shown on the following pages are the rec-
ommended operating procedures for this
transmission. Follow these procedures for
maximum vehicle performance and driving
enjoyment.
Starting the vehicle
cAfter starting the engine, fully depress the
brake pedal before shifting the selector
lever to the R (Reverse), N (Neutral), D
(Drive), 2 or 1 position. Be sure the
vehicle is at a complete stop before at-
tempting to shift the selector lever.
This automatic transmission is designed
so the brake pedal MUST be depressed
before shifting from P (Park) to any other
position while the ignition switch is ON.
DRIVING THE VEHICLE
5-6Starting and driving
ZX