Page 118 of 294

The parcel shelf allows for additional stor-
age for packages.
Do not load more than 30 pounds (13.6 kg)
on the parcel shelf. The parcel shelf can be
installed at two different heights and in a
storage position.
To install the parcel shelf:
c
Position the right side of the parcel shelf
in to one of the shelf positions on the right
side luggage compartment trim panel.
cPosition the left side of the parcel shelf
into the matching position (same height)
on the left side luggage compartment trim
panel.
cSlide the parcel shelf lock knob fully to
the left side (latch in green dot position).
cTurn the parcel shelf lock knob clock-
wise until securely locked.
The parcel shelf is also equipped with a
parcel shelf net to keep packages on the
parcel shelf from moving around while the
vehicle is in motion.
The parcel shelf net is permanently at-
tached to the back side of the parcel shelf.
Pull the parcel shelf net over the packagesand attach the three loops to the three
retainers on the bottom side of the parcel
shelf. Make sure the parcel shelf is securely
locked before covering the packages with
the parcel shelf net.
To remove the parcel shelf:
cUnlock the parcel shelf net.
cRemove all packages from the parcel
shelf.
cTurn the parcel shelf lock knob counter
clockwise until loose (maximum two
turns).
cSlide the parcel shelf lock knob fully to
the right side (unlatch in red dot posi-
tion).
cRemove the parcel shelf from the left
side luggage compartment trim panel,
then the right side luggage compartment
trim panel and reposition the parcel shelf
where desired.Put the parcel shelf in the floor storage
position when the parcel shelf is not used or
required.
APD1073
Instruments and controls2-29
ZX
Page 119 of 294

LUGGAGE RACK
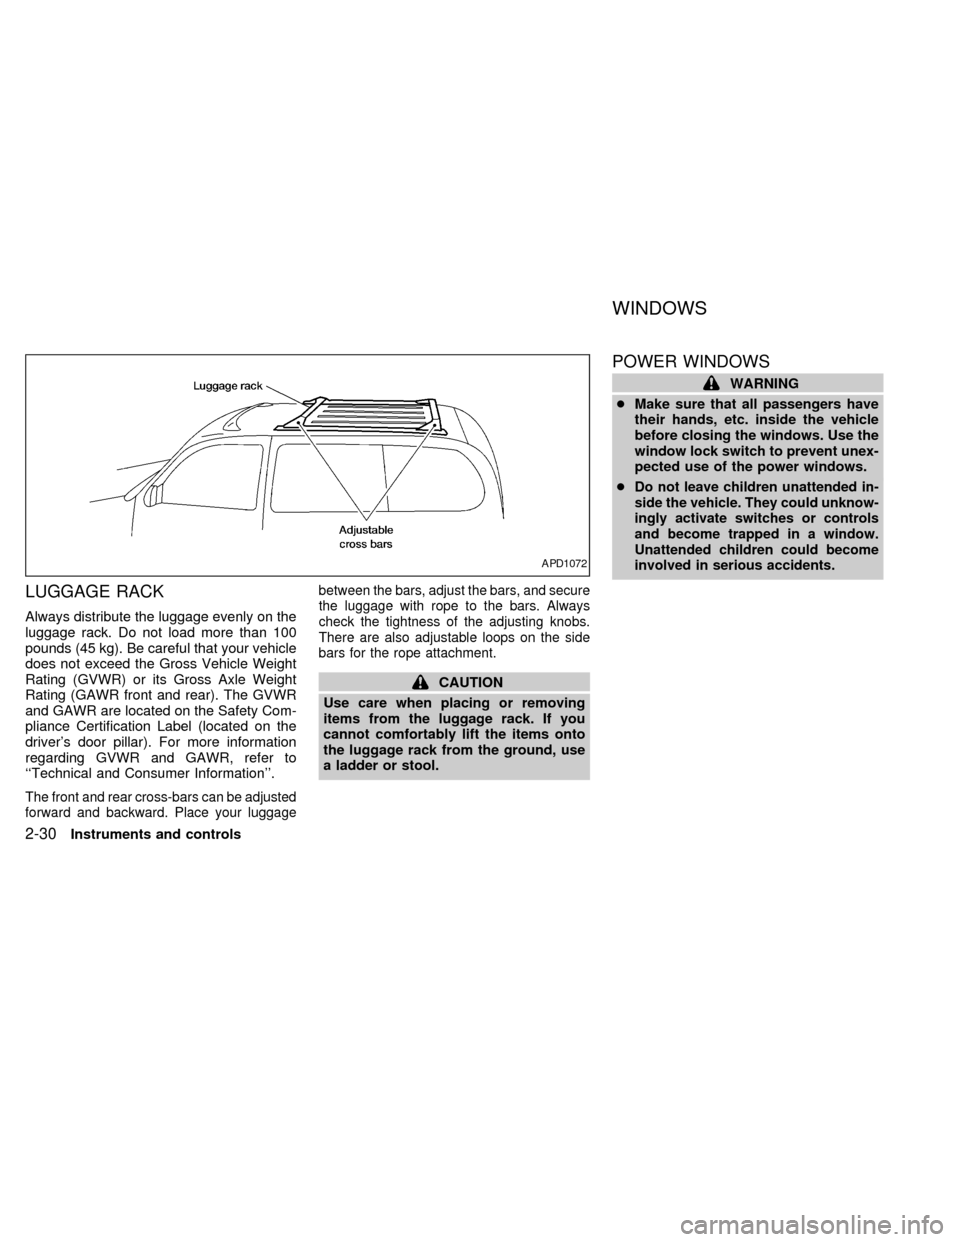
Always distribute the luggage evenly on the
luggage rack. Do not load more than 100
pounds (45 kg). Be careful that your vehicle
does not exceed the Gross Vehicle Weight
Rating (GVWR) or its Gross Axle Weight
Rating (GAWR front and rear). The GVWR
and GAWR are located on the Safety Com-
pliance Certification Label (located on the
driver's door pillar). For more information
regarding GVWR and GAWR, refer to
``Technical and Consumer Information''.
The front and rear cross-bars can be adjusted
forward and backward. Place your luggagebetween the bars, adjust the bars, and secure
the luggage with rope to the bars. Always
check the tightness of the adjusting knobs.
There are also adjustable loops on the side
bars for the rope attachment.
CAUTION
Use care when placing or removing
items from the luggage rack. If you
cannot comfortably lift the items onto
the luggage rack from the ground, use
a ladder or stool.
POWER WINDOWS
WARNING
cMake sure that all passengers have
their hands, etc. inside the vehicle
before closing the windows. Use the
window lock switch to prevent unex-
pected use of the power windows.
c
Do not leave children unattended in-
side the vehicle. They could unknow-
ingly activate switches or controls
and become trapped in a window.
Unattended children could become
involved in serious accidents.
APD1072
WINDOWS
2-30Instruments and controls
ZX
Page 120 of 294

The main switch (on the driver side) opens
or closes the driver's, and passenger's win-
dows, and (if so equipped) rear vent win-
dows.
To open the window, press the switch down.
To close the window, lift the switch up.
The power windows operate when the igni-
tion key is in the ON position, or for 15
minutes after the ignition key is turned to the
OFF position. If the driver's or passenger's
door is opened during this 15 minute period,
power to the windows is cancelled.
Locking passenger's window
When the power window lock-out button is
pushed in, the passenger's window cannot
be opened or closed. Push the power win-
dow lock-out button again to cancel this
feature.
Automatic operation
To fully open the driver side window, press
down firmly on the switch and release it; you
do not need to hold the switch down. The
window automatically opens all the way.
The automatic feature can be interrupted
before the window is fully open by briefly
lifting up on the switch as the window moves
down.
AIC1079AIC1080
Instruments and controls2-31
ZX
Page 121 of 294

The passenger side switch opens or closes
the passenger window only. To open the
window, press the switch down. To close
the window, lift the switch up.POWER VENT WINDOWS
(if so equipped)
Use the vent window switches on the driv-
er's side window controls to open and close
the power vent windows. To open one of the
power vent windows, press the switch down.
To close the window, lift the switch up.
The power vent windows operate when the
ignition key is in the ON position, or for 15
minutes after the ignition key is turned to the
OFF position. If the driver's or passenger's
door is opened during this 15 minute period,
power to the vent windows is cancelled.
MANUAL VENT WINDOWS
To open the manual vent windows, pull the
rear portion of the latch toward you until it
releases. To lock the window in the open
position, push the latch rearward until you
hear it latch. To close the windows, pull the
latch toward you and push the rear portion
of the latch toward the rear of the vehicle
until you feel it latch.
AIC1081AIC1067AIC0111
2-32Instruments and controls
ZX
Page 130 of 294

3 Pre-driving checks and adjustments
Keys .......................................................................3-2
Doors ......................................................................3-2
Locking with key ................................................3-3
Locking with inside lock knob............................3-3
Locking with power door lock switch.................3-4
Child safety sliding door locks...........................3-5
Remote keyless entry system ................................3-6
How to use remote keyless entry
system ...............................................................3-6
Battery replacement ..........................................3-8
Hood .......................................................................3-9
Rear door .............................................................3-10Fuel filler lid ..........................................................3-10
Opener operation ............................................3-10
Fuel filler cap ...................................................3-10
Steering wheel .....................................................3-11
Tilt operation ....................................................3-11
Sun visors.............................................................3-12
Vanity mirror ....................................................3-12
Mirrors ..................................................................3-12
Memory driver seat and mirrors
(if so equipped)................................................3-12
Inside mirror.....................................................3-13
Outside mirrors ................................................3-14
ZX
Page 131 of 294

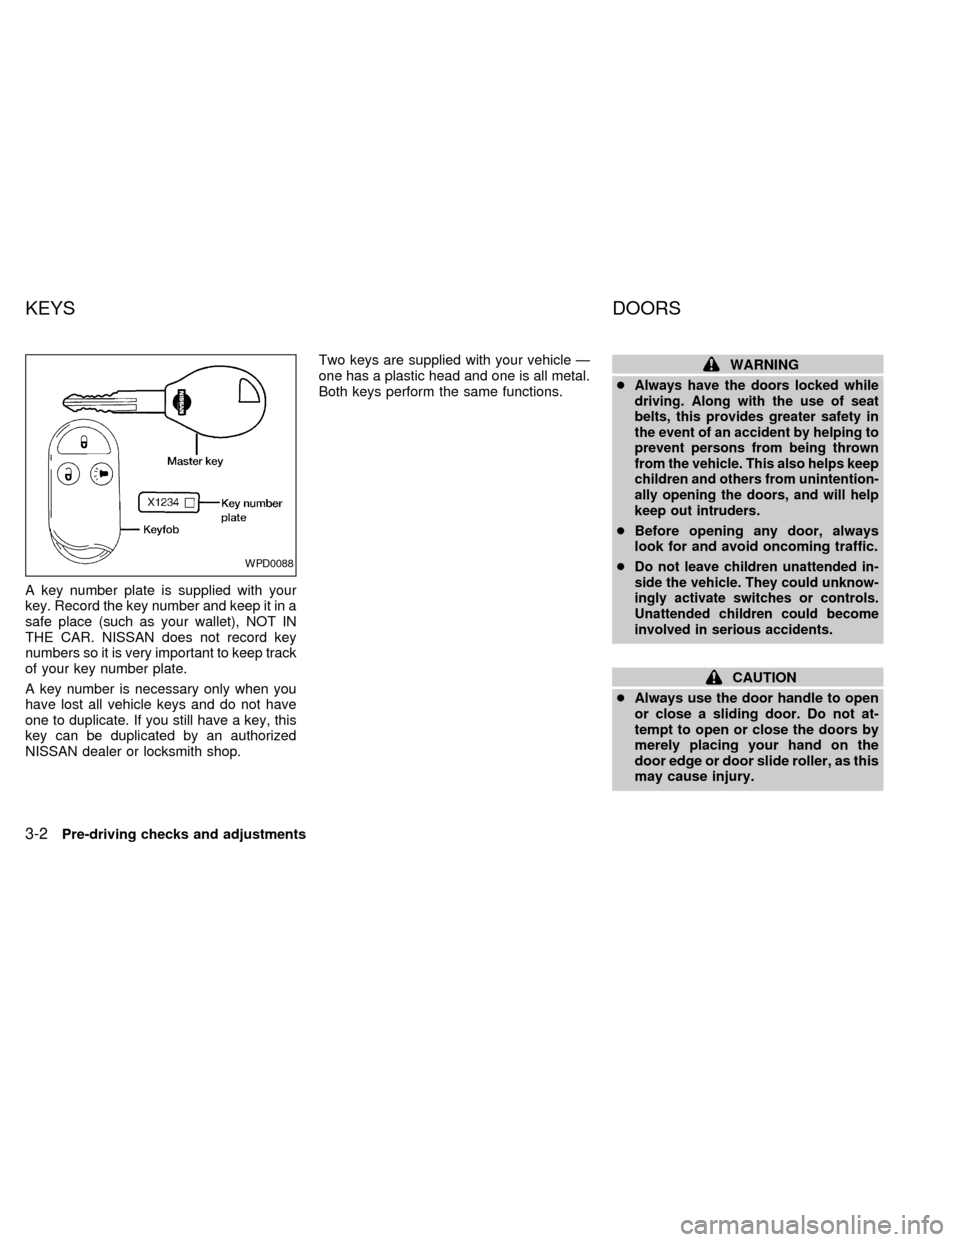
A key number plate is supplied with your
key. Record the key number and keep it in a
safe place (such as your wallet), NOT IN
THE CAR. NISSAN does not record key
numbers so it is very important to keep track
of your key number plate.
A key number is necessary only when you
have lost all vehicle keys and do not have
one to duplicate. If you still have a key, this
key can be duplicated by an authorized
NISSAN dealer or locksmith shop.Two keys are supplied with your vehicle Ð
one has a plastic head and one is all metal.
Both keys perform the same functions.
WARNING
c
Always have the doors locked while
driving. Along with the use of seat
belts, this provides greater safety in
the event of an accident by helping to
prevent persons from being thrown
from the vehicle. This also helps keep
children and others from unintention-
ally opening the doors, and will help
keep out intruders.
cBefore opening any door, always
look for and avoid oncoming traffic.
c
Do not leave children unattended in-
side the vehicle. They could unknow-
ingly activate switches or controls.
Unattended children could become
involved in serious accidents.
CAUTION
cAlways use the door handle to open
or close a sliding door. Do not at-
tempt to open or close the doors by
merely placing your hand on the
door edge or door slide roller, as this
may cause injury.
WPD0088
KEYS DOORS
3-2Pre-driving checks and adjustments
ZX
Page 132 of 294

cAlways be sure that hands and feet
are clear of the door frame to avoid
injury while closing a sliding door.
cWhen opening a sliding door on a
slope, ensure that it is fully open and
that it does not close by itself.
LOCKING WITH KEY
Turning the door key one time to the rear of
the vehicle unlocks the corresponding door.
From that position, returning the key to
Neutral (where the key can only be removed
and inserted) and turning it to the rear again
within 5 seconds unlocks all doors. Turning
the door key to the front of the vehicle locks
all doors. The selective unlock function and
locking all doors can be operated from the
driver, passenger and rear door.
LOCKING WITH INSIDE LOCK
KNOB
To lock all doors from inside the vehicle,
push the door lock knob in, then close the
door. When locking the doors this way, be
certain not to leave the key inside the ve-
hicle. All doors automatically unlock if the
key is in the ignition and a door is open.
APD1057WPD0087
Pre-driving checks and adjustments3-3
ZX
Page 133 of 294
Sliding door
To lock a sliding door from inside the ve-
hicle, press the door lock rocker switch on
the side marked L. To unlock, press the
rocker switch on the side marked U.
The driver side sliding door cannot be
fully opened when the fuel door is open.
LOCKING WITH POWER DOOR
LOCK SWITCH
Operating the lock-unlock switch locks or
unlocks all doors.
If the power door lock switch is pressed
when a sliding door is open, the sliding door
automatically locks when it is closed.
APD1055APD1074
3-4Pre-driving checks and adjustments
ZX