2002 NISSAN PATHFINDER light
[x] Cancel search: lightPage 133 of 288

cies and stops at the next broadcasting sta-
tion.
Push the SEEK/SCAN tuning button
or
for more than 1.5 seconds. SCAN tuning
begins from high to low or low to high frequen-
cies and stops at each broadcasting station for
10 seconds. Pushing the button again during
this 10 seconds period will stop SCAN tuning
and the radio will remain tuned to that station.
If the SEEK/SCAN tuning button is not pushed
within 10 seconds, SCAN tuning moves to the
next station.Station memory operations:
Twelve stations can be set for the FM band
(six for FM1, six for FM2).
Six stations can be set for the AM band.
1. Tune to the desired station using the
SEEK/SCAN or TUNE button.
2. Select the desired station and keep pushing
any of the desired station memory buttons
(1 to 6) until a beep sound is heard. (For
example, in the diagram ch2 is to be memo-
rized. The radio mutes when the select
button is pushed.)
3. The indicator ch2 will then come on and the
sound will resume. Memorizing is now com-
plete.
4. Other buttons can be set in the same
manner.
If the battery cable is disconnected, or if the
fuse blows, the radio memory will be can-
celled. In that case, reset the desired stations.
Cassette tape player operationTurn the ignition key to ACC or ON, and then
lightly insert the cassette tape into the tape
door. The cassette tape will be automatically
pulled into the player.
The radio or CD will turn off (if it is on) and the
SAA0475
4-16
Heater, air conditioner and audio systems
Z
01.9.21/R50-D/V5
X
Page 140 of 288
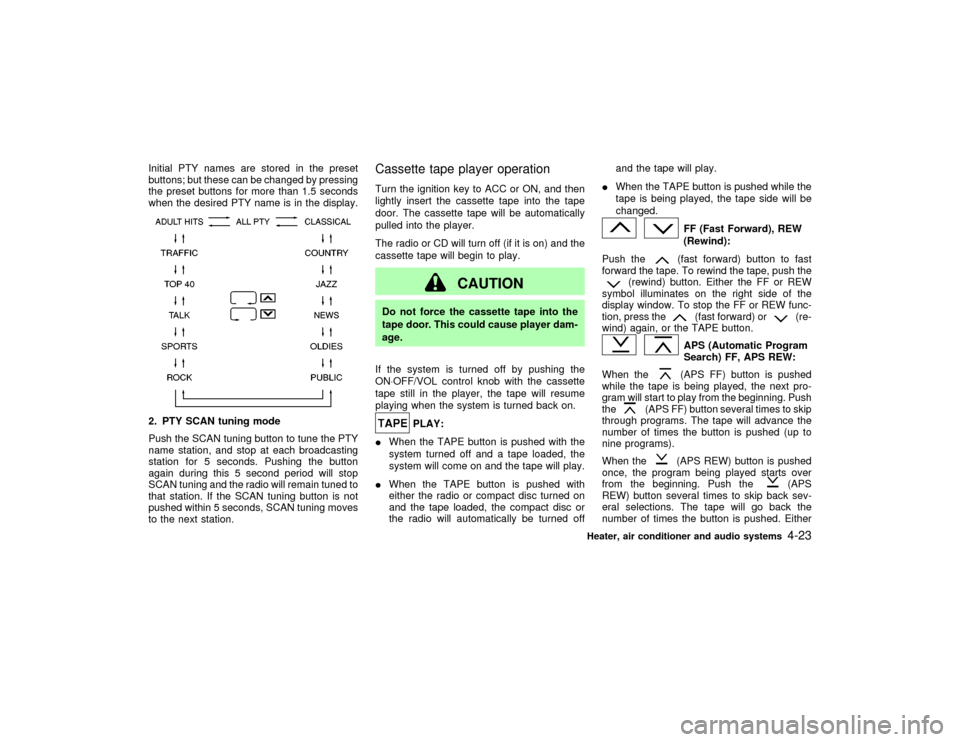
Initial PTY names are stored in the preset
buttons; but these can be changed by pressing
the preset buttons for more than 1.5 seconds
when the desired PTY name is in the display.2. PTY SCAN tuning mode
Push the SCAN tuning button to tune the PTY
name station, and stop at each broadcasting
station for 5 seconds. Pushing the button
again during this 5 second period will stop
SCAN tuning and the radio will remain tuned to
that station. If the SCAN tuning button is not
pushed within 5 seconds, SCAN tuning moves
to the next station.
Cassette tape player operationTurn the ignition key to ACC or ON, and then
lightly insert the cassette tape into the tape
door. The cassette tape will be automatically
pulled into the player.
The radio or CD will turn off (if it is on) and the
cassette tape will begin to play.
CAUTION
Do not force the cassette tape into the
tape door. This could cause player dam-
age.
If the system is turned off by pushing the
ON×OFF/VOL control knob with the cassette
tape still in the player, the tape will resume
playing when the system is turned back on.
PLAY:
IWhen the TAPE button is pushed with the
system turned off and a tape loaded, the
system will come on and the tape will play.
IWhen the TAPE button is pushed with
either the radio or compact disc turned on
and the tape loaded, the compact disc or
the radio will automatically be turned offand the tape will play.
IWhen the TAPE button is pushed while the
tape is being played, the tape side will be
changed.
FF (Fast Forward), REW
(Rewind):
Push the(fast forward) button to fast
forward the tape. To rewind the tape, push the
(rewind) button. Either the FF or REW
symbol illuminates on the right side of the
display window. To stop the FF or REW func-
tion, press the
(fast forward) or
(re-
wind) again, or the TAPE button.
APS (Automatic Program
Search) FF, APS REW:
When the(APS FF) button is pushed
while the tape is being played, the next pro-
gram will start to play from the beginning. Push
the
(APS FF) button several times to skip
through programs. The tape will advance the
number of times the button is pushed (up to
nine programs).
When the
(APS REW) button is pushed
once, the program being played starts over
from the beginning. Push the
(APS
REW) button several times to skip back sev-
eral selections. The tape will go back the
number of times the button is pushed. Either
Heater, air conditioner and audio systems
4-23
Z
01.9.21/R50-D/V5
X
Page 146 of 288
CAUTION
Do not force the cassette tape into the
tape door. This could cause player dam-
age.
The cassette tape automatically changes di-
rections to play the other side when the first
side is complete. At this time, the moving
digital squares illuminate on the left side of the
display window.
PLAY:
When the TAPE/CD button is pushed with the
radio turned on and the tape loaded, the radio
will automatically be turned off and the tape
will play.
If the TAPE/CD button is pushed during either
the FF, REW, APS FF or APS REW function,
the cassette tape enters the normal play
mode.
When the TAPE/CD button is pushed with the
CD playing, the tape will play.
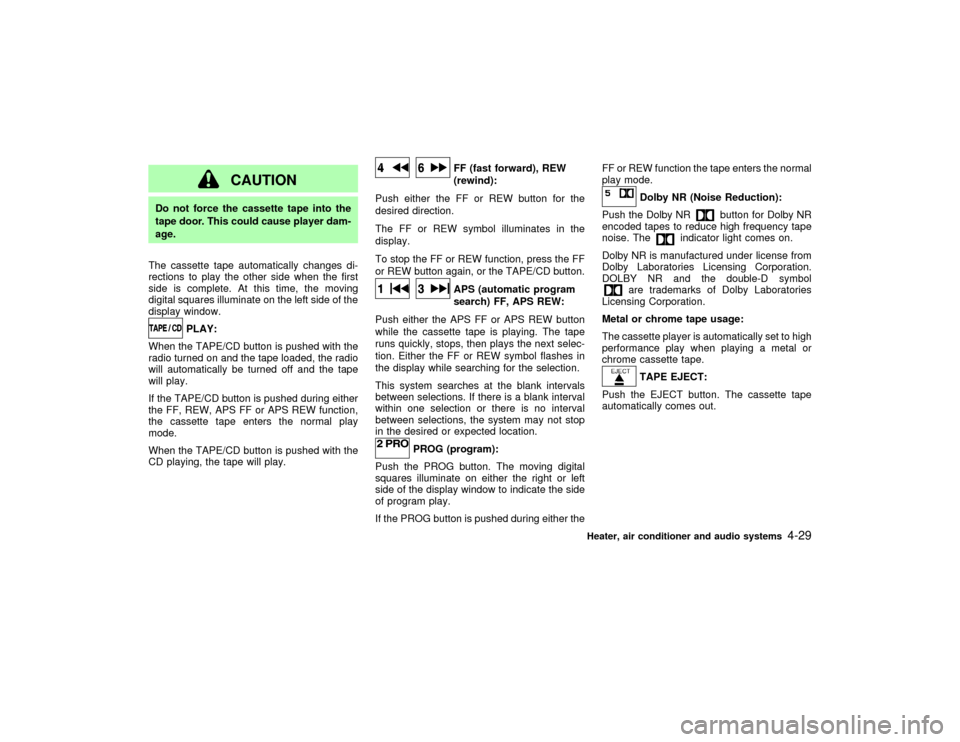
FF (fast forward), REW
(rewind):
Push either the FF or REW button for the
desired direction.
The FF or REW symbol illuminates in the
display.
To stop the FF or REW function, press the FF
or REW button again, or the TAPE/CD button.APS (automatic program
search) FF, APS REW:
Push either the APS FF or APS REW button
while the cassette tape is playing. The tape
runs quickly, stops, then plays the next selec-
tion. Either the FF or REW symbol flashes in
the display while searching for the selection.
This system searches at the blank intervals
between selections. If there is a blank interval
within one selection or there is no interval
between selections, the system may not stop
in the desired or expected location.
PROG (program):
Push the PROG button. The moving digital
squares illuminate on either the right or left
side of the display window to indicate the side
of program play.
If the PROG button is pushed during either theFF or REW function the tape enters the normal
play mode.
Dolby NR (Noise Reduction):
Push the Dolby NR
button for Dolby NR
encoded tapes to reduce high frequency tape
noise. The
indicator light comes on.
Dolby NR is manufactured under license from
Dolby Laboratories Licensing Corporation.
DOLBY NR and the double-D symbol
are trademarks of Dolby Laboratories
Licensing Corporation.
Metal or chrome tape usage:
The cassette player is automatically set to high
performance play when playing a metal or
chrome cassette tape.TAPE EJECT:
Push the EJECT button. The cassette tape
automatically comes out.
Heater, air conditioner and audio systems
4-29
Z
01.9.21/R50-D/V5
X
Page 154 of 288
fastened. This will keep you and your
passengers in position when driving
over rough terrain.
IBefore driving up or down grades,
check the road surface for bumps or
potholes. Be sure to climb a gentle
slope and descend a gentle slope.
IDo not drive across steep slopes.
Instead drive either straight up or
straight down the slopes. Off-road
vehicles can tip over sideways much
more easily than they can forward or
backward.
IMany hills are too steep for any ve-
hicle. If you drive up them, you may
stall. If you drive down them, you may
not be able to control your speed. If
you drive across them, you may roll
over.
IDo not shift gears while driving on
downhill grades as this could cause
loss of control of the vehicle.
IBe sure to use the engine brake. The
foot brake performance may be re-duced, resulting in a possible acci-
dent.
IStay alert when driving to the top of a
hill. At the top there could be a drop-
off or other hazard that could cause
an accident.
IStay alert when driving to the top of a
hill. At the top there could be a drop-
off or other hazard that could cause
an accident.
IIf your engine stalls or you cannot
make it to the top of a steep hill, never
attempt to turn around. Your vehicle
could tip or roll over. Always back
straight down in R (Reverse) gear.
Never back down in N (Neutral) or
with the clutch depressed (manual
transmission vehicles), using only
the brake, as this could cause loss of
control.
IHeavy braking going down a hill
could cause your brakes to overheat
and fade, resulting in loss of control
and an accident. Apply brakes lightlyand use a low gear to control your
speed.
IUnsecured cargo can be thrown
around when driving over rough ter-
rain. Properly secure all cargo so it
will not be thrown forward and cause
injury to you or your passengers.
ITo avoid raising the center of gravity
excessively, do not exceed the rated
capacity of the roof rack and evenly
distribute the load. Secure heavy
loads in the cargo area as far forward
and as low as possible. Do not equip
the vehicle with tires larger than
specified in this manual. This could
cause your vehicle to roll over.
IDo not grip the inside or spokes of
the steering wheel when driving of-
froad. The steering wheel could move
suddenly and injure your hands. In-
stead drive with your fingers and
thumbs on the outside of the rim.
IBefore operating the vehicle, ensure
that the driver and all passengers
Starting and driving
5-5
Z
01.9.21/R50-D/V5
X
Page 156 of 288
1) Move the selector lever into the P (Park)
position.
2) Turn the ignition key slightly in the ON
direction.
3) Turn the key toward the LOCK position.
4) Remove the key.
If the key is removed from the ignition switch,
the selector lever cannot be moved from P
(Park).The selector lever can be moved if
the ignition switch is in the ON position and
the foot brake pedal is depressed.
There is an OFF position in between LOCK
and ACC, although it does not show on the
lock cylinder. When the ignition is in OFF the
steering wheel is not locked.
In order for the steering wheel to be locked, it
must be turned about 1/6 of a turn clockwise
from the straight up position.
To lock the steering wheel, turn the key to
the LOCK position. Remove the key. To
unlock the steering wheel, insert the key
and turn it gently while rotating the steer-
ing wheel slightly right and left.
WARNING
Never remove or turn the key to the
LOCK position while driving. The steer-
ing wheel will lock. This may cause the
driver to lose control of the vehicle and
could result in serious vehicle damage
or personal injury.
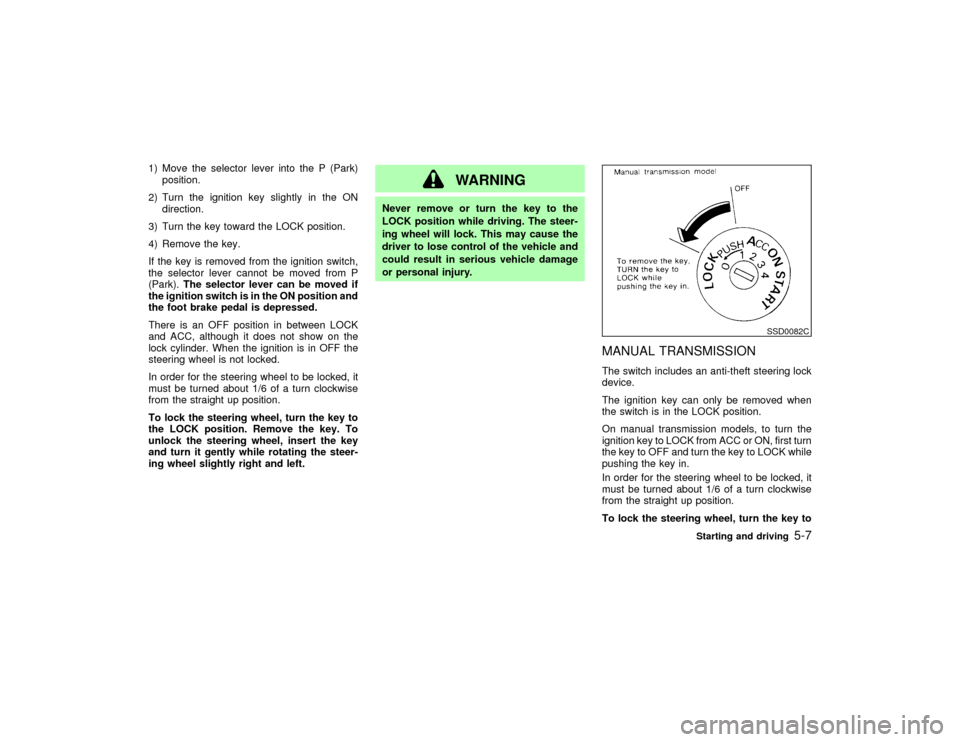
MANUAL TRANSMISSIONThe switch includes an anti-theft steering lock
device.
The ignition key can only be removed when
the switch is in the LOCK position.
On manual transmission models, to turn the
ignition key to LOCK from ACC or ON, first turn
the key to OFF and turn the key to LOCK while
pushing the key in.
In order for the steering wheel to be locked, it
must be turned about 1/6 of a turn clockwise
from the straight up position.
To lock the steering wheel, turn the key to
SSD0082C
Starting and driving
5-7
Z
01.9.21/R50-D/V5
X
Page 157 of 288
the LOCK position. Remove the key. To
unlock the steering wheel, insert the key
and turn it gently while rotating the steer-
ing wheel slightly right and left.
WARNING
Never remove or turn the key to the
LOCK position while driving. The steer-
ing wheel will lock. This may cause the
driver to lose control of the vehicle and
could result in serious vehicle damage
or personal injury.KEY POSITIONSLOCK (Normal parking position) (0)
The ignition key can only be removed when
the switch is at this position.
OFF (1)
The engine can be turned off without locking
the steering wheel.
ACC (Accessories) (2)
This position activates electrical accessories
such as the radio when the engine is not
running.ON (Normal operating position) (3)
This position turns on the ignition system and
the electrical accessories.
START (4)
This position activates the starter motor, start-
ing the engine.
NISSAN VEHICLE IMMOBILIZER
SYSTEMThe Nissan Vehicle Immobilizer System will
not allow the engine to start without the use of
the registered Nissan Vehicle Immobilizer Sys-
tem key.
If the engine fails to start using the registered
Nissan Vehicle Immobilizer System key (for
example, when interference is caused by an-
other Nissan Vehicle Immobilizer System key,
an automated toll road device or automated
payment device on the key ring), restart the
engine using the following procedures:
1. Leave the ignition switch in the ON position
for approximately 5 seconds.
2. Turn the ignition switch to the OFF or LOCK
position, and wait approximately 5 seconds.
3. Repeat step 1 and 2.
4. Restart the engine while holding the device(which may have caused the interference)
separate from the registered Nissan Ve-
hicle Immobilizer System key.
If the no start condition re-occurs, NISSAN
recommends placing the registered Nissan
Vehicle Immobilizer System key on a separate
key ring to avoid interference from other de-
vices.
5-8
Starting and driving
Z
01.9.21/R50-D/V5
X
Page 158 of 288
IMake sure the area around the vehicle is
clear.
ICheck fluid levels such as engine oil, cool-
ant, brake and clutch fluid, window washer
fluid as frequently as possible, at least
whenever you refuel.
ICheck to be sure that all windows and light
lenses are clean.
IVisually inspect tires for their appearance
and condition. Also check tires for proper
inflation.
ILock all doors.
IPosition seat and adjust head restraints.
IAdjust inside and outside mirrors.
IFasten seat belts and ask all passengers to
do likewise.
ICheck the operation of warning lights when
key is turned to the ON (3) position.1. Apply the parking brake.
2.Automatic transmission:
Move the selector lever to P (Park position)
or N (Neutral position). (P preferred)
The selector lever cannot be moved out
of P and into any of the other gear
positions if the ignition key is turned to
LOCK or if the key is removed from the
switch.
The starter is designed not to operate if
the selector lever is in one of the driving
positions.
Manual transmission:
Move the gearshift lever to N (Neutral po-
sition), and depress the clutch pedal to the
floor while starting the engine.
The starter is designed not to operate
unless the clutch pedal is fully de-
pressed.
3. Crank the enginewith your foot off the
accelerator pedalby turning the ignition
key to START. Release the key when the
engine starts. If the engine starts, but fails
to run, repeat the above procedure.
Ð If the engine is very hard to start in
extremely cold or hot weather ÐUse the accelerator pedal to help start the
engine.
CAUTION
Do not operate the starter for more than
15 seconds at a time. If the engine does
not start, turn the key off and wait 10
seconds before cranking again, other-
wise the starter could be damaged.
4.Warm-up
Always allow the engine to idle for at least
30 seconds after starting. Drive at moder-
ate speed for a short distance first, espe-
cially in cold weather.
BEFORE STARTING THE ENGINE STARTING THE ENGINE
Starting and driving
5-9
Z
01.9.21/R50-D/V5
X
Page 160 of 288
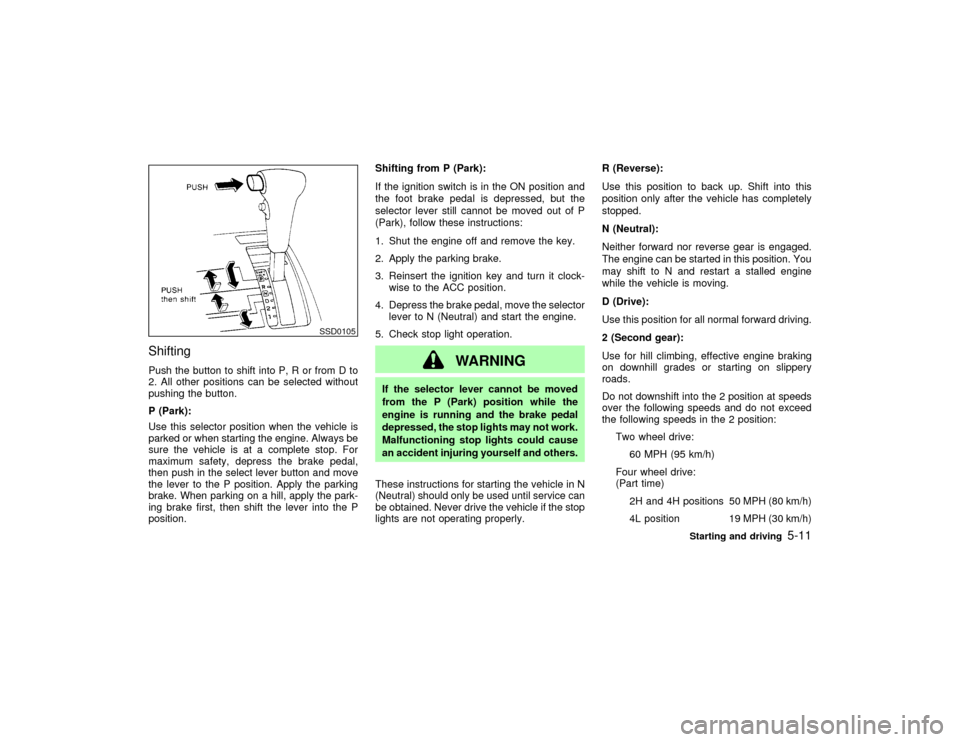
ShiftingPush the button to shift into P, R or from D to
2. All other positions can be selected without
pushing the button.
P (Park):
Use this selector position when the vehicle is
parked or when starting the engine. Always be
sure the vehicle is at a complete stop. For
maximum safety, depress the brake pedal,
then push in the select lever button and move
the lever to the P position. Apply the parking
brake. When parking on a hill, apply the park-
ing brake first, then shift the lever into the P
position.Shifting from P (Park):
If the ignition switch is in the ON position and
the foot brake pedal is depressed, but the
selector lever still cannot be moved out of P
(Park), follow these instructions:
1. Shut the engine off and remove the key.
2. Apply the parking brake.
3. Reinsert the ignition key and turn it clock-
wise to the ACC position.
4. Depress the brake pedal, move the selector
lever to N (Neutral) and start the engine.
5. Check stop light operation.
WARNING
If the selector lever cannot be moved
from the P (Park) position while the
engine is running and the brake pedal
depressed, the stop lights may not work.
Malfunctioning stop lights could cause
an accident injuring yourself and others.
These instructions for starting the vehicle in N
(Neutral) should only be used until service can
be obtained. Never drive the vehicle if the stop
lights are not operating properly.R (Reverse):
Use this position to back up. Shift into this
position only after the vehicle has completely
stopped.
N (Neutral):
Neither forward nor reverse gear is engaged.
The engine can be started in this position. You
may shift to N and restart a stalled engine
while the vehicle is moving.
D (Drive):
Use this position for all normal forward driving.
2 (Second gear):
Use for hill climbing, effective engine braking
on downhill grades or starting on slippery
roads.
Do not downshift into the 2 position at speeds
over the following speeds and do not exceed
the following speeds in the 2 position:
Two wheel drive:
60 MPH (95 km/h)
Four wheel drive:
(Part time)
2H and 4H positions 50 MPH (80 km/h)
4L position 19 MPH (30 km/h)
SSD0105
Starting and driving
5-11
Z
01.9.21/R50-D/V5
X