Page 175 of 288

on paved roads, vibration and tire
squealing may occur.
IThe 4WD transfer case may not be
shifted between 4H and 4LO at low
ambient temperatures and the trans-
fer 4LO position indicator light may
blink even when the 4WD shift switch
is shifted. After driving for a while
you can change the 4WD transfer
case between 4H and 4LO.
When driving on rough roads,
ISet the 4WD shift switch to AUTO, 4H or
4LO.
IDrive carefully according to the road sur-
face conditions.
When the vehicle is stuck,
IPlace stones or wooden blocks under the
tires to free the vehicle.
ISet the 4WD shift switch to 4H or 4LO.
IIf it is difficult to free the vehicle, repeat
forward and backward movement to in-
crease the movement.
IIf the vehicle is stuck deep in mud, tirechains may be effective.
CAUTION
IDo not increase the tire rotation ex-
cessively. Tires will sink deep into the
mud, making it difficult to free the
vehicle.
IAvoid shifting gears with the engine
running at high speeds as this may
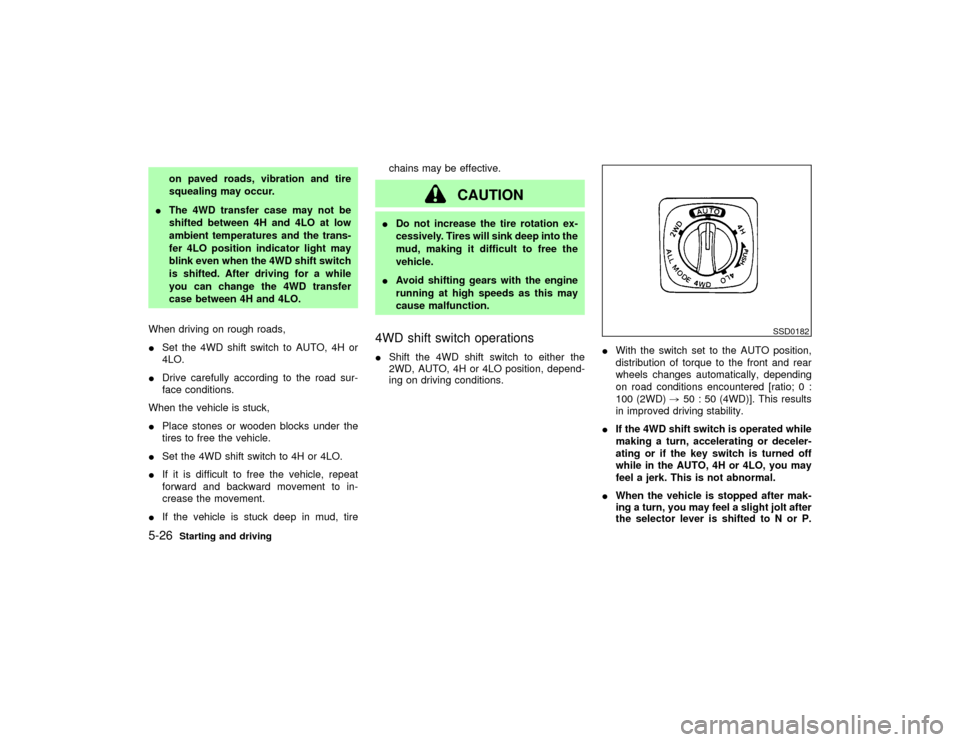
cause malfunction.4WD shift switch operationsIShift the 4WD shift switch to either the
2WD, AUTO, 4H or 4LO position, depend-
ing on driving conditions.IWith the switch set to the AUTO position,
distribution of torque to the front and rear
wheels changes automatically, depending
on road conditions encountered [ratio; 0 :
100 (2WD),50 : 50 (4WD)]. This results
in improved driving stability.
IIf the 4WD shift switch is operated while
making a turn, accelerating or deceler-
ating or if the key switch is turned off
while in the AUTO, 4H or 4LO, you may
feel a jerk. This is not abnormal.
IWhen the vehicle is stopped after mak-
ing a turn, you may feel a slight jolt after
the selector lever is shifted to N or P.
SSD0182
5-26
Starting and driving
Z
01.9.21/R50-D/V5
X
Page 177 of 288

come on immediately, make sure the
area around the vehicle is safe, and
drive the vehicle straight, accelerate or
decelerate or move the vehicle in re-
verse, then shift the 4WD shift switch.
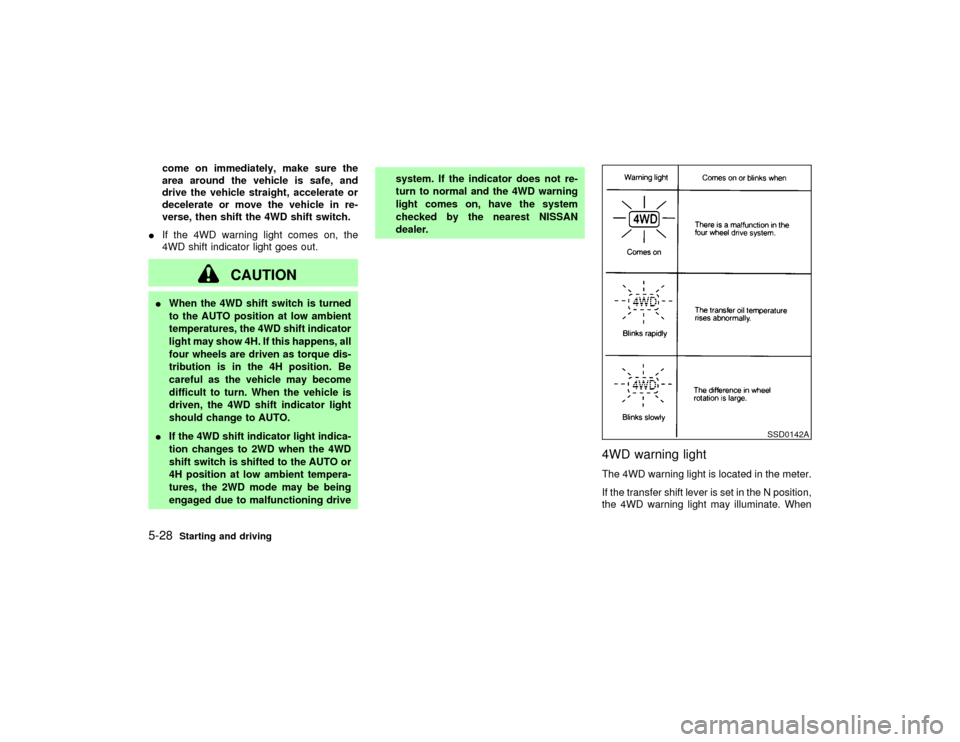
IIf the 4WD warning light comes on, the
4WD shift indicator light goes out.
CAUTION
IWhen the 4WD shift switch is turned
to the AUTO position at low ambient
temperatures, the 4WD shift indicator
light may show 4H. If this happens, all
four wheels are driven as torque dis-
tribution is in the 4H position. Be
careful as the vehicle may become
difficult to turn. When the vehicle is
driven, the 4WD shift indicator light
should change to AUTO.
IIf the 4WD shift indicator light indica-
tion changes to 2WD when the 4WD
shift switch is shifted to the AUTO or
4H position at low ambient tempera-
tures, the 2WD mode may be being
engaged due to malfunctioning drivesystem. If the indicator does not re-
turn to normal and the 4WD warning
light comes on, have the system
checked by the nearest NISSAN
dealer.
4WD warning lightThe 4WD warning light is located in the meter.
If the transfer shift lever is set in the N position,
the 4WD warning light may illuminate. When
SSD0142A
5-28
Starting and driving
Z
01.9.21/R50-D/V5
X
Page 191 of 288

the vehicle to move. This is especially
true for vehicle with limited slip dif-
ferential carriers.
IDo not allow passengers to stay in
the vehicle while it is on the jack.
Carefully read the following instructions.
1. Place the jack directly under the jack-up
point.
The jack should be used on level firm
ground.
2. Loosen each wheel nut one or two turns by
turning counterclockwise with the wheel nut
wrench.
Do not remove the wheel nuts until the tire
is off the ground.
3. Carefully raise the vehicle until the tire
clears the ground. To lift the vehicle, se-
curely hold the jack lever and rod with both
hands as shown above. Remove the wheel
nuts, and then remove the wheel. Do not
remove the brake drum with the wheel.
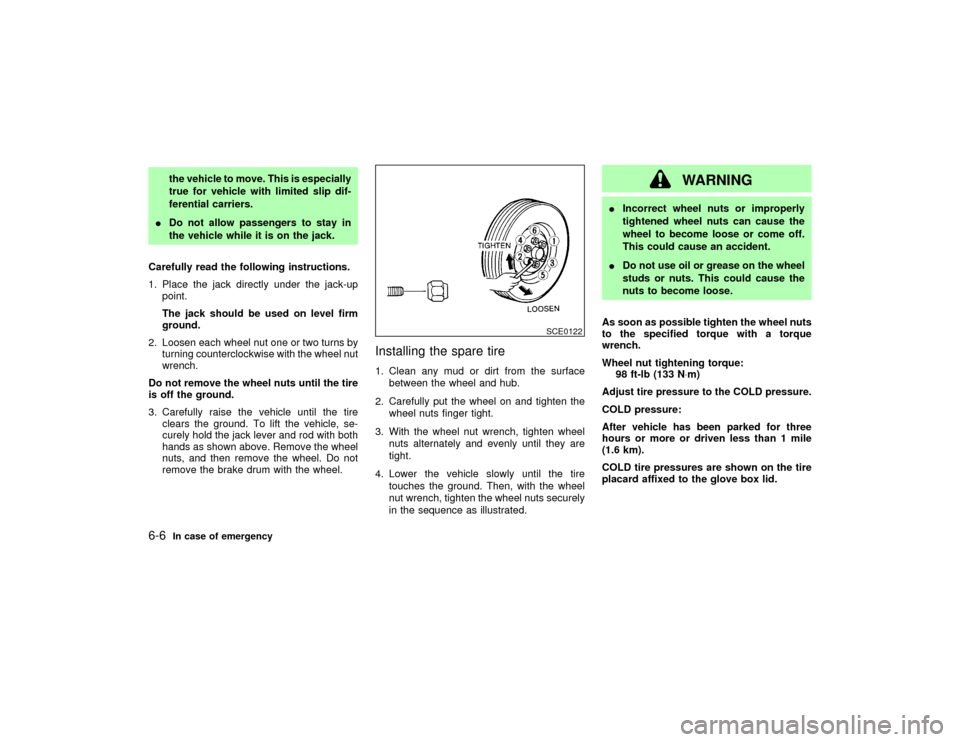
Installing the spare tire1. Clean any mud or dirt from the surface
between the wheel and hub.
2. Carefully put the wheel on and tighten the
wheel nuts finger tight.
3. With the wheel nut wrench, tighten wheel
nuts alternately and evenly until they are
tight.
4. Lower the vehicle slowly until the tire
touches the ground. Then, with the wheel
nut wrench, tighten the wheel nuts securely
in the sequence as illustrated.
WARNING
IIncorrect wheel nuts or improperly
tightened wheel nuts can cause the
wheel to become loose or come off.
This could cause an accident.
IDo not use oil or grease on the wheel
studs or nuts. This could cause the
nuts to become loose.
As soon as possible tighten the wheel nuts
to the specified torque with a torque
wrench.
Wheel nut tightening torque:
98 ft-lb (133 N×m)
Adjust tire pressure to the COLD pressure.
COLD pressure:
After vehicle has been parked for three
hours or more or driven less than 1 mile
(1.6 km).
COLD tire pressures are shown on the tire
placard affixed to the glove box lid.
SCE0122
6-6
In case of emergency
Z
01.9.21/R50-D/V5
X
Page 193 of 288
Tightening torque of nuts:
48 to 66 ft-lb
(66 to 89 N×m)
Use a suitable padlock.
CAUTION
Do not insert the jack rod straight as it isdesigned to be inserted at an angle as
shown.
When stowing the 17 inch wheel, remove the
cap pushing it from the inside of the wheel.
SCE0244
SCE0245
6-8
In case of emergency
Z
01.9.21/R50-D/V5
X
Page 246 of 288

CHANGING WHEELS AND TIRES
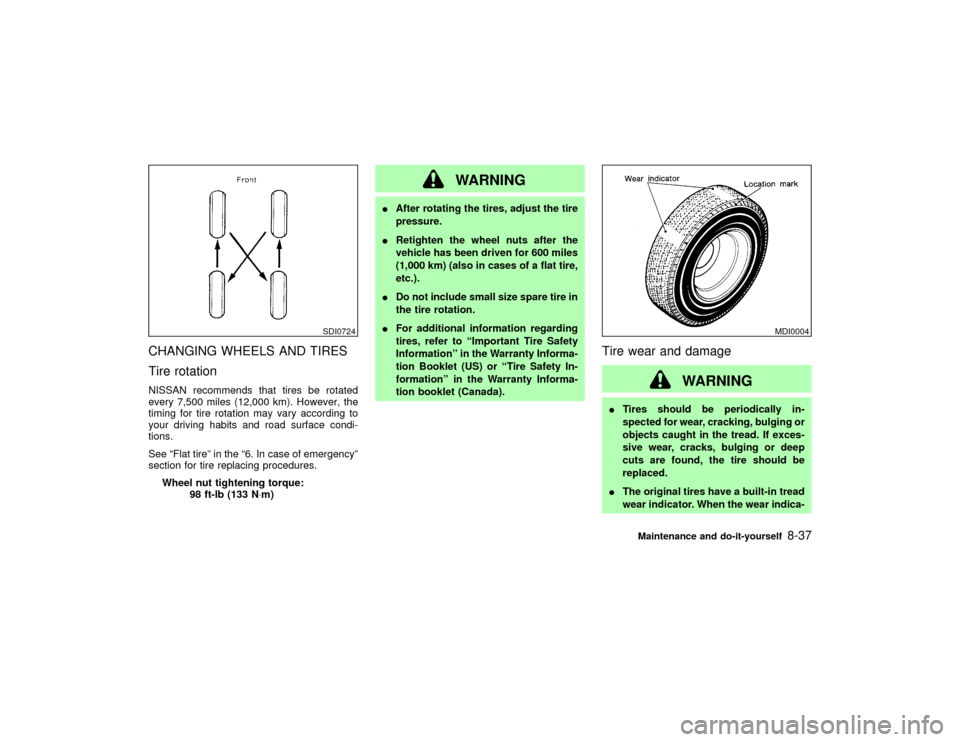
Tire rotationNISSAN recommends that tires be rotated
every 7,500 miles (12,000 km). However, the
timing for tire rotation may vary according to
your driving habits and road surface condi-
tions.
See ªFlat tireº in the ª6. In case of emergencyº
section for tire replacing procedures.
Wheel nut tightening torque:
98 ft-lb (133 N×m)
WARNING
IAfter rotating the tires, adjust the tire
pressure.
IRetighten the wheel nuts after the
vehicle has been driven for 600 miles
(1,000 km) (also in cases of a flat tire,
etc.).
IDo not include small size spare tire in
the tire rotation.
IFor additional information regarding
tires, refer to ªImportant Tire Safety
Informationº in the Warranty Informa-
tion Booklet (US) or ªTire Safety In-
formationº in the Warranty Informa-
tion booklet (Canada).
Tire wear and damage
WARNING
ITires should be periodically in-
spected for wear, cracking, bulging or
objects caught in the tread. If exces-
sive wear, cracks, bulging or deep
cuts are found, the tire should be
replaced.
IThe original tires have a built-in tread
wear indicator. When the wear indica-
SDI0724
MDI0004
Maintenance and do-it-yourself
8-37
Z
01.9.21/R50-D/V5
X