2002 NISSAN PATHFINDER transmission
[x] Cancel search: transmissionPage 225 of 288
CAUTION
Be careful not to burn yourself, as the
engine oil may be hot.
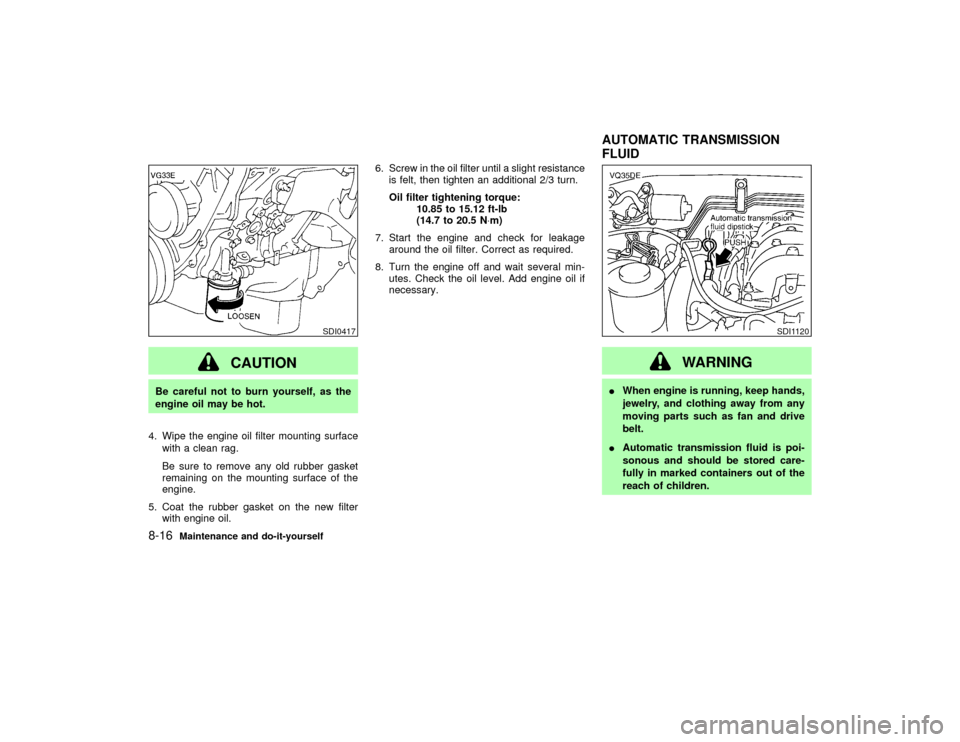
4. Wipe the engine oil filter mounting surface
with a clean rag.
Be sure to remove any old rubber gasket
remaining on the mounting surface of the
engine.
5. Coat the rubber gasket on the new filter
with engine oil.6. Screw in the oil filter until a slight resistance
is felt, then tighten an additional 2/3 turn.
Oil filter tightening torque:
10.85 to 15.12 ft-lb
(14.7 to 20.5 N×m)
7. Start the engine and check for leakage
around the oil filter. Correct as required.
8. Turn the engine off and wait several min-
utes. Check the oil level. Add engine oil if
necessary.
WARNING
IWhen engine is running, keep hands,
jewelry, and clothing away from any
moving parts such as fan and drive
belt.
IAutomatic transmission fluid is poi-
sonous and should be stored care-
fully in marked containers out of the
reach of children.
SDI0417
SDI1120
AUTOMATIC TRANSMISSION
FLUID
8-16
Maintenance and do-it-yourself
Z
01.9.21/R50-D/V5
X
Page 226 of 288
TEMPERATURE CONDITIONS
FOR CHECKINGThe fluid level should be checked using the
HOT range (L & H marks) on the dipstick at
fluid temperatures between 122 and 176ÉF (50
and 80ÉC) after the vehicle has been driven
approximately 5 minutes in urban areas after
the engine is warmed up. The level can be
checked at fluid temperatures between 86 and
122ÉF (30 and 50ÉC) using the COLD range on
the dipstick for reference, after the engine is
warmed up but before driving. However, the
fluid level must be rechecked using the HOT
range.1. Park the vehicle on a level surface and set
the parking brake.
2. Start the engine and then move the selector
lever through each gear range, ending in P.
3. Check the fluid level with the engine idling.
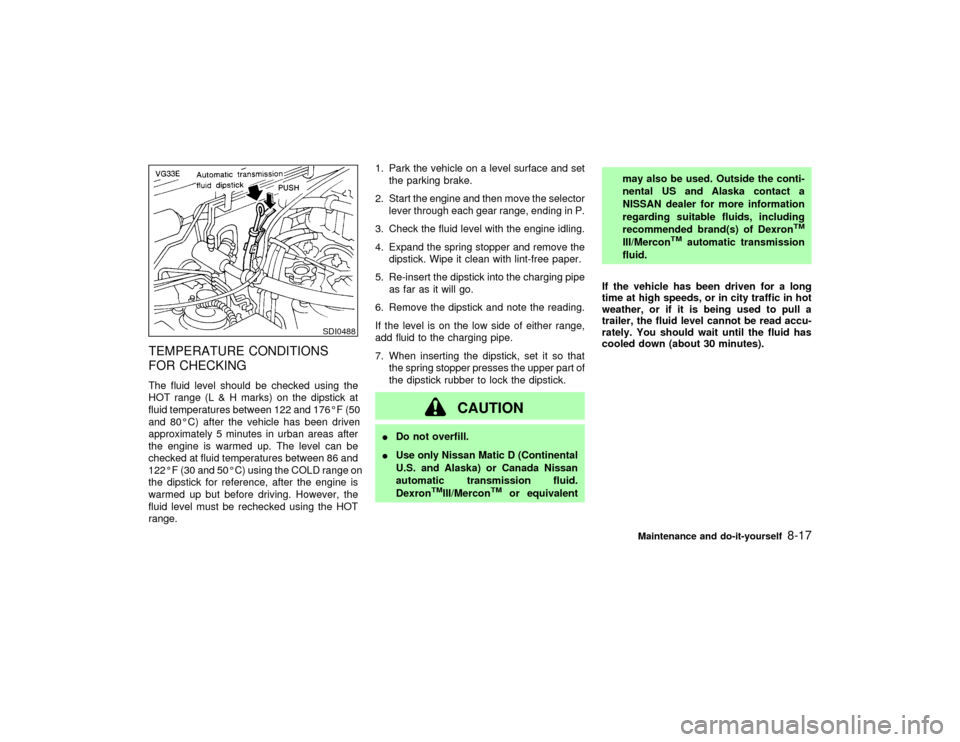
4. Expand the spring stopper and remove the
dipstick. Wipe it clean with lint-free paper.
5. Re-insert the dipstick into the charging pipe
as far as it will go.
6. Remove the dipstick and note the reading.
If the level is on the low side of either range,
add fluid to the charging pipe.
7. When inserting the dipstick, set it so that
the spring stopper presses the upper part of
the dipstick rubber to lock the dipstick.
CAUTION
IDo not overfill.
IUse only Nissan Matic D (Continental
U.S. and Alaska) or Canada Nissan
automatic transmission fluid.
Dexron
TMIII/Mercon
TM
or equivalentmay also be used. Outside the conti-
nental US and Alaska contact a
NISSAN dealer for more information
regarding suitable fluids, including
recommended brand(s) of Dexron
TM
III/Mercon
TM
automatic transmission
fluid.
If the vehicle has been driven for a long
time at high speeds, or in city traffic in hot
weather, or if it is being used to pull a
trailer, the fluid level cannot be read accu-
rately. You should wait until the fluid has
cooled down (about 30 minutes).
SDI0488
Maintenance and do-it-yourself
8-17
Z
01.9.21/R50-D/V5
X
Page 248 of 288
age the transmission, transfer case and
differential gears.
If excessive tire wear is found, it is recom-
mended that all four tires be replaced with tires
of the same size, brand, construction and
tread pattern. The tire pressure and wheel
alignment should also be checked and cor-
rected as necessary. Contact your NISSAN
dealer.Wheel balanceUnbalanced wheels may affect vehicle han-
dling and tire life. Even with regular use,
wheels can get out of balance. Therefore, they
should be balanced as required.
Wheel balance service should be performed
with the wheels off the vehicle. Spin balancing
the rear wheels on the vehicle could lead to
transmission damage.
IFor additional information regarding tires,
refer to ªImportant Tire Safety Informationº
in the Warranty Information Booklet (US) or
ªTire Safety Informationº in the Warranty
Information booklet (Canada).Care of wheelsIWash the wheels when washing the vehicleto maintain their appearance.
IClean the inner side of the wheels when the
wheel is changed or the underside of the
vehicle is washed.
IDo not use abrasive cleaners when wash-
ing the wheels.
IInspect wheel rims regularly for dents or
corrosion. This may cause loss of pressure
or damage the tire bead.
INISSAN recommends that the road wheels
be waxed to protect against road salt in
areas where it is used during winter.
TEMPORARY USE ONLY spare tire
(if so equipped)U.S. only. Canadian vehicles are equipped
with a full size spare tire.
Observe the following precautions if the TEM-
PORARY USE ONLY spare tire must be used,
otherwise your vehicle could be damaged or
involved in an accident.
WARNING
IThe TEMPORARY USE ONLY spare
tire should be used only for emer-gency. It should be replaced by the
standard tire at the first opportunity.
IDrive carefully while the TEMPO-
RARY USE ONLY spare tire is in-
stalled.
Avoid sharp turns and abrupt braking
while driving.
IPeriodically check the TEMPORARY
USE ONLY spare tire inflation pres-
sure, and always keep it at 28 psi (190
kPa, 1.9 bar).
IAlways keep the pressure of the full
size spare tire (if so equipped) at the
recommended pressure for standard
tires, as indicated on the tire placard.
For tire placard location, see ªTire
placardº in the ª9. Technical and con-
sumer informationº section.
IDo not drive your vehicle at speeds
faster than 50 MPH (80 km/h).
IWhen driving on roads covered with
snow or ice, the small size spare tire
should be used on the rear wheel and
Maintenance and do-it-yourself
8-39
Z
01.9.21/R50-D/V5
X
Page 249 of 288
the original tire used on the front
wheels (drive wheels). Use tire chains
only on the front two original tires.
ITire tread of the TEMPORARY USE
ONLY spare tire will wear at a faster
rate than the original tire. Replace the
TEMPORARY USE ONLY spare tire as
soon as the tread wear indicators
appear.
IDo not use the TEMPORARY USE
ONLY spare tire on other vehicles.
IDo not use more than one TEMPO-
RARY USE ONLY spare tire at the
same time.
IDo not tow a trailer while the TEMPO-
RARY USE ONLY spare tire is in-
stalled.
CAUTION
IDo not use tire chains on a TEMPO-
RARY USE ONLY spare tire. Tire
chains will not fit properly on theTEMPORARY USE ONLY spare tire
and may cause damage to the ve-
hicle.
IBecause the TEMPORARY USE ONLY
spare tire is smaller than the original
tire, ground clearance is reduced. To
avoid damage to the vehicle do not
drive over obstacles. Also do not
drive the vehicle through an auto-
matic car wash since it may get
caught.
CLUTCH HOUSING DRAIN
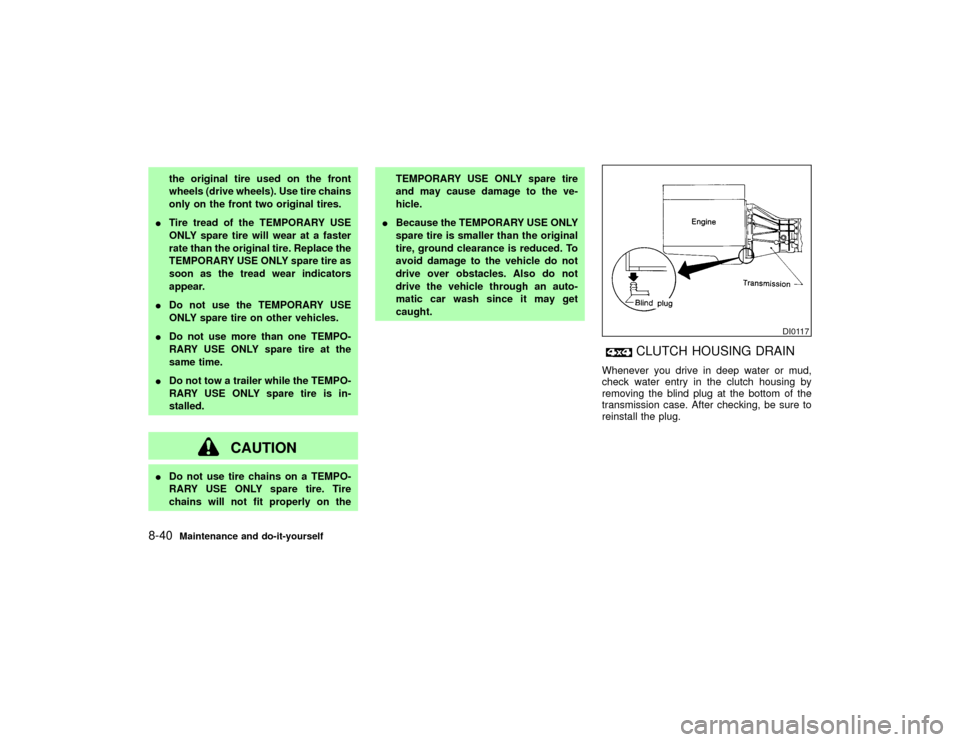
Whenever you drive in deep water or mud,
check water entry in the clutch housing by
removing the blind plug at the bottom of the
transmission case. After checking, be sure to
reinstall the plug.
DI0117
8-40
Maintenance and do-it-yourself
Z
01.9.21/R50-D/V5
X
Page 254 of 288

Capacity (Approximate)
Recommended specifications
US
measureImp
measureLiter
Manual transmissionÐ Ð Ð API GL-4 Viscosity SAE 75W-85 only
Differential gear oil (exc. LSD)Ð Ð Ð API GL-5*1
Limited-slip differential (LSD) gear oil Ð Ð ÐOnly LSD gear oil:
API GL-5 and SAE 80W-90*2 approved for Nissan LSD*3
Automatic transmission fluid
Refill to the proper oil level according to the instruc-
tions in the ª8. Maintenance and do-it-yourselfº sec-
tion.Nissan Matic ªDº (Continental U.S. and Alaska) or Canada
NISSAN Automatic Transmission Fluid.*6
Power steering fluidGenuine Nissan PSF II or equivalent*7
All-mode 4WD transfer fluidNissan Matic ªDº (Continental U.S. and Alaska) or Canada
NISSAN Automatic Transmission Fluid.*8
Transfer fluidNissan Matic ªCº*6 or API GL-4*1
Brake and clutch fluidGenuine Nissan Brake Fluid*4 or equivalent
DOT 3 (U.S. F.M.V.S.S. No. 116)
Propeller shaft greaseÐ Ð Ð NLGI No. 2 (Molybdenum disulphide lithium soap base)
Multi-purpose greaseÐ Ð Ð NLGI No. 2 (Lithium soap base)
Air conditioning system refrigerantÐ Ð Ð HFC-134a (R-134a)*5
Air conditioning system lubricantsÐ Ð Ð Nissan A/C System Oil Type S or exact equivalent*5
*1: For further details, see recommended SAE viscosity number chart.
*2: SAE 90 is acceptable in temperatures above 0ÉF (þ18ÉC).
*3: Contact your NISSAN dealer for a list of approved oils.
*4: Available in mainland U.S. through your NISSAN dealer.
*5: See ªVehicle identificationº later in this section for air conditioner specification label.
*6: Never mix Nissan Matic ªCº and API GL-4 oil.
*7: Genuine Nissan PSF, Canada NISSAN Automatic Transmission Fluid, DEXRON
TMIII/MERCON
TM
or equivalent ATF may also be used.
*8: Outside the continental U.S. and Alaska contact an authorized NISSAN dealer for more information regarding suitable fluids, including recommended brand(s) of
DEXRON
TMIII/MERCON
TM
Automatic Transmission Fluid.
Technical and consumer information
9-3
Z
01.9.21/R50-D/V5
X
Page 271 of 288
IAfter the hitch is removed, seal the
bolt holes to prevent exhaust fumes,
water or dust from entering the pas-
senger compartment.
IRegularly check all hitch mounting
bolts are securely mounted.
ITo reduce the possibility of additional
damage if your vehicle is struck from
the rear, where practical, remove the
hitch and/or receiver when not in use.
INever connect a trailer brake system
directly to the vehicle brake system.Tire pressuresIWhen towing a trailer, inflate the vehicle
tires to the recommended cold tire pressure
indicated on the tire placard (affixed to the
glove box lid).
ITrailer tire condition, size, load rating and
proper inflation pressure should be in ac-
cordance with the trailer and tire manufac-
turers' specifications.Safety chainsAlways use a suitable chain between yourvehicle and the trailer. The chain should be
crossed and should be attached to the hitch,
not to the vehicle bumper or axle. Be sure to
leave enough slack in the chain to permit
turning corners.
Trailer lightsTrailer lights should comply with Federal
and/or local regulations.
When wiring vehicle for towing connection,
connect stop and tail light pickup into the
vehicle electrical circuit at point between
the sensor and stop light switch or light
switch.Trailer brakesIf your trailer is equipped with a braking sys-
tem, make sure it conforms to Federal and/or
local regulations and that it is properly in-
stalled.
WARNING
Never connect a trailer brake system
directly to the vehicle brake system.Trailer towing tipsIn order to gain skill and an understanding ofthe vehicle's behavior, you should practice
turning, stopping and backing up in an area
which is free from traffic. Steering stability and
braking performance will be somewhat differ-
ent than under normal driving conditions.
IAlways secure items in the trailer to prevent
load shift while driving.
IAvoid abrupt starts, acceleration or stops.
IAvoid sharp turns or lane changes.
IAlways drive your vehicle at a moderate
speed.
IAlways block the wheels on both vehicle
and trailer when parking. Parking on a
slope is not recommended; however, if you
must do so, and if your vehicle is equipped
with automatic transmission, first block the
wheels and apply the parking brake, and
then move the transmission selector lever
into the P position. If you move the selector
lever to the P position before blocking the
wheels and applying the parking brake,
transmission damage could occur.
IWhen going down a hill, shift into a lower
gear and use the engine braking effect.
When ascending a long grade, downshift
the transmission to a lower gear and reduce
speed to reduce chances of engine over-
loading and/or overheating.
9-20
Technical and consumer information
Z
01.9.21/R50-D/V5
X
Page 272 of 288
However, for long steep grades, do not stay in
1st or 2nd gear when driving above 35 MPH
(56 km/h).
IIf the engine coolant rises to an extremely
high temperature when the air conditioning
system is on, turn off the air conditioner.
Coolant heat can be additionally vented by
opening the windows, switching the fan
control to high and setting the temperature
control to the HOT position.
ITrailer towing requires more fuel than nor-
mal circumstances.
IAvoid towing a trailer for the first 500 miles
(800 km).
IHave your vehicle serviced more often than
at intervals specified in the recommended
Maintenance Schedule.
When towing a trailer, change oil in the
transmission more frequently. See the
Maintenance Schedule.UNIFORM TIRE QUALITY
GRADINGDOT (Department of Transportation) Quality
Grades: All passenger car tire must conform to
Federal Safety Requirements in addition to
these grades.Quality grades can be found where applicable
on the tire sidewall between tread shoulder
and maximum section width. For example:
Treadwear 200 Traction AA Temperature A
TreadwearTreadwear grade is a comparative rating
based on tire wear rate when tested under
controlled conditions on specified government
test courses. For example, a tire graded 150
would wear one and a half (1-1/2) times as well
on the government course as a tire graded
100. However, relative tire performance de-
pends on actual driving conditions, and may
vary significantly due to variations in driving
habits, service practices and differences in
road characteristics and climate.Traction AA, A, B and CThe traction grades from highest to lowest are
AA, A, B, and C. Those grades represent the
tire's ability to stop on wet pavement as mea-
sured under controlled conditions on specified
government test surfaces of asphalt and con-
crete. A tire marked C may have poor traction
performance.
WARNING
The traction grade assigned to your ve-
hicle tires is based on straight-ahead
braking traction tests, and does not in-
clude acceleration, cornering, hydro-
planing, or peak traction characteristics.Temperature A, B and CTemperature grades are A (the highest), B,
and C. They represent a tire's resistance to
heat build-up, and its ability to dissipate heat
when tested under controlled conditions on a
specified indoor laboratory test wheel. Sus-
tained high temperature can cause tire mate-
rial to degenerate, reducing tire life. Excessive
temperatures can lead to sudden tire failure.
Grade C corresponds to a performance level
which all passenger car tires must meet under
the Federal Motor Vehicle Safety Standard No.
109. Grades A and B represent higher levels of
performance on laboratory test wheels than
the minimum required by law.Technical and consumer information
9-21
Z
01.9.21/R50-D/V5
X
Page 280 of 288

10 Index
A
ABS (Anti-lock brake system) ......................... 5-32
Air bag system
Front (See supplemental front airbag
system) ...................................................... 1-16
Side (See supplemental side air bag
system) ...................................................... 1-18
Air bag warning labels .................................... 1-20
Air bag warning light.............................. 1-21, 2-12
Air cleaner housing filter ................................. 8-23
Air conditioner
Air conditioner operation ...................... 4-2, 4-8
Air conditioner service ................ 4-2, 4-8, 4-10
Air conditioner specification label.............. 9-14
Air conditioning system refrigerant and
lubricant recommendations ................ 4-10, 9-8
Heater and air conditioner (automatic) ....... 4-8
Heater and air conditioner controls ............. 4-2
Servicing air conditioner .............................. 4-2
Air conditioner operation, Semiautomatic ......... 4-5
Air flow charts ................................................... 4-5
Alcohol, drugs and driving ................................ 5-4
Anchor point locations
Top tether strap ......................................... 1-41
Antenna........................................................... 4-31
Anti-lock Brake System (ABS) ........................ 5-32
Anti-lock brake warning light............................. 2-9Appearance care
Exterior appearance care ............................ 7-2
Interior appearance care ............................. 7-3
Armrest ............................................................. 1-9
Ashtray (See cigarette lighter and ashtray) .... 2-26
ATP warning light ........................................... 2-10
Audible reminders ........................................... 2-15
Audio operation precautions ........................... 4-12
Audio system .................................................. 4-11
Steering wheel audio controls ................... 4-30
Automatic
Automatic transmission fluid (ATF) ........... 8-16
Drive positioner ......................................... 3-16
Driving with automatic
transmission ....................................... 5-6, 5-10
Seat positioner, seat ................................. 3-16
Transmission park warning light ............... 2-10
Transmission selector lever lock release .. 5-13
Avoiding collision and rollover .......................... 5-4
B
Battery............................................................. 8-21
Battery saver system................................. 2-20
Battery replacement, (See remote keyless entry
system) ............................................................. 3-8
Before starting the engine ................................ 5-9
Belts (See drive belts) .................................... 8-22Brake
Anti-lock brake system (ABS) ................... 5-32
Brake and clutch fluid................................ 8-18
Brake booster ............................................ 8-26
Brake fluid ................................................. 8-18
Brake pedal ............................................... 8-25
Brake pedal check..................................... 8-26
Brake system............................................. 5-32
Parking brake check ........................ 5-16, 8-25
Parking brake operation ............................ 5-16
Warning light ............................................. 2-10
Break-in schedule ........................................... 5-19
Bulb check/instrument panel ............................ 2-9
Bulb replacement ............................................ 8-30
C
Capacities and recommended fuel/lubricants... 9-2
Car phone or CB radio ................................... 4-32
Cargo (See vehicle loading information) ........ 2-33
Cargo net ........................................................ 2-33
Cassette player (See audio system) .... 4-16, 4-23,
4-28
Catalytic converter, Three way catalyst............ 5-3
CD care and cleaning ..................................... 4-26
Child restraints ................................................ 1-31
Installation on front passenger seat .......... 1-42
Installation on rear seat outboard
positions .................................................... 1-35
Z
01.9.21/R50-D/V5
X