2002 NISSAN PATHFINDER window
[x] Cancel search: windowPage 140 of 288
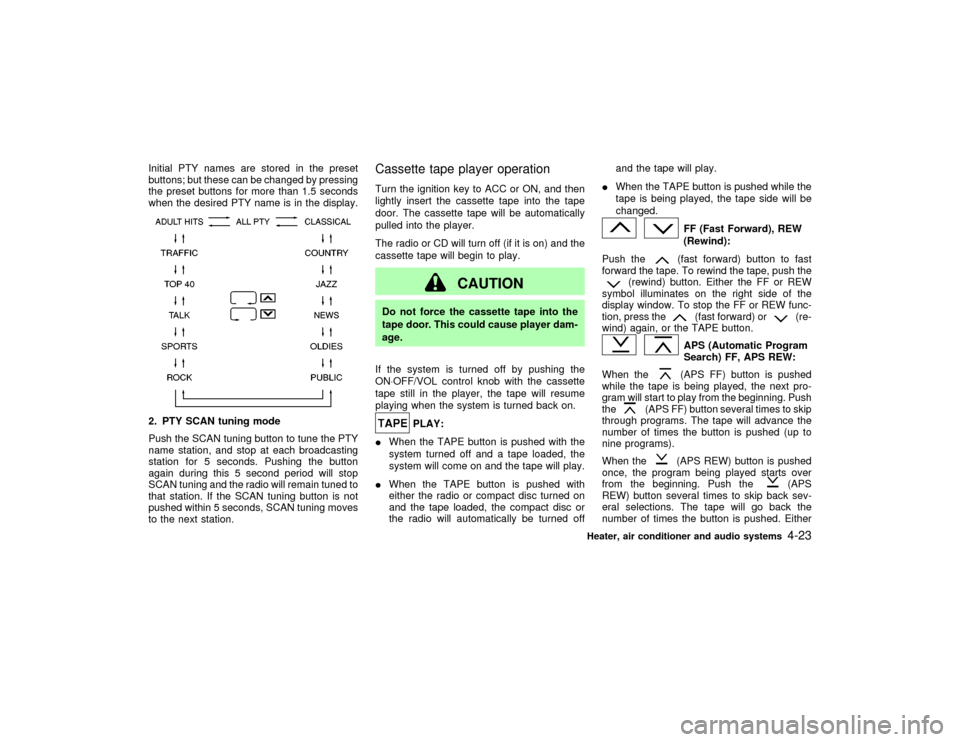
Initial PTY names are stored in the preset
buttons; but these can be changed by pressing
the preset buttons for more than 1.5 seconds
when the desired PTY name is in the display.2. PTY SCAN tuning mode
Push the SCAN tuning button to tune the PTY
name station, and stop at each broadcasting
station for 5 seconds. Pushing the button
again during this 5 second period will stop
SCAN tuning and the radio will remain tuned to
that station. If the SCAN tuning button is not
pushed within 5 seconds, SCAN tuning moves
to the next station.
Cassette tape player operationTurn the ignition key to ACC or ON, and then
lightly insert the cassette tape into the tape
door. The cassette tape will be automatically
pulled into the player.
The radio or CD will turn off (if it is on) and the
cassette tape will begin to play.
CAUTION
Do not force the cassette tape into the
tape door. This could cause player dam-
age.
If the system is turned off by pushing the
ON×OFF/VOL control knob with the cassette
tape still in the player, the tape will resume
playing when the system is turned back on.
PLAY:
IWhen the TAPE button is pushed with the
system turned off and a tape loaded, the
system will come on and the tape will play.
IWhen the TAPE button is pushed with
either the radio or compact disc turned on
and the tape loaded, the compact disc or
the radio will automatically be turned offand the tape will play.
IWhen the TAPE button is pushed while the
tape is being played, the tape side will be
changed.
FF (Fast Forward), REW
(Rewind):
Push the(fast forward) button to fast
forward the tape. To rewind the tape, push the
(rewind) button. Either the FF or REW
symbol illuminates on the right side of the
display window. To stop the FF or REW func-
tion, press the
(fast forward) or
(re-
wind) again, or the TAPE button.
APS (Automatic Program
Search) FF, APS REW:
When the(APS FF) button is pushed
while the tape is being played, the next pro-
gram will start to play from the beginning. Push
the
(APS FF) button several times to skip
through programs. The tape will advance the
number of times the button is pushed (up to
nine programs).
When the
(APS REW) button is pushed
once, the program being played starts over
from the beginning. Push the
(APS
REW) button several times to skip back sev-
eral selections. The tape will go back the
number of times the button is pushed. Either
Heater, air conditioner and audio systems
4-23
Z
01.9.21/R50-D/V5
X
Page 141 of 288
the FF or REW symbol flashes on the right
side of the display window while searching for
the selection.
This system searches for the blank intervals
between selections. If there is a blank interval
within one program or there is no interval
between programs, the system may not stop in
the desired or expected location.
SCAN tuning:
Push the SCAN tuning button while playing
tape, and it stops at the next tape program for
5 seconds. Pushing the button again during
this 5 second period will stop SCAN tuning and
the tape program is continued. If the SCAN
tuning button is not pushed within 5 seconds,
SCAN tuning moves to the next tape program.TAPE EJECT:
When this button is pushed with the tape
loaded, the tape will be ejected.
When the tape is ejected while it is being
played, the system will be turned off.
Compact disc (CD) changer
operationTurn the ignition key to the ACC or ON position
and insert the compact disc into the slot with
the label side facing up. The compact disc willbe guided automatically into the slot and start
playing.
After loading the disc, the number of tracks on
the disc and the play time will appear on the
display.
If the radio or tape is already operating, it will
automatically turn off and the compact disc will
play.
CAUTION
Do not force the compact disc into the
slot. This could damage the player.
If the system has been turned off while the
compact disc was playing, pushing the
ON×OFF/VOL control knob will start the com-
pact disc.
8 cm diameter compact discs can also be used
without an adapter.
LOAD button:
To insert a CD in the CD changer, push the
LOAD button for less than 1.5 seconds. And
select the loading slot by pushing the CD insert
select button (1 to 6) then insert the CD.
To insert 6 CDs to the CD changer, push the
LOAD button for more than 1.5 seconds.The inserted slot numbers will illuminate on the
display.
PLAY:
When the CD6 button is pushed with the
system off and the compact disc loaded, the
system will turn on and the compact disc will
start to play.
When the CD6 button is pushed with the
compact disc loaded but the tape or the radio
playing, the tape or radio will automatically be
turned off and the compact disc will start to
play.
FF (Fast Forward), REW
(Rewind):
When the(fast forward) or
(rewind)
button is pushed while the compact disc is
being played, the compact disc will play while
fast forwarding or rewinding. When the button
is released, the compact disc will return to
normal play speed.
APS (Automatic
Program Search) FF,
APS REW:
When the(APS FF) button is pushed
while the compact disc is being played, the
program next to the present one will start to
play from its beginning. Push several times to
4-24
Heater, air conditioner and audio systems
Z
01.9.21/R50-D/V5
X
Page 144 of 288
AUDIO button (BASS, TREBLE, FADER,
BALANCE):
Press the AUDIO button to change the select-
ing mode as follows:
BASS,TREBLE,FADER,BALANCE,
BASS
To adjust Bass, Treble, Fader, Balance, press
the AUDIO button until the desired mode
BASS, TREBLE, FADER or BALANCE ap-
pears in the display.
Press the
or
button to adjust Bass
and Treble to the desired level. Use the
or
button to adjust Fader or Bal-
ance modes. Fader adjusts the sound level
between the front and rear speakers and Bal-
ance adjusts the sound level between the right
and left speakers.
After 10 seconds, the radio or cassette tape
display reappears. Once the sound quality is
set to the desired level, press the AUDIO
button repeatedly until the radio or cassette
tape display appears.
Radio/Cassette tape priority modeIn this mode, the radio station illuminates in the
display during radio operation. During cassette
tape operation, TAPE illuminates in the dis-
play.
FM-AM radio operation
FM-AM band select:
Pushing the FM-AM band select button will
change the band as follows:
AM,AM (preset station),FM1,FM2,
FM (preset station),AM
When FM/AM band select button is pushed
while the ignition switch is in the ACC or ON,
the radio will come on at the station last
played.
The last station played will also come on when
the power knob is turned to ON.
If a compact disc or tape is playing when the
FM/AM band select button is turned to ON, the
compact disc or tape will automatically be
turned off and the last radio station played will
come on.
The FM stereo indicator, ST illuminates during
FM stereo reception. When the stereo broad-
cast signal is weak, the radio automatically
changes from stereo to monaural reception.
TUNE (Tuning):WARNING
The radio should not be tuned while
driving so full attention may be given to
vehicle operation.
Use these buttons for manual tuning. To move
quickly through the channels, hold either of the
TUNE buttons down for more than 0.5 sec-
onds.
SCAN tuning:
Push the SCAN tuning button then SCAN will
illuminate in the display window. SCAN tuning
begins from high to low or low to high frequen-
cies and stops at each broadcasting station for
5 seconds. Pushing the button again during
this 5 second period stops SCAN tuning and
the radio remains tuned to that station.
If any of the SEEK/SCAN tuning buttons are
not pushed within 5 seconds, SCAN tuning
moves to the next station.
Station memory (and preset) operations:
Twelve stations can be set for the FM band
(six for FM1, six for FM2) and six stations can
Heater, air conditioner and audio systems
4-27
Z
01.9.21/R50-D/V5
X
Page 145 of 288

be set for the AM band.
1. Tune to the desired station using the SCAN
or TUNE buttons.
2. Select the desired station and keep pushing
any of the desired station memory buttons
(1 to 6) until a beep sound is heard. (The
radio mutes when the select button is
pushed.)
3. The indicator ch2 will come on and the
sound will resume. Memorizing is now com-
plete.
4. Other station select buttons can be set in
the same manner.
If the battery cable is disconnected, or if the
radio fuse opens, the radio memory is can-
celled. In that case, reset the desired stations.
Program type:
When PTY button is pressed during FM mode,
the PTY name of the current tuned station is
displayed. During this time if the PTY data
code is zero, or the data is unreadable; the
display will show NONE.
1. PTY selection mode
PTY name selection can be done by the
up/down TUNE button
or
in the
PTY selection mode.It is possible to shift the PTY name by one
step, with one push of the up/down tuning
button
or
.
PTY name selection can also be achieved by
pressing the preset buttons.
Initial PTY names are stored in the preset
buttons; but these can be changed by pressing
the preset buttons for more than 1.5 seconds
when the desired PTY name is in the display.
2. PTY SEEK tuning
After selecting a PTY name, push the
TUNE button
or
within 10 sec-
onds. Tuning to the PTY station will start. If
you do not push the TUNE button within the
10 second period, the PTY mode will be
canceled.
3. PTY SCAN tuning mode
Push the SCAN tuning button to tune the
PTY name station, and stop at each broad-
casting station for 5 seconds. Pushing the
button again during this 5 second period will
stop SCAN tuning and the radio will remain
tuned to that station. If the SCAN tuning
button is not pushed within 5 seconds,
SCAN tuning moves to the next station.
Cassette tape player operationTurn the ignition key to ACC or ON, then
carefully insert a cassette tape into the tape
door.
The cassette tape automatically pulls into the
player. The word TAPE and moving digital
squares illuminate on the right side of the
display window.
4-28
Heater, air conditioner and audio systems
Z
01.9.21/R50-D/V5
X
Page 146 of 288
CAUTION
Do not force the cassette tape into the
tape door. This could cause player dam-
age.
The cassette tape automatically changes di-
rections to play the other side when the first
side is complete. At this time, the moving
digital squares illuminate on the left side of the
display window.
PLAY:
When the TAPE/CD button is pushed with the
radio turned on and the tape loaded, the radio
will automatically be turned off and the tape
will play.
If the TAPE/CD button is pushed during either
the FF, REW, APS FF or APS REW function,
the cassette tape enters the normal play
mode.
When the TAPE/CD button is pushed with the
CD playing, the tape will play.
FF (fast forward), REW
(rewind):
Push either the FF or REW button for the
desired direction.
The FF or REW symbol illuminates in the
display.
To stop the FF or REW function, press the FF
or REW button again, or the TAPE/CD button.APS (automatic program
search) FF, APS REW:
Push either the APS FF or APS REW button
while the cassette tape is playing. The tape
runs quickly, stops, then plays the next selec-
tion. Either the FF or REW symbol flashes in
the display while searching for the selection.
This system searches at the blank intervals
between selections. If there is a blank interval
within one selection or there is no interval
between selections, the system may not stop
in the desired or expected location.
PROG (program):
Push the PROG button. The moving digital
squares illuminate on either the right or left
side of the display window to indicate the side
of program play.
If the PROG button is pushed during either theFF or REW function the tape enters the normal
play mode.
Dolby NR (Noise Reduction):
Push the Dolby NR
button for Dolby NR
encoded tapes to reduce high frequency tape
noise. The
indicator light comes on.
Dolby NR is manufactured under license from
Dolby Laboratories Licensing Corporation.
DOLBY NR and the double-D symbol
are trademarks of Dolby Laboratories
Licensing Corporation.
Metal or chrome tape usage:
The cassette player is automatically set to high
performance play when playing a metal or
chrome cassette tape.TAPE EJECT:
Push the EJECT button. The cassette tape
automatically comes out.
Heater, air conditioner and audio systems
4-29
Z
01.9.21/R50-D/V5
X
Page 151 of 288
WARNING
IDo not leave children, impaired
adults, or pets alone in your vehicle.
They could accidentally injure them-
selves or others through inadvertent
operation of the vehicle. Also, on hot,
sunny days, temperatures in a closed
vehicle could quickly become high
enough to cause severe or possibly
fatal injuries to people or animals.
IProperly secure all cargo to help pre-
vent it from sliding or shifting. Do not
place cargo higher than the seat-
backs. In a sudden stop or collision,
unsecured cargo could cause per-
sonal injury.
EXHAUST GAS (Carbon monoxide)
WARNING
Do not breathe exhaust gases; they con-
tain colorless and odorless carbon mon-
oxide. Carbon monoxide is a dangerous.
It can cause unconsciousness or death.
IIf you suspect that exhaust fumes are
entering the vehicle, drive with all
windows fully open, and have the
vehicle inspected immediately.
IDo not run the engine in closed
spaces such as a garage.
IDo not park the vehicle with the en-
gine running for any extended length
of time.
IKeep the back door and glass hatch
closed while driving, otherwise ex-
haust gases could be drawn into the
passenger compartment. If you must
drive with the back door on glass
hatch open, follow these precautions:
1. Open all the windows.2. Set the air recirculation switch
OFF and the fan control at 4 (high)
to circulate the air.
IIf electrical wiring or other cable con-
nections must pass to a trailer
through the seal on the back door or
the body, follow the manufacturer's
recommendation to prevent carbon
monoxide entry into the vehicle.
IIf a special body or other equipment
is added for recreational or other us-
age, follow the manufacturer's rec-
ommendation to prevent carbon
monoxide entry into the vehicle.
(Some recreational vehicle appli-
ances such as stoves, refrigerator,
heaters, etc. may also generate car-
bon monoxide.)
IThe exhaust system and body should
be inspected by a qualified mechanic
whenever:
a. The vehicle is raised for service.
b. You suspect that exhaust fumes
are entering into the passenger
PRECAUTIONS WHEN STARTING
AND DRIVING5-2
Starting and driving
Z
01.9.21/R50-D/V5
X
Page 158 of 288
IMake sure the area around the vehicle is
clear.
ICheck fluid levels such as engine oil, cool-
ant, brake and clutch fluid, window washer
fluid as frequently as possible, at least
whenever you refuel.
ICheck to be sure that all windows and light
lenses are clean.
IVisually inspect tires for their appearance
and condition. Also check tires for proper
inflation.
ILock all doors.
IPosition seat and adjust head restraints.
IAdjust inside and outside mirrors.
IFasten seat belts and ask all passengers to
do likewise.
ICheck the operation of warning lights when
key is turned to the ON (3) position.1. Apply the parking brake.
2.Automatic transmission:
Move the selector lever to P (Park position)
or N (Neutral position). (P preferred)
The selector lever cannot be moved out
of P and into any of the other gear
positions if the ignition key is turned to
LOCK or if the key is removed from the
switch.
The starter is designed not to operate if
the selector lever is in one of the driving
positions.
Manual transmission:
Move the gearshift lever to N (Neutral po-
sition), and depress the clutch pedal to the
floor while starting the engine.
The starter is designed not to operate
unless the clutch pedal is fully de-
pressed.
3. Crank the enginewith your foot off the
accelerator pedalby turning the ignition
key to START. Release the key when the
engine starts. If the engine starts, but fails
to run, repeat the above procedure.
Ð If the engine is very hard to start in
extremely cold or hot weather ÐUse the accelerator pedal to help start the
engine.
CAUTION
Do not operate the starter for more than
15 seconds at a time. If the engine does
not start, turn the key off and wait 10
seconds before cranking again, other-
wise the starter could be damaged.
4.Warm-up
Always allow the engine to idle for at least
30 seconds after starting. Drive at moder-
ate speed for a short distance first, espe-
cially in cold weather.
BEFORE STARTING THE ENGINE STARTING THE ENGINE
Starting and driving
5-9
Z
01.9.21/R50-D/V5
X
Page 168 of 288
During the first 1,000 miles (1,600 km), follow
these recommendations for the future reliabil-
ity and economy of your new vehicle.
IAvoid driving for long periods at constant
speed, either fast or slow.
IDo not accelerate at full throttle in any gear.
IAvoid quick starts.
IAvoid hard braking as much as possible.
IDo not tow a trailer for the first 500 miles
(800 km).
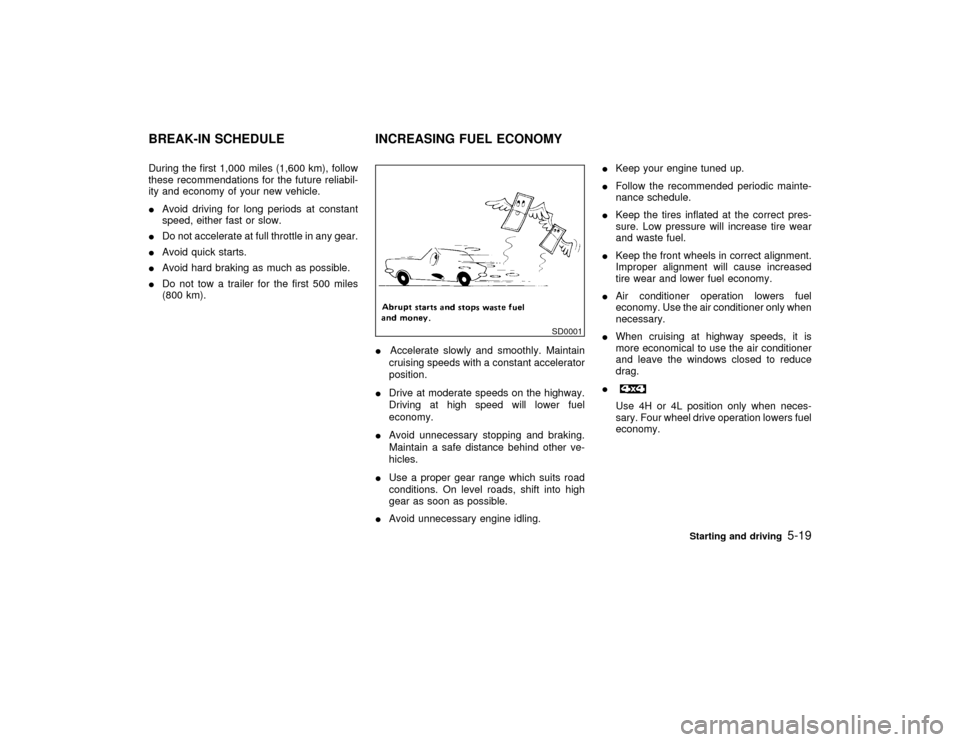
IAccelerate slowly and smoothly. Maintain
cruising speeds with a constant accelerator
position.
IDrive at moderate speeds on the highway.
Driving at high speed will lower fuel
economy.
IAvoid unnecessary stopping and braking.
Maintain a safe distance behind other ve-
hicles.
IUse a proper gear range which suits road
conditions. On level roads, shift into high
gear as soon as possible.
IAvoid unnecessary engine idling.IKeep your engine tuned up.
IFollow the recommended periodic mainte-
nance schedule.
IKeep the tires inflated at the correct pres-
sure. Low pressure will increase tire wear
and waste fuel.
IKeep the front wheels in correct alignment.
Improper alignment will cause increased
tire wear and lower fuel economy.
IAir conditioner operation lowers fuel
economy. Use the air conditioner only when
necessary.
IWhen cruising at highway speeds, it is
more economical to use the air conditioner
and leave the windows closed to reduce
drag.
I
Use 4H or 4L position only when neces-
sary. Four wheel drive operation lowers fuel
economy.
SD0001
BREAK-IN SCHEDULE INCREASING FUEL ECONOMY
Starting and driving
5-19
Z
01.9.21/R50-D/V5
X