2002 MERCEDES-BENZ G500 Synchronize key
[x] Cancel search: Synchronize keyPage 31 of 385
28 Central locking system
Te ch n i c a l
data Instruments
and controlsOperationDrivingInstrument
cluster displayPractical hints Car care Index
Start lock-out
Important!
Removing the electronic key from the starter switch
activates the start lock-out. The engine cannot be
started.
Inserting the electronic key in the starter switch
deactivates the start lock-out.
Note:
In case the engine cannot be started (vehicle’s battery is
in order), the system is not operational. Contact an
authorized Mercedes-Benz Light Truck Center or call
1-800-FOR-MERCedes (in the USA), or 1-800-387-0100
(in Canada).General notes on the central locking system
If the electronic key is inserted in the starter switch, the
vehicle cannot be locked or unlocked with the remote
control.
If the vehicle cannot be locked or unlocked:
•Check the batteries of the electronic key, see
page 343, or synchronize the electronic key, see
page 345.
•Use the mechanical key to unlock the vehicle. To
start engine, insert the electronic key in the starter
switch. There could be a slight delay until the
electronic key can be turned in the starter switch.
Important!
When unlocking the driver’s door with the mechanical
key, the exterior lamps will flash and the alarm will
sound.
To cancel the alarm, insert the electronic key in the
starter switch or press buttonŒ or‹ on the
electronic key.
J_G463.book Seite 28 Mittwoch, 19. September 2001 8:06 08
Page 34 of 385
31 Central locking system
Te ch n i c a l
data Instruments
and controlsOperationDrivingInstrument
cluster displayPractical hints Car care Index Locking and unlocking with remote control
Unlocking:
Press transmit button Œ. All turn signal lamps blink
once to indicate that the vehicle is unlocked.
The remote control can be programmed for two kinds of
unlocking modes (see below):
Selective unlocking mode –
Press transmit button Œ once to unlock driver’s door
and fuel filler flap.
Press transmit button Πtwice to unlock all doors,
fuel filler flap, and tailgate.
Global unlocking mode –
Press transmit button Πonce to unlock all doors,
fuel filler flap, and tailgate.
Notes:
If the tailgate was previously locked separately, it will
remain locked, see page 39.
The presently active unlocking mode (selective or
global) can only be determined by unlocking the vehicle
with the remote control (see below for changing mode).If within 40 seconds of unlocking with the remote
control, neither door or tailgate is opened, the electronic
key is not inserted in the starter switch, or the central
locking switch is not activated, the vehicle will
automatically lock.
Locking:
Press transmit button ‹ once. All turn signal lamps
blink three times to indicate that the vehicle is locked. If
they do not blink three times, a door or the tailgate is
not properly closed.
Note:
If the vehicle cannot be locked or unlocked by pressing
the transmit button, then it may be necessary to change
the batteries in the electronic key (if ok, battery check
lamp in electronic key will light briefly when pressing
transmit button) or to synchronize the remote control,
see pages 343 and 345.
Choosing global or selective mode on remote control
Press and hold transmit buttons‹ andŒ
simultaneously for 6 seconds to reprogram the remote
control. Battery check lamp will blink two times
indicating the completed mode change.
J_G463.book Seite 31 Mittwoch, 19. September 2001 8:06 08
Page 35 of 385
32 Central locking system
Te ch n i c a l
data Instruments
and controlsOperationDrivingInstrument
cluster displayPractical hints Car care Index
Opening and closing windows and sliding / pop-up
roof from outside
(summer opening / convenience feature)
Aim transmitter eye of remote control at the driver’s
door receiver.
Summer opening:
The sliding / pop-up roof and all side windows can be
opened automatically.
Continue to press transmit button Πafter unlocking
the vehicle.
The windows and sliding/pop-up roof begin to open
after approximately 1 second.
To interrupt opening procedure, release transmit
button.
Convenience feature:
The sliding / pop-up roof and the side windows can be
closed.
Continue to press transmit button ‹ after locking
the vehicle.
The windows and sliding / pop-up roof begin to close
after approximately 1 second.To interrupt closing procedure, release transmit button.
Ensure that all side windows and the sliding / pop-up
roof are properly closed before leaving the vehicle.
Note:
If the windows and sliding / pop-up roof cannot be
operated automatically by pressing the transmit button
of t he r emo te c ontr ol then it m ay be n ece ssar y to chan ge
the batteries in the electronic key (if ok, battery check
lamp in electronic key will light briefly when
transmitting), or to synchronize the remote control, see
page 343 and 345.
Wa r n i n g !
Never operate the windows or sliding / pop-up roof
if there is the possibility of anyone being harmed
by the opening or closing procedure.In case the procedure causes potential danger, the
procedure can be immediately halted by releasing
the remote control button. To reverse direction of
movement press Œ for opening or ‹ for
closing.
J_G463.book Seite 32 Mittwoch, 19. September 2001 8:06 08
Page 50 of 385
47 Seats
Te ch n i c a l
data Instruments
and controlsOperationDrivingInstrument
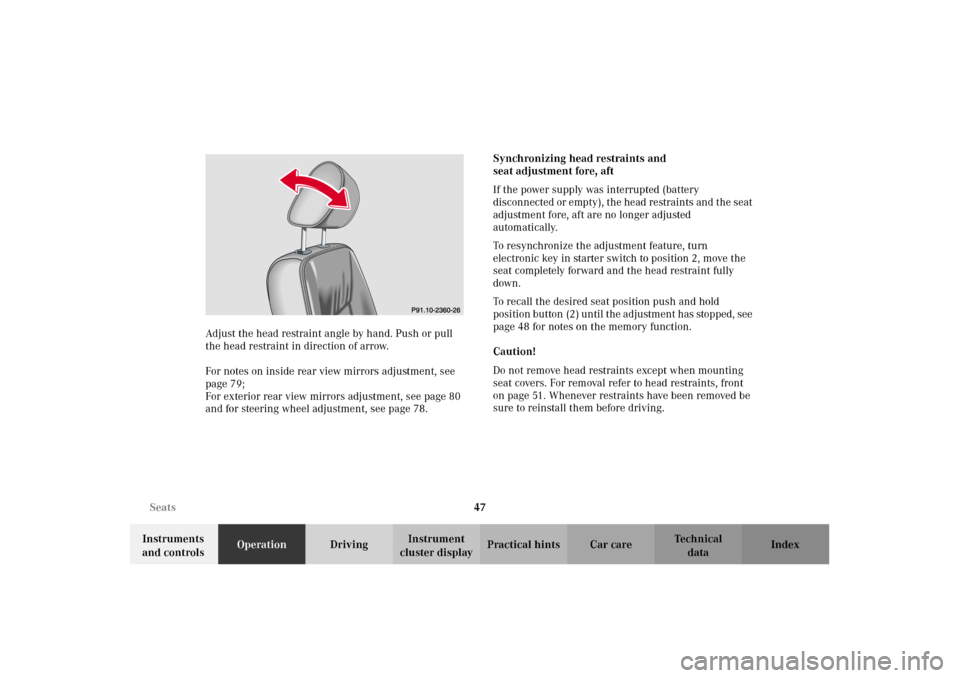
cluster displayPractical hints Car care Index Adjust the head restraint angle by hand. Push or pull
the head restraint in direction of arrow.
For notes on inside rear view mirrors adjustment, see
page 79;
For exterior rear view mirrors adjustment, see page 80
and for steering wheel adjustment, see page 78.Synchronizing head restraints and
seat adjustment fore, aft
If the power supply was interrupted (battery
disconnected or empty), the head restraints and the seat
adjustment fore, aft are no longer adjusted
automatically.
To resynchronize the adjustment feature, turn
electronic key in starter switch to position 2, move the
seat completely forward and the head restraint fully
down.
To recall the desired seat position push and hold
position button (2 ) un til t he ad justm ent has stop ped , see
page 48 for notes on the memory function.
Caution!
Do not remove head restraints except when mounting
seat covers. For removal refer to head restraints, front
on page 51. Whenever restraints have been removed be
sure to reinstall them before driving.
P91.10-2360-26
J_G463.book Seite 47 Mittwoch, 19. September 2001 8:06 08
Page 323 of 385
320 Battery
Te ch n i c a l
data Instruments
and controlsOperation DrivingInstrument
cluster displayPractical hintsCar care Index
The service life of the battery is dependent on its
condition of charge. The battery should always be kept
sufficiently charged, in order to last an optimum length
of time.
Therefore, we strongly recommend that you have the
battery charge checked frequently, and corrected if
necessary, especially if you use the vehicle less than
approximately 200 miles (300 km) per month,
mostly for short distance trips, or if it is not used for
long periods of time.
Only charge a battery with a battery charger after the
battery has been disconnected from the vehicle’s
electrical circuit.
Always disconnect the battery negative lead first and
connect last.
When removing and connecting the battery, always
make sure that all electrical consumers are off and the
key is in starter switch position 0. The battery must
always be securely installed when the vehicle is in
operation. During removal and installation always
protect the disconnected battery positive (+) terminal
with the cover attached to the battery.While t he en gin e is run ning t he batter y te rm in al clamp s
must not be loosened or detached, otherwise the
generator and other electronic components would be
damaged.
Note:
The gear selector lever will remain locked in
position “P” and the electronic key can not be turned in
the starter switch, if the vehicle battery is disconnected
or discharged.
After reconnecting the battery also set the clock (see
COMAND operator’s manual), synchronize the
electronic stability program (ESP) (see page 244) and
the front seat head restraints (see page 47).
Battery recycling
Batteries contain material that can harm the
environment with improper disposal.
Large 12 Volt storage batteries contain lead.
Recycling of batteries is the preferred method of
disposal.
Many states require sellers of batteries to accept old
batteries for recycling.
J_G463.book Seite 320 Mittwoch, 19. September 2001 8:06 08
Page 348 of 385
345 Electronic main key
Te ch n i c a l
data Instruments
and controlsOperation DrivingInstrument
cluster displayPractical hintsCar care Index Important!
Batteries contain materials that can harm the
environment if disposed of improperly. Recycling of
batteries is the preferred method of disposal. For
disposal, please follow manufacturer’s recommendation
on battery package.
Replacement Battery:
Lithium, type CR 2025 or equivalent.Synchronizing remote control
The remote control may have to be resynchronized, if
the vehicle cannot be locked or unlocked.
To synchronize insert electronic key in starter switch.
The remote control should once again be operational.
J_G463.book Seite 345 Mittwoch, 19. September 2001 8:06 08