Page 48 of 385
45 Seats
Te ch n i c a l
data Instruments
and controlsOperationDrivingInstrument
cluster displayPractical hints Car care Index Front seat adjustment
To operate the front power seat adjustment switches,
turn the electronic key in starter switch to position 1
or 2 (with respective front door open, the power seats
can also be operated with the electronic key removed or
in starter switch position 0).
Note:
If the passenger side seat backrest is set to a full upright
position and the passenger seat is moved fully forward,
the cup holder next to the armrest must be removed
(page 166) and the cup holder in the passenger footwell
(page 167) must be folded closed.
Wa r n i n g !
Do not adjust the driver’s seat while driving.
Adjusting the seat while driving could cause the
driver to lose control of the vehicle.Never ride in a moving vehicle with the seat back
reclined. Sitting in an excessively reclined position
can be dangerous. You could slide under the seat
belt in a collision. If you slide under it, the belt
would apply force at the abdomen or neck. That
could cause serious or fatal injuries. The seat back
and seat belts provide the best restraint when the
wearer is in an upright position and belts are
properly positioned on the body.Never place hands under seat or near any moving
parts while a seat is being adjusted.
When leaving the vehicle always remove the
electronic key from the starter switch, and lock
your vehicle. The power seats can also be operated with the
driver’s or front passenger door open. Do not leave
children unattended in the vehicle, or with access
to an unl ocked vehic l e. Uns upervi s ed us e of vehi cl e
equipment may cause serious personal injury.
J_G463.book Seite 45 Mittwoch, 19. September 2001 8:06 08
Page 81 of 385
78 Steering wheel adjustment
Te ch n i c a l
data Instruments
and controlsOperationDrivingInstrument
cluster displayPractical hints Car care Index
Steering wheel adjustment
To operate the steering wheel adjustment switches, turn
the electronic key in starter switch to position 1 or 2
(with a front door opened, the steering wheel
adjustment can also be operated with the electronic key
removed or in starter switch position 0 for
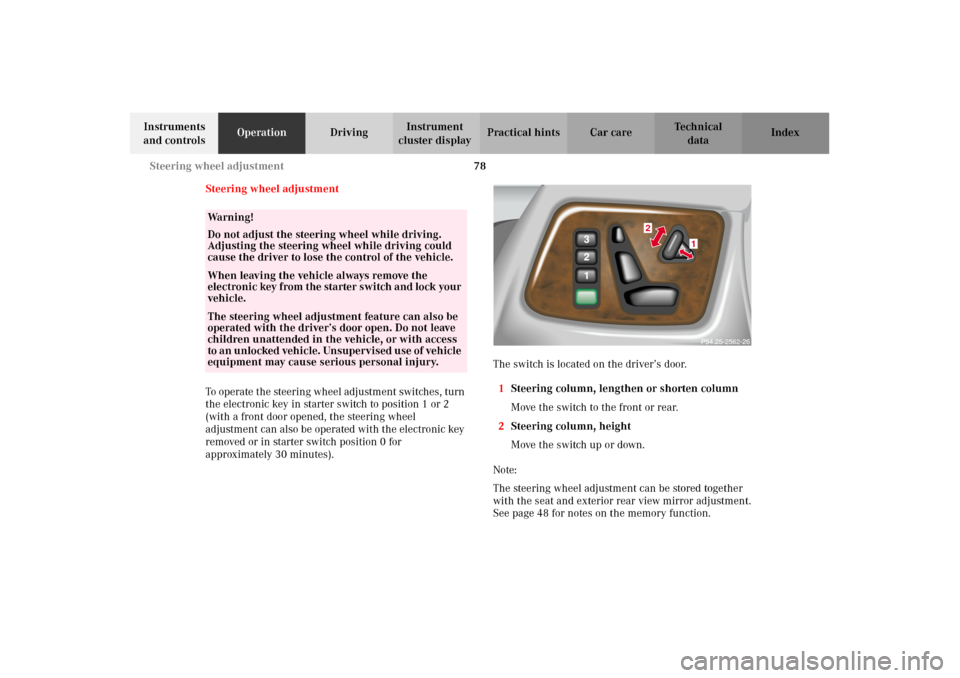
approximately 30 minutes).The switch is located on the driver’s door.
1Steering column, lengthen or shorten column
Move the switch to the front or rear.
2Steering column, height
Move the switch up or down.
Note:
The steering wheel adjustment can be stored together
with the seat and exterior rear view mirror adjustment.
See page 48 for notes on the memory function.
Wa r n i n g !
Do not adjust the steering wheel while driving.
Adjusting the steering wheel while driving could
cause the driver to lose the control of the vehicle.When leaving the vehicle always remove the
electroni c key f rom t he sta rter s wi tch a nd lock your
vehicle.The steering wheel adjustment feature can also be
operated with the driver’s door open. Do not leave
children unattended in the vehicle, or with access
to a n un locked vehi cle. Un supervi sed use of vehicl e
equipment may cause serious personal injury.
1
2
2562
J_G463.book Seite 78 Mittwoch, 19. September 2001 8:06 08
Page 90 of 385
87 Instrument cluster
Te ch n i c a l
data Instruments
and controlsOperationDrivingInstrument
cluster displayPractical hints Car care Index Activating instrument cluster display
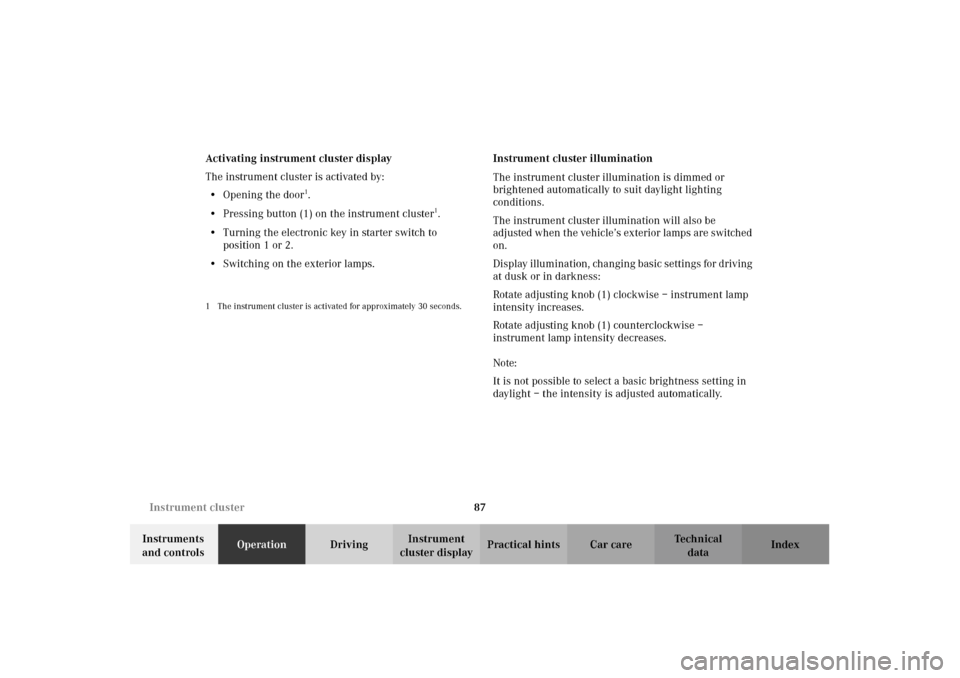
The instrument cluster is activated by:
•Opening the door
1.
•Pressing button (1) on the instrument cluster
1.
•Turning the electronic key in starter switch to
position 1 or 2.
•Switching on the exterior lamps.
1 The instrument cluster is activated for approximately 30 seconds.
Instrument cluster illumination
The instrument cluster illumination is dimmed or
brightened automatically to suit daylight lighting
conditions.
The instrument cluster illumination will also be
adjusted when the vehicle’s exterior lamps are switched
on.
Display illumination, changing basic settings for driving
at dusk or in darkness:
Rotate adjusting knob (1) clockwise – instrument lamp
intensity increases.
Rotate adjusting knob (1) counterclockwise –
instrument lamp intensity decreases.
Note:
It is not possible to select a basic brightness setting in
daylight – the intensity is adjusted automatically.
J_G463.book Seite 87 Mittwoch, 19. September 2001 8:06 08
Page 122 of 385
119 Multifunction steering wheel, multifunction display
Te ch n i c a l
data Instruments
and controlsOperationDrivingInstrument
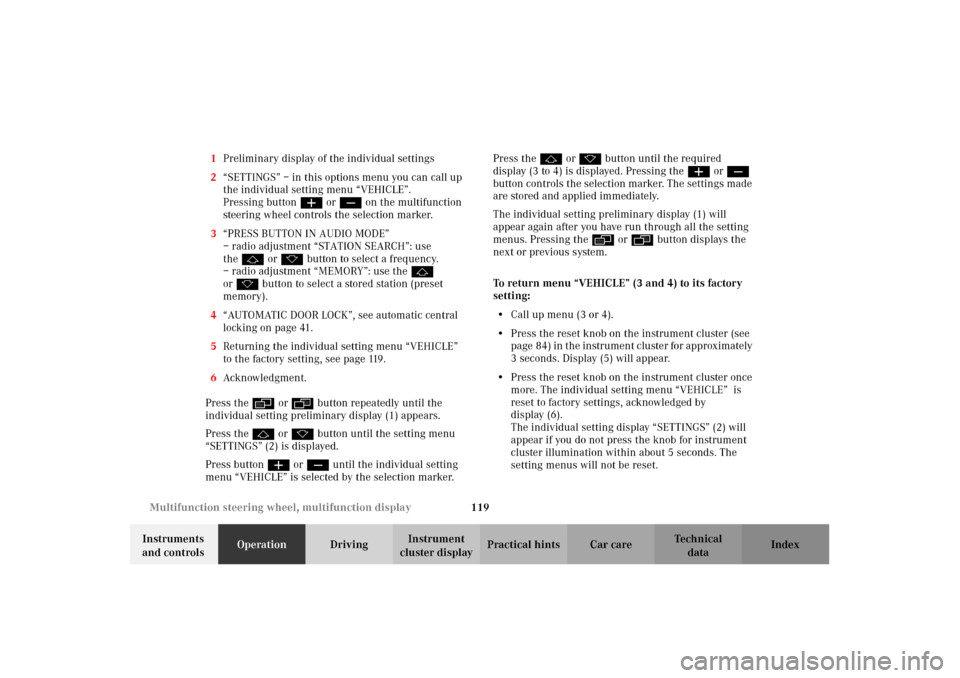
cluster displayPractical hints Car care Index 1Preliminary display of the individual settings
2“SETTINGS” – in this options menu you can call up
the individual setting menu “VEHICLE”.
Pressing buttonæ orç on the multifunction
steering wheel controls the selection marker.
3“PRESS BUTTON IN AUDIO MODE”
– radio adjustment “STATION SEARCH”: use
thej ork button to select a frequency.
– radio adjustment “MEMORY”: use the j
ork button to select a stored station (preset
memory).
4“AUTOMATIC DOOR LOCK”, see automatic central
locking on page 41.
5Returning the individual setting menu “VEHICLE”
to the factory setting, see page 119.
6Acknowledgment.
Press the è or ÿ button repeatedly until the
individual setting preliminary display (1) appears.
Press the j or k button until the setting menu
“SETTINGS” (2) is displayed.
Press buttonæ orç until the individual setting
menu “VEHICLE” is selected by the selection marker.Press the j or k button until the required
display (3 to 4) is displayed. Pressing the æ orç
button controls the selection marker. The settings made
are stored and applied immediately.
The individual setting preliminary display (1) will
appear again after you have run through all the setting
menus. Pressing the è or ÿ button displays the
next or previous system.
To return menu “VEHICLE” (3 and 4) to its factory
setting:
•Call up menu (3 or 4).
•Press the reset knob on the instrument cluster (see
page 84) in the instrument cluster for approximately
3 seconds. Display (5) will appear.
•Press the reset knob on the instrument cluster once
more. The individual setting menu “VEHICLE” is
reset to factory settings, acknowledged by
display (6).
The individual setting display “SETTINGS” (2) will
appear if you do not press the knob for instrument
cluster illumination within about 5 seconds. The
setting menus will not be reset.
J_G463.book Seite 119 Mittwoch, 19. September 2001 8:06 08
Page 136 of 385
133 Exterior lamp switch
Te ch n i c a l
data Instruments
and controlsOperationDrivingInstrument
cluster displayPractical hints Car care Index Locator lighting
Turn exterior lamp switch to positionU.
After unlocking the vehicle with the electronic key
during darkness the fog lamps and parking lamps
switch on for approximately 40 seconds.
The exterior lamps will be switched off when opening
the driver’s door.
See the individual setting menu “LIGHTING” –
“LOCATOR LIGHTING” on page 114, for instructions on
how to activate the function. Headlamp cleaning system
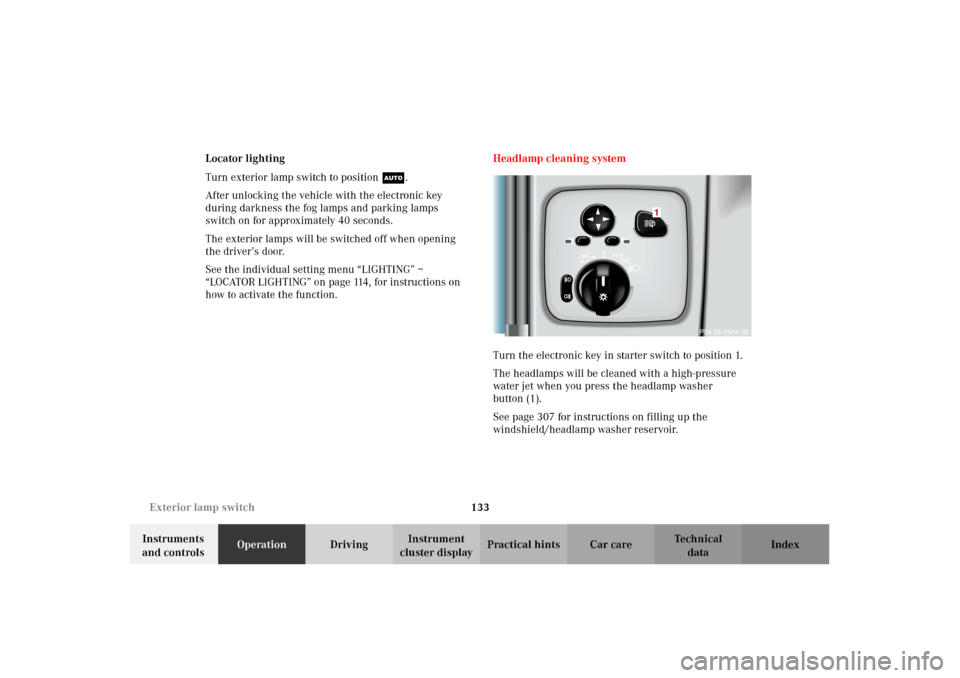
Turn the electronic key in starter switch to position 1.
The headlamps will be cleaned with a high-pressure
water jet when you press the headlamp washer
button (1).
See page 307 for instructions on filling up the
windshield/headlamp washer reservoir.
2564
J_G463.book Seite 133 Mittwoch, 19. September 2001 8:06 08
Page 155 of 385
152 Interior equipment
Te ch n i c a l
data Instruments
and controlsOperationDrivingInstrument
cluster displayPractical hints Car care Index
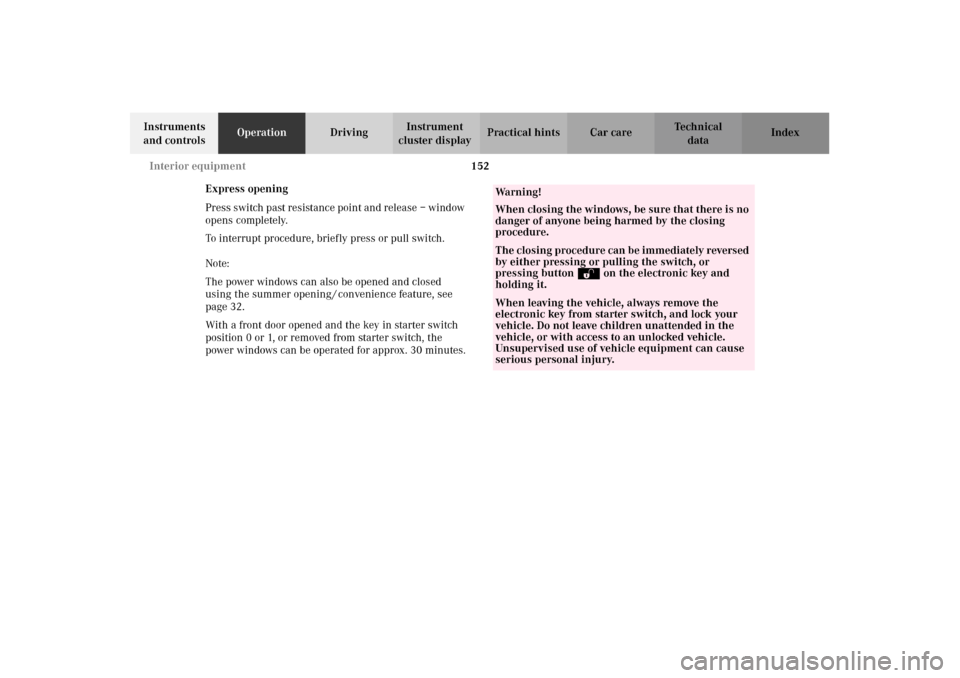
Express opening
Press switch past resistance point and release – window
opens completely.
To interrupt procedure, briefly press or pull switch.
Note:
The power windows can also be opened and closed
using the summer opening / convenience feature, see
page 32.
With a front door opened and the key in starter switch
position 0 or 1, or removed from starter switch, the
power windows can be operated for approx. 30 minutes.
Wa r n i n g !
When closing the windows, be sure that there is no
danger of anyone being harmed by the closing
procedure.The closing procedure can be immediately reversed
by either pressing or pulling the switch, or
pressing buttonΠon the electronic key and
holding it.When leaving the vehicle, always remove the
electronic key from starter switch, and lock your
vehicle. Do not leave children unattended in the
vehicle, or with access to an unlocked vehicle.
Unsupervised use of vehicle equipment can cause
serious personal injury.
J_G463.book Seite 152 Mittwoch, 19. September 2001 8:06 08
Page 156 of 385
153 Interior equipment
Te ch n i c a l
data Instruments
and controlsOperationDrivingInstrument
cluster displayPractical hints Car care Index Blocking of rear door window operation
If no operation of the rear windows by switch (for
instance by children) is desired, slide override
switch (5) to the right; the N symbol becomes
visible.
Operation of the rear door windows with the switches
located in the driver’s door is still possible.
J_G463.book Seite 153 Mittwoch, 19. September 2001 8:06 08
Page 159 of 385
156 Interior equipment
Te ch n i c a l
data Instruments
and controlsOperationDrivingInstrument
cluster displayPractical hints Car care Index
Interior lighting
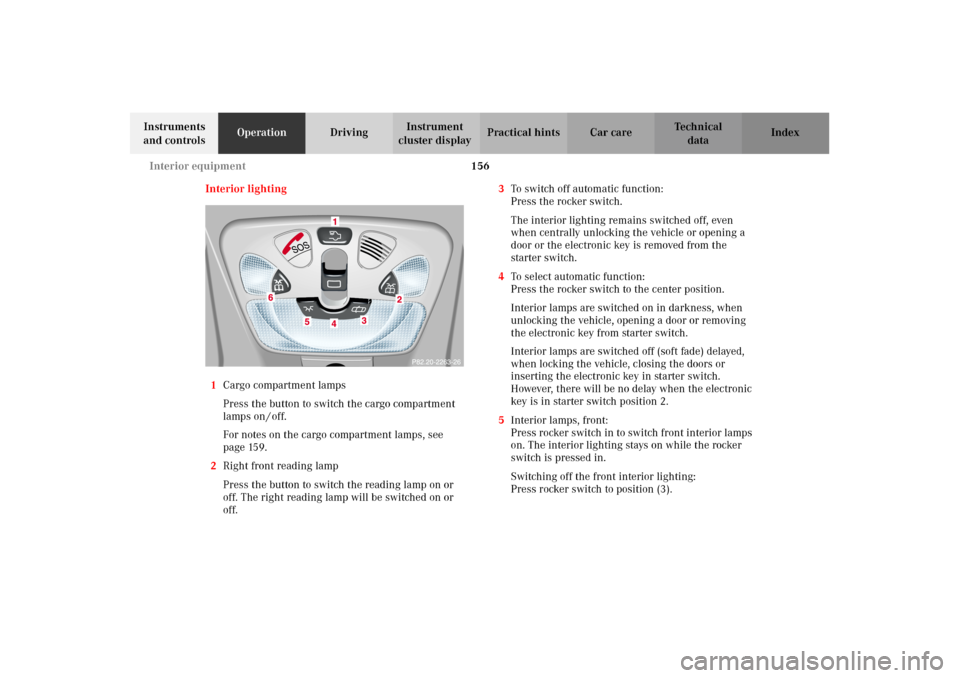
1Cargo compartment lamps
Press the button to switch the cargo compartment
lamps on / off.
For notes on the cargo compartment lamps, see
page 159.
2Right front reading lamp
Press the button to switch the reading lamp on or
off. The right reading lamp will be switched on or
off.3To switch off automatic function:
Press the rocker switch.
The interior lighting remains switched off, even
when centrally unlocking the vehicle or opening a
door or the electronic key is removed from the
starter switch.
4To select automatic function:
Press the rocker switch to the center position.
Interior lamps are switched on in darkness, when
unlocking the vehicle, opening a door or removing
the electronic key from starter switch.
Interior lamps are switched off (soft fade) delayed,
when locking the vehicle, closing the doors or
inserting the electronic key in starter switch.
However, there will be no delay when the electronic
key is in starter switch position 2.
5Interior lamps, front:
Press rocker switch in to switch front interior lamps
on. The interior lighting stays on while the rocker
switch is pressed in.
Switching off the front interior lighting:
Press rocker switch to position (3).
J_G463.book Seite 156 Mittwoch, 19. September 2001 8:06 08