2002 JEEP LIBERTY differential
[x] Cancel search: differentialPage 139 of 1803

Condition Possible Causes Correction
Loss Of Lubricant 1. Lubricant level too high. 1. Drain lubricant to the correct
level.
2. Worn axle shaft seals. 2. Replace seals.
3. Cracked differential housing. 3. Repair as necessary.
4. Worn pinion seal. 4. Replace seal.
5. Worn/scored yoke. 5. Replace yoke and seal.
6. Axle cover not properly sealed. 6. Remove, clean, and re-seal
cover.
Axle Overheating 1. Lubricant level low. 1. Fill differential to correct level.
2. Improper grade of lubricant. 2. Fill differential with the correct
fluid type and quantity.
3. Bearing pre-loads too high. 3. Re-adjust bearing pre-loads.
4. Insufficient ring gear backlash. 4. Re-adjust ring gear backlash.
Gear Teeth Broke 1. Overloading. 1. Replace gears. Examine other
gears and bearings for possible
damage.
2. Erratic clutch operation. 2. Replace gears and examine the
remaining parts for damage. Avoid
erratic clutch operation.
3. Ice-spotted pavement. 3. Replace gears and examine
remaining parts for damage.
4. Improper adjustments. 4. Replace gears and examine
remaining parts for damage. Ensure
ring gear backlash is correct.
Axle Noise 1. Insufficient lubricant. 1. Fill differential with the correct
fluid type and quantity.
2. Improper ring gear and pinion
adjustment.2. Check ring gear and pinion
contact pattern. Adjust backlash or
pinion depth.
3. Unmatched ring gear and pinion. 3. Replace gears with a matched
ring gear and pinion.
4. Worn teeth on ring gear and/or
pinion.4. Replace ring gear and pinion.
5. Loose pinion bearings. 5. Adjust pinion bearing pre-load.
6. Loose differential bearings. 6. Adjust differential bearing
pre-load.
7. Mis-aligned or sprung ring gear. 7. Measure ring gear run-out.
Replace components as necessary.
8. Loose differential bearing cap
bolts.8. Inspect differential components
and replace as necessary. Ensure
that the bearing caps are torqued
tot he proper specification.
9. Housing not machined properly. 9. Replace housing.
3 - 90 REAR AXLE-81/4KJ
REAR AXLE - 8 1/4 (Continued)
Page 141 of 1803

(10) Install axle vent hose.
(11) Install propeller shaft with reference marks.
(12) Install the wheels and tires.
(13) Add gear lubricant to specifications, if neces-
sary.
(14) Remove lifting device from axle and lower the
vehicle.
(15) Tighten the lower control arm bolts to torque
specification.
ADJUSTMENTS
Ring gears and pinions are supplied as matched
sets only. The identifying numbers for the ring gear
and pinion are etched/marked onto each gear (Fig. 8).
A plus (+) number, minus (±) number or zero (0) is
etched/marked on the face or shaft of the pinion. This
number is the amount (in thousandths of an inch)
the depth varies from the standard depth setting of a
pinion etched with a (0). The standard depth pro-
vides the best gear tooth contact pattern. Refer to
Backlash and Contact Pattern Analysis paragraph in
this section for additional information.
Compensation for pinion depth variance is
achieved with select shims. The shims are placed
behind the rear pinion bearing (Fig. 9).
If a new gear set is being installed, note the depth
variance etched into both the original and replace-
ment pinion. Add or subtract the thickness of the
original depth shims to compensate for the difference
in the depth variances. Refer to the Depth Variance
chart.
Note where Old and New Pinion Marking columns
intersect. Intersecting figure represents plus or
minus the amount needed.Note the etched number on the face of the pinion
gear head (±1, ±2, 0, +1, +2, etc.). The numbers rep-
resent thousands of an inch deviation from the stan-
dard. If the number is negative, add that value to the
required thickness of the depth shims. If the number
is positive, subtract that value from the thickness of
the depth shim. If the number is 0 no change is nec-
essary.
Fig. 7 LOWER SUSPENSION ARM
1 - AXLE BRACKET BOLT
2 - LOWER CONTROL ARM
3 - BODY BRACKET BOLT
Fig. 8 Pinion Gear ID Numbers - Typical
1 - PRODUCTION NUMBERS
2 - DRIVE PINION GEAR DEPTH VARIANCE
3 - GEAR MATCHING NUMBER (SAME AS RING GEAR
NUMBER)
Fig. 9 Adjustment Shim Locations
1 - DIFFERENTIAL HOUSING
2 - COLLAPSIBLE SPACER
3 - REAR PINION BEARING
4 - PINION DEPTH SHIM
5 - PINION GEAR
6 - BEARING CUP
3 - 92 REAR AXLE-81/4KJ
REAR AXLE - 8 1/4 (Continued)
Page 142 of 1803

PINION GEAR DEPTH VARIANCE
Original Pinion
Gear Depth
VarianceReplacement Pinion Gear Depth Variance
24232221 0 +1 +2 +3 +4
+4+0.008 +0.007 +0.006 +0.005 +0.004 +0.003 +0.002 +0.001 0
+3+0.007 +0.006 +0.005 +0.004 +0.003 +0.002 +0.001 020.001
+2+0.006 +0.005 +0.004 +0.003 +0.002 +0.001 020.00120.002
+1+0.005 +0.004 +0.003 +0.002 +0.001 020.00120.00220.003
0+0.004 +0.003 +0.002 +0.001 020.00120.00220.00320.004
21+0.003 +0.002 +0.001 020.00120.00220.00320.00420.005
22+0.002 +0.001 020.00120.00220.00320.00420.00520.006
23+0.001 020.00120.00220.00320.00420.00520.00620.007
24020.00120.00220.00320.00420.00520.00620.00720.008
PINION DEPTH MEASUREMENT
Measurements are taken with pinion bearing cups and
pinion bearings installed in the housing. Take measure-
ments with Pinion Gauge Set and Dial Indicator C-3339.
(1) Assemble Pinion Height Block 6739, Pinion
Block 8540 and rear pinion bearing onto Screw 6741
(Fig. 10).(2) Insert assembled height gauge components,
rear bearing, and screw into the housing through
pinion bearing cups (Fig. 11).
(3) Install front pinion bearing and Cone-Nut 6740
hand tight (Fig. 10).
(4) Place Arbor Disc 8541 on Arbor D-115-3 in posi-
tion in the housing side bearing cradles (Fig. 12).
Install differential bearing caps on Arbor Discs and
tighten cap bolts to 41 N´m (30 ft. lbs.).
NOTE: Arbor Discs 8541 has different step diame-
ters to fit other axles. Choose proper step for axle
being serviced.
(5) Assemble Dial Indicator C-3339 into Scooter
Block D-115-2 and secure set screw.
Fig. 10 Pinion Depth Gauge Tools
1 - DIAL INDICATOR
2 - ARBOR
3 - PINION HEIGHT BLOCK
4 - CONE
5 - SCREW
6 - PINION BLOCK
7 - SCOOTER BLOOK
8 - ARBOR DISC
Fig. 11 Pinion Height Block
1 - PINION BLOCK
2 - PINION HEIGHT BLOCK
KJREAR AXLE - 8 1/4 3 - 93
REAR AXLE - 8 1/4 (Continued)
Page 143 of 1803

(6) Position Scooter Block/Dial Indicator flush on
the pinion height block. Hold scooter block and zero
the dial indicator.
(7) Slowly slide the scooter block across the pinion
height block over to the arbor (Fig. 13). Move the
scooter block till the dial indicator probe crests the
arbor, then record the highest reading.
(8) Select a shim equal to the dial indicator read-
ing plus the drive pinion gear depth variance number
etched/marked on the pinion (Fig. 8). For example, if
the depth variance is ±2, add +0.002 in. to the dial
indicator reading.
BEARING PRELOAD AND GEAR BACKLASH
The following must be considered when adjusting
bearing preload and gear backlash:
²The maximum ring gear backlash variation is
0.076 mm (0.003 inch).
²Mark the gears so the same teeth are meshed
during all backlash measurements.
²Maintain the torque while adjusting the bearing
preload and ring gear backlash.
²Excessive adjuster torque will introduce a high
bearing load and cause premature bearing failure.
Insufficient adjuster torque can result in excessive
differential case free-play and ring gear noise.
²Insufficient adjuster torque will not support the
ring gear correctly and can cause excessive differen-
tial case free-play and ring gear noise.
NOTE: The differential bearing cups will not always
immediately follow the threaded adjusters as they
are moved during adjustment. To ensure accurate
bearing cup responses to the adjustments:
²Maintain the gear teeth engaged (meshed) as
marked.
²The bearings must be seated by rapidly rotat-
ing the pinion gear a half turn back and forth.
²Do this five to ten times each time the threaded
adjusters are adjusted.
(1) Adjust each threaded adjuster inward with
Wrench C-4164 until the differential bearing free-
play is eliminated (Fig. 14). Allow some ring gear
backlash, approximately 0.25 mm (0.01 in.) between
the ring and pinion gear. Seat the bearing cups with
the procedure described above.
Fig. 12 Gauge Tools In Housing
1 - ARBOR DISC
2 - PINION BLOCK
3 - ARBOR
4 - PINION HEIGHT BLOCK
Fig. 13 Pinion Gear Depth Measurement
1 - ARBOR
2 - SCOOTER BLOCK
3 - DIAL INDICATOR
Fig. 14 Threaded Adjuster
1 - AXLE TUBE
2 - BACKING PLATE
3 - ADJUSTER WRENCH
3 - 94 REAR AXLE-81/4KJ
REAR AXLE - 8 1/4 (Continued)
Page 144 of 1803

(2) Install dial indicator and position the plunger
against the drive side of a ring gear tooth (Fig. 15).
Measure the backlash at 4 positions (90 degrees
apart) around the ring gear. Locate and mark the
area of minimum backlash.
(3) Rotate the ring gear to the position of the least
backlash. Mark the gear so that all future backlash
measurements will be taken with the same gear
teeth meshed.
(4) Loosen the right-side, tighten the left-side
threaded adjuster. Obtain backlash of 0.076 to 0.102
mm (0.003 to 0.004 in.) with each adjuster tightened
to 14 N´m (10 ft. lbs.). Seat the bearing cups with the
procedure described above.
(5) Tighten the differential bearing cap bolts in a
criss-cross pattern to 95 N´m (70 ft. lbs.).
(6) Tighten the right-side threaded adjuster to 102
N´m (75 ft. lbs.). Seat the bearing cups with the pro-
cedure described above. Continue to tighten the
right-side adjuster and seat bearing cups until the
torque remains constant at 102 N´m (75 ft. lbs.)(7) Measure the ring gear backlash. The range of
backlash is 0.15 to 0.203 mm (0.006 to 0.008 in.).
(8) Continue increasing the torque at the right-
side threaded adjuster until the specified backlash is
obtained.
NOTE: The left-side threaded adjuster torque
should have approximately 102 N´m (75 ft. lbs.). If
the torque is considerably less, the complete
adjustment procedure must be repeated.
(9) Tighten the left-side threaded adjuster until
102 N´m (75 ft. lbs.) torque is indicated. Seat the
bearing rollers with the procedure described above.
Do this until the torque remains constant.
(10) Install the threaded adjuster locks and
tighten the lock screws to 10 N´m (90 in. lbs.).
After the proper backlash is achieved, perform the
Gear Contact Pattern procedure.
GEAR CONTACT PATTERN
The ring gear and pinion teeth contact patterns
will show if the pinion depth is correct in the hous-
ing. It will also show if the ring gear backlash has
been adjusted correctly. The backlash can be adjusted
within specifications to achieve desired tooth contact
patterns.
(1) Apply a thin coat of hydrated ferric oxide or
equivalent, to the drive and coast side of the ring
gear teeth.
(2) Wrap, twist and hold a shop towel around the
pinion yoke to increase the turning resistance of the
pinion. This will provide a more distinct contact pat-
tern.
(3) With a boxed end wrench on a ring gear bolt,
rotate the differential case one complete revolution in
both directions while a load is being applied from
shop towel.
The areas on the ring gear teeth with the greatest
degree of contact against the pinion teeth will squee-
gee the compound to the areas with the least amount
of contact. Note and compare patterns on the ring
gear teeth to Gear Tooth Contact Patterns chart (Fig.
16) and adjust pinion depth and gear backlash as
necessary.
Fig. 15 Ring Gear Backlash
1 - DIAL INDICATOR
2 - RING GEAR
3 - EXCITER RING
KJREAR AXLE - 8 1/4 3 - 95
REAR AXLE - 8 1/4 (Continued)
Page 146 of 1803

SIDE GEAR CLEARANCE
NOTE: When measuring side gear clearance, check
each gear independently. If it necessary to replace a
side gear, replace both gears as a matched set.
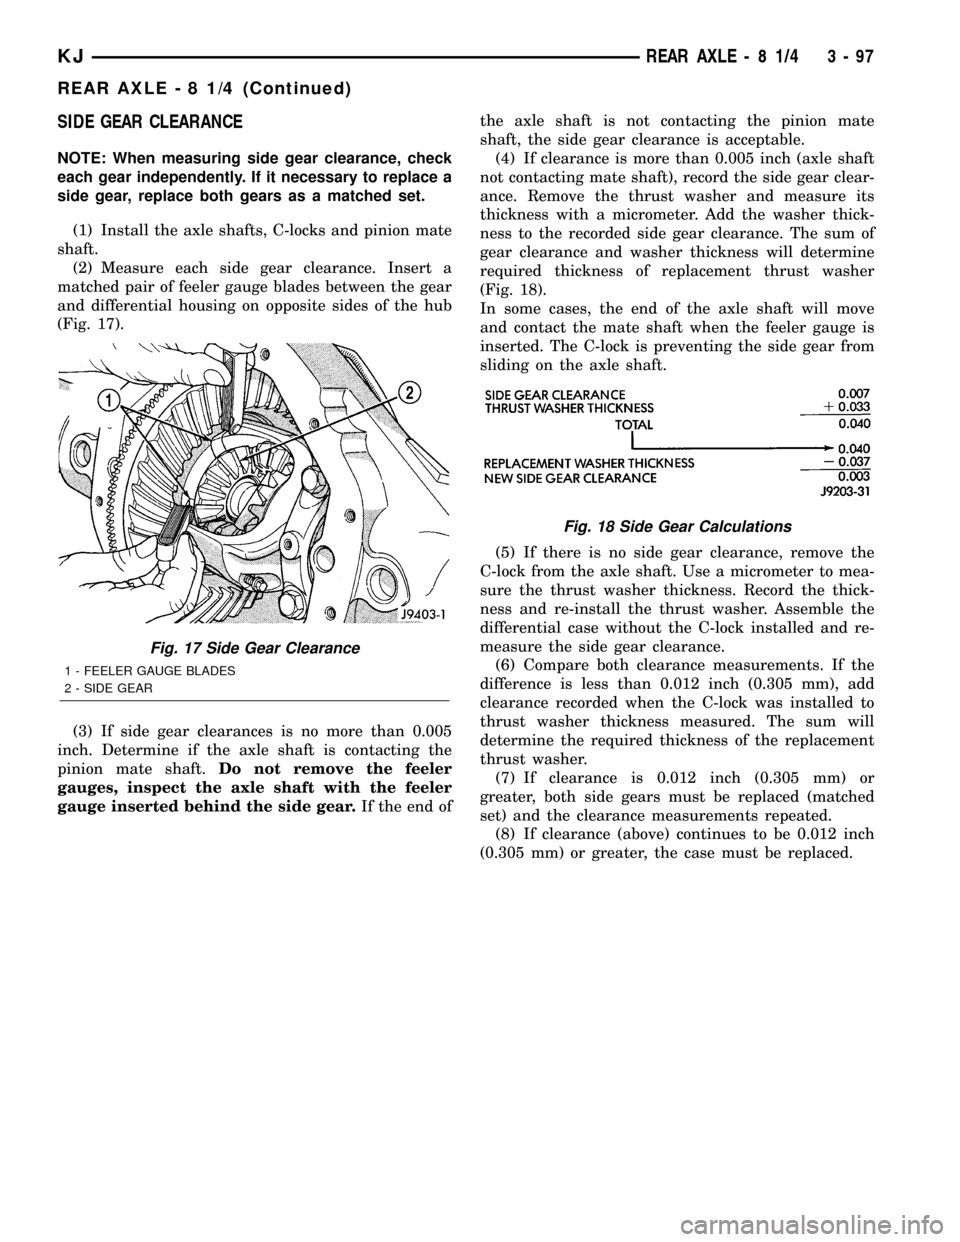
(1) Install the axle shafts, C-locks and pinion mate
shaft.
(2) Measure each side gear clearance. Insert a
matched pair of feeler gauge blades between the gear
and differential housing on opposite sides of the hub
(Fig. 17).
(3) If side gear clearances is no more than 0.005
inch. Determine if the axle shaft is contacting the
pinion mate shaft.Do not remove the feeler
gauges, inspect the axle shaft with the feeler
gauge inserted behind the side gear.If the end ofthe axle shaft is not contacting the pinion mate
shaft, the side gear clearance is acceptable.
(4) If clearance is more than 0.005 inch (axle shaft
not contacting mate shaft), record the side gear clear-
ance. Remove the thrust washer and measure its
thickness with a micrometer. Add the washer thick-
ness to the recorded side gear clearance. The sum of
gear clearance and washer thickness will determine
required thickness of replacement thrust washer
(Fig. 18).
In some cases, the end of the axle shaft will move
and contact the mate shaft when the feeler gauge is
inserted. The C-lock is preventing the side gear from
sliding on the axle shaft.
(5) If there is no side gear clearance, remove the
C-lock from the axle shaft. Use a micrometer to mea-
sure the thrust washer thickness. Record the thick-
ness and re-install the thrust washer. Assemble the
differential case without the C-lock installed and re-
measure the side gear clearance.
(6) Compare both clearance measurements. If the
difference is less than 0.012 inch (0.305 mm), add
clearance recorded when the C-lock was installed to
thrust washer thickness measured. The sum will
determine the required thickness of the replacement
thrust washer.
(7) If clearance is 0.012 inch (0.305 mm) or
greater, both side gears must be replaced (matched
set) and the clearance measurements repeated.
(8) If clearance (above) continues to be 0.012 inch
(0.305 mm) or greater, the case must be replaced.
Fig. 17 Side Gear Clearance
1 - FEELER GAUGE BLADES
2 - SIDE GEAR
Fig. 18 Side Gear Calculations
KJREAR AXLE - 8 1/4 3 - 97
REAR AXLE - 8 1/4 (Continued)
Page 147 of 1803

SPECIFICATIONS
REAR AXLE
AXLE SPECIFICATIONS
DESCRIPTION SPECIFICATION
Axle Ratio 3.07, 3.55, 4.10
Differential Case Flange Runout 0.076 mm (0.003 in.)
Differential Case Clearance 0.12 mm (0.005 in.)
Ring Gear Diameter 209.5 mm (8.25 in.)
Ring Gear Backlash 0.12-0.20 mm (0.005-0.008 in.)
Ring Gear Runout 0.12 mm (0.005 in.)
Pinion Bearing Preload - Original Bearings 1-2 N´m (10-20 in. lbs.)
Pinion Bearing Preload - New Bearings 1-3.4 N´m (10-30 in. lbs.)
TORQUE SPECIFICATIONS
DESCRIPTION N´m Ft. Lbs. In. Lbs.
Differential Cover Bolts 41 30 -
Bearing Cap Bolts 136 100 -
Ring Gear Bolts 95 70 -
Pinion Nut Minimum 285 210 -
Pinion Mate Shaft Screw 16.25 12 -
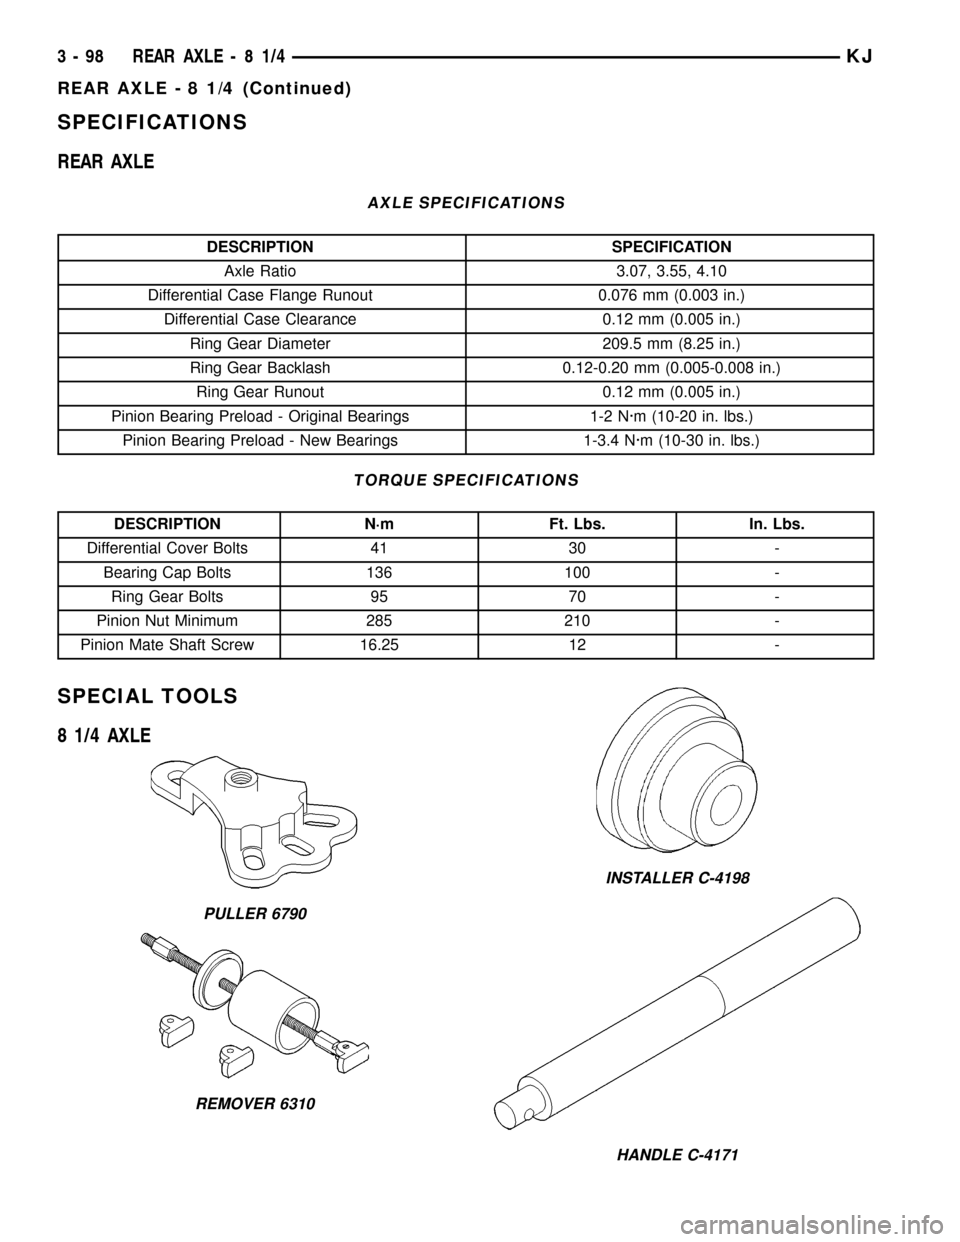
SPECIAL TOOLS
8 1/4 AXLE
PULLER 6790
REMOVER 6310
INSTALLER C-4198
HANDLE C-4171
3 - 98 REAR AXLE-81/4KJ
REAR AXLE - 8 1/4 (Continued)
Page 150 of 1803

AXLE SHAFTS
REMOVAL
(1) Place the transmission in NEUTRAL and raise
and support vehicle.
(2) Remove wheel and tire assembly.
(3) Remove brake drum.
(4) Remove the housing cover and drain lubricant.
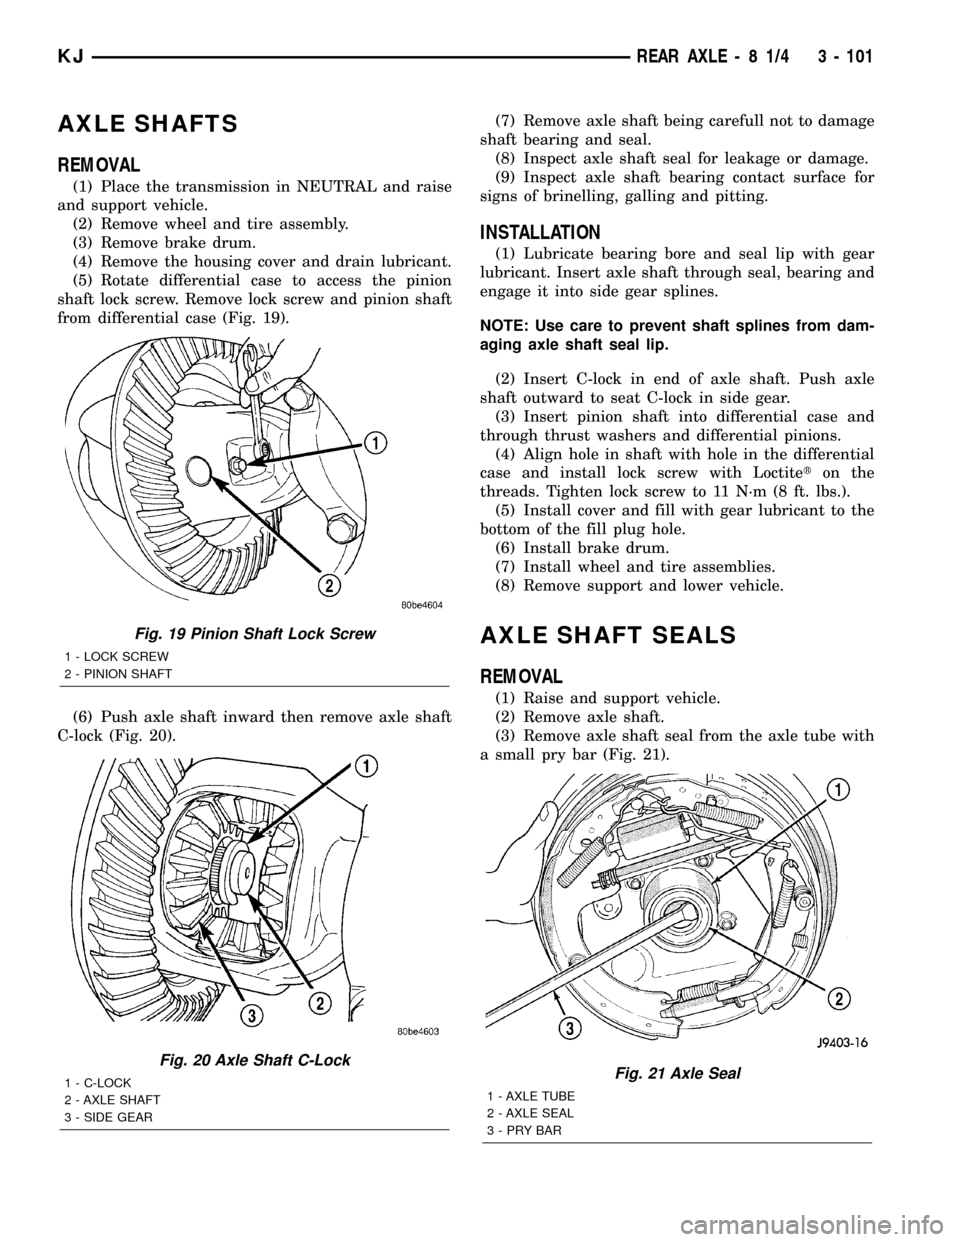
(5) Rotate differential case to access the pinion
shaft lock screw. Remove lock screw and pinion shaft
from differential case (Fig. 19).
(6) Push axle shaft inward then remove axle shaft
C-lock (Fig. 20).(7) Remove axle shaft being carefull not to damage
shaft bearing and seal.
(8) Inspect axle shaft seal for leakage or damage.
(9) Inspect axle shaft bearing contact surface for
signs of brinelling, galling and pitting.
INSTALLATION
(1) Lubricate bearing bore and seal lip with gear
lubricant. Insert axle shaft through seal, bearing and
engage it into side gear splines.
NOTE: Use care to prevent shaft splines from dam-
aging axle shaft seal lip.
(2) Insert C-lock in end of axle shaft. Push axle
shaft outward to seat C-lock in side gear.
(3) Insert pinion shaft into differential case and
through thrust washers and differential pinions.
(4) Align hole in shaft with hole in the differential
case and install lock screw with Loctiteton the
threads. Tighten lock screw to 11 N´m (8 ft. lbs.).
(5) Install cover and fill with gear lubricant to the
bottom of the fill plug hole.
(6) Install brake drum.
(7) Install wheel and tire assemblies.
(8) Remove support and lower vehicle.
AXLE SHAFT SEALS
REMOVAL
(1) Raise and support vehicle.
(2) Remove axle shaft.
(3) Remove axle shaft seal from the axle tube with
a small pry bar (Fig. 21).
Fig. 19 Pinion Shaft Lock Screw
1 - LOCK SCREW
2 - PINION SHAFT
Fig. 20 Axle Shaft C-Lock
1 - C-LOCK
2 - AXLE SHAFT
3 - SIDE GEARFig. 21 Axle Seal
1 - AXLE TUBE
2 - AXLE SEAL
3-PRYBAR
KJREAR AXLE - 8 1/4 3 - 101