2002 Hyundai Grandeur stop start
[x] Cancel search: stop startPage 134 of 230
DRIVING YOUR HYUNDAI 2- 5
C050B01A-GAT Normal Conditions: The Starting Procedure:
1. Insert key, and fasten the seat belt.
2. Depress the clutch pedal fully and
place the gearshift lever (manualtransaxle) in neutral or the selectorlever (automatic transaxle) in "P" (park) position.
3. After turning the ignition key to the "ON" position, make certain all warn- ing lights and gauges are function-ing properly before starting the en-gine.
WARNING:
Be sure that the clutch is fully de-pressed when starting a manualtransaxle vehicle. Otherwise, thereis the potential to cause damage tothe vehicle or injury to someone inside or outside the vehicle as a result of the forward or backwardmovement of the vehicle that willoccur if the clutch is not depressedwhen the vehicle is started. 4. Turn the ignition key to the "Start"
position and release it when theengine starts.
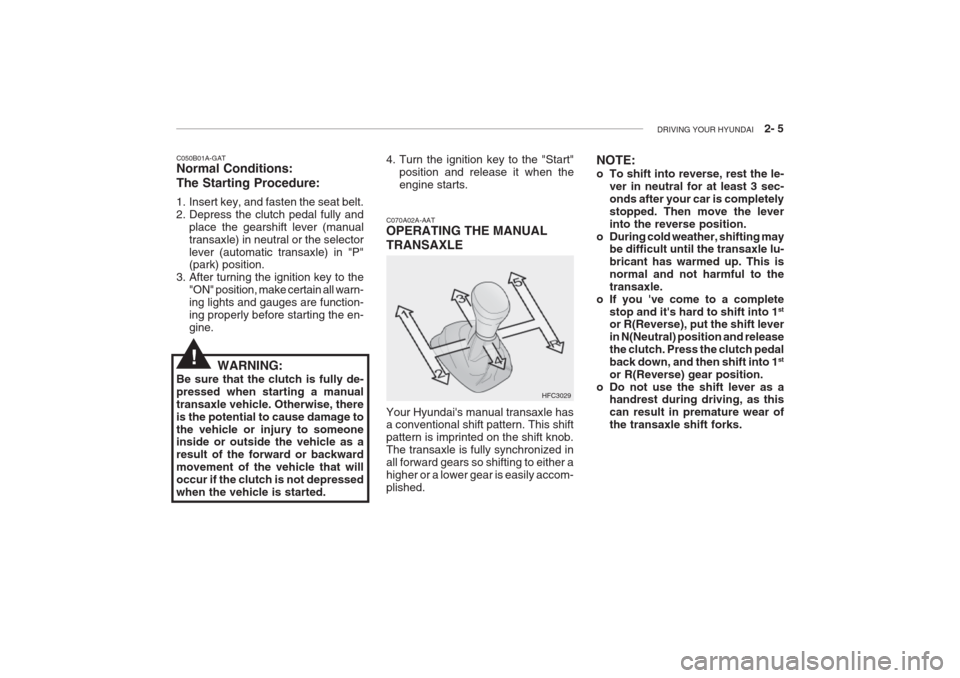
C070A02A-AAT OPERATING THE MANUAL TRANSAXLE
HFC3029
Your Hyundai's manual transaxle has a conventional shift pattern. This shift pattern is imprinted on the shift knob.The transaxle is fully synchronized inall forward gears so shifting to either ahigher or a lower gear is easily accom-plished. NOTE:
o To shift into reverse, rest the le-
ver in neutral for at least 3 sec- onds after your car is completelystopped. Then move the leverinto the reverse position.
o During cold weather, shifting may be difficult until the transaxle lu-bricant has warmed up. This isnormal and not harmful to thetransaxle.
o If you 've come to a complete
stop and it's hard to shift into 1 st
or R(Reverse), put the shift leverin N(Neutral) position and releasethe clutch. Press the clutch pedalback down, and then shift into 1 st
or R(Reverse) gear position.
o Do not use the shift lever as a handrest during driving, as thiscan result in premature wear ofthe transaxle shift forks.
!
Page 137 of 230
2- 8 DRIVING YOUR HYUNDAI
C090C01A-AAT o R(Reverse): Use for backing up the vehicle. Bring the car to a complete stop before shift- ing the selector lever to "R" position. C090D02A-AAT o N (Neutral): In the "N" position, the transaxle is in neutral, which means that no gearsare engaged. The engine can be startedwith the shift lever in "N" position,although this is not recommended ex- cept if the engine stalls while the car is moving.
C090E01L-GAT o D (Drive): Use for normal driving. This position is
used for most city and highway driving,for starting from a full stop to maximumspeed. The transaxle will automati-cally shift through a four/five gearsequency, giving best economy and power.
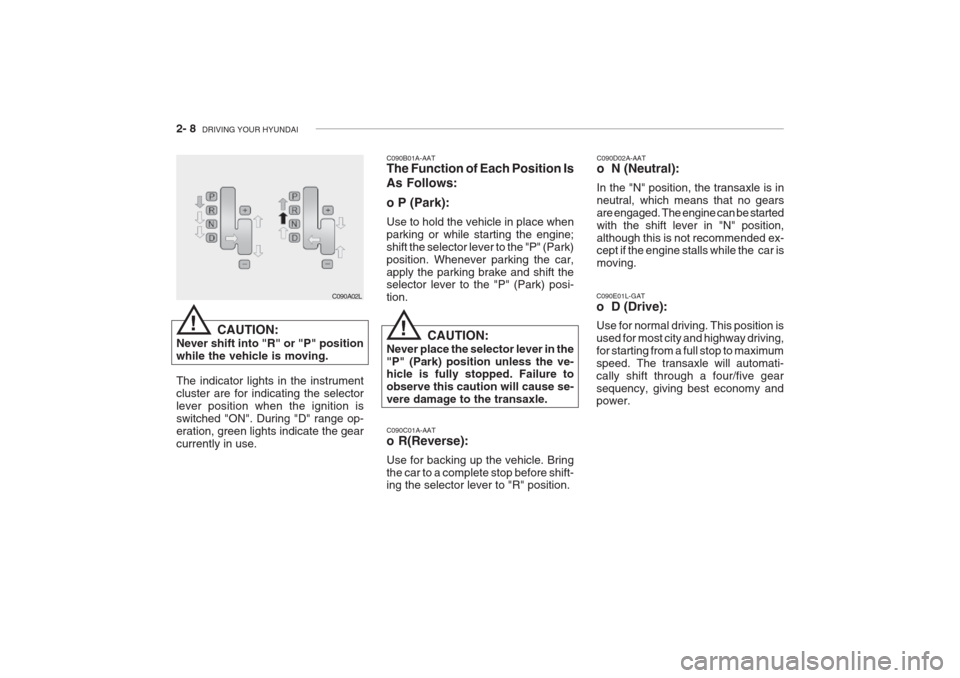
C090B01A-AAT The Function of Each Position Is As Follows: o P (Park): Use to hold the vehicle in place when parking or while starting the engine;shift the selector lever to the "P" (Park)position. Whenever parking the car,apply the parking brake and shift the selector lever to the "P" (Park) posi- tion.
CAUTION:
Never place the selector lever in the"P" (Park) position unless the ve- hicle is fully stopped. Failure to observe this caution will cause se-vere damage to the transaxle.
C090A02L
CAUTION:
Never shift into "R" or "P" positionwhile the vehicle is moving. The indicator lights in the instrument cluster are for indicating the selectorlever position when the ignition isswitched "ON". During "D" range op-eration, green lights indicate the gearcurrently in use.
!!
Page 141 of 230
2- 12 DRIVING YOUR HYUNDAI
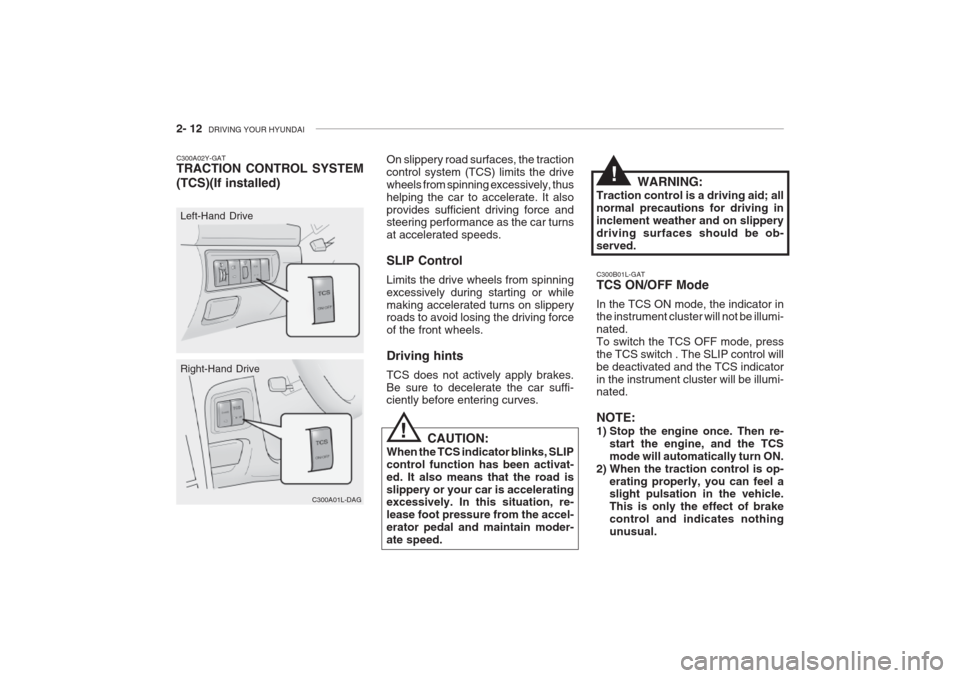
C300B01L-GAT TCS ON/OFF Mode In the TCS ON mode, the indicator in the instrument cluster will not be illumi- nated.To switch the TCS OFF mode, pressthe TCS switch . The SLIP control willbe deactivated and the TCS indicatorin the instrument cluster will be illumi- nated. NOTE:
1) Stop the engine once. Then re-
start the engine, and the TCS mode will automatically turn ON.
2) When the traction control is op- erating properly, you can feel a slight pulsation in the vehicle. This is only the effect of brakecontrol and indicates nothingunusual.
On slippery road surfaces, the tractioncontrol system (TCS) limits the drivewheels from spinning excessively, thushelping the car to accelerate. It alsoprovides sufficient driving force and steering performance as the car turns at accelerated speeds. SLIP Control Limits the drive wheels from spinning excessively during starting or whilemaking accelerated turns on slippery roads to avoid losing the driving force of the front wheels. Driving hints TCS does not actively apply brakes. Be sure to decelerate the car suffi- ciently before entering curves.
CAUTION:
When the TCS indicator blinks, SLIP control function has been activat-ed. It also means that the road isslippery or your car is accelerating excessively. In this situation, re- lease foot pressure from the accel-erator pedal and maintain moder-ate speed.
C300A01L-DAG
Right-Hand Drive
C300A02Y-GAT TRACTION CONTROL SYSTEM (TCS)(If installed)
C300A01L
Left-Hand Drive WARNING:
Traction control is a driving aid; all normal precautions for driving ininclement weather and on slipperydriving surfaces should be ob-served.
!
!
Page 142 of 230

DRIVING YOUR HYUNDAI 2- 13
NOTE:
1) When TCS illuminates, traction
control is automatically deacti- vated for safety.
2) This warning function is not pro- vided when in the TCS-OFF mode.
3) When the engine starts, a click is
heard from the engine compart-ment; however, this is only thesound of traction control beingchecked.
4) When moving out of the mud or
fresh snow, pressing the accel-erator pedal may not cause theengine speed to increase.
C300D02L-GAT Indicator and Warning The indicator should illuminate when
the ignition key is turned ON or START but should go out after three seconds. If the indicators do not illuminate or goout after three seconds, have themchecked by an authorized dealer. Should there be any unusual condi- tions in the device, TCS illuminates asa warning.If TCS illuminates, pull your car to asafe place and stop the engine.Then, start the engine again to check if the TCS indicator goes out. If the indicator do not go out after three seconds even after the engine hasbeen started, have your car checkedby an authorized Hyundai dealer. C130A01A-AAT GOOD BRAKING PRACTICES
WARNING:
Nothing should be carried on top of the cargo area cover behind therear seat. If there were an accidentor a sudden stop, such objectscould move forward and cause dam- age to the vehicle or injure the oc- cupants.
o After being parked, check to be sure the parking brake is not engaged and that the parking brake indicator light is out before driving away.
o Driving through water may get the brakes wet. They can also get wet when the car is washed. Wet brakescan be dangerous! Your car will notstop as quickly if the brakes are wet. Wet brakes cause the car to pull toone side. To dry the brakes, applythe brakes lightly until the braking
action returns to normal, taking careto keep the car under control at all times. If the braking action does not return to normal, stop as soon as it
is safe to do so and call your Hyundaidealer for assistance.
o Don't coast down hills with the car out of gear. This is extremely haz- ardous. Keep the car in gear at all times, use the brakes to slow down,then shift to a lower gear so thatengine braking will help you main-tain a safe speed.
o Don't "ride" the brake pedal. Rest- ing your foot on the brake pedalwhile driving can be dangerous be-cause it can result in the brakes
overheating and losing their effec-tiveness. It also increases the wearof the brake components.
o If a tire goes flat while you are
driving, apply the brakes gently and
keep the car pointed straight aheadwhile you slow down. When you are
moving slowly enough for it to besafe to do so, pull off the road and stop in a safe place.
!
Page 143 of 230
2- 14 DRIVING YOUR HYUNDAI
o Drive at a moderate speed. The
faster you drive, the more fuel your car uses. Driving at a moderatespeed, especially on the highway, isone of the most effective ways to reduce fuel consumption.
o Don't "ride" the brake or clutch pedal. This can increase fuel consumption and also increase wear on thesecomponents. In addition, driving withyour foot resting on the brake pedal may cause the brakes to overheat, which reduces their effectivenessand may lead to more serious con-sequences.
o Take care of your tires. Keep them
inflated to the recommended pres- sure. Incorrect inflation, either too much or too little, results in unnec-essary tire wear. Check the tire pres-sures at least once a month.
o Be sure that the wheels are aligned correctly. Improper alignment can result from hitting curbs or driving too fast over irregular surfaces. Pooralignment causes faster tire wearand may also result in other prob-lems as well as greater fuel con-sumption.
transaxle) and block the rear wheelsso the car cannot roll. Then releasethe parking brake.
o Do not hold the vehicle on the up- grade with the accelerator pedal. This can cause the transaxle to overheat. Always use the brakepedal or parking brake.
C140A01A-AAT DRIVING FOR ECONOMY You can save fuel and get more miles from your car if you follow these sug-gestions:
o Drive smoothly. Accelerate at a moderate rate. Don't make "jack- rabbit" starts or full-throttle shiftsand maintain a steady cruisingspeed. Don't race between stop-lights. Try to adjust your speed tothat of the other traffic so you don't have to change speeds unneces- sarily. Avoid heavy traffic wheneverpossible. Always maintain a safedistance from other vehicles so youcan avoid unnecessary braking. Thisalso reduces brake wear.
o If your car is equipped with an auto-
matic transaxle, don't let your carcreep forward. To avoid creepingforward, keep your foot on the brake
pedal when the car is stopped.
o Use caution when parking on a hill.
Engage the parking brake and placethe gear selector lever in "P" (auto-matic transaxle) or in first or reversegear (manual transaxle). If your caris facing downhill, turn the front wheels into the curb to help keep the car from rolling. If your car is facinguphill, turn the front wheels awayfrom the curb to help keep the carfrom rolling.If there is no curb or if it is required by other conditions to keep the car from rolling, block the wheels.
o Under some conditions your park-
ing brake can freeze in the engagedposition. This is most likely to hap-pen when there is an accumulation of snow or ice around or near the rear brakes or if the brakes are wet.If there is a risk that the parkingbrake may freeze, apply it only tem-porarily while you put the gear se-lector lever in "P" (automatic) or in first or reverse gear (manual
Page 150 of 230

DRIVING YOUR HYUNDAI 2- 21
14.When going down a hill, shift into a
lower gear and use the engine brak- ing effect.When ascending a long grade,downshift the transaxle to a lower gear and reduce speed to reduce chances of engine overloading and/or overheating.
15.If you have to stop while going uphill, do not hold the vehicle inplace by pressing on the accelera- tor. This can cause the automatic transaxle to overheat. Use the park-ing brake or footbrake.
NOTE: When towing, check transaxle fluid more frequently.
CAUTION:
If overheating should occur whentowing, (temperature gauge readsnear red zone), taking the followingaction may reduce or eliminate theproblem.
get out of the other vehicle's airturbulence.
8. When parking your car and trailer,
especially on a hill, be sure to followall the normal precautions. Turn your front wheel into the curb, set the parking brake firmly, and putthe transaxle in 1st or Reverse(manual) or Park (automatic). Inaddition, place wheel chocks ateach of the trailer's tires.
9. If the trailer has electric brakes,
start your vehicle and trailer mov-ing, and then apply the trailer brakecontroller by hand to be sure thebrakes are working. This lets youcheck your electrical connection at the same time.
10.During your trip, check occasion- ally to be sure that the load is secure, and that the lights and anytrailer brakes are still working.
11.Avoid jerky starts, sudden accel- eration or sudden stops.
12.Avoid sharp turns and rapid lane changes.
13.Avoid holding the brake pedal down too long or too frequently. This couldcause the brakes to overheat, re- sulting in reduced braking efficien- cy. 1. Turn off the air conditioner.
2. Reduce highway speed.
3. Select a lower gear when going
uphill.
4. While in stop and go traffic, place the gear selector in park or neutraland idle the engine at a higher speed.
!
Page 185 of 230

6- 8 DO-IT-YOURSELF MAINTENANCE
4. When the oil has stopped draining,
replace the drain plug using a new washer and retighten by turning itclockwise. Oil pan drain plug tightening torque : 3.5 ~4.0 kgf.m
5. Remove the oil filter by turning it counterclockwise with a oil filter wrench of the proper size. A cer- tain amount of oil will come out when you remove the filter. So besure to have your drain pan in place underneath it.
6. Install a new oil filter in accordance with the instructions on the carton or on the filter itself. Do not over-tighten. Oil filter tightening torque : 1.2 ~ 1.6 kgf.m Be sure that the mounting surface on the engine is clean and that theold gasket is removed completely. Lubricate the new gasket on the filter with clean engine oil beforeinstallation. 7. Refill the crankcase with the rec-
ommended engine oil. Refer to thespecification in chapter 9 for en-gine oil capacity.
8. Start the engine and check to be sure no oil is leaking from the drain plug or oil filter.
9. Shut off the engine and recheck the oil level.
NOTE: Always dispose of used engine oil
in an environmentally acceptable manner. It is suggested that it beplaced in a sealed container and taken to a service station for recla- mation. Do not pour the oil on theground or put it in with the house- hold trash.
WARNING:
Used motor oil may cause irrita-
tion or cancer of the skin if left in contact with the skin for prolongedperiods of time. Wash your hands thoroughly with soap and warm water as soon as possible afterhandling used oil. G050A01A-AAT
CHECKING AND CHANGING THE ENGINE COOLANT
WARNING:
Do not remove the radiator cap
when the engine is hot. When the engine is hot, the engine coolantis under pressure and may erupt through the opening if the cap is removed. You could be seriouslyburned if you do not observe this precaution. Do not remove the ra- diator cap until the radiator is coolto the touch.
!
!
Page 187 of 230
6- 10 DO-IT-YOURSELF MAINTENANCE
4. Turn the radiator cap counterclock-
wise without pressing down on it, until it stops. This relieves any pres-sure remaining in the cooling sys- tem. And remove the radiator cap by pushing down and turning coun-terclockwise.Now fill the radiator with clean dem-ineralized or distilled water. Con- tinue to add clean demineralized or distilled water in small quantitiesuntil the fluid level stays up in the radiator neck. G050D01L
G050D02L
5. Start the engine, top off the radia- tor with water and then add enginecoolant to the reservoir until the level is between "LOW" and "FULL".
6. Replace the radiator and reservoir
caps and check to be sure thedrain cocks are fully closed and not leaking.
WARNING:
The cooling fan is controlled by
engine coolant temperature andmay sometimes operate even when the engine is not running. Useextreme caution when working near the blades of the cooling fan so that you are not injured by a
3. Check Section 9 for the capacity of
the cooling system in your car.Then, following the manufacturer'sdirections on the engine coolant container, add the appropriate quantity of coolant to the radiator. rotating fan blade. As the engine coolant temperature decreases, the fan will automatically shut off. Thisis a normal condition.
G060A01L
G060A02L-GAT
SPARK PLUGS
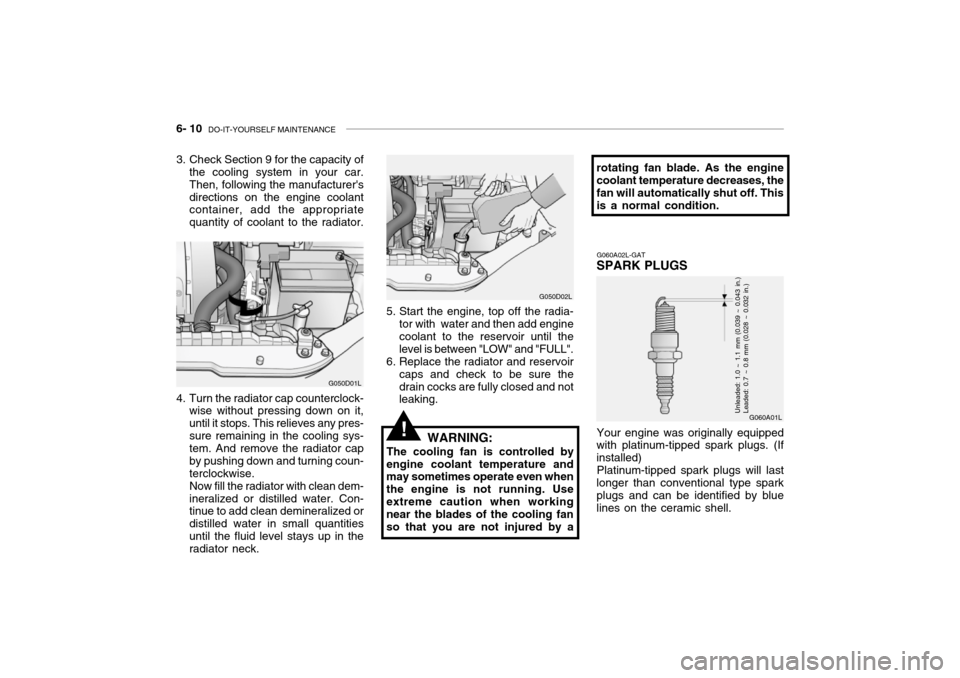
Your engine was originally equipped
with platinum-tipped spark plugs. (If installed)
Platinum-tipped spark plugs will last
longer than conventional type sparkplugs and can be identified by blue lines on the ceramic shell.Unleaded: 1.0 ~ 1.1 mm (0.039 ~ 0.043 in.) Leaded: 0.7 ~ 0.8 mm (0.028 ~ 0.032 in.)
!