2002 Hyundai Atos warning lights
[x] Cancel search: warning lightsPage 66 of 249
DRIVING YOUR HYUNDAI
DRIVING YOUR HYUNDAI DRIVING YOUR HYUNDAI
DRIVING YOUR HYUNDAI
DRIVING YOUR HYUNDAI
2- 3
C050A01X-GAT
STARTING
STARTING STARTING
STARTING
STARTING
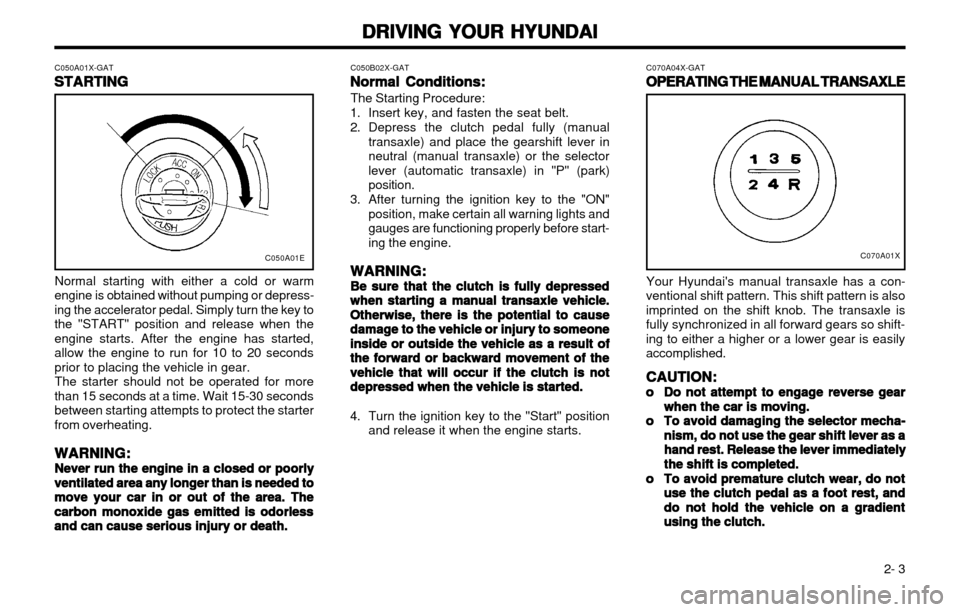
Normal starting with either a cold or warm
engine is obtained without pumping or depress-
ing the accelerator pedal. Simply turn the key tothe "START" position and release when theengine starts. After the engine has started,allow the engine to run for 10 to 20 secondsprior to placing the vehicle in gear. The starter should not be operated for more
than 15 seconds at a time. Wait 15-30 secondsbetween starting attempts to protect the starterfrom overheating.
WARNING:
WARNING: WARNING:
WARNING:
WARNING:
Never run the engine in a closed or poorly
Never run the engine in a closed or poorly Never run the engine in a closed or poorly
Never run the engine in a closed or poorly
Never run the engine in a closed or poorly ventilated area
ventilated area ventilated area
ventilated area
ventilated area any longer than is needed to
any longer than is needed to any longer than is needed to
any longer than is needed to
any longer than is needed to
move your car in or out of the area. The
move your car in or out of the area. The move your car in or out of the area. The
move your car in or out of the area. The
move your car in or out of the area. The
carbon
carbon carbon
carbon
carbon monoxide gas emitted is odorless
monoxide gas emitted is odorless monoxide gas emitted is odorless
monoxide gas emitted is odorless
monoxide gas emitted is odorless
and can cause serious injury or death.
and can cause serious injury or death. and can cause serious injury or death.
and can cause serious injury or death.
and can cause serious injury or death. C050B02X-GAT
Normal Conditions:
Normal Conditions: Normal Conditions:
Normal Conditions:
Normal Conditions:
The Starting Procedure:
1. Insert key, and fasten the seat belt.
2. Depress the clutch pedal fully (manual transaxle) and place the gearshift lever in neutral (manual transaxle) or the selectorlever (automatic transaxle) in "P" (park)position.
3. After turning the ignition key to the "ON" position, make certain all warning lights andgauges are functioning properly before start-
ing the engine.
WARNING:
WARNING: WARNING:
WARNING:
WARNING:
Be sure that the clutch is fully depressed
Be sure that the clutch is fully depressed Be sure that the clutch is fully depressed
Be sure that the clutch is fully depressed
Be sure that the clutch is fully depressed when starting a
when starting a when starting a
when starting a
when starting a manual transaxle vehicle.
manual transaxle vehicle. manual transaxle vehicle.
manual transaxle vehicle.
manual transaxle vehicle.
Otherwise, there is the potential to cause
Otherwise, there is the potential to cause Otherwise, there is the potential to cause
Otherwise, there is the potential to cause
Otherwise, there is the potential to cause
damage
damage damage
damage
damage to the vehicle or injury to someone
to the vehicle or injury to someone to the vehicle or injury to someone
to the vehicle or injury to someone
to the vehicle or injury to someone
inside or outside the vehicle as a result
inside or outside the vehicle as a result inside or outside the vehicle as a result
inside or outside the vehicle as a result
inside or outside the vehicle as a result ofof
ofof
of
the forward or backward movement of the
the forward or backward movement of the the forward or backward movement of the
the forward or backward movement of the
the forward or backward movement of the
vehicle that will occur if the
vehicle that will occur if the vehicle that will occur if the
vehicle that will occur if the
vehicle that will occur if the clutch is not
clutch is not clutch is not
clutch is not
clutch is not
depressed when the vehicle is started.
depressed when the vehicle is started. depressed when the vehicle is started.
depressed when the vehicle is started.
depressed when the vehicle is started.
4. Turn the ignition key to the "Start" position
and release it when the engine starts. C070A04X-GAT
OPERATING THE MANUAL TRANSAXLE
OPERATING THE MANUAL TRANSAXLE OPERATING THE MANUAL TRANSAXLE
OPERATING THE MANUAL TRANSAXLE
OPERATING THE MANUAL TRANSAXLE
C070A01X
Your Hyundai's manual transaxle has a con-
ventional shift pattern. This shift pattern is also imprinted on the shift knob. The transaxle isfully synchronized in all forward gears so shift-
ing to either a higher or a lower gear is easilyaccomplished.
CAUTION:
CAUTION: CAUTION:
CAUTION:
CAUTION:
oo
oo
o Do not attempt to engage reverse gear
Do not attempt to engage reverse gear Do not attempt to engage reverse gear
Do not attempt to engage reverse gear
Do not attempt to engage reverse gear
when the
when the when the
when the
when the car is moving.
car is moving. car is moving.
car is moving.
car is moving.
oo
oo
o To avoid damaging the selector mecha-
To avoid damaging the selector mecha- To avoid damaging the selector mecha-
To avoid damaging the selector mecha-
To avoid damaging the selector mecha-
nism, do not use the gear
nism, do not use the gear nism, do not use the gear
nism, do not use the gear
nism, do not use the gear shift lever as a
shift lever as a shift lever as a
shift lever as a
shift lever as a
hand rest. Release the lever immediately
hand rest. Release the lever immediately hand rest. Release the lever immediately
hand rest. Release the lever immediately
hand rest. Release the lever immediately
the shift is completed.
the shift is completed. the shift is completed.
the shift is completed.
the shift is completed.
oo
oo
o To avoid premature clutch wear, do not
To avoid premature clutch wear, do not To avoid premature clutch wear, do not
To avoid premature clutch wear, do not
To avoid premature clutch wear, do not
use the clutch pedal as
use the clutch pedal as use the clutch pedal as
use the clutch pedal as
use the clutch pedal as
a foot rest, and
a foot rest, and a foot rest, and
a foot rest, and
a foot rest, and
do not hold the vehicle on a gradient
do not hold the vehicle on a gradient do not hold the vehicle on a gradient
do not hold the vehicle on a gradient
do not hold the vehicle on a gradient
using the clutch.
using the clutch. using the clutch.
using the clutch.
using the clutch.
C050A01E
Page 76 of 249
DRIVING YOUR HYUNDAI
DRIVING YOUR HYUNDAI DRIVING YOUR HYUNDAI
DRIVING YOUR HYUNDAI
DRIVING YOUR HYUNDAI
2- 13
4. To maintain engine braking efficiency andelectrical charging performance, do not use fifth gear (manual transaxle) or overdrive(automatic transaxle).
5. Always secure items in the trailer to prevent load shift while driving.
6. Check the condition and air pressure of all tires on the trailer and your car. Low tirepressure can seriously affect the handling.Also check the spare tire.
7. The vehicle/trailer combination is more af- fected by crosswind and buffeting. When being passed by a large vehicle, keep a constant speed and steer straight ahead.If there is too much wind buffeting slowdown to get out of the other vehicle's airturbulence.
8. When parking your car and trailer, especial- ly on a hill, be sure to follow all the normalprecautions. Turn your front wheel into thecurb, set the parking brake firmly, and putthe transaxle in 1st or Reverse (manual) orPark (automatic). In addition, place wheelchocks at each of the trailer's tires.
9. If the trailer has electric brakes, start your vehicle and trailer moving, and then applythe trailer brake controller by hand to besure the brakes are working. This lets youcheck your electrical connection at the sametime.
10. During your trip, check occasionally to be sure that the load is secure, and that thelights and any trailer brakes are still working.
WARNING:
WARNING: WARNING:
WARNING:
WARNING:
oo
oo
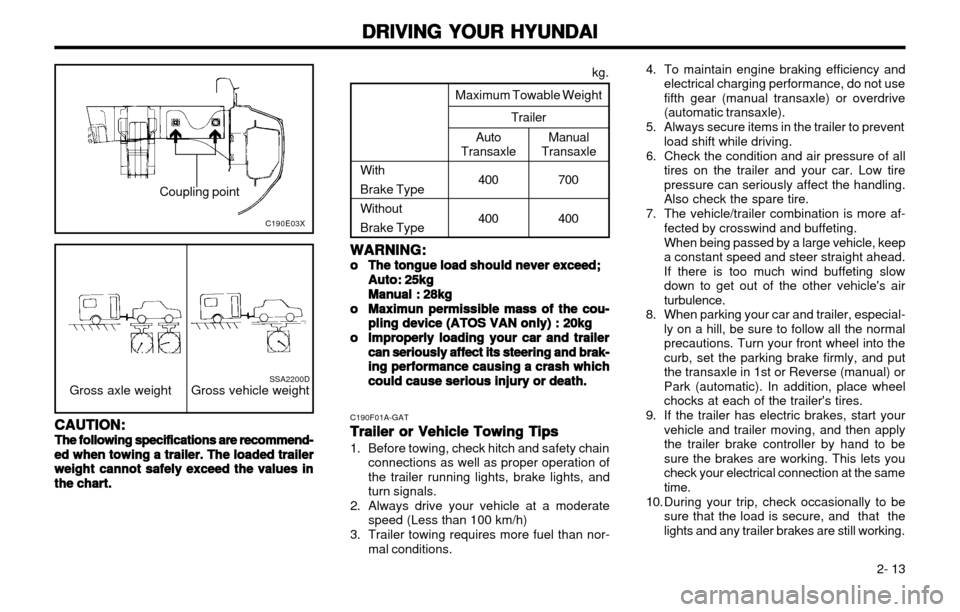
o The tongue load should never exceed;
The tongue load should never exceed; The tongue load should never exceed;
The tongue load should never exceed;
The tongue load should never exceed;
Auto: 25kg
Auto: 25kg Auto: 25kg
Auto: 25kg
Auto: 25kg
Manual : 28kg
Manual : 28kg Manual : 28kg
Manual : 28kg
Manual : 28kg
oo
oo
o Maximun permissible mass of the cou-
Maximun permissible mass of the cou- Maximun permissible mass of the cou-
Maximun permissible mass of the cou-
Maximun permissible mass of the cou-
pling device (ATOS VAN only) : 20kg
pling device (ATOS VAN only) : 20kg pling device (ATOS VAN only) : 20kg
pling device (ATOS VAN only) : 20kg
pling device (ATOS VAN only) : 20kg
oo
oo
o Improperly loading your car and trailer
Improperly loading your car and trailer Improperly loading your car and trailer
Improperly loading your car and trailer
Improperly loading your car and trailer
can seriously affect its steering and brak-
can seriously affect its steering and brak- can seriously affect its steering and brak-
can seriously affect its steering and brak-
can seriously affect its steering and brak-
ing performance causing a crash which
ing performance causing a crash which ing performance causing a crash which
ing performance causing a crash which
ing performance causing a crash which
could cause serious injury or death.
could cause serious injury or death. could cause serious injury or death.
could cause serious injury or death.
could cause serious injury or death. kg.
Maximum Towable Weight Trailer
Manual
TransaxleAuto
Transaxle
With Brake TypeWithoutBrake Type 400 400
C190F01A-GAT
Trailer or Vehicle Towing Tips
Trailer or Vehicle Towing Tips Trailer or Vehicle Towing Tips
Trailer or Vehicle Towing Tips
Trailer or Vehicle Towing Tips
1. Before towing, check hitch and safety chain
connections as well as proper operation of the trailer running lights, brake lights, andturn signals.
2. Always drive your vehicle at a moderate speed (Less than 100 km/h)
3. Trailer towing requires more fuel than nor- mal conditions.
Gross axle weight Gross vehicle weightSSA2200D
CAUTION:
CAUTION: CAUTION:
CAUTION:
CAUTION:
The following specifications are recommend-
The following specifications are recommend- The following specifications are recommend-
The following specifications are recommend-
The following specifications are recommend- ed when towing a
ed when towing a ed when towing a
ed when towing a
ed when towing a trailer. The loaded trailer
trailer. The loaded trailer trailer. The loaded trailer
trailer. The loaded trailer
trailer. The loaded trailer
weight cannot safely exceed the values in
weight cannot safely exceed the values in weight cannot safely exceed the values in
weight cannot safely exceed the values in
weight cannot safely exceed the values in
the the
the the
the chart.
chart. chart.
chart.
chart. Coupling point
C190E03X
�
�
700 400
Page 79 of 249
WHAT TO DO IN AN EMERGENCY
WHAT TO DO IN AN EMERGENCY WHAT TO DO IN AN EMERGENCY
WHAT TO DO IN AN EMERGENCY
WHAT TO DO IN AN EMERGENCY
3-2 2. Turn off all unnecessary lights and acces-
sories in both vehicles.
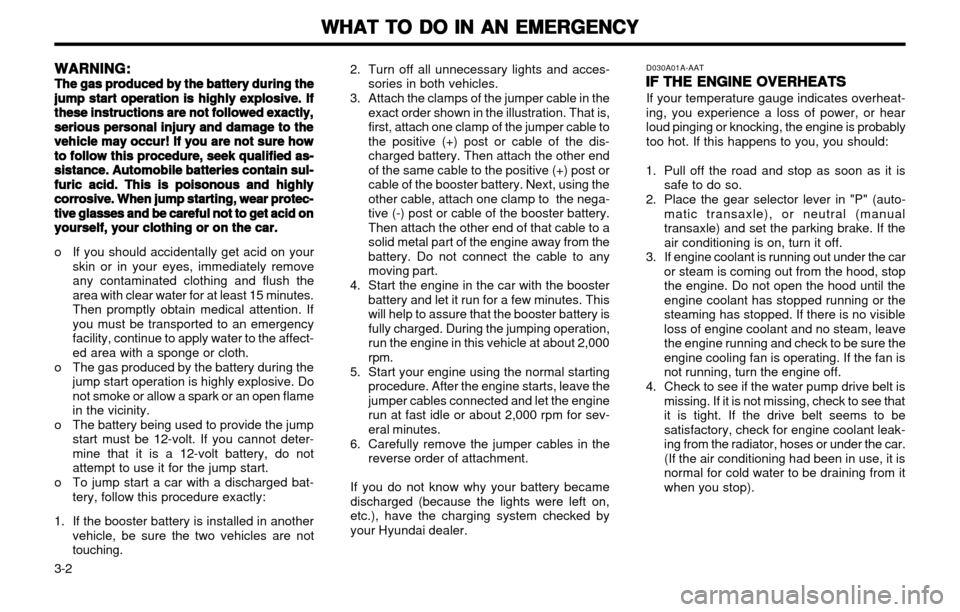
3. Attach the clamps of the jumper cable in the exact order shown in the illustration. That is, first, attach one clamp of the jumper cable tothe positive (+) post or cable of the dis-charged battery. Then attach the other endof the same cable to the positive (+) post orcable of the booster battery. Next, using theother cable, attach one clamp to the nega-tive (-) post or cable of the booster battery.Then attach the other end of that cable to asolid metal part of the engine away from thebattery. Do not connect the cable to anymoving part.
4. Start the engine in the car with the booster battery and let it run for a few minutes. Thiswill help to assure that the booster battery isfully charged. During the jumping operation,run the engine in this vehicle at about 2,000rpm.
5. Start your engine using the normal starting procedure. After the engine starts, leave thejumper cables connected and let the enginerun at fast idle or about 2,000 rpm for sev-eral minutes.
6. Carefully remove the jumper cables in the reverse order of attachment.
If you do not know why your battery becamedischarged (because the lights were left on,etc.), have the charging system checked byyour Hyundai dealer.
WARNING:
WARNING: WARNING:
WARNING:
WARNING:
The gas produced by the battery during the
The gas produced by the battery during the The gas produced by the battery during the
The gas produced by the battery during the
The gas produced by the battery during the jump start operation is highly explosive. If
jump start operation is highly explosive. If jump start operation is highly explosive. If
jump start operation is highly explosive. If
jump start operation is highly explosive. If
these instructions are not followed exactly,
these instructions are not followed exactly, these instructions are not followed exactly,
these instructions are not followed exactly,
these instructions are not followed exactly,
serious personal injury and damage to the
serious personal injury and damage to the serious personal injury and damage to the
serious personal injury and damage to the
serious personal injury and damage to the
vehicle may occur! If you are not sure how
vehicle may occur! If you are not sure how vehicle may occur! If you are not sure how
vehicle may occur! If you are not sure how
vehicle may occur! If you are not sure how
to follow this procedure, seek qualified as-
to follow this procedure, seek qualified as- to follow this procedure, seek qualified as-
to follow this procedure, seek qualified as-
to follow this procedure, seek qualified as-
sistance. Automobile batteries contain sul-
sistance. Automobile batteries contain sul- sistance. Automobile batteries contain sul-
sistance. Automobile batteries contain sul-
sistance. Automobile batteries contain sul-
furic acid. This is poisonous and highly
furic acid. This is poisonous and highly furic acid. This is poisonous and highly
furic acid. This is poisonous and highly
furic acid. This is poisonous and highly
corrosive. When jump starting, wear protec-
corrosive. When jump starting, wear protec- corrosive. When jump starting, wear protec-
corrosive. When jump starting, wear protec-
corrosive. When jump starting, wear protec-
tive glasses and be careful not to get acid on
tive glasses and be careful not to get acid on tive glasses and be careful not to get acid on
tive glasses and be careful not to get acid on
tive glasses and be careful not to get acid on
yourself, your clothing or on the car.
yourself, your clothing or on the car. yourself, your clothing or on the car.
yourself, your clothing or on the car.
yourself, your clothing or on the car.
o If you should accidentally get acid on your
skin or in your eyes, immediately remove any contaminated clothing and flush thearea with clear water for at least 15 minutes.Then promptly obtain medical attention. Ifyou must be transported to an emergencyfacility, continue to apply water to the affect-ed area with a sponge or cloth.
o The gas produced by the battery during the jump start operation is highly explosive. Donot smoke or allow a spark or an open flamein the vicinity.
o The battery being used to provide the jump start must be 12-volt. If you cannot deter-mine that it is a 12-volt battery, do notattempt to use it for the jump start.
o To jump start a car with a discharged bat- tery, follow this procedure exactly:
1. If the booster battery is installed in another vehicle, be sure the two vehicles are nottouching. D030A01A-AAT
IF THE ENGINE OVERHEATS
IF THE ENGINE OVERHEATS IF THE ENGINE OVERHEATS
IF THE ENGINE OVERHEATS
IF THE ENGINE OVERHEATS
If your temperature gauge indicates overheat-ing, you experience a loss of power, or hearloud pinging or knocking, the engine is probablytoo hot. If this happens to you, you should:
1. Pull off the road and stop as soon as it is safe to do so.
2. Place the gear selector lever in "P" (auto- matic transaxle), or neutral (manual
transaxle) and set the parking brake. If theair conditioning is on, turn it off.
3. If engine coolant is running out under the car or steam is coming out from the hood, stopthe engine. Do not open the hood until theengine coolant has stopped running or thesteaming has stopped. If there is no visibleloss of engine coolant and no steam, leavethe engine running and check to be sure theengine cooling fan is operating. If the fan isnot running, turn the engine off.
4. Check to see if the water pump drive belt is missing. If it is not missing, check to see thatit is tight. If the drive belt seems to besatisfactory, check for engine coolant leak-ing from the radiator, hoses or under the car.(If the air conditioning had been in use, it isnormal for cold water to be draining from itwhen you stop).
Page 111 of 249
DO-IT-YOURSELF MAINTENANCE
DO-IT-YOURSELF MAINTENANCE DO-IT-YOURSELF MAINTENANCE
DO-IT-YOURSELF MAINTENANCE
DO-IT-YOURSELF MAINTENANCE
6-15
CAUTION:
CAUTION: CAUTION:
CAUTION:
CAUTION:
A burned-out fuse indicates that there is a
A burned-out fuse indicates that there is a A burned-out fuse indicates that there is a
A burned-out fuse indicates that there is a
A burned-out fuse indicates that there is a problem in the electrical circuit. If you re-
problem in the electrical circuit. If you re- problem in the electrical circuit. If you re-
problem in the electrical circuit. If you re-
problem in the electrical circuit. If you re-
place a fuse and it blows as soon as the
place a fuse and it blows as soon as the place a fuse and it blows as soon as the
place a fuse and it blows as soon as the
place a fuse and it blows as soon as the
accessory is turned on, the problem is seri-
accessory is turned on, the problem is seri- accessory is turned on, the problem is seri-
accessory is turned on, the problem is seri-
accessory is turned on, the problem is seri-
ous and should be referred to a Hyundai
ous and should be referred to a Hyundai ous and should be referred to a Hyundai
ous and should be referred to a Hyundai
ous and should be referred to a Hyundai
dealer for diagnosis and repair. Never re-
dealer for diagnosis and repair. Never re- dealer for diagnosis and repair. Never re-
dealer for diagnosis and repair. Never re-
dealer for diagnosis and repair. Never re-
place a fuse with anything except a fuse
place a fuse with anything except a fuse place a fuse with anything except a fuse
place a fuse with anything except a fuse
place a fuse with anything except a fuse
with the same or a lower amperage rating. A
with the same or a lower amperage rating. A with the same or a lower amperage rating. A
with the same or a lower amperage rating. A
with the same or a lower amperage rating. A
higher capacity fuse could cause damage
higher capacity fuse could cause damage higher capacity fuse could cause damage
higher capacity fuse could cause damage
higher capacity fuse could cause damage
and create a fire hazard.
and create a fire hazard. and create a fire hazard.
and create a fire hazard.
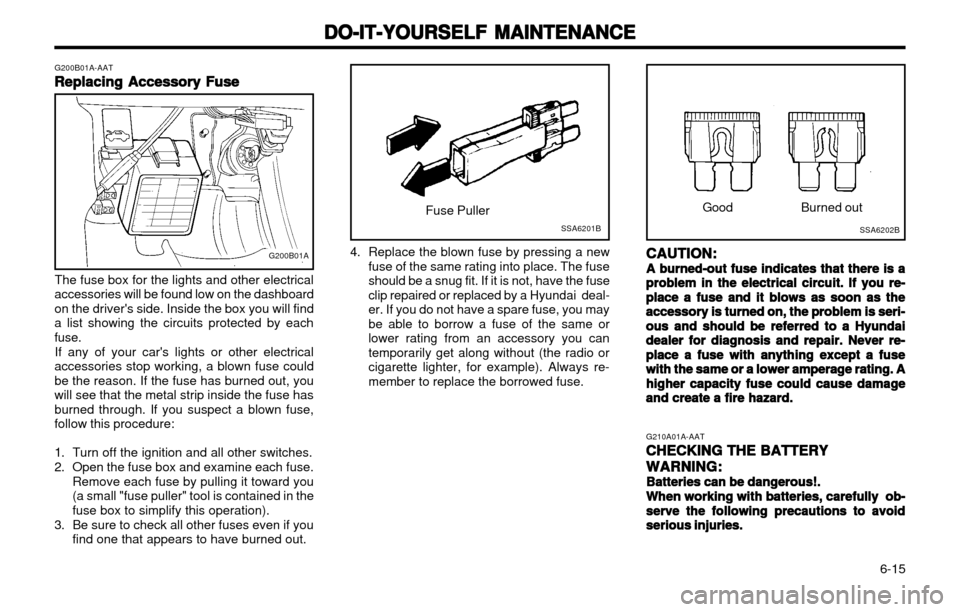
and create a fire hazard. Good
Burned out
4. Replace the blown fuse by pressing a new fuse of the same rating into place. The fuse should be a snug fit. If it is not, have the fuseclip repaired or replaced by a Hyundai deal-er. If you do not have a spare fuse, you maybe able to borrow a fuse of the same orlower rating from an accessory you cantemporarily get along without (the radio orcigarette lighter, for example). Always re-member to replace the borrowed fuse.
G200B01A-AAT
Replacing Accessory Fuse
Replacing Accessory Fuse Replacing Accessory Fuse
Replacing Accessory Fuse
Replacing Accessory Fuse
The fuse box for the lights and other electrical
accessories will be found low on the dashboardon the driver's side. Inside the box you will finda list showing the circuits protected by eachfuse.
If any of your car's lights or other electrical
accessories stop working, a blown fuse couldbe the reason. If the fuse has burned out, youwill see that the metal strip inside the fuse hasburned through. If you suspect a blown fuse,follow this procedure:
1. Turn off the ignition and all other switches.
2. Open the fuse box and examine each fuse. Remove each fuse by pulling it toward you (a small "fuse puller" tool is contained in thefuse box to simplify this operation).
3. Be sure to check all other fuses even if you find one that appears to have burned out.
G200B01A
SSA6201BSSA6202B
Fuse Puller
G210A01A-AATCHECKING THE BATTERY
CHECKING THE BATTERY CHECKING THE BATTERY
CHECKING THE BATTERY
CHECKING THE BATTERY
WARNING:
WARNING: WARNING:
WARNING:
WARNING:
Batteries can be dangerous!.
Batteries can be dangerous!. Batteries can be dangerous!.
Batteries can be dangerous!.
Batteries can be dangerous!.
When working with batteries, carefully ob-
When working with batteries, carefully ob- When working with batteries, carefully ob-
When working with batteries, carefully ob-
When working with batteries, carefully ob-
serve the following precautions to avoid
serve the following precautions to avoid serve the following precautions to avoid
serve the following precautions to avoid
serve the following precautions to avoid
serious injuries.
serious injuries. serious injuries.
serious injuries.
serious injuries.
Page 128 of 249
INDEX
INDEX INDEX
INDEX
INDEX
10-4
Towing
Emergency ..................................................................................... 3-8
If your car must be towed ............................................................. 3-7
Trailer or vehicle towing .............................................................. 2-11
Transaxle
Automatic ....................................................................................... 2-5
Automatic transaxle fluid checking ................................... 6-10 ~ 6-11
Manual transaxle oil checking ....................................................... 6-9
VV
VV
V
Vehicle Identification Number (VIN) .................................................... 8-1 Ventilation
Center ventilator ........................................................................... 1-37
Side ventilator .............................................................................. 1-37
WW
WW
W
Warning Lights ....................................................................... 1-20 ~ 1-22Windows
Manual ........................................................................................... 1-6
Power ............................................................................................. 1-7
Windshield Wiper and Washer ......................................................... 1-24
Windshield Wiper Blades .................................................................... 6-9
Page 155 of 249
FEATURES OF YOUR HYUNDAI
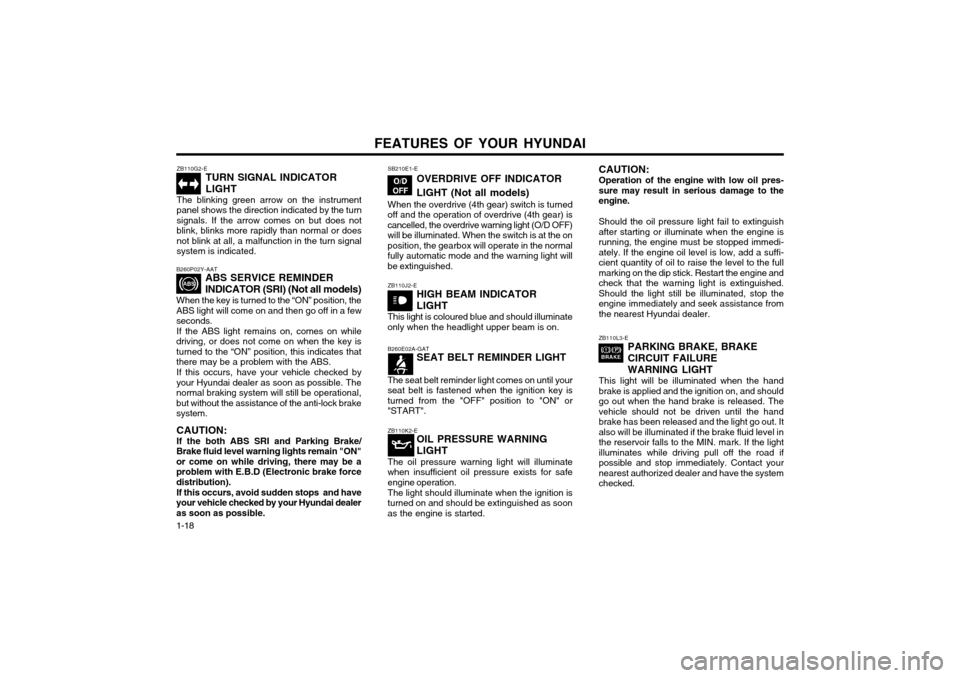
1-18 ZB110G2-E
TURN SIGNAL INDICATOR LIGHT
The blinking green arrow on the instrument panel shows the direction indicated by the turnsignals. If the arrow comes on but does notblink, blinks more rapidly than normal or doesnot blink at all, a malfunction in the turn signalsystem is indicated.
B260P02Y-AAT ABS SERVICE REMINDER INDICATOR (SRI) (Not all models)
When the key is turned to the “ON” position, the ABS light will come on and then go off in a fewseconds. If the ABS light remains on, comes on while
driving, or does not come on when the key isturned to the “ON” position, this indicates thatthere may be a problem with the ABS.
If this occurs, have your vehicle checked by
your Hyundai dealer as soon as possible. Thenormal braking system will still be operational,but without the assistance of the anti-lock brakesystem.
CAUTION: If the both ABS SRI and Parking Brake/
Brake fluid level warning lights remain "ON" or come on while driving, there may be aproblem with E.B.D (Electronic brake forcedistribution).
If this occurs, avoid sudden stops and have
your vehicle checked by your Hyundai dealeras soon as possible. SB210E1-E
OVERDRIVE OFF INDICATOR LIGHT (Not all models)
When the overdrive (4th gear) switch is turned off and the operation of overdrive (4th gear) iscancelled, the overdrive warning light (O/D OFF)will be illuminated. When the switch is at the onposition, the gearbox will operate in the normalfully automatic mode and the warning light willbe extinguished.
ZB110J2-E HIGH BEAM INDICATOR LIGHT
This light is coloured blue and should illuminate only when the headlight upper beam is on.
B260E02A-GAT SEAT BELT REMINDER LIGHT
The seat belt reminder light comes on until your seat belt is fastened when the ignition key isturned from the "OFF" position to "ON" or"START".
ZB110K2-E OIL PRESSURE WARNING LIGHT
The oil pressure warning light will illuminate when insufficient oil pressure exists for safeengine operation. The light should illuminate when the ignition is turned on and should be extinguished as soonas the engine is started.
ZB110L3-E PARKING BRAKE, BRAKE CIRCUIT FAILURE WARNING LIGHT
This light will be illuminated when the hand brake is applied and the ignition on, and shouldgo out when the hand brake is released. Thevehicle should not be driven until the handbrake has been released and the light go out. Italso will be illuminated if the brake fluid level inthe reservoir falls to the MIN. mark. If the lightilluminates while driving pull off the road ifpossible and stop immediately. Contact yournearest authorized dealer and have the systemchecked.
CAUTION: Operation of the engine with low oil pres- sure may result in serious damage to theengine. Should the oil pressure light fail to extinguish after starting or illuminate when the engine isrunning, the engine must be stopped immedi-ately. If the engine oil level is low, add a suffi-cient quantity of oil to raise the level to the fullmarking on the dip stick. Restart the engine andcheck that the warning light is extinguished.Should the light still be illuminated, stop theengine immediately and seek assistance fromthe nearest Hyundai dealer.
Page 156 of 249

FEATURES OF YOUR HYUNDAI 1-19
YB110C1-A
SRS (Airbag) SERVICE REMINDER INDICATOR(Not all models)
The SRS service reminder indicator (SRI) comes
on and flashes for about 6 seconds after the ignition key is turned to the “ON” position orafter the engine is started, after which it will goout.
This light also comes on when the SRS is not
working properly.
If the SRI does not come on, or continuously
remains on after flashing for about 6 secondswhen you turned the ignition key to the “ON”position or started the engine, or if it comes onwhile driving, have the SRS inspected by anauthorized Hyundai Dealer.
ZB110P2-E LOW FUEL LEVEL WARNING LIGHT
The low fuel level warning light comes on when the fuel tank is approaching empty. When itcomes on, you should add fuel as soon aspossible. Driving with the fuel level warning lighton or with the fuel level below "E" can cause theengine to misfire.
ZB110R1-E BRAKE PAD WEAR WARNING SOUNDWhen the brake pads of the front brakes be-
come worn to almost the limit of use, a metalfriction squealing sound will be heard as awarning to the driver that the brakes should bechecked. When this sound is heard, replace thebrake pads with new ones.
ZB110Q2-A MALFUNCTION INDICATOR LIGHT
This light illuminates when there is a malfunc- tion of an exhaust gas related component, andthe system is not functioning properly so that
B260L01A-GAT DOOR AJAR WARNING LIGHT
The door ajar warning light warns you that a
door is not completely closed.
ZB110M2-E CHARGING WARNING LIGHT
This red warning light indicates malfunctioning of the alternator and electrical charging system.If this warning light glows when the ignitionswitch is in the "ON" position (engine off), thebulb and electrical wiring are satisfactory. Thelight should go out when the engine is started.If the light glows when the engine is running, thealternator and electrical system should bechecked as soon as possible.
Warning Light Operation The parking brake/brake fluid level warning
light should come on when the parking brake is applied and the ignition switch is turned to "ON"or "START". After the engine is started, the lightshould go out when the parking brake is re-leased.
If the parking brake is not applied, the warning
light should come on when the ignition switch isturned to "ON" or "START", then go out whenthe engine starts. If the light comes on at anyother time, you should slow the vehicle andbring it to a complete stop in a safe location offthe roadway.
The brake warning light indicates that the brake
fluid level in the brake master cylinder is lowand hydraulic brake fluid conforming to DOT 3or DOT 4 specifications should be added. Afteradding fluid, if no other trouble is found, the carshould be immediately and carefully drivento a Hyundai dealer for inspection. If furthertrouble is experienced, the vehicle should notbe driven at all but taken to a dealer by aprofessional towing service or some other safemethod.
Your Hyundai is equipped with dual-diagonal
braking systems. This means you still havebraking on two wheels even if one of the dualsystems should fail. With only one of the dualsystems working, more than normal pedal trav-el and greater pedal pressure are required tostop the car. Also, the car will not stop in asshort a distance with only half of the brakesystem working. If the brakes fail while you are driving, shift to a lower gear for additional en-gine braking and stop the car as soon as it issafe to do so.
Page 157 of 249
FEATURES OF YOUR HYUNDAI
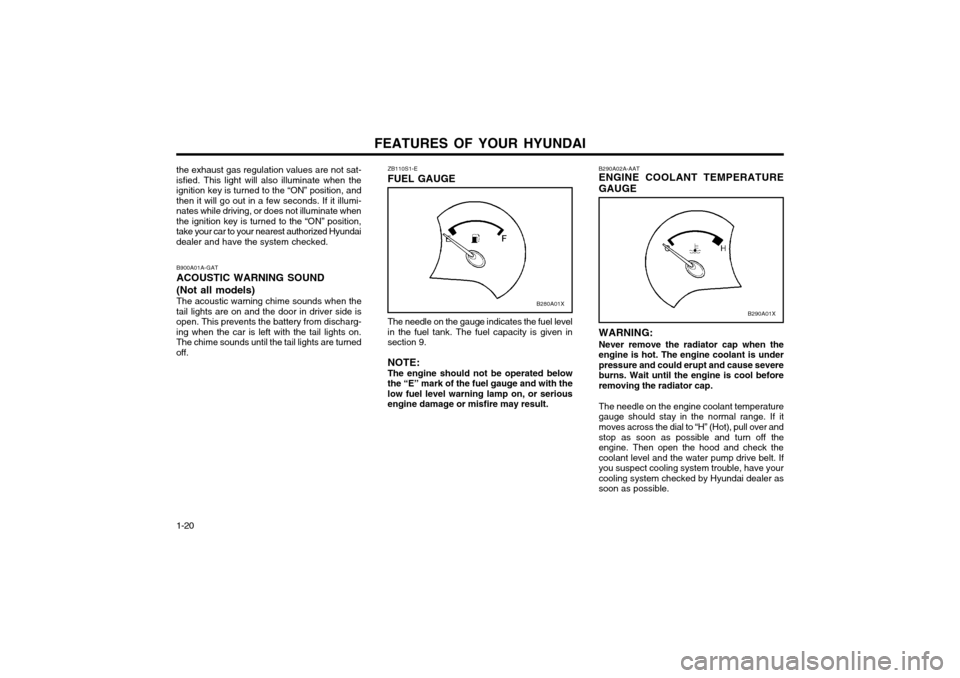
1-20 WARNING: Never remove the radiator cap when the engine is hot. The engine coolant is underpressure and could erupt and cause severeburns. Wait until the engine is cool beforeremoving the radiator cap. The needle on the engine coolant temperature
gauge should stay in the normal range. If itmoves across the dial to “H” (Hot), pull over and stop as soon as possible and turn off the engine. Then open the hood and check thecoolant level and the water pump drive belt. If
you suspect cooling system trouble, have yourcooling system checked by Hyundai dealer assoon as possible.
The needle on the gauge indicates the fuel levelin the fuel tank. The fuel capacity is given insection 9. NOTE: The engine should not be operated below the “E” mark of the fuel gauge and with thelow fuel level warning lamp on, or seriousengine damage or misfire may result. B290A02A-AAT ENGINE COOLANT TEMPERATURE GAUGE
ZB110S1-E FUEL GAUGE
B900A01A-GATACOUSTIC WARNING SOUND (Not all models) The acoustic warning chime sounds when the
tail lights are on and the door in driver side is open. This prevents the battery from discharg-ing when the car is left with the tail lights on.The chime sounds until the tail lights are turnedoff.
the exhaust gas regulation values are not sat-isfied. This light will also illuminate when theignition key is turned to the “ON” position, andthen it will go out in a few seconds. If it illumi-nates while driving, or does not illuminate whenthe ignition key is turned to the “ON” position,take your car to your nearest authorized Hyundaidealer and have the system checked.
B280A01XB290A01X