2002 Hyundai Atos child seat
[x] Cancel search: child seatPage 25 of 249
FEATURES OF YOUR HYUNDAI
FEATURES OF YOUR HYUNDAI FEATURES OF YOUR HYUNDAI
FEATURES OF YOUR HYUNDAI
FEATURES OF YOUR HYUNDAI
1- 16 to the body structure, can adversely affect SRS performance and lead to possibleinjury.
o For cleaning the airbag pad covers, use only a soft, dry cloth or one which hasbeen moistened with plain water. Solventsor cleaners could adversely affect theairbag covers and proper deployment ofthe system.
o No objects should be placed over or near the airbag modules on the steering wheel,instrument panel, and the front passen-ger's panel above the glove box, becauseany such object could cause harm if thevehicle is in a crash severe enough tocause the airbags to inflate.
o If the airbags inflate, they must be re- placed by an authorized Hyundai dealer.
o Do not tamper with or disconnect SRS wiring, or other components of the SRSsystem. Doing so could result in injury,due to accidental firing of the airbags orby rendering the SRS inoperative.
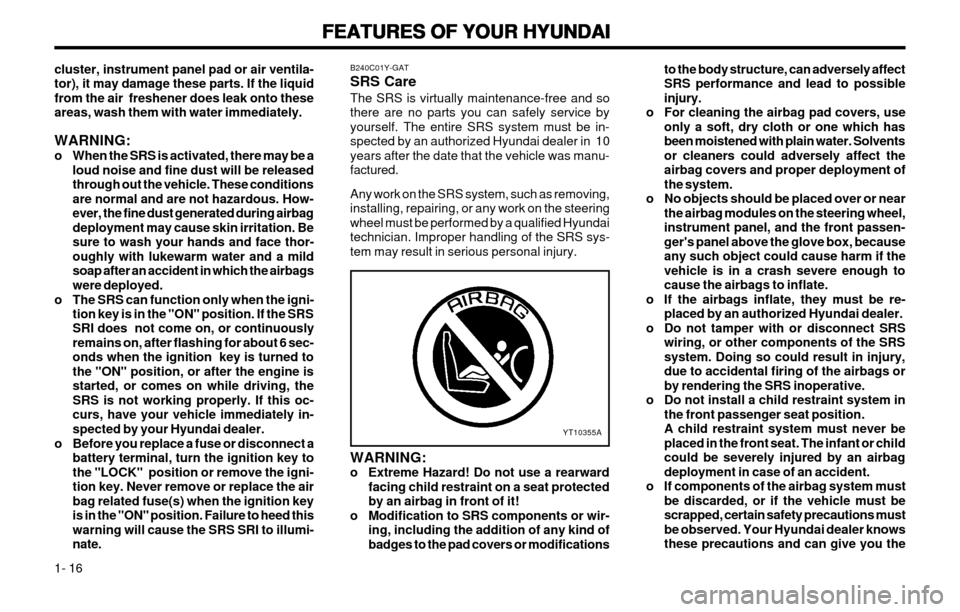
o Do not install a child restraint system in the front passenger seat position.A child restraint system must never beplaced in the front seat. The infant or childcould be severely injured by an airbagdeployment in case of an accident.
o If components of the airbag system must be discarded, or if the vehicle must bescrapped, certain safety precautions mustbe observed. Your Hyundai dealer knowsthese precautions and can give you the
YT10355A
cluster, instrument panel pad or air ventila- tor), it may damage these parts. If the liquidfrom the air freshener does leak onto theseareas, wash them with water immediately. WARNING:
o When the SRS is activated, there may be a loud noise and fine dust will be released through out the vehicle. These conditionsare normal and are not hazardous. How-ever, the fine dust generated during airbagdeployment may cause skin irritation. Besure to wash your hands and face thor-oughly with lukewarm water and a mildsoap after an accident in which the airbagswere deployed.
o The SRS can function only when the igni- tion key is in the "ON" position. If the SRSSRI does not come on, or continuouslyremains on, after flashing for about 6 sec-onds when the ignition key is turned tothe "ON" position, or after the engine isstarted, or comes on while driving, theSRS is not working properly. If this oc-curs, have your vehicle immediately in-spected by your Hyundai dealer.
o Before you replace a fuse or disconnect a battery terminal, turn the ignition key tothe "LOCK" position or remove the igni-tion key. Never remove or replace the airbag related fuse(s) when the ignition keyis in the "ON" position. Failure to heed thiswarning will cause the SRS SRI to illumi-nate. B240C01Y-GAT SRS CareThe SRS is virtually maintenance-free and so there are no parts you can safely service byyourself. The entire SRS system must be in-spected by an authorized Hyundai dealer in 10years after the date that the vehicle was manu-factured. Any work on the SRS system, such as removing, installing, repairing, or any work on the steeringwheel must be performed by a qualified Hyundaitechnician. Improper handling of the SRS sys-tem may result in serious personal injury. WARNING:
o Extreme Hazard! Do not use a rearward
facing child restraint on a seat protectedby an airbag in front of it!
o Modification to SRS components or wir- ing, including the addition of any kind ofbadges to the pad covers or modifications
Page 113 of 249

DO-IT-YOURSELF MAINTENANCE
DO-IT-YOURSELF MAINTENANCE DO-IT-YOURSELF MAINTENANCE
DO-IT-YOURSELF MAINTENANCE
DO-IT-YOURSELF MAINTENANCE
6-17
G270A02X-GAT
HEADLIGHT BULB
HEADLIGHT BULB HEADLIGHT BULB
HEADLIGHT BULB
HEADLIGHT BULB
Replacement instructions:
1. Allow the bulb to cool. Wear eye protection.
2. Always grasp the bulb by its base, avoid touching the glass.
3. Disconnect the connector, then remove the dust cover.
4. Push the bulb spring for removing the head- light bulb.
5. Remove the headlight bulb. If the bulb is burned out, replace it with the same watt- age.
6. Installation is the reverse order of the re- moval.
7. Use the protective cap and carton to promptly dispose of the old bulb.
8. Check for proper headlight aim. WARNING:
WARNING: WARNING:
WARNING:
WARNING:
The halogen bulb contains gas under pres-
The halogen bulb contains gas under pres- The halogen bulb contains gas under pres-
The halogen bulb contains gas under pres-
The halogen bulb contains gas under pres- sure and if impacted
sure and if impacted sure and if impacted
sure and if impacted
sure and if impacted
could shatter, and re-
could shatter, and re- could shatter, and re-
could shatter, and re-
could shatter, and re-
sulting in flying fragments. Always wear eye
sulting in flying fragments. Always wear eye sulting in flying fragments. Always wear eye
sulting in flying fragments. Always wear eye
sulting in flying fragments. Always wear eye
protection
protection protection
protection
protection
when servicing the bulb. Protect
when servicing the bulb. Protect when servicing the bulb. Protect
when servicing the bulb. Protect
when servicing the bulb. Protect
the bulb against abrasions or scratches and
the bulb against abrasions or scratches and the bulb against abrasions or scratches and
the bulb against abrasions or scratches and
the bulb against abrasions or scratches and
against liquids when lighted. Turn the bulb
against liquids when lighted. Turn the bulb against liquids when lighted. Turn the bulb
against liquids when lighted. Turn the bulb
against liquids when lighted. Turn the bulb
on only when installed in a headlight. Re-
on only when installed in a headlight. Re- on only when installed in a headlight. Re-
on only when installed in a headlight. Re-
on only when installed in a headlight. Re-
place the headlight if damaged or cracked.
place the headlight if damaged or cracked. place the headlight if damaged or cracked.
place the headlight if damaged or cracked.
place the headlight if damaged or cracked.
Keep the bulb out of the reach
Keep the bulb out of the reach Keep the bulb out of the reach
Keep the bulb out of the reach
Keep the bulb out of the reach
of children
of children of children
of children
of children
and dispose of the used bulb with care.
and dispose of the used bulb with care. and dispose of the used bulb with care.
and dispose of the used bulb with care.
and dispose of the used bulb with care. G290A02X-GAT
HEADLIGHT AIMING ADJUSTMENT
HEADLIGHT AIMING ADJUSTMENT HEADLIGHT AIMING ADJUSTMENT
HEADLIGHT AIMING ADJUSTMENT
HEADLIGHT AIMING ADJUSTMENT Before performing aiming adjustment, make sure of the following.
1. Keep all tires inflated to the correct pres-
sure.
2. Place the vehicle on level ground and press the front bumper & rear bumper down sev- eral times. Place the vehicle at a distance of3,000 mm (118 in.) from the test wall.
3. See that the vehicle is unloaded (except for full levels of coolant, engine oil and fuel, andspare tire, jack, and tools). Have the driveror equivalent weight placed in driver's seat.
Recommended Fluid
Recommended Fluid Recommended Fluid
Recommended Fluid
Recommended Fluid
Use PSF-3 type fluid.
NOTE:
NOTE: NOTE:
NOTE:
NOTE:
Do not start the engine when the power
Do not start the engine when the power Do not start the engine when the power
Do not start the engine when the power
Do not start the engine when the power steering oil reservoir is empty.
steering oil reservoir is empty. steering oil reservoir is empty.
steering oil reservoir is empty.
steering oil reservoir is empty.
G240A01A-AATPOWER STEERING HOSES
POWER STEERING HOSES POWER STEERING HOSES
POWER STEERING HOSES
POWER STEERING HOSES
It is suggested that you check the power steer-
ing hose connections for fluid leakage at those intervals specified in the vehicle maintenanceschedule in Section 5.
The power steering hoses should be replaced if
there is severe surface cracking, pulling, scuff-ing or worn spots. Deterioration of the hosecould cause premature failure.
G260A03A-AATREPLACING HEADLIGHT BULBS
REPLACING HEADLIGHT BULBS REPLACING HEADLIGHT BULBS
REPLACING HEADLIGHT BULBS
REPLACING HEADLIGHT BULBS
Before attempting to replace a headlight bulb,
be sure the switch is turned to the "OFF"position.
The next paragraph shows how to reach head-
light bulbs so they may be changed. Be sure toreplace the burned-out bulb with one of thesame number and wattage rating.
CAUTION:
CAUTION: CAUTION:
CAUTION:
CAUTION:
Keep the lamps out of contact with petro-
Keep the lamps out of contact with petro- Keep the lamps out of contact with petro-
Keep the lamps out of contact with petro-
Keep the lamps out of contact with petro- leum product, such as oil, gasoline, etc.
leum product, such as oil, gasoline, etc. leum product, such as oil, gasoline, etc.
leum product, such as oil, gasoline, etc.
leum product, such as oil, gasoline, etc.
G270A01X
Page 140 of 249
FEATURES OF YOUR HYUNDAI 1-3
CAUTION:
o If you fail to try the limp home procedure with the sequence of three times, you have to wait for about one hour to do thelimp home procedure again.
o If you cannot start your engine in spite of limp home procedure, have your vehicletowed by an authorized Hyundai dealer.
1. To set the password you may turn the igni-
tion key "ON" and then turn it "OFF" accord-ing to the digit numbers, then the immobi-lizer indicator will blink along with the opera-tion of the ignition key. For example, turn theignition key once for digit number "1", andtwice for "2", and so on. However, for thedigit number "0", you must turn the ignitionkey for 10 times.
2. Wait for 3~10 seconds.
3. You may set the remaining number of digits by following the same procedures 1 and 2.
4. If all of four digits have been tried success- fully, turn the ignition key "ON" and check that the immobilizer indicator illuminates.From this time, you have to start your enginewithin 30 seconds. If you start your engineafter 30 seconds, your engine will not start.
NOTE: If the engine dies while driving after limp
home procedure, you can start your engine within 8 seconds without limp home proce-dure again.
5. If the immobilizer indicator blinks for five seconds, you have to try the limp home procedure again from the beginning.
After doing the limp home procedure, you have
to consult with your authorized Hyundai dealeras soon as possible. SB040A1-F DOOR LOCKS WARNING:
o Unlocked doors can be dangerous. Before you drive away-especially if there are children in the car-be sure that all thedoors are securely closed and locked, the doors cannot be opened from inside. This helps assure that doors will not beopened accidentally. Also, when com-bined with the proper use of seat belts,locking the doors helps keep occupantsfrom being ejected from the car in caseof an accident.
o Before opening the door, always look for and avoid oncoming traffic.
XV10050E
Unlock Lock
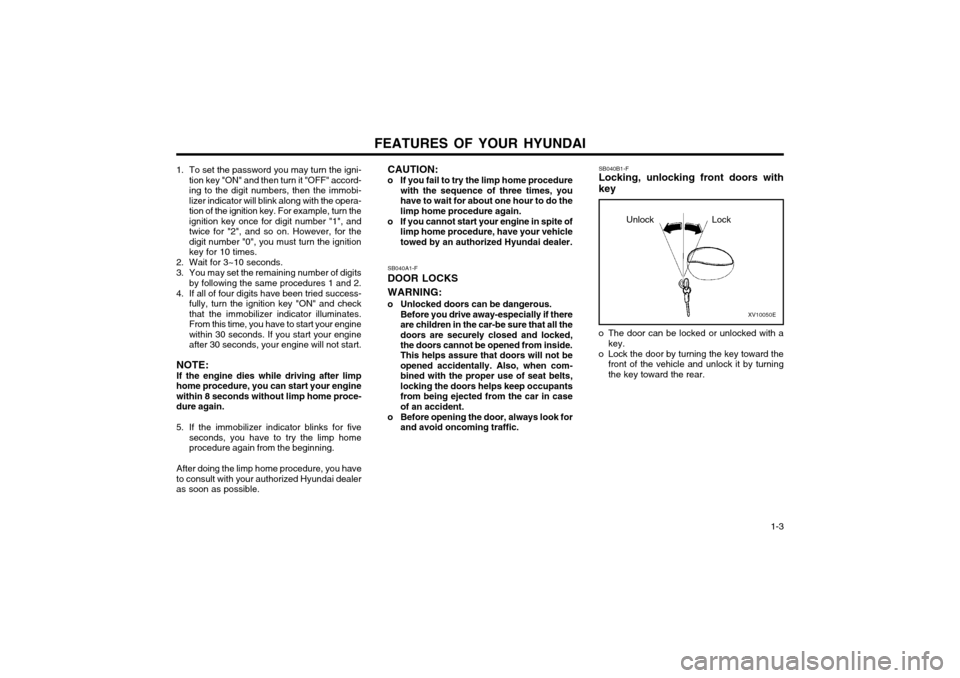
SB040B1-F Locking, unlocking front doors with key
o The door can be locked or unlocked with a key.
o Lock the door by turning the key toward the front of the vehicle and unlock it by turning the key toward the rear.
Page 141 of 249
FEATURES OF YOUR HYUNDAI
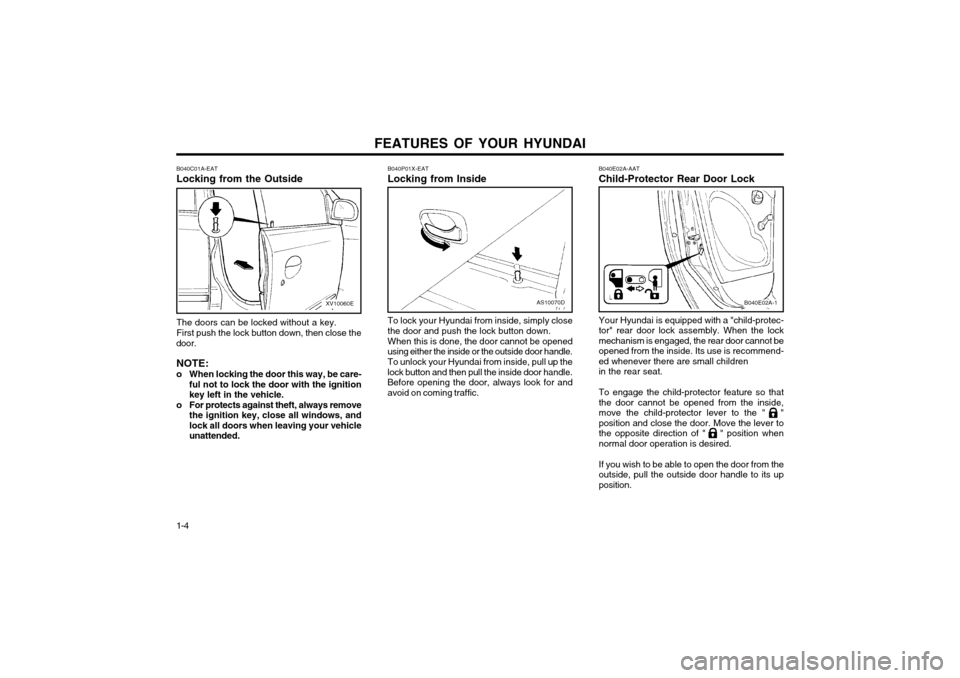
1-4 B040E02A-AAT Child-Protector Rear Door Lock Your Hyundai is equipped with a "child-protec-
tor" rear door lock assembly. When the lockmechanism is engaged, the rear door cannot be
opened from the inside. Its use is recommend-ed whenever there are small childrenin the rear seat. To engage the child-protector feature so that
the door cannot be opened from the inside,move the child-protector lever to the " "
position and close the door. Move the lever to
the opposite direction of " " position whennormal door operation is desired. If you wish to be able to open the door from the outside, pull the outside door handle to its upposition.
B040E02A-1
To lock your Hyundai from inside, simply close the door and push the lock button down. When this is done, the door cannot be opened using either the inside or the outside door handle. To unlock your Hyundai from inside, pull up the lock button and then pull the inside door handle.
Before opening the door, always look for andavoid on coming traffic. B040P01X-EAT Locking from Inside
AS10070D
B040C01A-EAT Locking from the OutsideXV10060E
The doors can be locked without a key. First push the lock button down, then close the
door.
NOTE:
o When locking the door this way, be care- ful not to lock the door with the ignition key left in the vehicle.
o For protects against theft, always remove the ignition key, close all windows, andlock all doors when leaving your vehicleunattended.
Page 144 of 249
FEATURES OF YOUR HYUNDAI 1-7
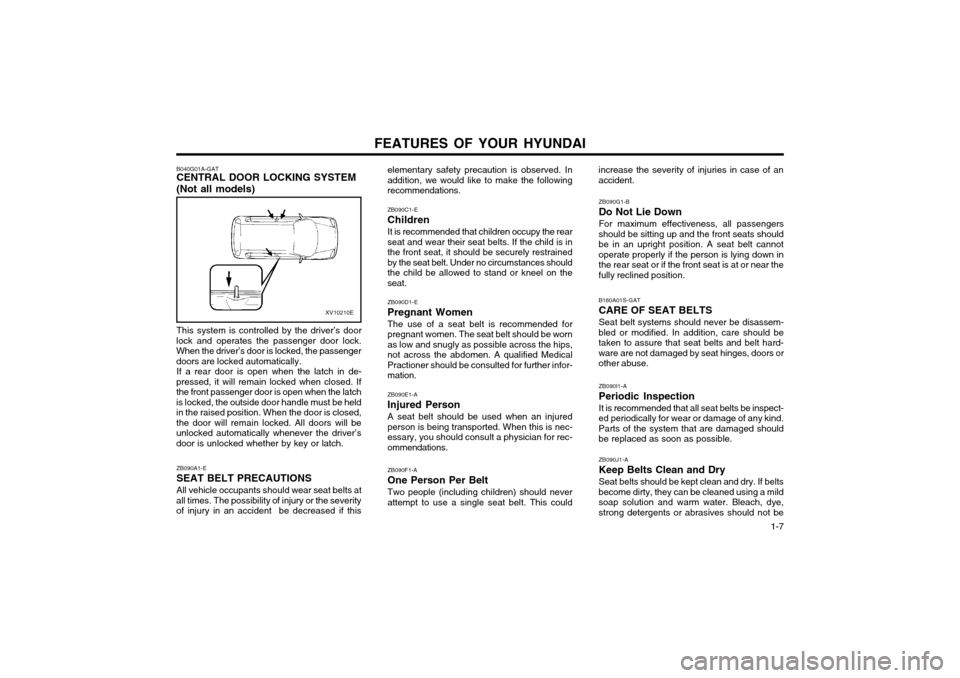
B040G01A-GAT CENTRAL DOOR LOCKING SYSTEM (Not all models)
XV10210E
This system is controlled by the driver’s door
lock and operates the passenger door lock. When the driver’s door is locked, the passengerdoors are locked automatically. If a rear door is open when the latch in de-
pressed, it will remain locked when closed. Ifthe front passenger door is open when the latchis locked, the outside door handle must be heldin the raised position. When the door is closed,the door will remain locked. All doors will beunlocked automatically whenever the driver’sdoor is unlocked whether by key or latch.
ZB090A1-E SEAT BELT PRECAUTIONSAll vehicle occupants should wear seat belts at
all times. The possibility of injury or the severity of injury in an accident be decreased if this elementary safety precaution is observed. Inaddition, we would like to make the followingrecommendations. ZB090C1-E ChildrenIt is recommended that children occupy the rear seat and wear their seat belts. If the child is inthe front seat, it should be securely restrainedby the seat belt. Under no circumstances shouldthe child be allowed to stand or kneel on theseat. ZB090D1-E Pregnant WomenThe use of a seat belt is recommended for pregnant women. The seat belt should be wornas low and snugly as possible across the hips,not across the abdomen. A qualified MedicalPractioner should be consulted for further infor-mation. ZB090E1-A Injured PersonA seat belt should be used when an injured person is being transported. When this is nec-essary, you should consult a physician for rec-ommendations. ZB090F1-A One Person Per BeltTwo people (including children) should never attempt to use a single seat belt. This could
increase the severity of injuries in case of anaccident.
ZB090G1-B Do Not Lie DownFor maximum effectiveness, all passengers
should be sitting up and the front seats should be in an upright position. A seat belt cannotoperate properly if the person is lying down inthe rear seat or if the front seat is at or near thefully reclined position.
B160A01S-GAT CARE OF SEAT BELTSSeat belt systems should never be disassem-
bled or modified. In addition, care should be taken to assure that seat belts and belt hard-
ware are not damaged by seat hinges, doors orother abuse.
ZB090I1-A Periodic InspectionIt is recommended that all seat belts be inspect-
ed periodically for wear or damage of any kind. Parts of the system that are damaged shouldbe replaced as soon as possible.
ZB090J1-A Keep Belts Clean and Dry Seat belts should be kept clean and dry. If belts
become dirty, they can be cleaned using a mild soap solution and warm water. Bleach, dye,strong detergents or abrasives should not be
Page 147 of 249
FEATURES OF YOUR HYUNDAI
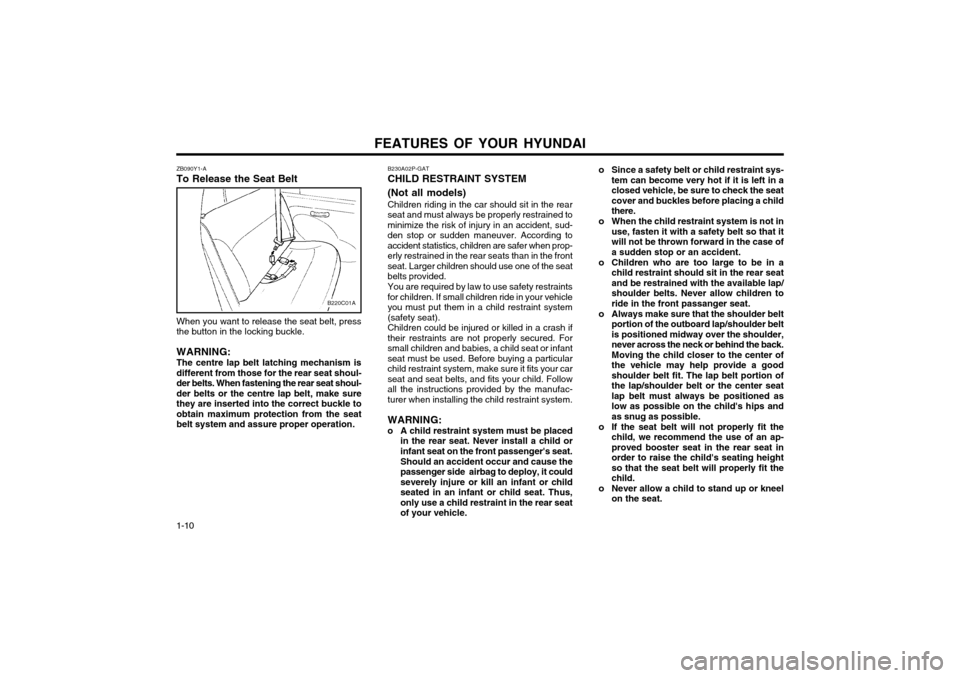
1-10 ZB090Y1-A To Release the Seat Belt
B220C01A
When you want to release the seat belt, press the button in the locking buckle. WARNING: The centre lap belt latching mechanism is different from those for the rear seat shoul-der belts. When fastening the rear seat shoul-der belts or the centre lap belt, make surethey are inserted into the correct buckle toobtain maximum protection from the seatbelt system and assure proper operation. B230A02P-GAT CHILD RESTRAINT SYSTEM (Not all models) Children riding in the car should sit in the rear seat and must always be properly restrained tominimize the risk of injury in an accident, sud-den stop or sudden maneuver. According toaccident statistics, children are safer when prop-erly restrained in the rear seats than in the frontseat. Larger children should use one of the seatbelts provided. You are required by law to use safety restraints for children. If small children ride in your vehicleyou must put them in a child restraint system(safety seat).Children could be injured or killed in a crash iftheir restraints are not properly secured. Forsmall children and babies, a child seat or infantseat must be used. Before buying a particularchild restraint system, make sure it fits your carseat and seat belts, and fits your child. Followall the instructions provided by the manufac-turer when installing the child restraint system. WARNING:
o A child restraint system must be placed in the rear seat. Never install a child or infant seat on the front passenger's seat. Should an accident occur and cause the passenger side airbag to deploy, it couldseverely injure or kill an infant or childseated in an infant or child seat. Thus,only use a child restraint in the rear seatof your vehicle. o Since a safety belt or child restraint sys-
tem can become very hot if it is left in aclosed vehicle, be sure to check the seatcover and buckles before placing a childthere.
o When the child restraint system is not in use, fasten it with a safety belt so that itwill not be thrown forward in the case ofa sudden stop or an accident.
o Children who are too large to be in a child restraint should sit in the rear seatand be restrained with the available lap/shoulder belts. Never allow children toride in the front passanger seat.
o Always make sure that the shoulder belt portion of the outboard lap/shoulder beltis positioned midway over the shoulder,never across the neck or behind the back.Moving the child closer to the center ofthe vehicle may help provide a goodshoulder belt fit. The lap belt portion ofthe lap/shoulder belt or the center seatlap belt must always be positioned aslow as possible on the child's hips andas snug as possible.
o If the seat belt will not properly fit the child, we recommend the use of an ap-proved booster seat in the rear seat inorder to raise the child's seating heightso that the seat belt will properly fit thechild.
o Never allow a child to stand up or kneel on the seat.
Page 148 of 249
FEATURES OF YOUR HYUNDAI 1-11
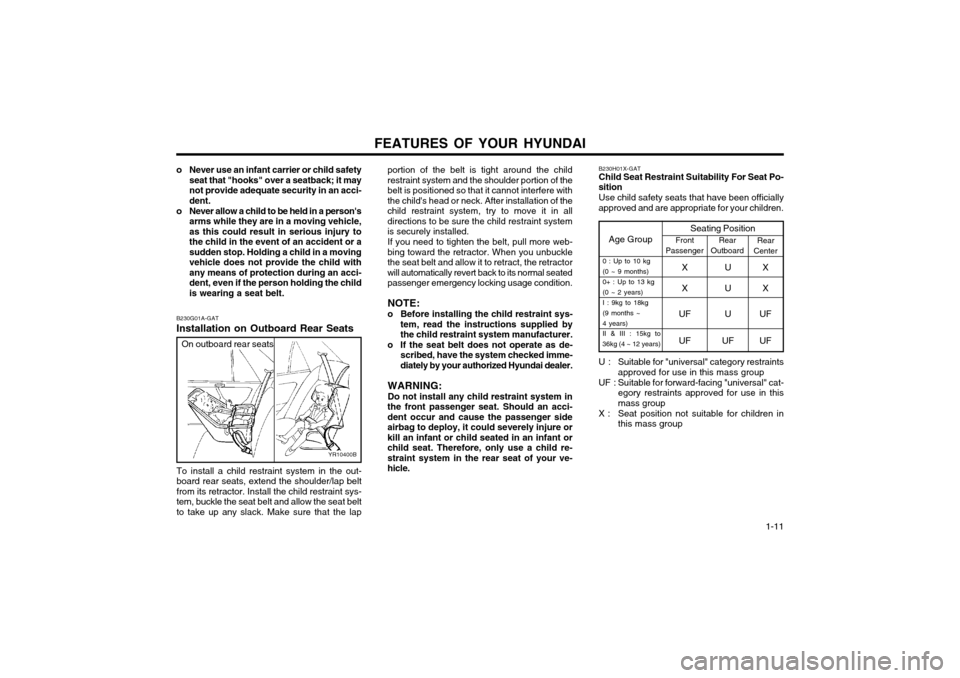
B230G01A-GAT Installation on Outboard Rear Seats
YR10400B
To install a child restraint system in the out- board rear seats, extend the shoulder/lap beltfrom its retractor. Install the child restraint sys-tem, buckle the seat belt and allow the seat beltto take up any slack. Make sure that the lap
On outboard rear seats
o Never use an infant carrier or child safety
seat that "hooks" over a seatback; it may not provide adequate security in an acci-dent.
o Never allow a child to be held in a person's arms while they are in a moving vehicle,as this could result in serious injury tothe child in the event of an accident or asudden stop. Holding a child in a movingvehicle does not provide the child withany means of protection during an acci-dent, even if the person holding the childis wearing a seat belt. portion of the belt is tight around the childrestraint system and the shoulder portion of thebelt is positioned so that it cannot interfere withthe child's head or neck. After installation of thechild restraint system, try to move it in alldirections to be sure the child restraint systemis securely installed.
If you need to tighten the belt, pull more web-
bing toward the retractor. When you unbucklethe seat belt and allow it to retract, the retractorwill automatically revert back to its normal seatedpassenger emergency locking usage condition.
NOTE:
o Before installing the child restraint sys- tem, read the instructions supplied bythe child restraint system manufacturer.
o If the seat belt does not operate as de- scribed, have the system checked imme-diately by your authorized Hyundai dealer.
WARNING: Do not install any child restraint system in
the front passenger seat. Should an acci- dent occur and cause the passenger sideairbag to deploy, it could severely injure orkill an infant or child seated in an infant orchild seat. Therefore, only use a child re-straint system in the rear seat of your ve-hicle.
Age Group Seating PositionFront
Passenger Rear
Outboard Rear
Center
0 : Up to 10 kg (0 ~ 9 months) 0+ : Up to 13 kg(0 ~ 2 years)I : 9kg to 18kg(9 months ~4 years) II & III : 15kg to
36kg (4 ~ 12 years)XUX
XUX
UF U UF
UF UF UF
B230H01X-GAT Child Seat Restraint Suitability For Seat Po-
sition
Use child safety seats that have been officially
approved and are appropriate for your children.
U : Suitable for "universal" category restraints approved for use in this mass group
UF : Suitable for forward-facing "universal" cat- egory restraints approved for use in this mass group
X : Seat position not suitable for children in this mass group
Page 235 of 249

DO-IT-YOURSELF MAINTENANCE 6-17
WARNING: The halogen bulb contains gas under pres-
sure and if impacted could shatter, and re- sulting in flying fragments. Always wear eye
protection when servicing the bulb. Protectthe bulb against abrasions or scratches andagainst liquids when lighted. Turn on thebulb only when installing in a headlight.Replace the headlight if damaged or cracked.Keep the bulb out of the reach of childrenand dispose of the used bulb with care.
G290A01X-EAT
HEADLIGHT AIMING ADJUSTMENT
G290A01V
Before performing aiming adjustment, make sure
of the following.
Vertical aiming
1. Keep all tires inflated to the correct pres- sure.
2. Place the vehicle on level ground and press the front bumper & rear bumper down sev- eral times.
3. See that the vehicle is unloaded (except for full levels of coolant, engine oil and fuel, andspare tire, jack, and tools). Have the driveror equivalent weight placed in driver's seat.
4. Clean the head lights lens and turn on the headlight (Low beam).
5. Open the bonnet.
6. Draw the vertical line (through the center of each headlight) and the horizontal line(through the centre of each headlight) on theaiming screen.
1) Horizontal line dimension from ground:25.43 in. (646 mm)
2) Distance between each vertical line: 38.89 in. (988 mm)And then, draw the parallel line at 1.18 in. (30 mm) place under the horizontal line.
7. Adjust each cut-off line of the low beam to the parallel line with a phillips screwdriver -VERTICAL AIMING
8. Adjust each cut-off line of the low beam to the each vertical line with a phillips screw-driver - HORIZONTAL AIMING. G290B01X-EAT
Adjustment After Headlight Assembly Replacement
If the vehicle has had front body repair and the headlight assembly has been replaced, theheadlight aiming should be checked using theaiming screen as shown in the illustration. Turnon the headlight switch. (Low Beam Position)
1. Adjust headlights so that main axis of light is parallel to centre line of the body and isaligned with point "P" shown in the illustra-tion.
2. Dotted lines in the illustration show centre of headlights. G290B01S-DAG
Horizontal lineVertical line
W
0.59 in.
"P" 1.18 in.
Cut-off line
Ground line H
H L