Page 106 of 280

If your keys are lost or stolen you
will need to do the following:
²Use your spare key to start the
vehicle, or
²Have your vehicle towed to a
dealership or locksmith. The key
codes will need to be erased from
your vehicle and new key codes will need to be re-coded.
Replacing coded keys can be very costly and you may want to store an
extra programmed key away from the vehicle in a safe place to prevent
an unforeseen inconvenience.
The correctcoded keymust be used for your vehicle. The use of the
wrong type ofcoded keymay lead to a ªNO-STARTº condition.
If an unprogrammed key is used in the ignition it will cause a
ªNO STARTº condition.
Programming spare keys
A maximum of eight keys can be coded to your vehicle. Only
SecuriLockykeys can be used. To program acoded keyyourself, you
will need two previously programmedcoded keys(keys that already
operate your vehicle's engine) and the new unprogrammed key(s) readily
accessible for timely implementation of each step in the procedure.
If two previously programmed coded keys are not available, you must
bring your vehicle to your dealership to have the spare coded key(s)
programmed.
Please read and understand the entire procedure before you begin.
Locks and security
106
Page 110 of 280
Using the armrest (if equipped)
Push the release control to move
the armrest up or down.
Using the manual lumbar support
Turn the lumbar support control
toward the front of vehicle to move
the lumbar support forward for
more direct support.
Turn the lumbar support control
toward the rear of vehicle to move
the lumbar support back for less
direct support.
Adjusting the front power seat (if equipped)
Never adjust the driver's seat or seatback when the vehicle is
moving.
Do not pile cargo higher than the seatbacks to avoid injuring
people in a collision or sudden stop.
Always drive and ride with your seatback upright and the lap
belt snug and low across the hips.
Seating and safety restraints
110
Page 113 of 280

REAR SEATS
Adjustable head restraints
Your vehicle's seats may be equipped with head restraints which are
vertically adjustable. The purpose of these head restraints is to help limit
head motion in the event of a rear collision. To properly adjust your head
restraints, lift the head restraint so that it is located directly behind your
head or as close to that position as possible. Refer to the following to
raise and lower the head restraints.
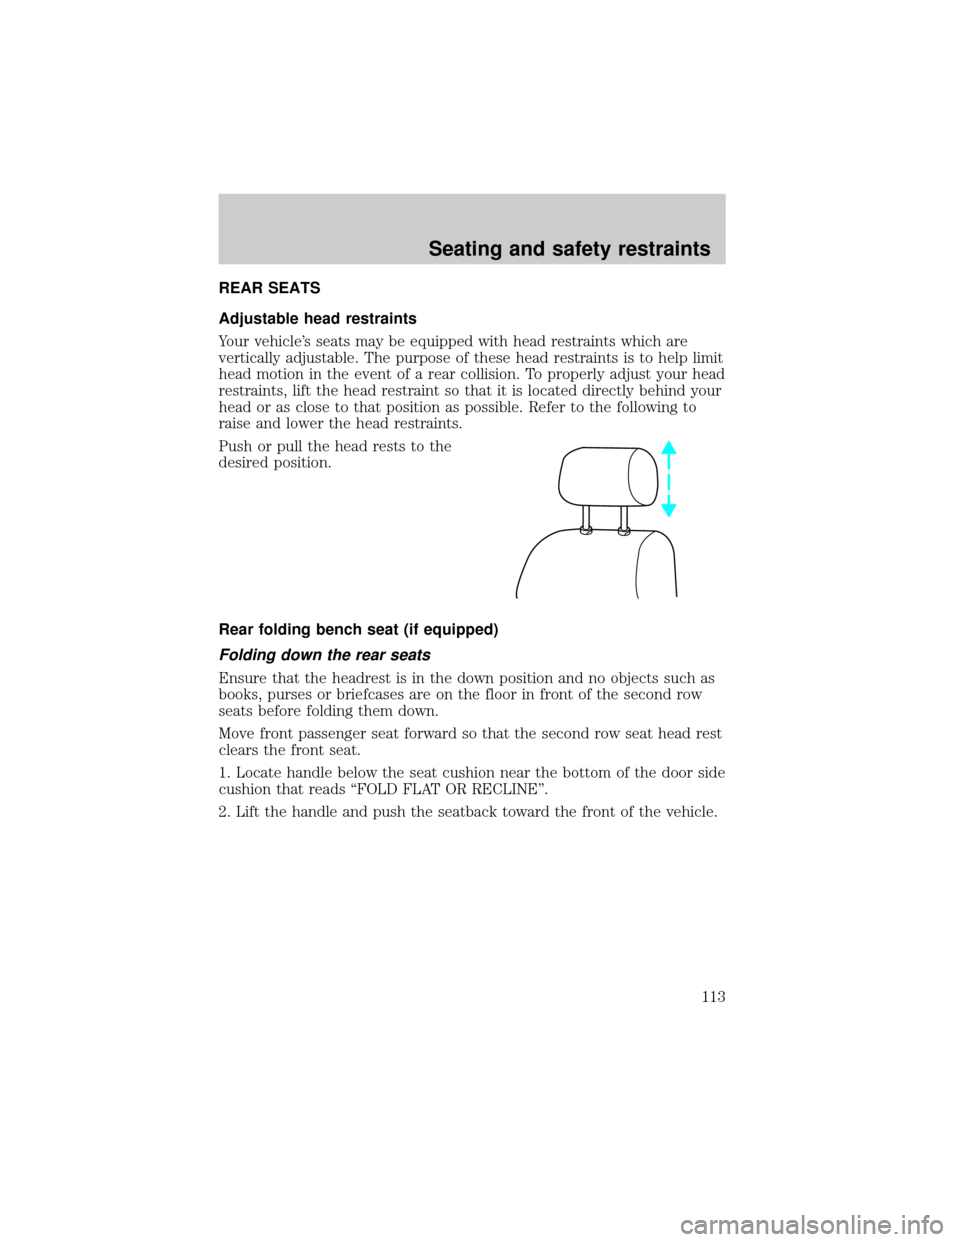
Push or pull the head rests to the
desired position.
Rear folding bench seat (if equipped)
Folding down the rear seats
Ensure that the headrest is in the down position and no objects such as
books, purses or briefcases are on the floor in front of the second row
seats before folding them down.
Move front passenger seat forward so that the second row seat head rest
clears the front seat.
1. Locate handle below the seat cushion near the bottom of the door side
cushion that reads ªFOLD FLAT OR RECLINEº.
2. Lift the handle and push the seatback toward the front of the vehicle.
Seating and safety restraints
113
Page 116 of 280

To minimize the risk of personal injury, the third row seat should not be
left in the forward, stowed position while the vehicle is in motion. Please
ensure that the seat is in the upright, fully latched position before
putting the vehicle in motion.
1. Locate and lift seat control ª3RD ROW ENTRYº to release seatback
and cushion to flip toward the front seat.
2. After entering the seat, reverse this procedure; ensure that the latch
tub and surrounding areas are clear.
Folding down the third row seat
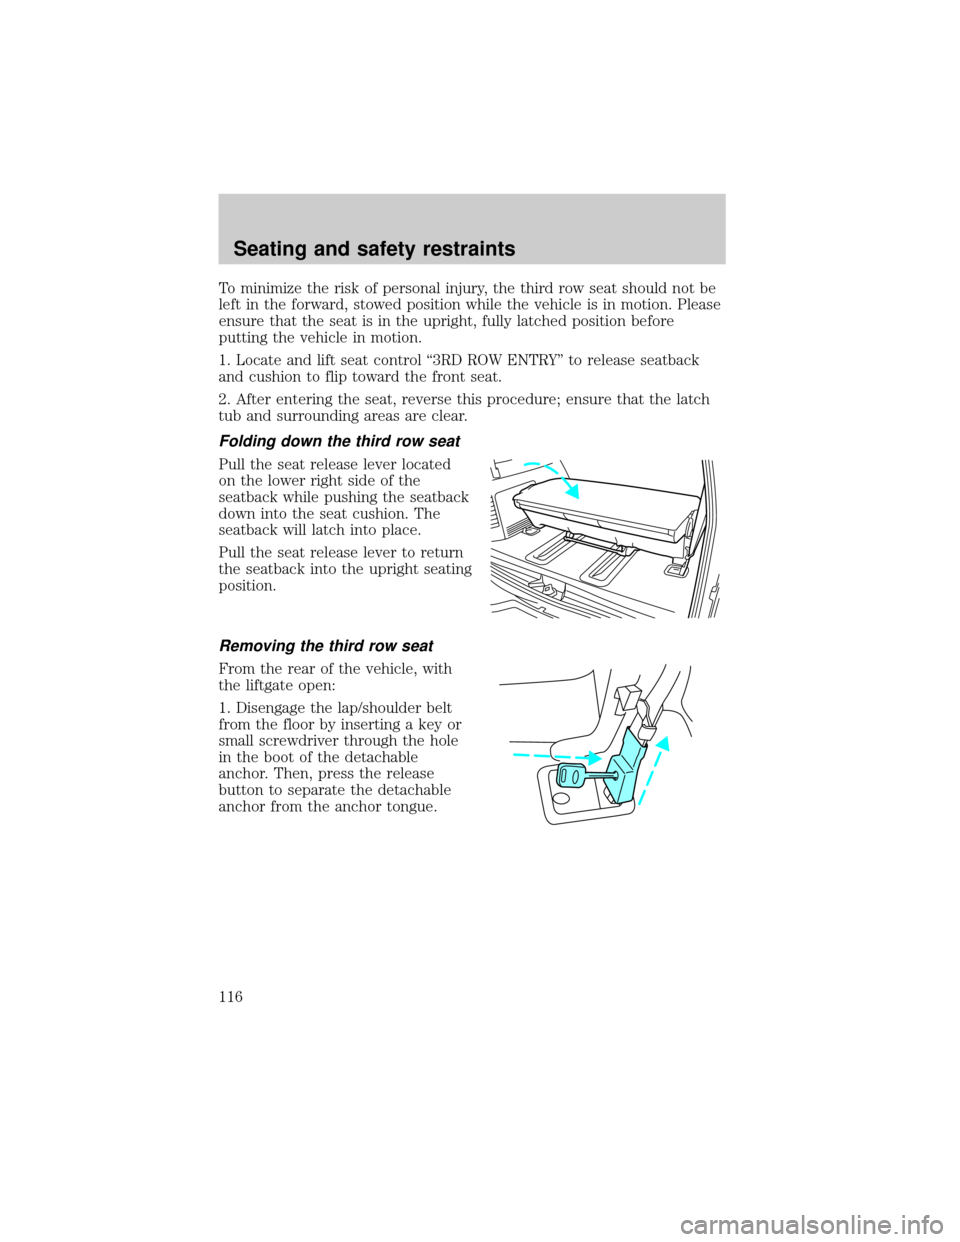
Pull the seat release lever located
on the lower right side of the
seatback while pushing the seatback
down into the seat cushion. The
seatback will latch into place.
Pull the seat release lever to return
the seatback into the upright seating
position.
Removing the third row seat
From the rear of the vehicle, with
the liftgate open:
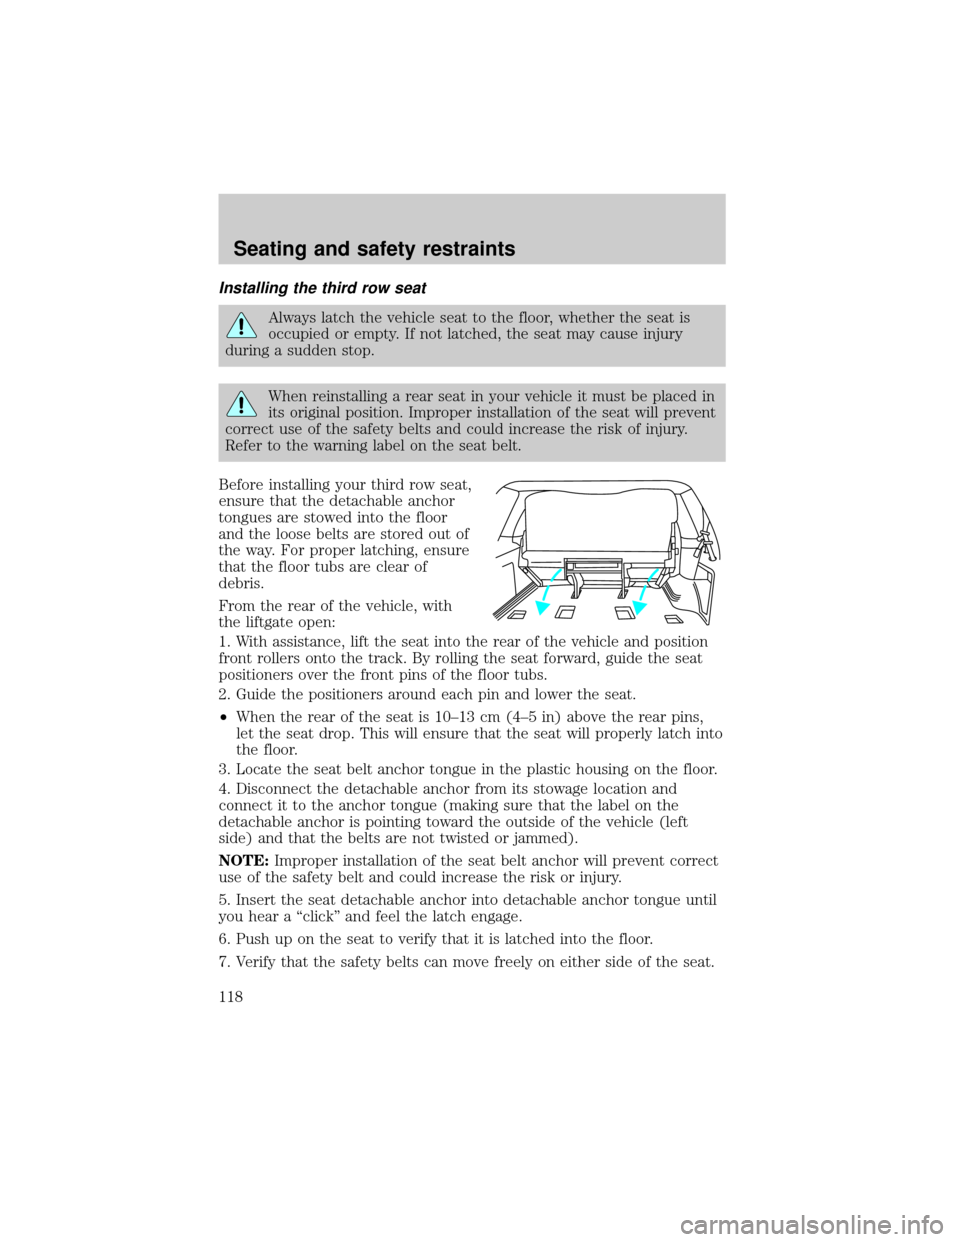
1. Disengage the lap/shoulder belt
from the floor by inserting a key or
small screwdriver through the hole
in the boot of the detachable
anchor. Then, press the release
button to separate the detachable
anchor from the anchor tongue.
Seating and safety restraints
116
Page 117 of 280
2. Before removing the seat, be sure
that the detachable anchor tongue is
stowed flat into the vehicle floor.
3. Use the black plastic clip (located
just above the detachable anchor) to
stow the loose seat belt.
²Pull the seat release lever located
on the lower right side of the
seatback while pushing the
seatback down into the seat
cushion.
²The seatback will latch into place.
4. Lift the seat release bar located
at the center of the seat near the
floor to release the floor latches.
5. While pulling up on the release
bar, lift the seat up and out of the floor tubs and roll seat rearward.
6. With assistance, lift the seat out of the vehicle.
Seating and safety restraints
117
Page 118 of 280

Installing the third row seat
Always latch the vehicle seat to the floor, whether the seat is
occupied or empty. If not latched, the seat may cause injury
during a sudden stop.
When reinstalling a rear seat in your vehicle it must be placed in
its original position. Improper installation of the seat will prevent
correct use of the safety belts and could increase the risk of injury.
Refer to the warning label on the seat belt.
Before installing your third row seat,
ensure that the detachable anchor
tongues are stowed into the floor
and the loose belts are stored out of
the way. For proper latching, ensure
that the floor tubs are clear of
debris.
From the rear of the vehicle, with
the liftgate open:
1. With assistance, lift the seat into the rear of the vehicle and position
front rollers onto the track. By rolling the seat forward, guide the seat
positioners over the front pins of the floor tubs.
2. Guide the positioners around each pin and lower the seat.
²When the rear of the seat is 10±13 cm (4±5 in) above the rear pins,
let the seat drop. This will ensure that the seat will properly latch into
the floor.
3. Locate the seat belt anchor tongue in the plastic housing on the floor.
4. Disconnect the detachable anchor from its stowage location and
connect it to the anchor tongue (making sure that the label on the
detachable anchor is pointing toward the outside of the vehicle (left
side) and that the belts are not twisted or jammed).
NOTE:Improper installation of the seat belt anchor will prevent correct
use of the safety belt and could increase the risk or injury.
5. Insert the seat detachable anchor into detachable anchor tongue until
you hear a ªclickº and feel the latch engage.
6. Push up on the seat to verify that it is latched into the floor.
7. Verify that the safety belts can move freely on either side of the seat.
Seating and safety restraints
118
Page 119 of 280
3rd row tip/stow feature
The 3rd row seat has a tip/stow feature to increase cargo space without
removing the seat from the vehicle.
To put seat in tip/stow position:
1. Pull the seat release lever located
on the lower right side of the
seatback while pushing the seatback
down into the seat cushion.
2. The seatback will latch into place.
3. To release the rear floor latches
of the 3rd row seat, lift the seat
release bar located at the center of
the seat near the floor to release the
floor latches.
4. Lift back of seat up and hold.
5. Lift latch up and out of floor tub
to upright position using the strap
on the latch.
Seating and safety restraints
119
Page 134 of 280
Do not put anything on or over the air bag module. Placing
objects on or over the air bag inflation area may cause those
objects to be propelled by the air bag into your face and torso causing
serious injury.
Do not attempt to service, repair, or modify the air bag
supplemental restraint systems or its fuses. See your Ford or
Lincoln Mercury dealer.
The front passenger air bag is not designed to offer protection to
occupants in the center front seating position.
Modifications to the front end of the vehicle, including frame,
bumper, front end body structure and tow hooks may affect the
performance of the air bag sensors increasing the risk of injury. Do not
modify the front end of the vehicle.
Additional equipment may affect the performance of the air bag
sensors increasing the risk of injury. Please refer to the Body
Builders Layout Book for instructions about the appropriate installation
of additional equipment.
Seating and safety restraints
134