2002 FORD CROWN VICTORIA change time
[x] Cancel search: change timePage 25 of 240
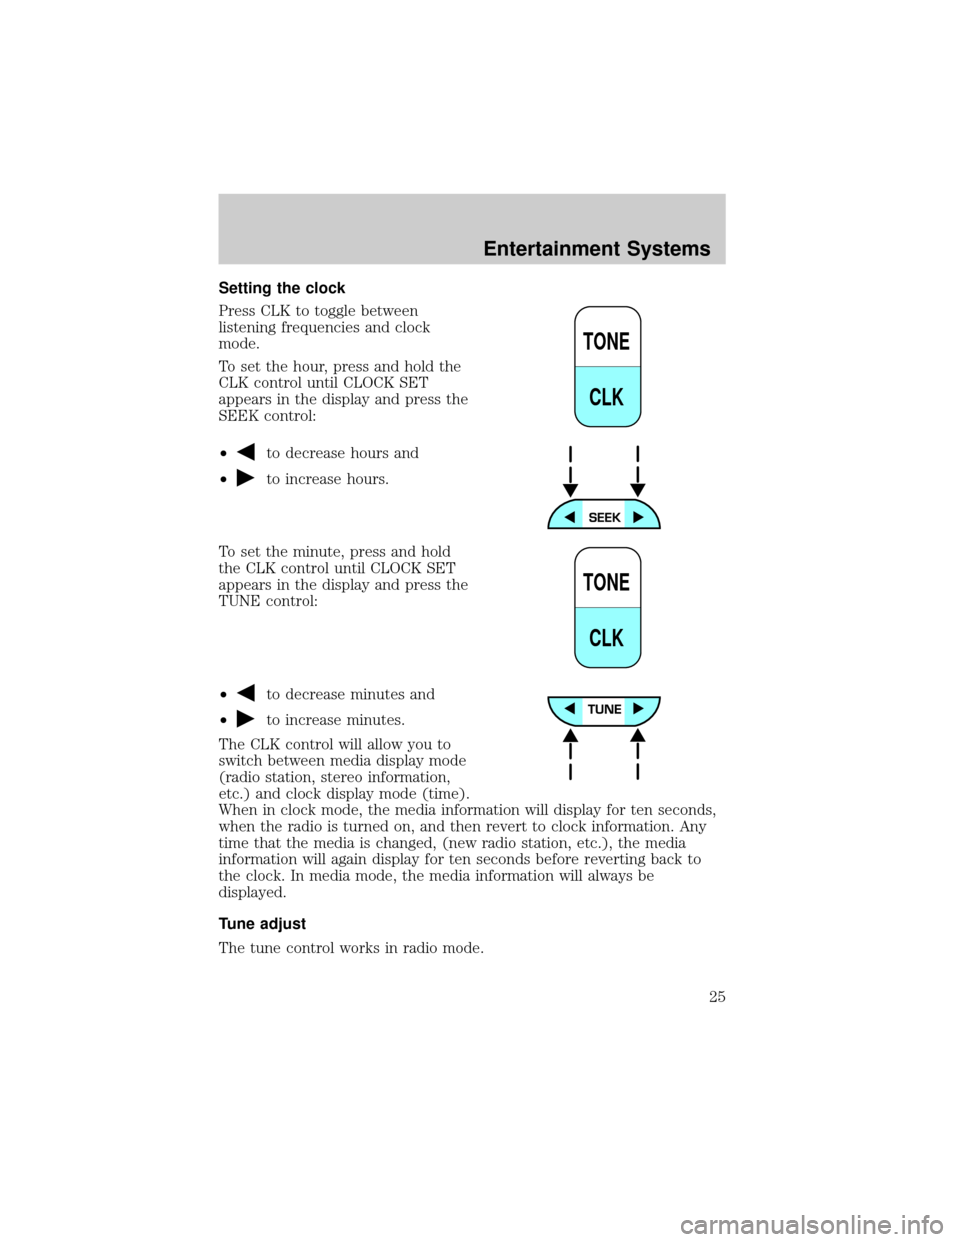
Setting the clock
Press CLK to toggle between
listening frequencies and clock
mode.
To set the hour, press and hold the
CLK control until CLOCK SET
appears in the display and press the
SEEK control:
²
to decrease hours and
²
to increase hours.
To set the minute, press and hold
the CLK control until CLOCK SET
appears in the display and press the
TUNE control:
²
to decrease minutes and
²
to increase minutes.
The CLK control will allow you to
switch between media display mode
(radio station, stereo information,
etc.) and clock display mode (time).
When in clock mode, the media information will display for ten seconds,
when the radio is turned on, and then revert to clock information. Any
time that the media is changed, (new radio station, etc.), the media
information will again display for ten seconds before reverting back to
the clock. In media mode, the media information will always be
displayed.
Tune adjust
The tune control works in radio mode.
TONE
CLK
TONE
CLK
Entertainment Systems
25
Page 30 of 240
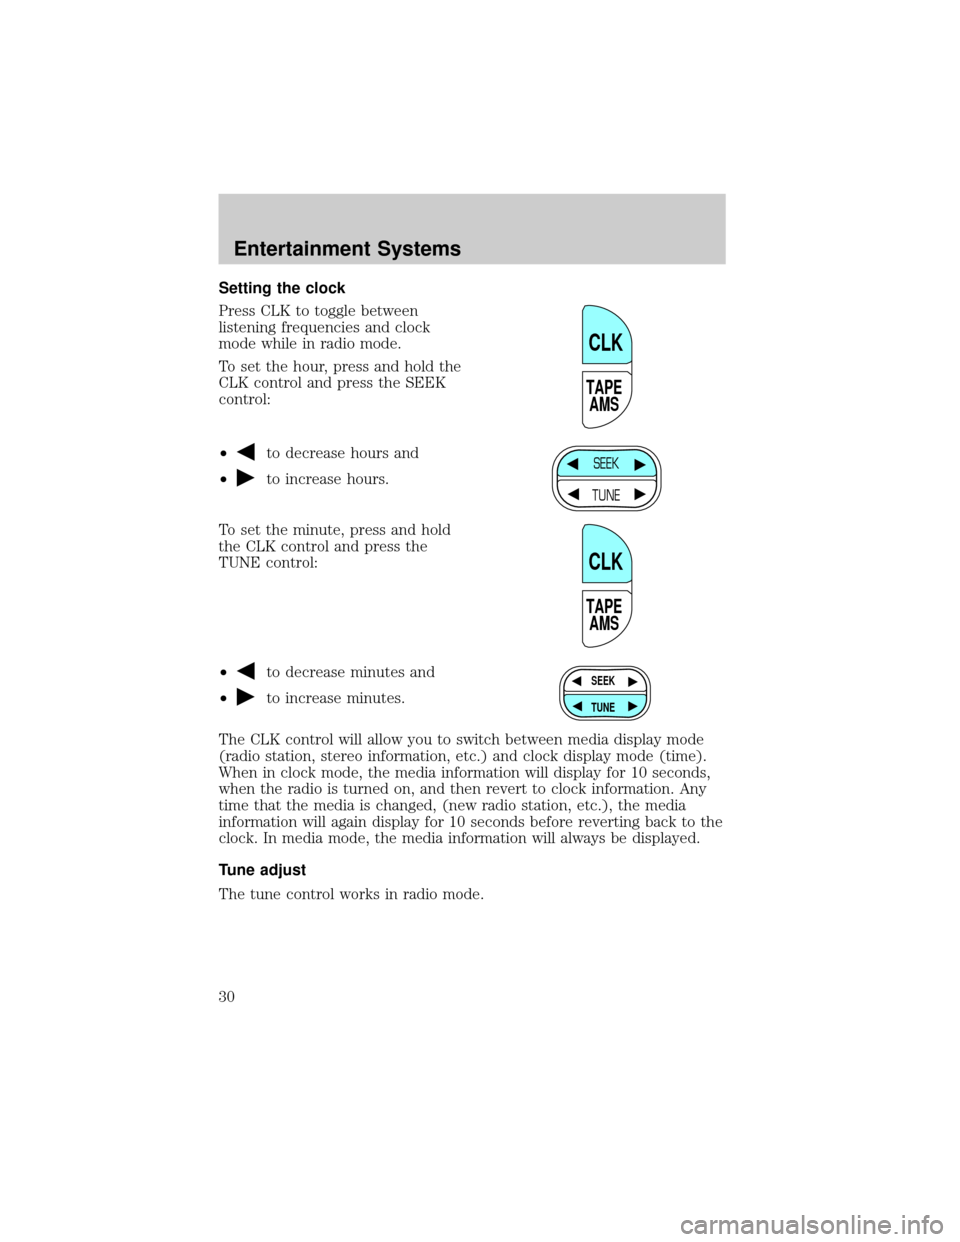
Setting the clock
Press CLK to toggle between
listening frequencies and clock
mode while in radio mode.
To set the hour, press and hold the
CLK control and press the SEEK
control:
²
to decrease hours and
²
to increase hours.
To set the minute, press and hold
the CLK control and press the
TUNE control:
²
to decrease minutes and
²
to increase minutes.
The CLK control will allow you to switch between media display mode
(radio station, stereo information, etc.) and clock display mode (time).
When in clock mode, the media information will display for 10 seconds,
when the radio is turned on, and then revert to clock information. Any
time that the media is changed, (new radio station, etc.), the media
information will again display for 10 seconds before reverting back to the
clock. In media mode, the media information will always be displayed.
Tune adjust
The tune control works in radio mode.
TAPE
AMS
CLK
SEEK
TUNE
TAPE
AMS
CLK
SEEK
TUNE
Entertainment Systems
30
Page 44 of 240
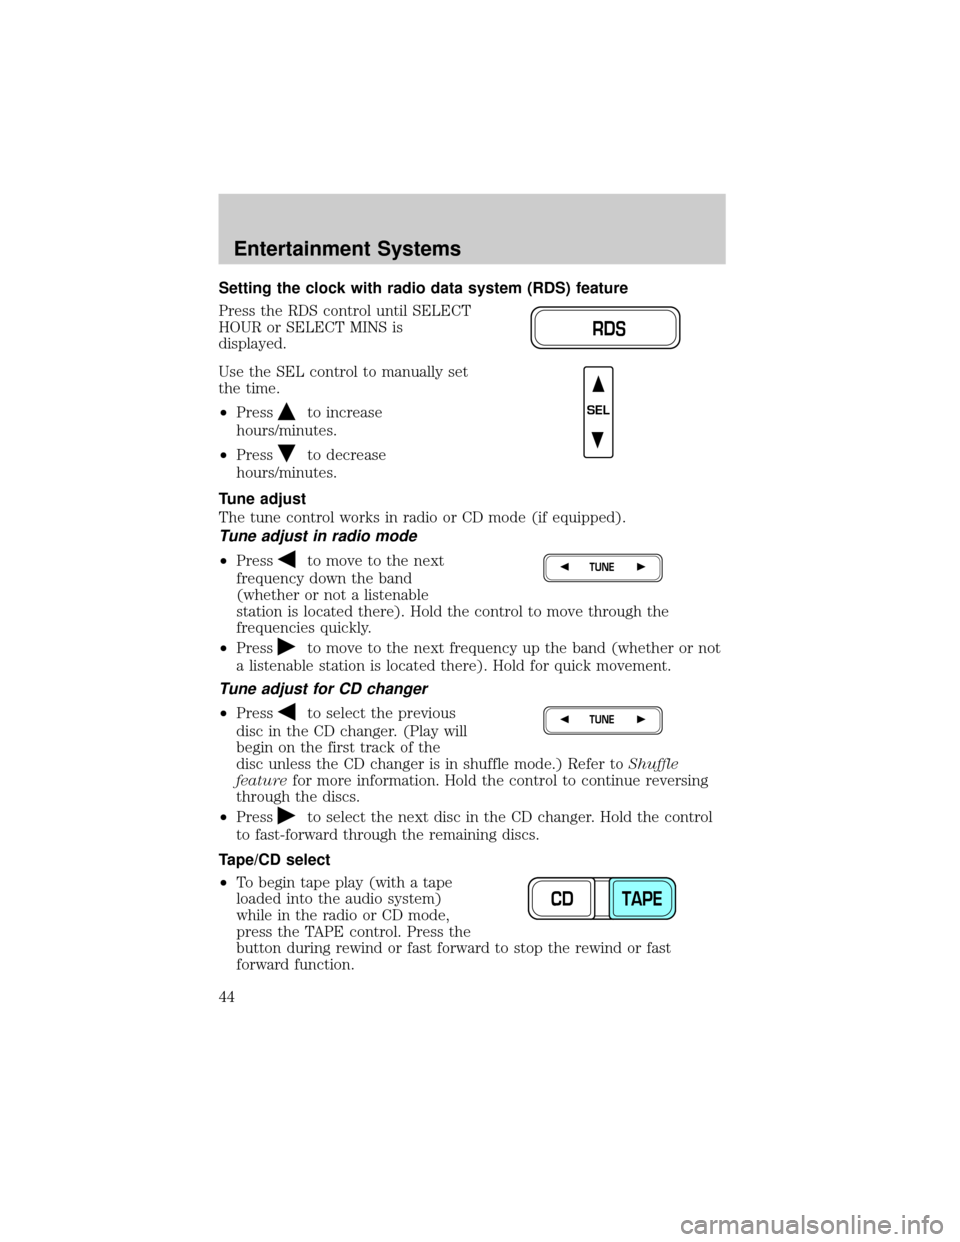
Setting the clock with radio data system (RDS) feature
Press the RDS control until SELECT
HOUR or SELECT MINS is
displayed.
Use the SEL control to manually set
the time.
²Press
to increase
hours/minutes.
²Press
to decrease
hours/minutes.
Tune adjust
The tune control works in radio or CD mode (if equipped).
Tune adjust in radio mode
²Pressto move to the next
frequency down the band
(whether or not a listenable
station is located there). Hold the control to move through the
frequencies quickly.
²Press
to move to the next frequency up the band (whether or not
a listenable station is located there). Hold for quick movement.
Tune adjust for CD changer
²Pressto select the previous
disc in the CD changer. (Play will
begin on the first track of the
disc unless the CD changer is in shuffle mode.) Refer toShuffle
featurefor more information. Hold the control to continue reversing
through the discs.
²Press
to select the next disc in the CD changer. Hold the control
to fast-forward through the remaining discs.
Tape/CD select
²To begin tape play (with a tape
loaded into the audio system)
while in the radio or CD mode,
press the TAPE control. Press the
button during rewind or fast forward to stop the rewind or fast
forward function.
RDS
SEL
TUNE
TUNE
CD TAPE
Entertainment Systems
44
Page 52 of 240

CD AND CD CHANGER CARE
²Handle discs by their edges only. Never touch the playing surface.
²Do not expose discs to direct sunlight or heat sources for extended
periods of time.
²Do not insert more than one disc into each slot of the CD changer
magazine.
CD units are designed to play commercially pressed 12 cm (4.75
in) audio compact discs only. Due to technical incompatibility,
certain recordable and re-recordable compact discs may not
function correctly when used in Ford CD players. Irregular
shaped CDs, CDs with a scratch protection film attached, and CDs
with homemade paper (adhesive) labels should not be inserted
into the CD player. The label may peel and cause the CD to
become jammed. It is recommended that homemade CDs be
identified with permanent felt tip marker rather than adhesive
labels. Ball point pens may damage CDs. Please contact your
dealer for further information.
CLEANING CASSETTE PLAYER (IF EQUIPPED)
Clean the tape player head with a cassette cleaning cartridge after 10 to
12 hours of play in order to maintain the best sound and operation.
CASSETTE AND CASSETTE PLAYER CARE
²Use only cassettes that are 90 minutes long or less.
²Do not expose tapes to direct sunlight, high humidity, extreme heat or
extreme cold. Allow tapes that may have been exposed to extreme
temperatures to reach a moderate temperature before playing.
²Tighten very loose tapes by inserting a finger or pencil into the hole
and turning the hub.
²Remove loose labels before inserting tapes.
²Do not leave tapes in the cassette player for a long time when not
being played.
Entertainment Systems
52
Page 58 of 240
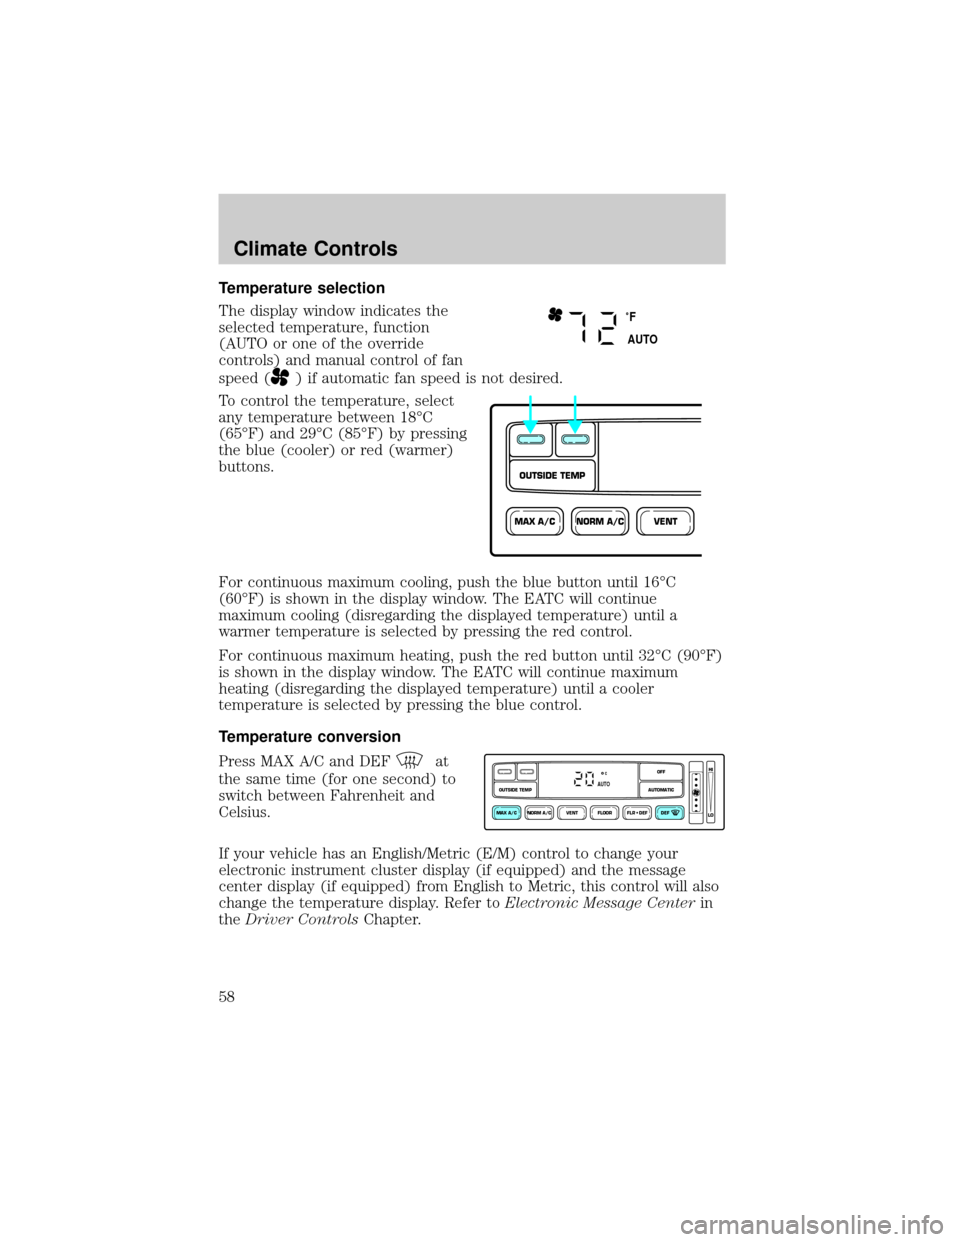
Temperature selection
The display window indicates the
selected temperature, function
(AUTO or one of the override
controls) and manual control of fan
speed (
) if automatic fan speed is not desired.
To control the temperature, select
any temperature between 18ÉC
(65ÉF) and 29ÉC (85ÉF) by pressing
the blue (cooler) or red (warmer)
buttons.
For continuous maximum cooling, push the blue button until 16ÉC
(60ÉF) is shown in the display window. The EATC will continue
maximum cooling (disregarding the displayed temperature) until a
warmer temperature is selected by pressing the red control.
For continuous maximum heating, push the red button until 32ÉC (90ÉF)
is shown in the display window. The EATC will continue maximum
heating (disregarding the displayed temperature) until a cooler
temperature is selected by pressing the blue control.
Temperature conversion
Press MAX A/C and DEF
at
the same time (for one second) to
switch between Fahrenheit and
Celsius.
If your vehicle has an English/Metric (E/M) control to change your
electronic instrument cluster display (if equipped) and the message
center display (if equipped) from English to Metric, this control will also
change the temperature display. Refer toElectronic Message Centerin
theDriver ControlsChapter.
˚F
AUTO
NORM A/CVENTMAX A/C
OUTSIDE TEMP
NORM A/CVENT FLOOR FLR • DEF DEF
HI
LO
MAX A/C
OUTSIDE TEMP AUTOMATICOFFAUTO
Climate Controls
58
Page 93 of 240
REMOTE ENTRY SYSTEM (IF EQUIPPED)
This device complies with part 15 of the FCC rules and with RS-210 of
Industry Canada. Operation is subject to the following two conditions:
(1) This device may not cause harmful interference, and (2) This device
must accept any interference received, including interference that may
cause undesired operation.
Changes or modifications not expressly approved by the party
responsible for compliance could void the user's authority to
operate the equipment.
The remote entry system allows you to lock or unlock all vehicle doors
without a key.
The remote entry features operate with the ignition in any position,
except in RUN, with the transmission not in either P (Park) or N
(Neutral).
If there is any potential remote keyless entry problem with your vehicle,
ensureALL remote entry transmittersare brought to the dealership,
to aid in troubleshooting.
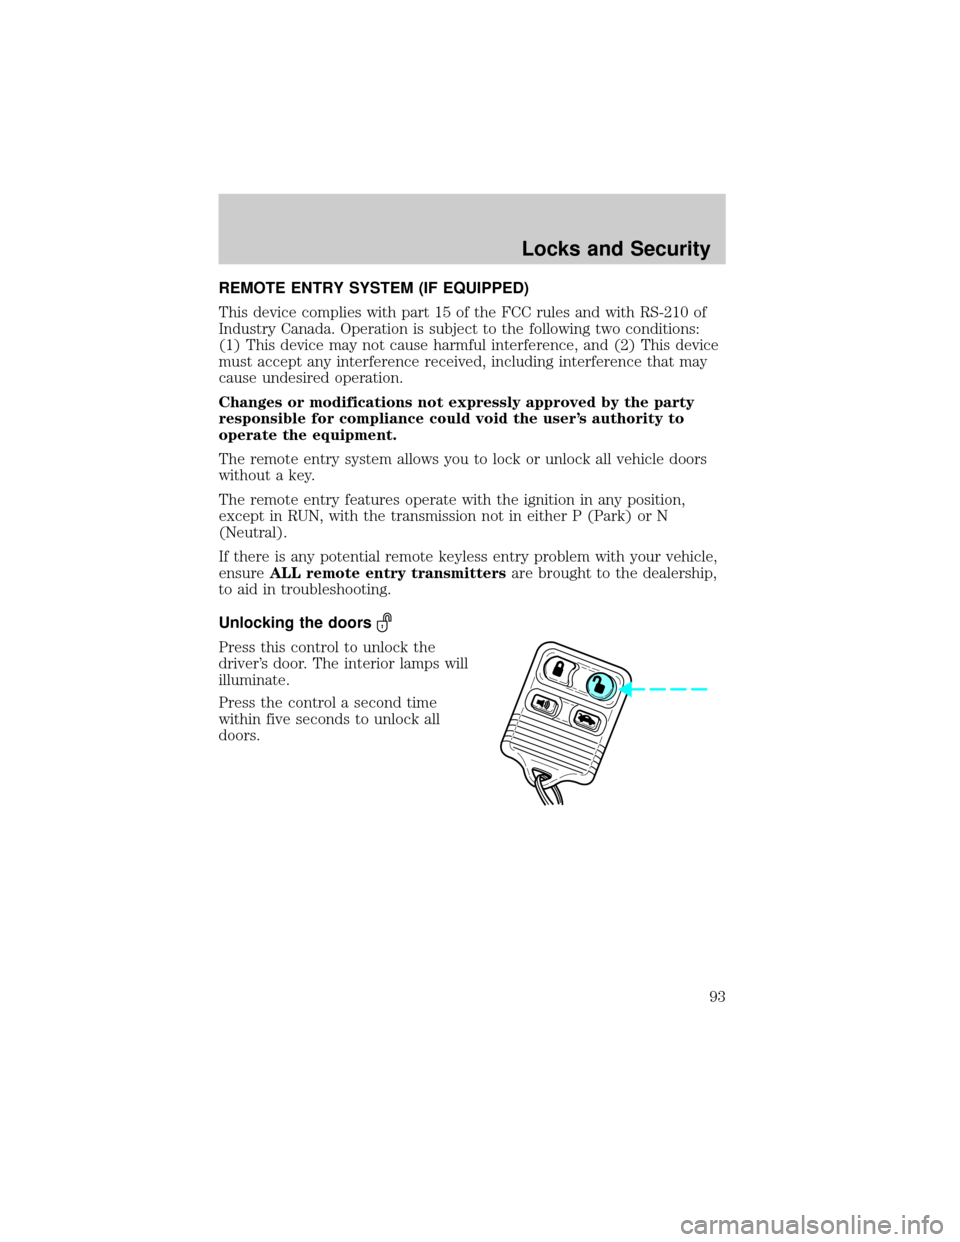
Unlocking the doors
Press this control to unlock the
driver's door. The interior lamps will
illuminate.
Press the control a second time
within five seconds to unlock all
doors.
Locks and Security
93
Page 121 of 240
1. Turn the ignition switch to the RUN (or ON) position. (DO NOT
START THE ENGINE)
2. Wait until the safety belt warning light turns off. (Approximately 1±2
minutes)
²Steps 3±5 must be completed within 60 seconds or the procedure will
have to be repeated.
3. Buckle then unbuckle the safety belt three times, ending with the
safety belt unbuckled. This can be done before or during BeltMinder
warning activation.
4. Turn on the parklamps/headlamps, turn off the parklamps/headlamps.
5. Buckle then unbuckle the safety belt three times, ending with the
safety belt unbuckled.
²After step 5 the safety belt warning light will be turned on for three
seconds.
6. Within seven seconds of the safety belt warning light turning off,
buckle then unbuckle the safety belt.
²This will disable BeltMinder if it is currently enabled, or enable
BeltMinder if it is currently disabled.
7. Confirmation of disabling BeltMinder is provided by flashing the safety
belt warning light four times per second for three seconds.
8. Confirmation of enabling BeltMinder is provided by flashing the safety
belt warning light four times per second for three seconds, followed by
three seconds with the safety belt warning light off, then followed by
flashing the safety belt warning light four times per second for three
seconds again.
9. After receiving confirmation, the deactivation/activation procedure is
complete.
Safety belt extension assembly
If the safety belt is too short when fully extended, there is a 20 cm (8
inch) safety belt extension assembly that can be added (part number
611C22). This assembly can be obtained from your dealer at no cost.
Use only extensions manufactured by the same supplier as the safety
belt. Manufacturer identification is located at the end of the webbing on
the label. Also, use the safety belt extension only if the safety belt is too
short for you when fully extended.
Do not use extensions to change the fit of the shoulder belt across the
torso.
Seating and Safety Restraints
121
Page 141 of 240
If you ever smell exhaust fumes of any kind inside your vehicle,
have your dealer inspect and fix your vehicle immediately. Do
not drive if you smell exhaust fumes. These fumes are harmful and
could kill you.
Have the exhaust and body ventilation systems checked whenever:
²the vehicle is raised for service.
²the sound of the exhaust system changes.
²the vehicle has been damaged in a collision.
WARNING:Engine exhaust, some of its constituents, and
certain vehicle components contain or emit chemicals known to
the State of California to cause cancer and birth defects or other
reproductive harm. In addition, certain fluids contained in vehicles and
certain products of component wear contain or emit chemicals known
to the State of California to cause cancer and birth defects or other
reproductive harm.
Important ventilating information
If the engine is idling while the vehicle is stopped in an open area for
long periods of time, open the windows at least 2.5 cm (one inch).
Adjust the heating or air conditioning (if equipped) to bring in fresh air.
Improve vehicle ventilation by keeping all air inlet vents clear of snow,
leaves and other debris.
BRAKES
Your service brakes are self-adjusting. Refer to the scheduled
maintenance guide for scheduled maintenance.
Occasional brake noise is normal and often does not indicate a
performance concern with the vehicle's brake system. In normal
operation, automotive brake systems may emit occasional or intermittent
squeal or groan noises when the brakes are applied. Such noises are
usually heard during the first few brake applications in the morning;
however, they may be heard at any time while braking and can be
aggravated by environmental conditions such as cold, heat, moisture, road
dust, salt or mud. If a ªmetal-to-metal,º ªcontinuous grindingº or
ªcontinuous squealº sound is present while braking, the brake linings may
be worn-out and should be inspected by a qualified service technician.
Driving
141