2002 FIAT DUCATO 244 ESP
[x] Cancel search: ESPPage 170 of 246
CONNECT Nav+
169
Once the modem has been proper-
ly installed, the portable computer can
use all the applications provided for
telematic connections to data base -
external servers, etc.; more particu-
larly the following can be used:
– Hiper Terminal;
– Microsoft Explorer or Netscape
for Internet and its applications (pro-
vided the user has an “Internet
provider”);
– Microsoft Mail or Groupwise (for
e-mail address).To activate the Modem function,
proceed as follows:
– press the “MAIN” button17-fig. 1
to display the main screen;
– press the knob 22-fig. 1and turn
it to select “Setup” then press the
knob to confirm; the display will show
the “Commands&Set” menu. The
field near “Modem” will show the cur-
rent status:
“Off” = serial transmission not pos-
sible
“On” = serial transmission operat-
ing;– to change status turn knob 22-
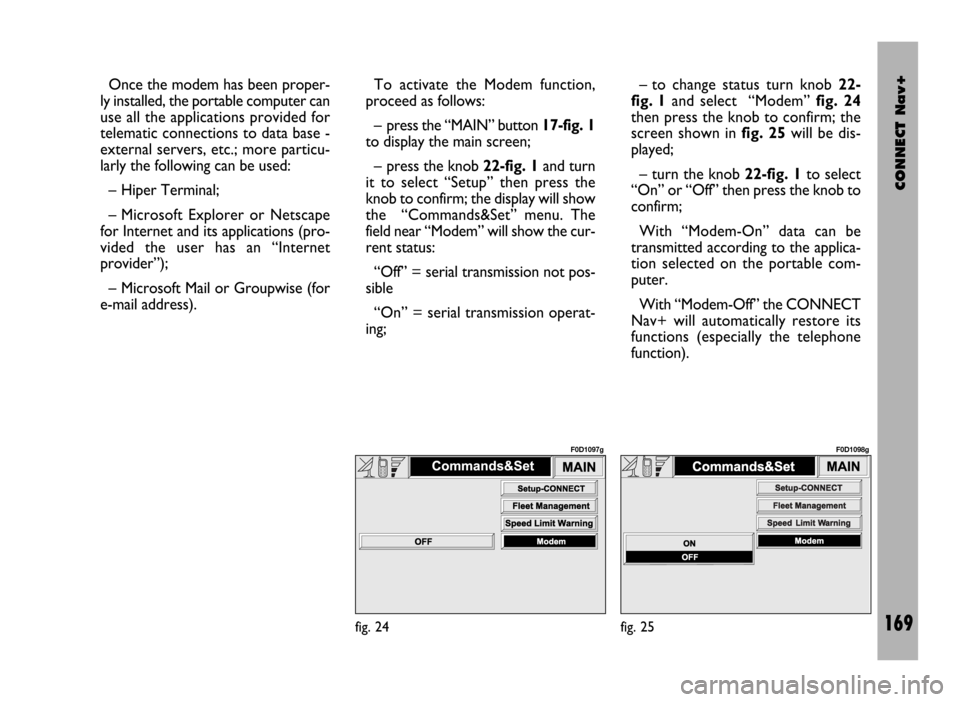
fig. 1and select “Modem” fig. 24
then press the knob to confirm; the
screen shown in fig. 25will be dis-
played;
– turn the knob 22-fig. 1to select
“On” or “Off” then press the knob to
confirm;
With “Modem-On” data can be
transmitted according to the applica-
tion selected on the portable com-
puter.
With “Modem-Off” the CONNECT
Nav+ will automatically restore its
functions (especially the telephone
function).
fig. 24
F0D1097g
fig. 25
F0D1098g
Page 171 of 246

CONNECT Nav+
170
SETUP-CONNECT
Choosing this function, a screen with
the following system setup functions
is displayed fig. 26:
– Daytime brightness
– Nighttime brightness
– Colours
– Voice language
– Text language
– Distance units.“Daytime brightness” or “Nighttime
brightness” selected and confirmed
with knob 22-fig. 1, enable to vary the
display brightness in the provided val-
ue range.
“Colours” is used to select display
setting between “Day”, “Night” and
“Automatic”. “Automatic” enables au-
tomatic switching from day to night
(and vice versa) when turning the ex-
ternal lights on/off and according to
the light intensity in the passenger
compartment.Selecting “VR language” will enable
to set the language for the voice
recognition only.
– ITALIANO
– DEUTSCH
– ENGLISH
– ESPÃNOL
– FRANÇAIS
– PORTUGUÊS
– NEDERLANDS.
fig. 26
F0D1072g
Page 178 of 246

CONNECT Nav+
177
Automatic tuning
This function seeks automatically sta-
tions in the chosen band.
Proceed as follows:
– select the frequency band (FM1,
FM2, FM3, LW or MW) pressing re-
peatedly the SRC key 15-fig. 1;
– Press key 11-fig. 1o 12-fig. 1to
start the automatic search for tuning
the next station that can be received
in the direction chosen, respectively
lowering or highering the frequency;
the display will show “SEEK”.
If the “TA” function is on (traffic in-
formation), the tuner only seeks sta-
tions that broadcast traffic bulletins.
If the “PTY” function is on, the tuner
only seeks PTY stations. Manual station
storage
The station being heard can be
stored in the range chosen with keys
1 ÷ 6-fig. 1.
Keep one of these keys pressed un-
til the display shows the number of the
key with which the station has been
stored.
Listening to stored stations
Proceed as follows:
– choose the required frequency
band
(FM1, FM2, FM3, LW or MW) press-
ing repeatedly the “SRC” key 15-
fig. 1;
– press briefly one of the keys 1÷6-
fig. 1.
In the FM1, FM2 and FM3 bands, if
reception is poor and the AF alterna-
tive frequency seek function is on, a
station with the strongest signal that
is broadcasting the same programme
is automatically sought. “AUDIO SETUP” FUNCTION
(AUDIO ADJUSTMENTS)
The audio parameters can be acti-
vated and adjusted in the same way
with all the audio sources (Radio, CD).
The adjustment procedures are de-
scribed in the related paragraph of the
previous chapter.
“TA” FUNCTION (TRAFFIC
INFORMATION)
Certain stations in the FM band
(FM1, FM2 and FM3) are also enabled
to broadcast information about the
conditions of the traffic. In this case
the displays shows the abbreviation
“TP”.
To turn the TA function (Traffic An-
nouncement) on/off for traffic bul-
letins, repeatedly press the knob 22-
fig. 1after selecting the TA/AF func-
tion.
The cyclic activation of the TA/AF
functions, which is obtained by brief
presses on the knob 22-fig. 1, is the
following: AF – TA – TA and AF –
both functions off – AF …etc.
Page 183 of 246

CONNECT Nav+
182
To turn the Autostore function on
(automatic station storage) press the
knob 22-fig. 1after selecting it.
When this function is on, the radio
automatically stores the stations with
the strongest signal, in decreasing or-
der of intensity of the signal in the fre-
quency band tuned:
– 6 stations in the FM1, FM2 or FM3
band or
– 6 stations in the MW band or
– 6 stations in the LW band.
If the TA function is on (traffic infor-
mation), only stations that broadcast
traffic information will be stored. This
function can be turned on also when
playing a CD.
During automatic storage the display
shows the wording “Autostore”. To
interrupt the automatic storage
process, turn off the “Autostore”
function pressing the “ESC” key 23-
fig. 1; the radio will tune the station
heard before the function was acti-
vated. On the preset keys 1 ÷ 6-fig. 1the
stations that have a strong signal in
that moment will be stored, in the pre-
set band. After storage the radio tunes
automatically to the first station of the
FM1 band, corresponding to the fre-
quency stored on preset key 1-fig. 1.
Every station is stored only once, ex-
cept in the case of regional pro-
grammes which in certain cases might
be stored twice.
The behaviour of the set during Au-
tostore is as follows:
– at the beginning of the Autostore
function all the other functions are dis-
abled
– any change in volume is not shown
on the display– pressing one of the preset keys 1÷
6-fig. 1the automatic storage process
is interrupted and the station stored
with that key is tuned
– selecting and activating a radio
function (e.g. PTY) the automatic stor-
age process is interrupted, the last sta-
tion heard before tuning on Autostore
is tuned and the function associated
with the key pressed is run
– selecting and activating one or both
TA/AF functions during the automat-
ic storage process, automatic storage
will be interrupted, the TA (traffic in-
formation) and AF (alternative fre-
quencies) functions will be turned
on/off and a new automatic storage
process will be started
– changing the audio source (Radio,
CD) during the automatic storage
process, the Autostore function is not
interrupted.
IMPORTANTIt may occur that
the Autostore function is unable to
find 6 stations with a strong signal; in
this case only the stations found are
stored. “AUTOSTORE” FUNCTION (AUTOMATIC STATION STORAGE)
Page 184 of 246
CONNECT Nav+
183
“ST/MONO” FUNCTION
To turn on/off the Stereo function
(stereo station reception) press the
knob 22-fig. 1after selecting the
St/Mono function.
When stereo reception is on the dis-
play shows “STEREO”, when it is off
the display shows “MONO”.
When the signal of the station tuned
is weak, to improve the sound quality,
it is advisable to switch to “MONO”.CD MODE
To guarantee optimum playing, use
original CDs. If using R/RW CDs, use
top quality CDs duplicated at as low
as possible speed.
IMPORTANTNever use 8 mm
audio CDs, even with the specific
adapter, since this format will damage
the system.
Choosing the CD source with the
“SRC” key 15-fig. 1, will display a
screen with the following options
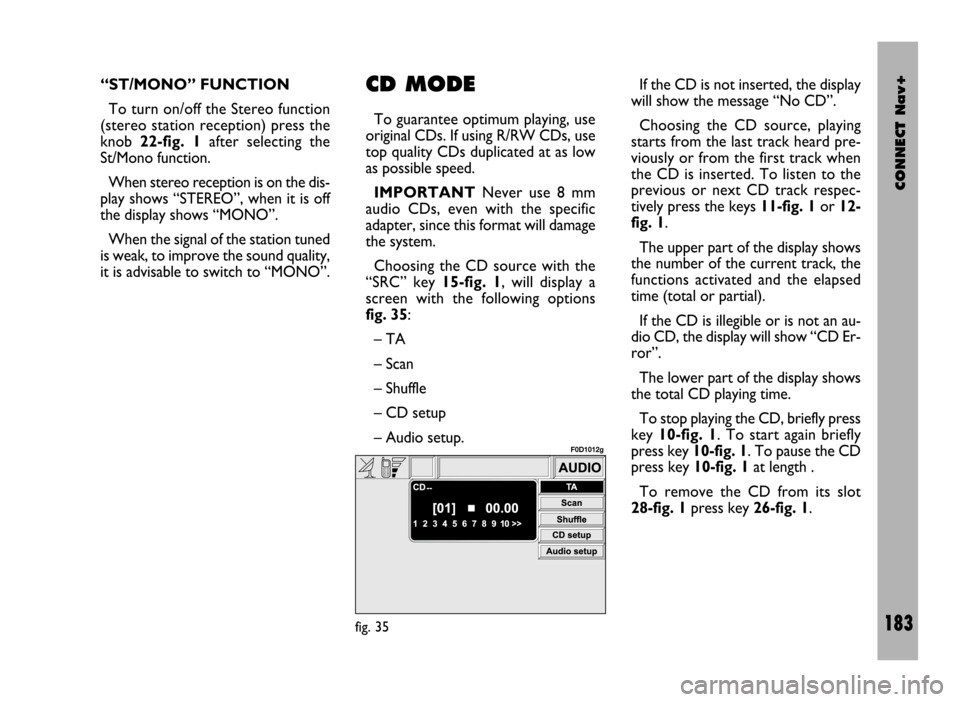
fig. 35:
– TA
– Scan
– Shuffle
– CD setup
– Audio setup.If the CD is not inserted, the display
will show the message “No CD”.
Choosing the CD source, playing
starts from the last track heard pre-
viously or from the first track when
the CD is inserted. To listen to the
previous or next CD track respec-
tively press the keys 11-fig. 1or 12-
fig. 1.
The upper part of the display shows
the number of the current track, the
functions activated and the elapsed
time (total or partial).
If the CD is illegible or is not an au-
dio CD, the display will show “CD Er-
ror”.
The lower part of the display shows
the total CD playing time.
To stop playing the CD, briefly press
key 10-fig. 1. To start again briefly
press key 10-fig. 1. To pause the CD
press key 10-fig. 1at length .
To remove the CD from its slot
28-fig. 1press key 26-fig. 1.
fig. 35
F0D1012g
Page 185 of 246
CONNECT Nav+
184
“TA” FUNCTION
(TRAFFIC INFORMATION)
To turn the TA function (Traffic An-
nouncement) on/off while listening to
a CD, press the knob 22-fig. 1after
selecting the function.
For the description of the function,
refer to the corresponding paragraph
in the “RADIO MODE” chapter.
“SCAN” FUNCTION
(BRIEF PLAYBACK)
The “Scan” function is turned on/off
pressing the knob 22-fig. 1after se-
lecting the function.
When this function is on, all the CD
tracks are played for about 10 seconds
in the actual sequence on the CD.
Press the knob again to turn the
function off 22-fig. 1.
The “Scan” function is turned off au-
tomatically when “Shuffle” is turned on.“SHUFFLE” FUNCTION
(RANDOM PLAYBACK)
The “Shuffle” function is turned on/off
pressing the knob 22-fig. 1after se-
lecting the function.
With this function on, the CD tracks
are played in random sequence. To
turn the function off press the knob
again 22-fig. 1. The “Shuffle” function
is turned off automatically when the
“Scan” function is turned on.
“CD SETUP” MENU
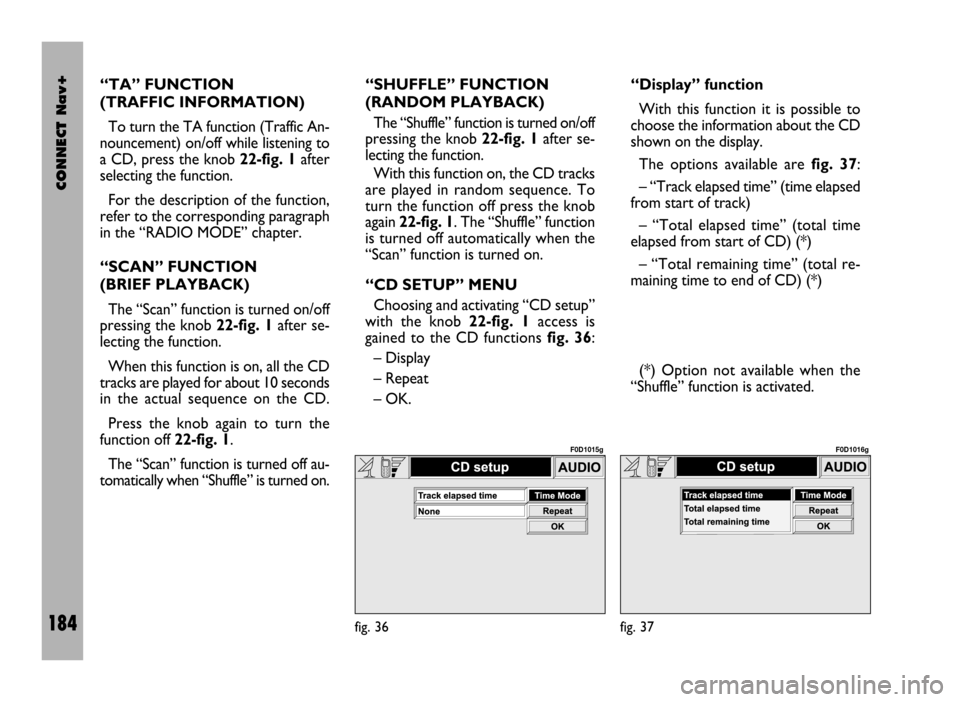
Choosing and activating “CD setup”
with the knob 22-fig. 1access is
gained to the CD functions fig. 36:
– Display
– Repeat
– OK.“Display” function
With this function it is possible to
choose the information about the CD
shown on the display.
The options available are fig. 37:
– “Track elapsed time” (time elapsed
from start of track)
– “Total elapsed time” (total time
elapsed from start of CD) (*)
– “Total remaining time” (total re-
maining time to end of CD) (*)
(*) Option not available when the
“Shuffle” function is activated.
fig. 36
F0D1015g
fig. 37
F0D1016g
Page 186 of 246
CONNECT Nav+
185
To choose an option turn and press
the knob 22-fig. 1after selecting the
“Display” function.
To store the option chosen, choose
and confirm “OK” with the knob 22-
fig. 1.“Repeat” function
With this function it is possible to turn
on/off the continuous repetition of the
current track or of the whole CD.
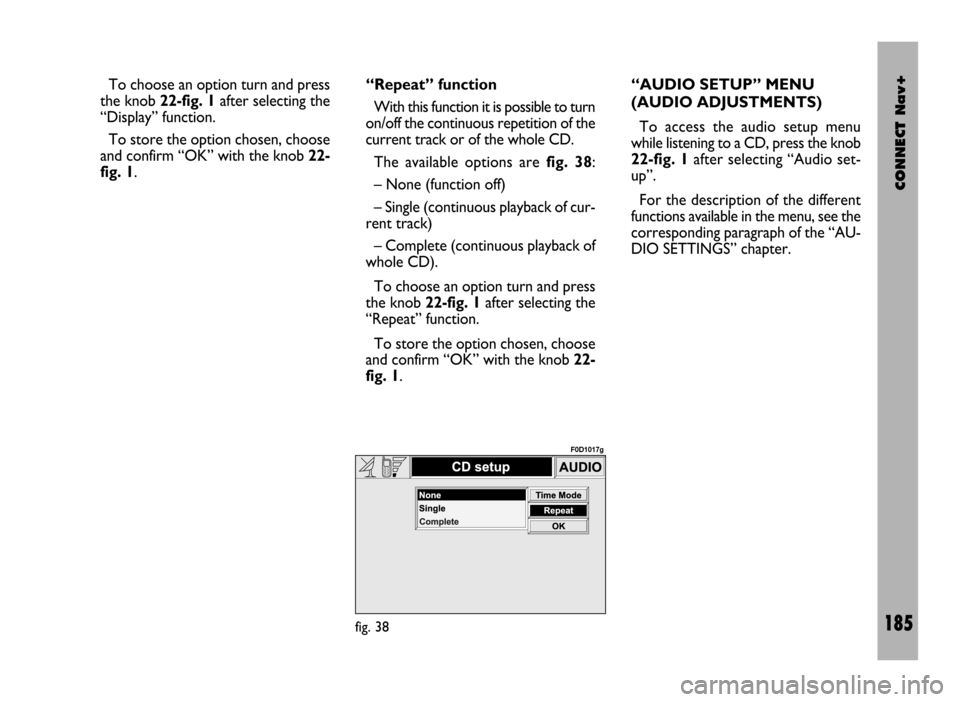
The available options are fig. 38:
– None (function off)
– Single (continuous playback of cur-
rent track)
– Complete (continuous playback of
whole CD).
To choose an option turn and press
the knob 22-fig. 1after selecting the
“Repeat” function.
To store the option chosen, choose
and confirm “OK” with the knob 22-
fig. 1.“AUDIO SETUP” MENU
(AUDIO ADJUSTMENTS)
To access the audio setup menu
while listening to a CD, press the knob
22-fig. 1after selecting “Audio set-
up”.
For the description of the different
functions available in the menu, see the
corresponding paragraph of the “AU-
DIO SETTINGS” chapter.
fig. 38
F0D1017g
Page 191 of 246
CONNECT Nav+
190
MAIN MENU
FUNCTIONS
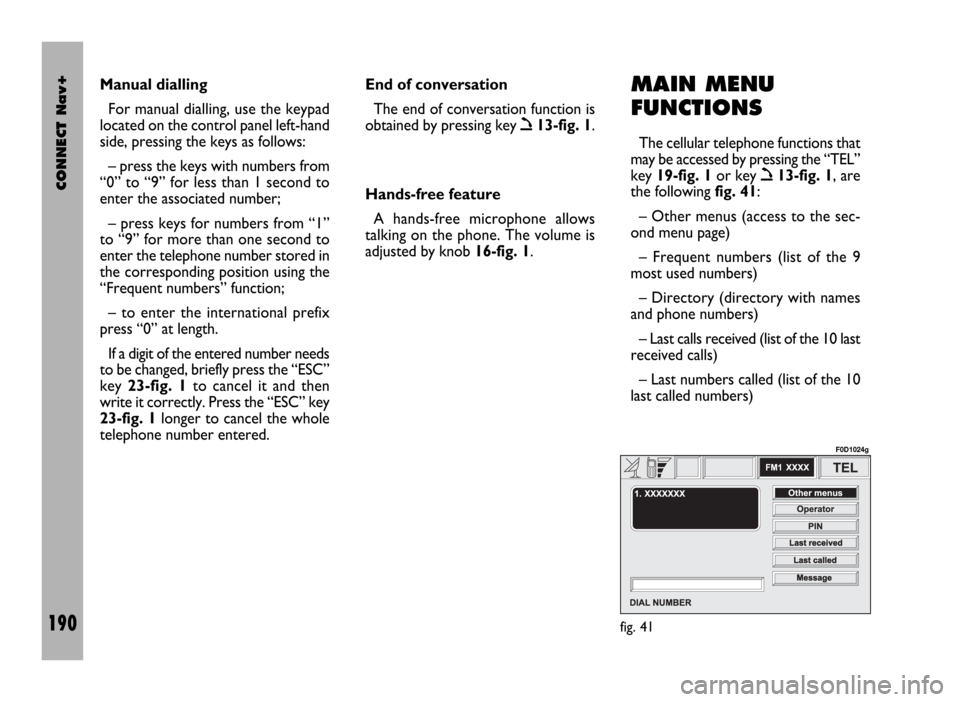
The cellular telephone functions that
may be accessed by pressing the “TEL”
key 19-fig. 1or key
ò13-fig. 1, are
the following fig. 41:
– Other menus (access to the sec-
ond menu page)
– Frequent numbers (list of the 9
most used numbers)
– Directory (directory with names
and phone numbers)
– Last calls received (list of the 10 last
received calls)
– Last numbers called (list of the 10
last called numbers) Manual dialling
For manual dialling, use the keypad
located on the control panel left-hand
side, pressing the keys as follows:
– press the keys with numbers from
“0” to “9” for less than 1 second to
enter the associated number;
– press keys for numbers from “1”
to “9” for more than one second to
enter the telephone number stored in
the corresponding position using the
“Frequent numbers” function;
– to enter the international prefix
press “0” at length.
If a digit of the entered number needs
to be changed, briefly press the “ESC”
key 23-fig. 1to cancel it and then
write it correctly. Press the “ESC” key
23-fig. 1longer to cancel the whole
telephone number entered. End of conversation
The end of conversation function is
obtained by pressing key
ò13-fig. 1.
Hands-free feature
A hands-free microphone allows
talking on the phone. The volume is
adjusted by knob 16-fig. 1.
fig. 41
F0D1024g