2002 FIAT DUCATO 244 audio
[x] Cancel search: audioPage 38 of 246
37
CONNECT Nav
“AUTOSTORE” FUNCTION
(AUTOMATIC STATION
STORAGE)
After selecting the AMST or FMST
band, to turn on the Autostore func-
tion (automatic station storage), select
and confirm “AUTOSTORE” with the
knob 22-fig. 1.
When this function is on, the radio
automatically stores the stations with
the strongest signal:
– 6 FM stations in the FMST band or
– 6 AM stations in the AMST band.
Stations will be stored automatically
on the multifunction keys 1 ÷ 6-fig. 1.
After storage, the radio tunes auto-
matically to the first station of the
FMAST band, corresponding to the fre-
quency stored on the multifunction key
1-fig. 1.Every station is stored only once, ex-
cept in the case of regional pro-
grammes which in certain cases might
be stored twice.
The behaviour of the set during Au-
tostore is as follows:
– at the beginning of the Autostore
function all the other functions are dis-
abled
– any change in volume is not shown
on the display
– pressing one of the multifunction
keys 1 ÷ 6-fig. 1the automatic stor-
age process is interrupted and the sta-
tion stored with that key is tuned
– selecting and activating a radio
function (e.g. PTY) the automatic stor-
age process is interrupted, the last sta-
tion heard before tuning on Autostore
is tuned and the function associated
with the key pressed is run– selecting and activating one or both
TA/AF functions during the automat-
ic storage process, automatic storage
will be interrupted, the TA (traffic in-
formation) and AF (alternative fre-
quencies) functions will be turned
on/off and a new automatic storage
process will be started
– changing the audio source (Radio,
CD) during the automatic storage
process, the Autostore function is in-
terrupted.
IMPORTANTIt may occur that
the Autostore function is unable to
find 6 stations with a strong signal; in
this case only the stations found are
stored.
IMPORTANTActivating the “Au-
tostore” function cancels the stations
stored previously in the FMST or
AMST band.
Page 39 of 246
CONNECT Nav
38
“BAND SCAN” FUNCTION
The “BAND SCAN” function acti-
vates station scanning in the chosen
frequency band. Each station frequen-
cy will be displayed for about 10 sec-
onds.
To turn on the “BAND SCAN” func-
tion, select and confirm “BAND
SCAN” with the knob 22-fig. 1from
the main audio menu.
During scanning, the display will
show “BAND SCAN”.
To stop the band scan function, press
“ESC” 23-fig. 1.“PRESET SCAN” FUNCTION
The “PRESET SCAN” function acti-
vates stored station scanning in the
chosen frequency band. Each stored
station will be played for about 10 sec-
onds.
To turn on the “PRESET SCAN”
function, select and confirm “PRESET
SCAN” with the knob 22-fig. 1, from
the main audio menu.
During scanning, the display will show
“PRES. SCAN”. To stop the band scan
function, press “ESC” 23-fig. 1.
“STATION LIST” FUNCTION
The “STATION LIST” function dis-
plays a screen fig. 22, listing the ra-
dio stations previously stored in the
tuned band, the RDS codes and the
corresponding frequencies.
To turn this function on, select and
confirm “STATION LIST” with the
knob 22-fig. 1from the main audio
menu. To scroll the stored station list
use the encoder 14-fig. 1.“RADIO SETUP” FUNCTION
To turn this function on, select and
confirm “RADIO SETUP” with the
knob 22-fig. 1from the main audio
menu.
This function enables to go to next
window to adjust radio settings. When
in this window it is not possible to
change the audio source. The follow-
ing functions are displayed:
– LOC/DX
– MONO/STEREO
– REGIONAL
– NEWS.
Page 41 of 246
CONNECT Nav
40
“NEWS” FUNCTION
This function shortly enables or not
the PTY code News.
To turn this function on/off, select
and confirm “NEWS” with the knob
22-fig. 1.
Select “ENABLED” or “DISABLED”
rotating and pressing the knob 22-
fig. 1to confirm.
This function is only available on FM
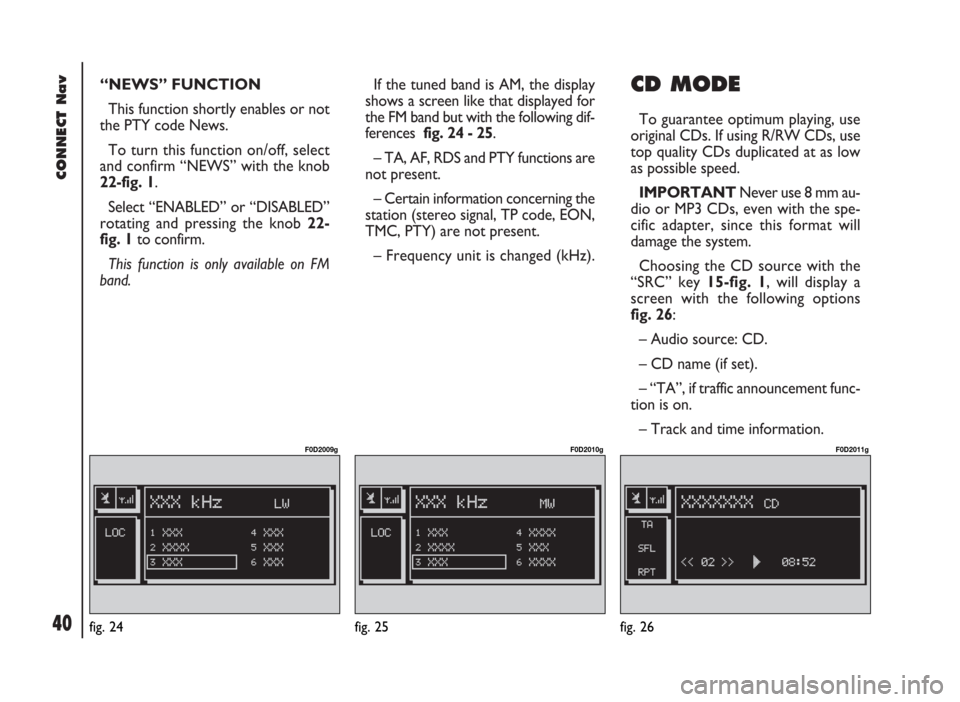
band. If the tuned band is AM, the display
shows a screen like that displayed for
the FM band but with the following dif-
ferences fig. 24 - 25.
– TA, AF, RDS and PTY functions are
not present.
– Certain information concerning the
station (stereo signal, TP code, EON,
TMC, PTY) are not present.
– Frequency unit is changed (kHz). CD MODE
To guarantee optimum playing, use
original CDs. If using R/RW CDs, use
top quality CDs duplicated at as low
as possible speed.
IMPORTANTNever use 8 mm au-
dio or MP3 CDs, even with the spe-
cific adapter, since this format will
damage the system.
Choosing the CD source with the
“SRC” key 15-fig. 1, will display a
screen with the following options
fig. 26:
– Audio source: CD.
– CD name (if set).
– “TA”, if traffic announcement func-
tion is on.
– Track and time information.
fig. 24
F0D2009g
fig. 25
F0D2010g
fig. 26
F0D2011g
Page 42 of 246
41
CONNECT Nav
– Current status of CD (play ˙,
pause II, stop ~).
– CD time information. If the CD is
not inserted, the display will show the
message “NO CD” “NO CD-DA” and
all CD options are disabled.
– SCAN, if the SCAN function is on.
– SFL, if the SHUFFLE function is on.
– RPT ONE /REPEAT ALL, if the rel-
evant functions are on.
– PROG, if the PROG function is on.
The front panel keys are the follow-
ing:
÷11/ ˜12: to select previous
or next CD track;
II˙10(short push): to play or stop
the CD;
II˙10(long push): to pause the CD.Press the knob 22-fig. 1to display
the following options:
– CD SHUFFLE
– CD TA
– CD REPEAT
– CD PROG
– CD SCAN
– CD COMPRESSION
– CD SETUP
– AUDIO SETUP.
“CD SHUFFLE” FUNCTION
(RANDOM PLAYING)
To turn the “SHUFFLE” function
on/off, press the knob 22-fig. 1, after
selecting “SHUFFLE” with the knob.
Select and confirm “YES” or “NO” by
rotating and pressing the knob 22-
fig. 1. When the Shuffle function is on,
the display shows “SFL”.
With this function on, the CD tracks
are played in random sequence. To
turn off this function select “NO” with
the same above described procedure.“CD TA” FUNCTION
(TRAFFIC INFORMATION)
To turn the TA function (Traffic An-
nouncement) on/off while listening to
a CD, select and confirm “CD TA”
with the knob 22-fig. 1.
When the “TA” function is on, the
main screen displays “TA”.
For the description of the function,
refer to the corresponding paragraph
in the “RADIO MODE” chapter.
Page 47 of 246
CONNECT Nav
46
Selecting “DELETE NAME” rotating
the knob 22-fig. 1will display the list
of programmed CDs. Select the CD
name to be deleted with the knob 22-
fig. 1and then press it to delete. Se-
lect “OK” to confirm.
“
OK”
To confirm your choices, select and
confirm “OK” with the knob 22-fig. 1;
the name and the associated sequence
will be stored or deleted.
IMPORTANTIn case of buffer full,
a warning message “WARNING,
MEMORY FULL” will be displayed to
point out the problem. The user shall
have to delete some previously stored
CD names. “CD INFO” function
Selecting and confirming “CD INFO”
with the knob 22-fig. 1, will display
a screen with the following informa-
tion:
– CD name;
– track sequence (if defined).“AUDIO SETUP” FUNCTION
(AUDIO ADJUSTMENTS)
To access the audio setup menu
while listening to a CD, select and con-
firm “AUDIO SETUP” with the knob
22-fig. 1.
For the description of the different
functions available in the menu, see the
corresponding paragraph of the “AU-
DIO SETTINGS” chapter.
Page 48 of 246
47
CONNECT Nav
AUDIO SETTINGS
The audio parameters described in this
paragraph can be activated and adjust-
ed with all the audio sources (Radio,
CD).
To display the main menu press the
knob 22-fig. 1, with any audio source
on.
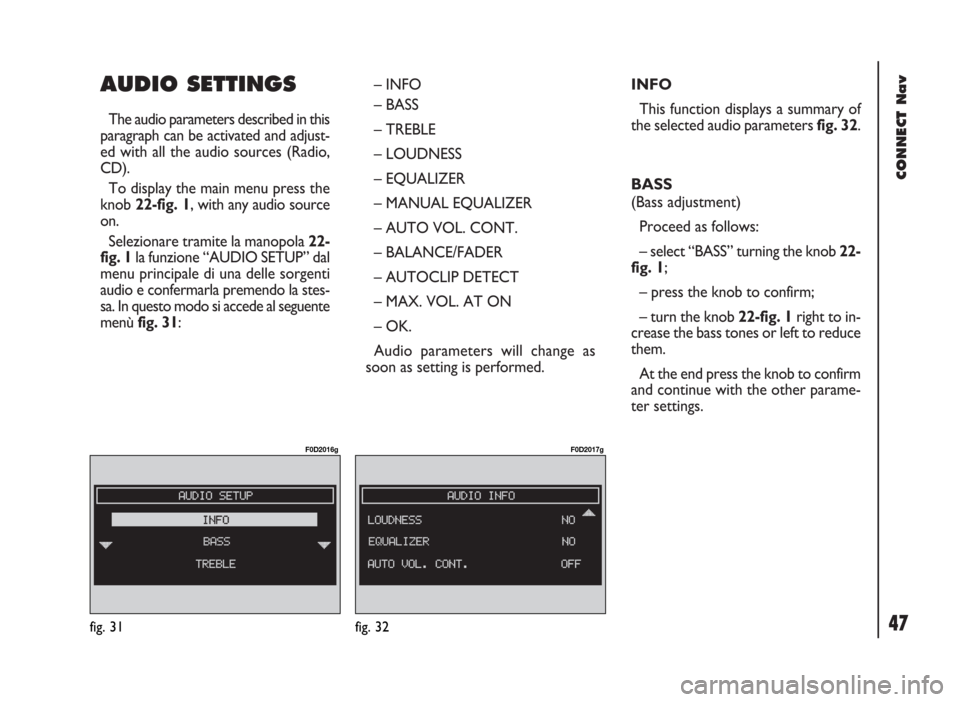
Selezionare tramite la manopola 22-
fig. 1la funzione “AUDIO SETUP” dal
menu principale di una delle sorgenti
audio e confermarla premendo la stes-
sa. In questo modo si accede al seguente
menù fig. 31: – INFO
– BASS
– TREBLE
– LOUDNESS
– EQUALIZER
– MANUAL EQUALIZER
– AUTO VOL. CONT.
– BALANCE/FADER
– AUTOCLIP DETECT
– MAX. VOL. AT ON
– OK.
Audio parameters will change as
soon as setting is performed.INFO
This function displays a summary of
the selected audio parameters fig. 32.
BASS
(Bass adjustment)
Proceed as follows:
– select “BASS” turning the knob 22-
fig. 1;
– press the knob to confirm;
– turn the knob 22-fig. 1right to in-
crease the bass tones or left to reduce
them.
At the end press the knob to confirm
and continue with the other parame-
ter settings.
fig. 31
F0D2016g
fig. 32
F0D2017g
Page 54 of 246
53
CONNECT Nav
IMPORTANTTechnical data and
operating conditions for MP3 files:
– sampling frequencies are: 44.1 kHz,
stereo (96 to 320 kbit/s) - 22.05 kHz,
mono or stereo (32 to 80 kbit/s);
– it is possible to play variable bit-rate
tracks (files);
– compatibility with multi-session
CDs, in this case only the first CD ses-
sion will be read;
– reading compatibility with CD-RW;
– MP3 CDs shall have ISO 9660 for-
mat;– incompatibility with ID3TAG-2;
– incompatibility with packet writing
CDs (DirectCD
TMor INCDTM);
– files in WMA
TMor Atrac3TMre-
named as .mp3, cannot be played.
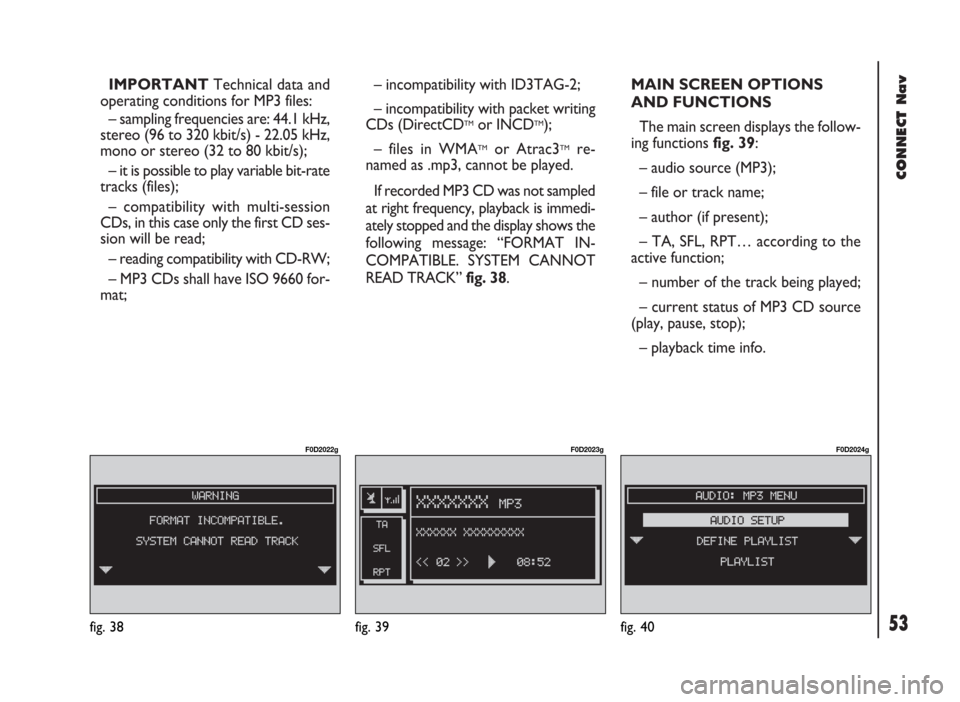
If recorded MP3 CD was not sampled
at right frequency, playback is immedi-
ately stopped and the display shows the
following message: “FORMAT IN-
COMPATIBLE. SYSTEM CANNOT
READ TRACK” fig. 38.MAIN SCREEN OPTIONS
AND FUNCTIONS
The main screen displays the follow-
ing functions fig. 39:
– audio source (MP3);
– file or track name;
– author (if present);
– TA, SFL, RPT… according to the
active function;
– number of the track being played;
– current status of MP3 CD source
(play, pause, stop);
– playback time info.
fig. 39
F0D2023g
fig. 40
F0D2024g
fig. 38
F0D2022g
Page 55 of 246
CONNECT Nav
54
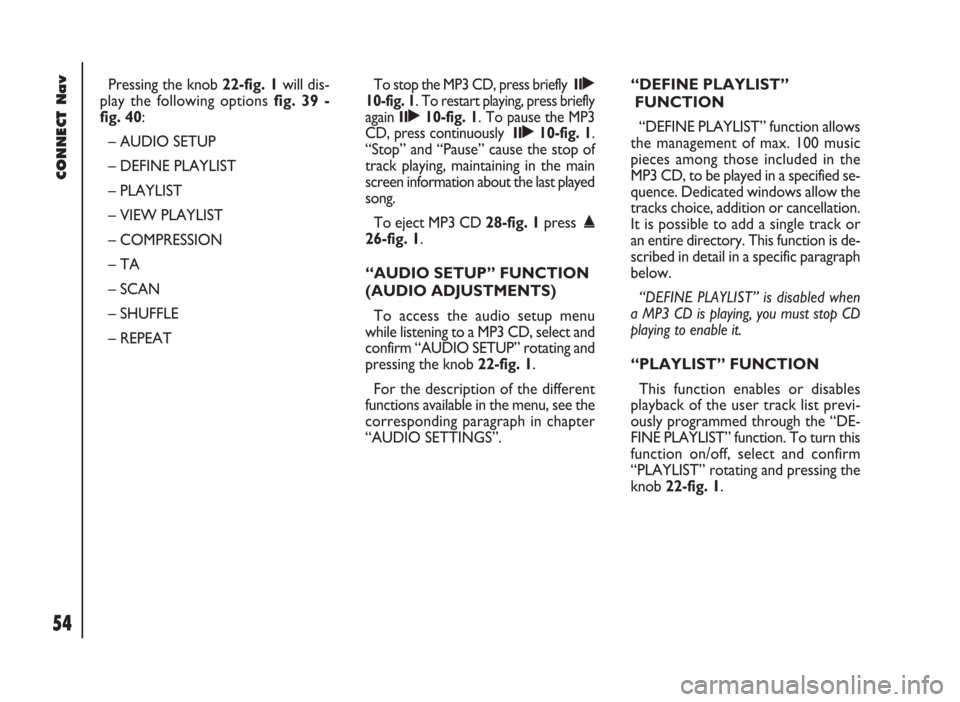
Pressing the knob 22-fig. 1will dis-
play the following options fig. 39 -
fig. 40:
– AUDIO SETUP
– DEFINE PLAYLIST
– PLAYLIST
– VIEW PLAYLIST
– COMPRESSION
– TA
– SCAN
– SHUFFLE
– REPEATTo stop the MP3 CD, press briefly II˙
10-fig. 1. To restart playing, press briefly
again II˙10-fig. 1. To pause the MP3
CD, press continuously II˙10-fig. 1.
“Stop” and “Pause” cause the stop of
track playing, maintaining in the main
screen information about the last played
song.
To eject MP3 CD 28-fig. 1press ˚
26-fig. 1.
“AUDIO SETUP” FUNCTION
(AUDIO ADJUSTMENTS)
To access the audio setup menu
while listening to a MP3 CD, select and
confirm “AUDIO SETUP” rotating and
pressing the knob 22-fig. 1.
For the description of the different
functions available in the menu, see the
corresponding paragraph in chapter
“AUDIO SETTINGS”.“DEFINE PLAYLIST”
FUNCTION
“DEFINE PLAYLIST” function allows
the management of max. 100 music
pieces among those included in the
MP3 CD, to be played in a specified se-
quence. Dedicated windows allow the
tracks choice, addition or cancellation.
It is possible to add a single track or
an entire directory. This function is de-
scribed in detail in a specific paragraph
below.
“DEFINE PLAYLIST” is disabled when
a MP3 CD is playing, you must stop CD
playing to enable it.
“PLAYLIST” FUNCTION
This function enables or disables
playback of the user track list previ-
ously programmed through the “DE-
FINE PLAYLIST” function. To turn this
function on/off, select and confirm
“PLAYLIST” rotating and pressing the
knob 22-fig. 1.