Page 65 of 246

CONNECT Nav
64
To accept the call, proceed as
follows:
– short push on button ò13-fig. 1;
dialog box disappears and ring stops,
the display shows the string “call in
progress”.
To close the conversation,
proceed as follows:
– press button ò13-fig. 1; the sys-
tem returns automatically to the pre-
vious mode and the display shows the
relevant status.
To refuse the call, proceed as
follows:
– long push on button ò13-fig. 1;
dialog box disappears and ring stops.
In this case the screen will remain the
one shown before the incoming call.
IMPORTANT: dialog box disap-
pears and ring stops also if the line is
unwillingly lost.OUTGOING CALLS
To start a call, proceed as
follows:
– enter the telephone mode as pre-
viously described;
– dial the required number using the
multifunction keys 1 ÷ 12-fig. 1;
– to enter the international prefix
(“+” char), push button “*/+” at
length;
dialled number is shown in the input
box on the display; max. 20 digits can
be input and in case there is no enough
space to keep the whole string, the in-
terface will provide a left string scroll;
– to start a call, press button ò13-
fig. 1; active screen becomes the one
shown in fig. 47.
To enter a phone number, follow
these instructions:
Press briefly one of the multifunction
keys 1 ÷ 12-fig. 1to enter the cor-
responding digit or character;More particularly keys “*” and “#”
can be used.
Press continuously button “+” to en-
ter the international prefix (“+” char);
Press continuously keys 1 ÷ 9-fig. 1
to select the corresponding frequent
number set (see paragraph “Frequent
Numbers”);
Short push on “ESC” 23-fig. 1clears
the last input digit;
Long push on “ESC” 23-fig. 1clears
all entered digits;
DIALLING A SERVICE
NUMBER
Following the instructions given in
the previous paragraph, the user can
dial service numbers (e.g.: ←#
xxxxx←) according to ETSI Standard
GSM 02.30.
Page 81 of 246

CONNECT Nav
80
SETUP: This function selected and
confirmed rotating and pressing the
knob 22-fig. 1 allows the following:
– to display current settings by se-
lecting “CURRENT SETTINGS”,
fig. 78;
– to enter provider telephone num-
ber by selecting “PROVIDER PHONE”
fig. 79;
– to enter IP address by selecting “IP
ADDRESS”;
– to enter connection line type by se-
lecting “CONNECTION TYPE”, ana-
log or ISDN;
– to enter IP port by selecting “IP
PORT”;– to log-in user name by selecting
“USER NAME” fig. 80;
– to enter the password used to ac-
cess the WAP service, by selecting
“PASSWORD”;
Any of these options activates the
keypad to be used for entering the re-
quired data.“VOICE MEMO” FUNCTION
(where provided)
“VOICE MEMO” allows manage-
ment of the messages recorded in the
voice box.
It is activated by long push on the
front panel key ô14-fig. 1: a beep
and a display message fig. 81mark the
start of recording.
A maximum of 3 minutes of user’s
voice sampling is available and can be
split in several recording sessions.
fig. 78
F0D2134g
fig. 80
F0D2061g
fig. 81
F0D2062gfig. 79
F0D2135g
Page 83 of 246

CONNECT Nav
82
MESSAGES
SMS - (Short Message Service)
“MESSAGES” function allows read-
ing and sending short messages (max-
imum length is 160 characters) by
GSM phone.
Read and sent messages are stored
into two separate boxes, which how-
ever share a common memory sec-
tion; so the sum of sent and read
stored messages must not exceed the
maximum number of allowed SMSs (it
depends on the SIM card.
Telephone module stops input of
new messages when the buffer is full
and the “DIAL” option is disabled.
In this case the display shows a string
with the following warning message:
“FURTHER MESSAGES CANNOT BE
STORED OR RECEIVED”.Selecting and confirming “MES-
SAGES” with the knob 22-fig. 1dis-
plays the screen in fig. 85with the fol-
lowing icon keys:
– DIAL
– SELECT
– CENTER NUMBER.
“DIAL”
Select and confirm “DIAL” with the
knob 22-fig. 1, the display will show
fig. 86 screen with the following op-
tions:TEXT: displays the following options
fig. 87:
– “ADD”: to add a new message us-
ing the keypad; the counter shows the
number of still available characters
fig. 88; in case of mistake, select
“DelC” to delete the last entered char-
acter or “Del” to delete the entire
string.
– “VIEW MESSAGE”: to display the
text of the message fig. 89;
– “OK”: to confirm.
fig. 85
F0D2066g
fig. 86
F0D2067g
Page 86 of 246

When selecting types 3or 4from the
above list, the display will show the
screen in fig. 93, with the following
options:
– “VIEW MESSAGE”
– “DELETE”
– “CALL”
– “ANSWER”
Selecting and confirming “VIEW MES-
SAGE” rotating and pressing the knob
22-fig. 1will display the selected mes-
sage. Selecting and confirming “DELETE”
rotating and pressing the knob 22-
fig. 1activates selected message dele-
tion. A confirmation dialog is shown
for user confirmation; pressing the
knob 22-fig. 1starts message deletion
from SIM card.
Selecting and confirming “CALL” ro-
tating and pressing the knob 22-fig. 1
starts a call to the sender of the mes-
sage; the display shows “CALL IN
PROGRESS”.
Selecting and confirming “ANSWER”
rotating and pressing the knob 22-fig. 1
lets the user reply to the received mes-
sage with a new SMS.
Press “ESC” 23-fig. 1to quit and go
back to fig. 92screen.“CENTER NUMBER”
Selecting “CENTER NUMBER”
(provider phone number) using the
keypad (keys 0-9, +, *, #) rotating the
knob 22-fig. 1and pressing it to con-
firm, the user can set the service
Provider phone number.
CONNECT Nav
85fig. 93
F0D2074g
Page 89 of 246
CONNECT Nav
88
“RECALL LAST PIN”: stores the first
PIN entered, sending it automatically
to the SIM card when required. This
setting is saved in system settings,
when inserting the SIM card the dis-
play will not show “PIN REQUEST”.
“OK”: to accept and store settings.Information
“INFORMATION” shows informa-
tion related to the GSM service
provider fig. 99. Press ”ESC” 23-
fig. 1to quit.“PHONE SETTINGS”
FUNCTION
Selecting and confirming “PHONE
SETTINGS” rotating and pressing the
knob 22-fig. 1, will display the screen
in fig. 100, with the following options:
– “RINGER VOLUME”: sets the vol-
ume level of the telephone ringer;
fig. 99
F0D2080g
fig. 100
F0D2081g
Page 95 of 246
94
CONNECT Nav
– HOME1/HOME2: start route cal-
culation towards one of the two pre-
defined or frequently used destina-
tions.
– INFO: displays info on vehicle po-
sition and destination.
– DETOUR: allows the user to
choose an alternative route.
– SET ROUTE: defines route calcu-
lation parameters and activates the
zoom intersection function fig. 108.
– DESTINATION AND ROUTE:
controls destination and activate route
calculation.
– VOICE DIRECTORY (where pro-
vided): controls navigator voice direc-
tory.SELECT POINT
Choosign and confirming “SELECT
POINT” rotating and pressing the
knob 22-fig. 1, will activate this func-
tion that enables to specify a geo-
graphical point or a service and to get
the required information fig. 109.The available functions are:
– ADDRESS
– POINTS OF INTEREST
– LAST DESTINATIONS
– DIRECTORY
– RDS-TMC
– HOME 1
– HOME 2.
fig. 107
F0D2137g
fig. 108
F0D2138g
fig. 109
F0D2083g
Page 100 of 246

99
CONNECT Nav
Near car
“NEAR CAR” allows the user to find
the services near the current vehicle
position as follows:
– “CATEGORY”: allows service cat-
egory (hotels, restaurants,..) selection
in the system data-base using the key-
pad.
– “LIST OF SERVICES”: will provide
the list of available services for the
specified category. The list is scrolled
by rotating the knob 22-fig. 1and
pressing it to confirm.
The list shows the service name, dis-
tance and direction.
– “INFO”: to get information on the
selected service with respect to the
chosen point of interest.
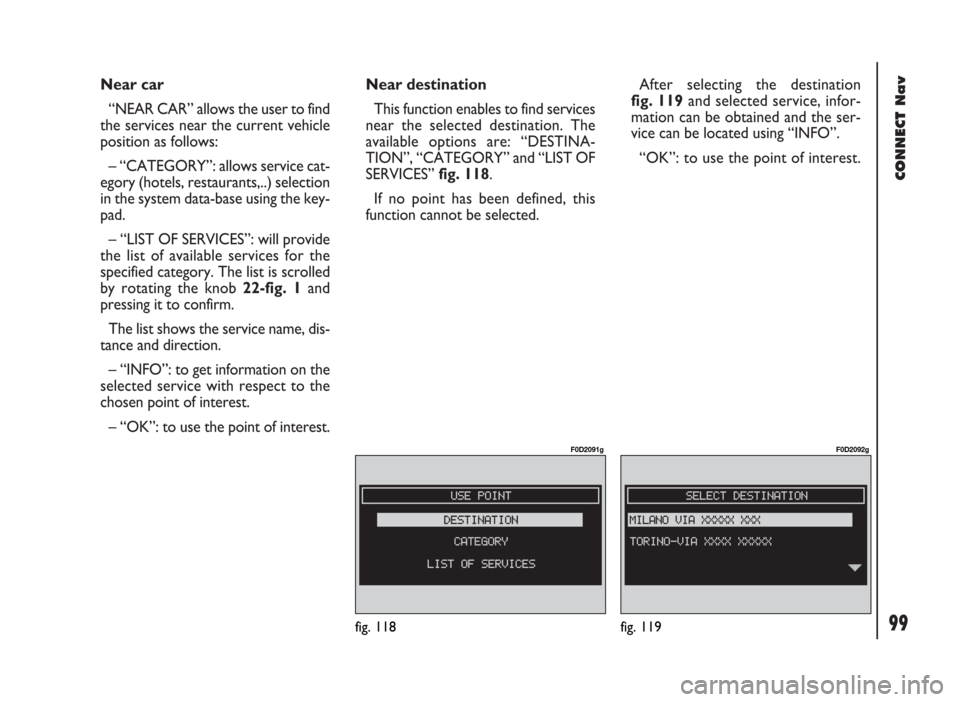
– “OK”: to use the point of interest.Near destination
This function enables to find services
near the selected destination. The
available options are: “DESTINA-
TION”, “CATEGORY” and “LIST OF
SERVICES” fig. 118.
If no point has been defined, this
function cannot be selected.After selecting the destination
fig. 119and selected service, infor-
mation can be obtained and the ser-
vice can be located using “INFO”.
“OK”: to use the point of interest.
fig. 118
F0D2091g
fig. 119
F0D2092g
Page 101 of 246

100
CONNECT Nav
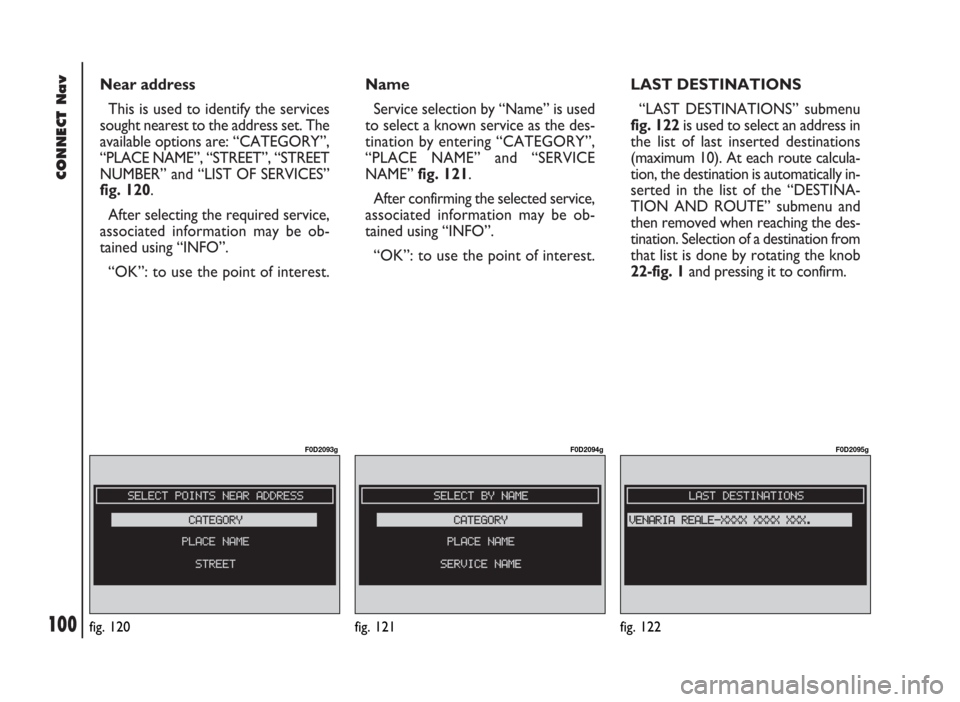
Near address
This is used to identify the services
sought nearest to the address set. The
available options are: “CATEGORY”,
“PLACE NAME”, “STREET”, “STREET
NUMBER” and “LIST OF SERVICES”
fig. 120.
After selecting the required service,
associated information may be ob-
tained using “INFO”.
“OK”: to use the point of interest. Name
Service selection by “Name” is used
to select a known service as the des-
tination by entering “CATEGORY”,
“PLACE NAME” and “SERVICE
NAME” fig. 121.
After confirming the selected service,
associated information may be ob-
tained using “INFO”.
“OK”: to use the point of interest.LAST DESTINATIONS
“LAST DESTINATIONS” submenu
fig. 122 is used to select an address in
the list of last inserted destinations
(maximum 10). At each route calcula-
tion, the destination is automatically in-
serted in the list of the “DESTINA-
TION AND ROUTE” submenu and
then removed when reaching the des-
tination. Selection of a destination from
that list is done by rotating the knob
22-fig. 1and pressing it to confirm.
fig. 120
F0D2093g
fig. 121
F0D2094g
fig. 122
F0D2095g