Page 263 of 486

3-31
� SEEK �: The right arrow is the same as the NEXT
pushbutton, and the left arrow is the same as the PREV
pushbutton. If the arrows are held or pressed more than
once, the player will continue moving forward or
backward through the tape. SEEK and a positive or
negative number will appear on the display.
BAND: Press this button to listen to the radio
when a tape is playing. The tape will stop but remain
in the player.
TAPE CD: Press this button to play a tape when
listening to the radio. Press TAPE CD to switch between
the tape and compact disc if both are loaded. The
inactive tape or CD will remain safely inside the radio
for future listening.
EJT (Eject): Press this button, located to the right
of the cassette tape slot, to stop a tape when it is playing
or to eject a tape when it is not playing. Eject may be
activated with the radio off. Cassette tapes may be
loaded with the radio off if this button is pressed first.Cassette Tape Messages
CHK TAPE (Check Tape): If this message appears on
the radio display, the tape won't play because of one of
the following errors.
�The tape is tight and the player can't turn the tape
hubs. Remove the tape. Hold the tape with the open
end down and try to turn the right hub
counterclockwise with a pencil. Turn the tape over
and repeat. If the hubs do not turn easily, your tape
may be damaged and should not be used in the
player. Try a new tape to make sure your player is
working properly.
�The tape is broken. Try a new tape.
�The tape is wrapped around the tape head. Attempt
to get the cassette out. Try a new tape.
CLEAN: If this message appears on the display, the
cassette tape player needs to be cleaned. It will still play
tapes, but you should clean it as soon as possible to
prevent damage to the tapes and player. See ªCare of
Your Cassette Tape Playerº in the Index.
If any error occurs repeatedly or if an error can't be
corrected, contact your dealer.
Page 266 of 486

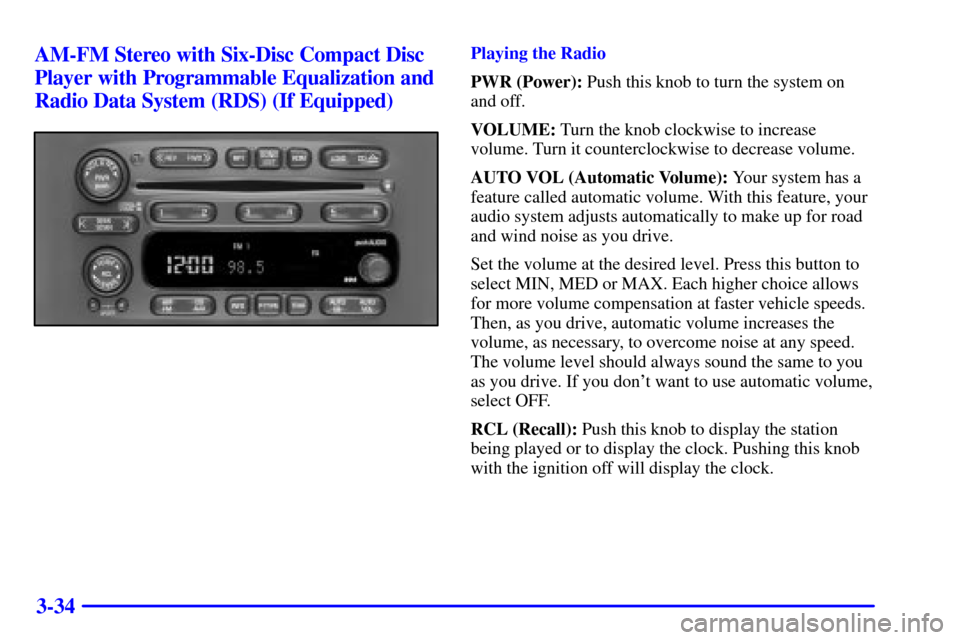
3-34 AM-FM Stereo with Six-Disc Compact Disc
Player with Programmable Equalization and
Radio Data System (RDS) (If Equipped)
Playing the Radio
PWR (Power): Push this knob to turn the system on
and off.
VOLUME: Turn the knob clockwise to increase
volume. Turn it counterclockwise to decrease volume.
AUTO VOL (Automatic Volume): Your system has a
feature called automatic volume. With this feature, your
audio system adjusts automatically to make up for road
and wind noise as you drive.
Set the volume at the desired level. Press this button to
select MIN, MED or MAX. Each higher choice allows
for more volume compensation at faster vehicle speeds.
Then, as you drive, automatic volume increases the
volume, as necessary, to overcome noise at any speed.
The volume level should always sound the same to you
as you drive. If you don't want to use automatic volume,
select OFF.
RCL (Recall): Push this knob to display the station
being played or to display the clock. Pushing this knob
with the ignition off will display the clock.
Page 284 of 486

3-52 Rear Seat Audio (Vehicles without the
Entertainment System) (If Equipped)
This feature allows rear seat passengers to listen to and
control any of the music sources: AM
-FM, cassette tapes
and CDs. However, the rear seat passengers can only
control the music sources that the front seat passengers
are not listening to. For example, rear seat passengers
may listen to a cassette tape or CD through the two sets
of headphones, (provided in the glove box), while the
driver listens to the radio through the front speakers. The
rear seat passengers have control of the volume for each
set of headphones. Be aware that the front seat audio
controls always have priority over the RSA controls. If
the front seat passengers switch the source for the main
radio to a remote source, the RSA will play the same
remote source. The rear speakers will be muted when the
RSA power is turned on. You may operate the RSA
functions even when the main radio is off.
Primary Radio Controls
The following function is controlled by the knob on the
main radio:
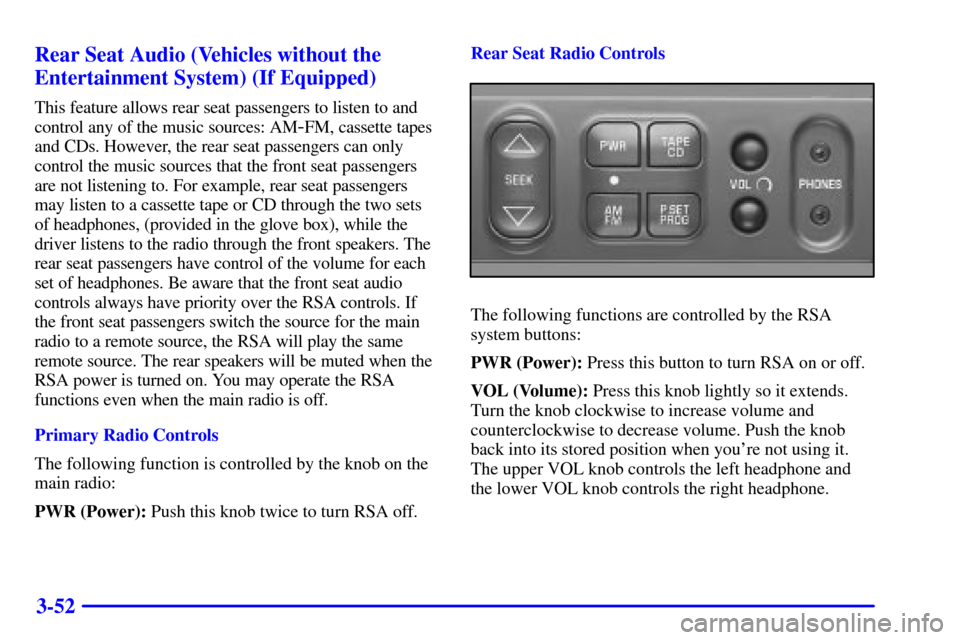
PWR (Power): Push this knob twice to turn RSA off.Rear Seat Radio Controls
The following functions are controlled by the RSA
system buttons:
PWR (Power): Press this button to turn RSA on or off.
VOL (Volume): Press this knob lightly so it extends.
Turn the knob clockwise to increase volume and
counterclockwise to decrease volume. Push the knob
back into its stored position when you're not using it.
The upper VOL knob controls the left headphone and
the lower VOL knob controls the right headphone.
Page 304 of 486

4-13
An emergency like this requires close attention and a
quick decision. If you are holding the steering wheel at
the recommended 9 and 3 o'clock positions, you can
turn it a full 180 degrees very quickly without removing
either hand. But you have to act fast, steer quickly, and
just as quickly straighten the wheel once you have
avoided the object.
The fact that such emergency situations are always
possible is a good reason to practice defensive driving at
all times and wear safety belts properly.
Off-Road Recovery
You may find that your right wheels have dropped off the
edge of a road onto the shoulder while you're driving.
If the level of the shoulder is only slightly below the
pavement, recovery should be fairly easy. Ease off the
accelerator and then, if there is nothing in the way, steer so
that your vehicle straddles the edge of the pavement. You
can turn the steering wheel up to one
-quarter turn until the
right front tire contacts the pavement edge. Then turn your
steering wheel to go straight down the roadway.
Page 350 of 486
5-17 How to Add Coolant to the Radiator
1. You can remove the radiator pressure cap when
the cooling system, including the radiator pressure
cap and upper radiator hose, is no longer hot.
Turn the pressure cap slowly counterclockwise until
it first stops. (Don't press down while turning the
pressure cap.)
If you hear a hiss, wait for that to stop. A hiss means
there is still some pressure left.
2. Then keep turning the pressure cap, but now push
down as you turn it. Remove the pressure cap.
CAUTION:
You can be burned if you spill coolant on hot
engine parts. Coolant contains ethylene glycol
and it will burn if the engine parts are hot
enough. Don't spill coolant on a hot engine.
Page 356 of 486
5-23
The tools you'll be using include the jack (A),
extension (B) and folding wrench (C).
The compact spare tire is located under the vehicle,
ahead of the rear bumper. See ªCompact Spare Tireº
later in this section for more information about the
compact spare. To remove the compact spare tire,
do the following:A. Hoist Shaft
B. Hoist Assembly
C. Retainer
D. Compact Spare TireE. Extension
(Chisel End)
F. Folding Wrench
1. Attach the folding wrench to the extension and insert
the chisel end on an angle through the hole in the
rear bumper and into the hoist shaft.
2. Turn the folding wrench counterclockwise to lower
the spare tire to the ground. Continue to turn the
wrench so the compact spare tire can be pulled out
from under the vehicle.
Page 357 of 486

5-24
3. To remove the compact spare tire from the cable, tilt
the retainer at the end of the cable so it can be pulled
up through the wheel opening.4. If your vehicle is an all
-wheel-drive vehicle, after
removing the compact spare tire turn the wrench
clockwise to raise the cable back up.
On and AWD vehicle, you can not store a full
-size
tire under the vehicle. It should be stowed inside
the vehicle by the cable provided. See ªStoring the
Flat Tire on an All
-Wheel-Drive Vehicleº later in
this section.
If you have a front
-wheel-drive vehicle, the hoist is
used to store a full
-size or a flat road tire under the
vehicle. See ªStoring the Spare Tire and Toolsº and
ªStoring the Flat Tire on a Front
-Wheel-Drive
Vehicleº later in this section.
If the compact spare tire will not lower, check under the
vehicle to see if the tire is hanging loose and the cable
end and spring under the wheel plate are missing. If so
the secondary latch system is engaged. See ªSecondary
Latch Systemº later in this section.
To continue changing the flat tire see ªRemoving
the Flat Tire and Installing the Spare Tireº later in
this section.
Page 360 of 486
5-27
1. Place the jack under the vehicle, ahead of the rear
bumper. Position the center lift point of the jack
under the center of the compact spare tire.
2. Turn the folding wrench clockwise to raise the jack
until it lifts the secondary latch devise under the
wheel plate.
3. Keep raising the jack until the compact spare tire
stops moving upward and is held firmly in place, this
lets you know that the secondary latch has released.
4. Lower the jack by turning the folding wrench
counterclockwise. Keep lowering the jack until the
compact spare tire is resting on the folding wrench.5. Grasp the compact spare tire with both hands and
pull it out from under the vehicle.
6. Reach under the vehicle and remove the folding
wrench and jack.
Have the hoist assembly inspected as soon as you can.
You will not be able to store a spare or flat tire using the
hoist assembly until it has been repaired or replaced.