Page 81 of 497

2-
2-1
Section 2 Features and Controls
Here you can learn about the many standard and optional features on your vehicle, and information on starting,
shifting and braking. Also explained are the instrument panel and the warning systems that tell you if everything is
working properly
-- and what to do if you have a problem.
2
-2 Windows
2-5 Keys
2-7 Door Locks
2-12 Keyless Entry System (If Equipped)
2-15 Rear Doors
2-16 Tailgate
2-17 Theft
2-19 Content Theft-Deterrent (If Equipped)
2-20 Passlock�
2-21 New Vehicle ªBreak-Inº
2-21 Ignition Positions
2-24 Starting Your Engine
2-25 Engine Coolant Heater (If Equipped)
2-27 Automatic Transmission Operation
2-32 Manual Transmission Operation
2-37 Parking Brake
2-38 Shifting Into PARK (P)
(Automatic Transmission Only)
2
-41 Shifting Out of PARK (P)
(Automatic Transmission Only)2
-41 Parking Your Vehicle
(Manual Transmission Models Only)
2
-42 Parking Over Things That Burn
2-42 Engine Exhaust
2-43 Running Your Engine While You're Parked
(Automatic Transmission)
2
-44 Manual Selectable Ride (If Equipped)
2-45 Locking Rear Axle (If Equipped)
2-45 Four-Wheel Drive (If Equipped)
2-56 QUADRASTEER�(4WS) (If Equipped)
2-59 Turn Signal/Multifunction Lever
2-66 Exterior Lamps
2-71 Interior Lamps
2-73 Mirrors
2-90 OnStar� System (If Equipped)
2-94 The Instrument Panel - Your
Information System
2
-96 Instrument Panel Cluster
2-98 Warning Lights, Gages and Indicators
2-115 Message Center
Page 107 of 497
2-27
Automatic Transmission OperationIf your vehicle is equipped with an automatic
transmission, it features an electronic shift position
indicator within the instrument panel cluster. This
display must be powered anytime the shift lever is
capable of being moved out of PARK (P). This means
that if your key is in OFF, rather than LOCK, there will
be a small current drain on your battery which could
discharge your battery over a period of time. If you have
to leave your key in the ignition in OFF for an extended
period, it is recommended that you remove the IGN 0
fuse from the instrument panel fuse block. See ªFuses
and Circuit Breakersº in the Index.
There are several different positions for your shift lever.
Page 124 of 497

2-44
Manual Selectable Ride (If Equipped)
The main function of this system is to provide superior
ride comfort while trailering or fully loaded, as well as
for unloaded driving. This system also helps to provide:
�Improved trailering stability
�Improved handling response when trailering or
fully loaded
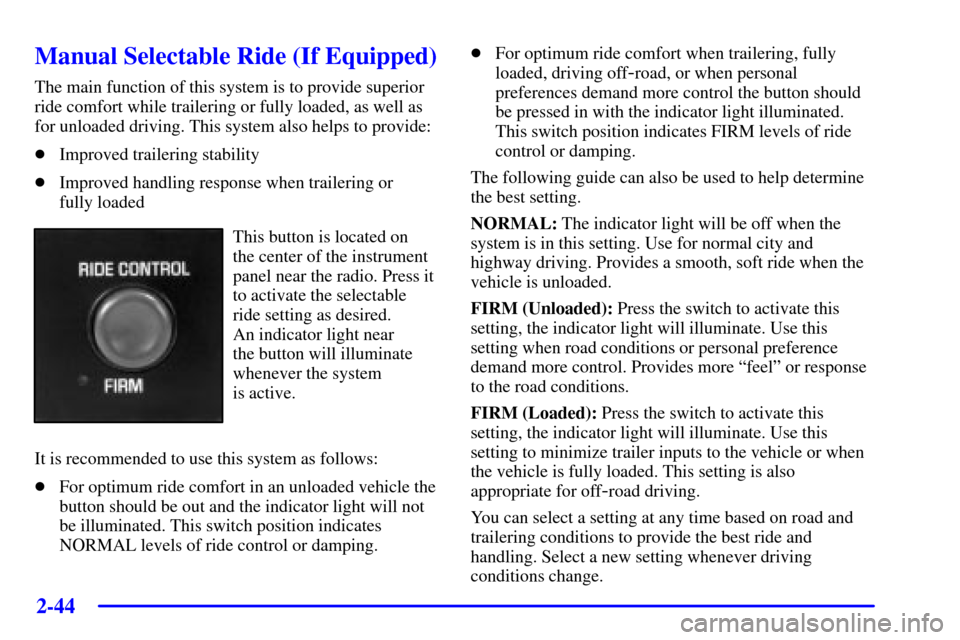
This button is located on
the center of the instrument
panel near the radio. Press it
to activate the selectable
ride setting as desired.
An indicator light near
the button will illuminate
whenever the system
is active.
It is recommended to use this system as follows:
�For optimum ride comfort in an unloaded vehicle the
button should be out and the indicator light will not
be illuminated. This switch position indicates
NORMAL levels of ride control or damping.�For optimum ride comfort when trailering, fully
loaded, driving off
-road, or when personal
preferences demand more control the button should
be pressed in with the indicator light illuminated.
This switch position indicates FIRM levels of ride
control or damping.
The following guide can also be used to help determine
the best setting.
NORMAL: The indicator light will be off when the
system is in this setting. Use for normal city and
highway driving. Provides a smooth, soft ride when the
vehicle is unloaded.
FIRM (Unloaded): Press the switch to activate this
setting, the indicator light will illuminate. Use this
setting when road conditions or personal preference
demand more control. Provides more ªfeelº or response
to the road conditions.
FIRM (Loaded): Press the switch to activate this
setting, the indicator light will illuminate. Use this
setting to minimize trailer inputs to the vehicle or when
the vehicle is fully loaded. This setting is also
appropriate for off
-road driving.
You can select a setting at any time based on road and
trailering conditions to provide the best ride and
handling. Select a new setting whenever driving
conditions change.
Page 128 of 497
2-48
To shift into or out of 4-Wheel Low (4LO)
or NEUTRAL (N):
1. Slow the vehicle to a roll, about 1 to 3 mph
(2 to 5 km/h) and shift an automatic transmission
into NEUTRAL (N), or with a manual transmission,
press the clutch pedal.
2. Shift the transfer case shift lever in one
continuous motion.
Don't pause in NEUTRAL (N) as you shift the
transfer case into 4
-Wheel Low (4LO), or your
gears could clash.
Remember that driving in 4
-Wheel High (4HI) or
4
-Wheel Low (4LO) may reduce fuel economy. Also,
driving in four
-wheel drive on dry pavement could
cause your tires to wear faster and make your transfer
case harder to shift and run noisier.
Automatic Transfer Case (If Equipped)
The transfer case buttons
are located to the left of the
instrument panel cluster.
Use these switches to shift into and out of
four
-wheel drive.
Page 132 of 497
2-52
Shifting Out of NEUTRAL
To shift out of NEUTRAL:
1. Set the parking brake and apply the regular
brake pedal.
2. Shift the transmission to NEUTRAL (N) and turn the
ignition to RUN with the engine off.
3. Press the button for the desired transfer case shift
position (2HI, 4HI, AUTO 4WD or 4LO).
4. After the transfer case has shifted out of NEUTRAL
the red light will go out.
5. You may start the engine and shift the transmission
to the desired position.Electronic Transfer Case (If Equipped)
If your four-wheel-drive vehicle has the electronic
transfer case, the transfer case switches are located to
the left of the instrument panel cluster.
Use these switches to shift into and out of four
-wheel
drive. You can choose among three driving settings:
2HI: This setting is for driving in most street and
highway situations. Your front axle is not engaged in
two
-wheel drive.
Page 136 of 497

2-56
QUADRASTEER� (4WS)
(If Equipped)
The QUADRASTEER System has a control and
diagnostic module that monitors and records current
system status and operational information.
If your vehicle is equipped with the 4 Wheel Steer
system it has the ability to steer the vehicle with all
four wheels.
Once the 4 Wheel Steer mode is selected, it is
recommended to leave the vehicle in this mode
at all times.
The 4WS system is equipped with three different
driving modes:
�Two wheel steering (2WS)
�Four wheel steering (4WS)
�Four wheel steering with a trailer mode (4WS TOW)
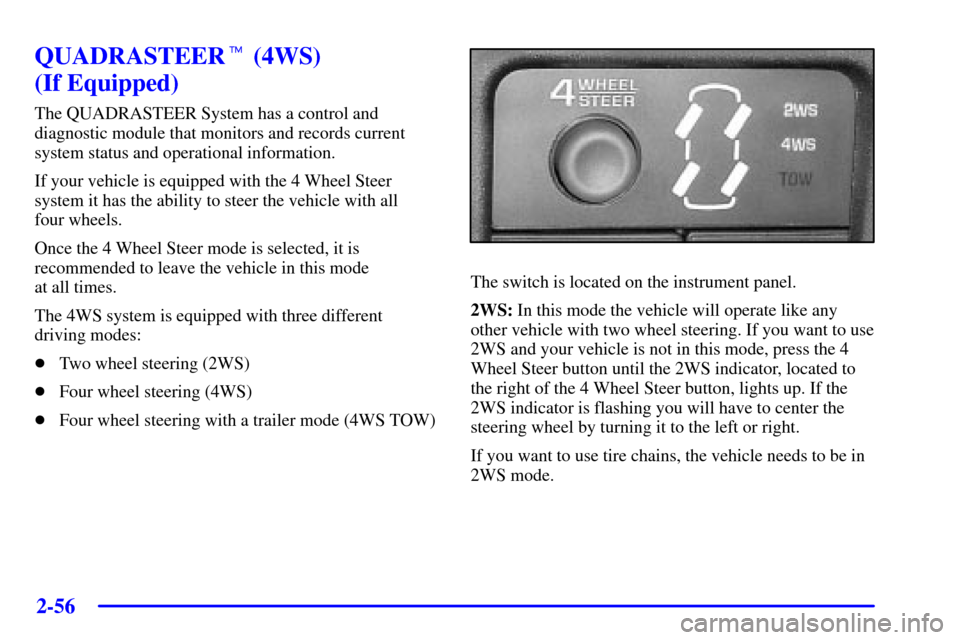
The switch is located on the instrument panel.
2WS: In this mode the vehicle will operate like any
other vehicle with two wheel steering. If you want to use
2WS and your vehicle is not in this mode, press the 4
Wheel Steer button until the 2WS indicator, located to
the right of the 4 Wheel Steer button, lights up. If the
2WS indicator is flashing you will have to center the
steering wheel by turning it to the left or right.
If you want to use tire chains, the vehicle needs to be in
2WS mode.
Page 137 of 497

2-57
4WS: In this mode all four wheels will help steer the
vehicle. If you want to use 4WS, and your vehicle is not
in this mode, press the 4 Wheel Steer button, until the
4WS indicator, located to the right of the 4 Wheel Steer
button, lights up. If the 4WS indicator is flashing you
will have to center the steering wheel by turning it to the
left or right.
Slower Speed (below 40 m.p.h.)
At slower speeds the front and rear wheels will turn in
opposite directions. This helps the vehicle make tighter
turns, such as during parking, cornering and turning into
tight spaces.
Higher Speeds (40 m.p.h. and above)
At higher speeds the front and rear wheels will turn in
the same direction. This improves stability of the vehicle
during lane changes and sweeping turns.
4WS TOW: The 4WS TOW mode provides enhanced
stability allowing the trailer to follow the path of the tow
vehicle more closely, especially during lane changes.
In this mode the system operates much like the 4WS
mode, but is enhanced for trailer towing. It is
recommended for all types and weights of trailers.
To engage the 4WS TOW mode, press the 4 Wheel Steer
button until the 4WS and TOW indicators light up on
the instrument panel. If the TOW indicator is flashing
you will have to center the steering wheel by turning it
to the left or right. While in the 4WS TOW mode, it is
possible the steering wheel may be slightly off center.
Page 140 of 497
2-60
Turn and Lane Change Signals
The turn signal has two upward (for right) and
two downward (for left) positions. These positions allow
you to signal a turn or a lane change.
To signal a turn, move the lever all the way up
or down. When the turn is finished, the lever will
return automatically.
An arrow on the instrument
panel cluster will flash in
the direction of the turn or
lane change.To signal a lane change, just raise or lower the lever
until the arrow starts to flash. Hold it there until you
complete your lane change. The lever will return by
itself when you release it.
If you move the lever all the way up or down, and the
arrow flashes at twice the normal rate, a signal bulb
may be burned out and other drivers may not see your
turn signal.
If a bulb is burned out, replace it to help avoid an
accident. If the arrows don't go on at all when you
signal a turn, check for burned
-out bulbs or a blown
fuse (see ªFuses and Circuit Breakersº in the Index).