Page 113 of 399

2-56 Power Remote Control Mirrors
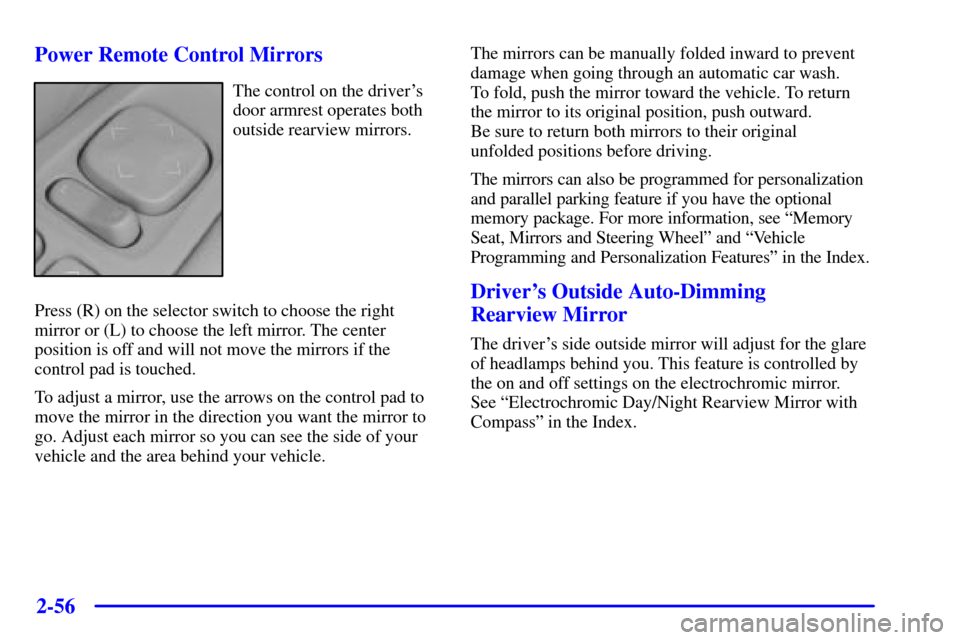
The control on the driver's
door armrest operates both
outside rearview mirrors.
Press (R) on the selector switch to choose the right
mirror or (L) to choose the left mirror. The center
position is off and will not move the mirrors if the
control pad is touched.
To adjust a mirror, use the arrows on the control pad to
move the mirror in the direction you want the mirror to
go. Adjust each mirror so you can see the side of your
vehicle and the area behind your vehicle.The mirrors can be manually folded inward to prevent
damage when going through an automatic car wash.
To fold, push the mirror toward the vehicle. To return
the mirror to its original position, push outward.
Be sure to return both mirrors to their original
unfolded positions before driving.
The mirrors can also be programmed for personalization
and parallel parking feature if you have the optional
memory package. For more information, see ªMemory
Seat, Mirrors and Steering Wheelº and ªVehicle
Programming and Personalization Featuresº in the Index.
Driver's Outside Auto-Dimming
Rearview Mirror
The driver's side outside mirror will adjust for the glare
of headlamps behind you. This feature is controlled by
the on and off settings on the electrochromic mirror.
See ªElectrochromic Day/Night Rearview Mirror with
Compassº in the Index.
Page 152 of 399

2-95
HEADLAMPS SUGGESTED - 23: If it's dark enough
outside and the headlamps and Twilight Sentinel�
controls are off, this message will display on the DIC.
This message informs the driver that turning on the
exterior lamps is recommended even though the DRL
are still illuminated. It has become dark enough outside
to require the headlamps and/or other exterior lamps.
This message will also appear if the optional
Rainsense� wiping feature is on and the Twilight
Sentinel is off.
ICE POSSIBLE
- 13: This message appears when
the outside air temperature is cold enough to create
icy road conditions.
LEFT REAR DOOR AJAR
- 142: The left rear door
is open or ajar when this message appears. The ignition
must be in ON and the transaxle not in PARK (P) for
this message to display. A chime will sound if the
vehicle's speed is greater than 3 mph (5 km/h).
OIL PRESSURE LOW STOP ENGINE
- 35: If this
message appears while the engine is running, stop the
engine and do not operate it until the cause of low oil
pressure is corrected. Severe damage to the engine can
result. A multiple chime will sound when this message
is displayed.PASSENGER DOOR AJAR
- 141: The passenger's
door is open or ajar when this message appears.
The ignition must be in ON and the transaxle not in
PARK (P) for this message to display. A chime
will sound if the vehicle's speed is greater than
3 mph (5 km/h).
RIGHT REAR DOOR AJAR
- 143: The right
rear door is open or ajar when this message appears.
The ignition must be in ON and the transaxle not in
PARK (P) for this message to display. A chime
will sound if the vehicle's speed is greater than
3 mph (5 km/h).
SERVICE AC SYSTEM
- 14: This message
appears when the electronic sensors that control the air
conditioning and heating systems are no longer working.
Have the climate control system serviced if you notice a
drop in heating and air conditioning efficiency.
SERVICE AIR BAG
- 83: There is a problem with
the supplemental inflatable restraint (air bag) system
when this message appears. Let only a qualified
technician work on your vehicle. Have your vehicle
serviced by your dealership immediately.
Page 159 of 399

2-102
Auto Exit Steering Wheel (If Equipped)
This feature will move the column to the driver's
previously programmed exit position when the
ignition is turned off and the driver's door is opened.
Programmable Modes
Mode 1: ON
Mode 2: OFF
Before your vehicle was shipped from the factory, it was
programmed to Mode 1. The mode to which the vehicle
was programmed may have been changed since it left
the factory. To determine the mode to which the vehicle
is programmed or to program the vehicle to a different
mode, do the following:
1. Enter FEATURE PROGRAMMING following
the instructions listed previously.
2. Press the down arrow on the INFO button until
AUTO EXIT STRG WHEEL appears on the
DIC display.3. To turn on the feature, press the ON/OFF button
until ON appears on the DIC display. To turn it off,
press the ON/OFF button until OFF appears on
the display.
The mode you selected is now set. You can either exit
the programming mode by following the instructions
later in this section or program the next feature available
on your vehicle.
Lights Flash at Unlock
This feature allows the parking lamps to flash twice
when the remote keyless entry transmitter is used to
unlock the vehicle. All doors must be closed, and the
lamps will not flash if the manual parking lamps or
headlamps are active.
Programmable Modes
Mode 1: ON
Mode 2: OFF
Page 160 of 399

2-103
Before your vehicle was shipped from the factory, it was
programmed to Mode 1. The mode to which the vehicle
was programmed may have been changed since it left
the factory. To determine the mode to which the vehicle
is programmed or to program the vehicle to a different
mode, do the following:
1. Enter FEATURE PROGRAMMING following
the instructions listed previously.
2. Press the down arrow on the INFO button until
LIGHTS FLASH AT UNLOCK appears on the
DIC display.
3. To turn on the feature, press the ON/OFF button
until ON appears on the DIC display. To turn it off,
press the ON/OFF button until OFF appears on
the display.
The mode you selected is now set. You can either exit
the programming mode by following the instructions
later in this section or program the next feature available
on your vehicle.Lights Flash at Lock
This feature allows the parking lamps to flash once
when the remote keyless entry transmitter is used to lock
the vehicle. All doors must be closed for this feature to
work, and the lamps will not flash if the manual parking
lamps or headlamps are active.
Programmable Modes
Mode 1: ON
Mode 2: OFF
Before your vehicle was shipped from the factory, it was
programmed to Mode 1. The mode to which the vehicle
was programmed may have been changed since it left
the factory. To determine the mode to which the vehicle
is programmed or to program the vehicle to a different
mode, do the following:
1. Enter FEATURE PROGRAMMING following
the instructions listed previously.
2. Press the down arrow on the INFO button until
LIGHTS FLASH AT LOCK appears on the
DIC display.
Page 225 of 399

4-17
Here are some tips on night driving.
�Drive defensively.
�Don't drink and drive.
�Since you can't see as well, you may need to
slow down and keep more space between you and
other vehicles.
�Slow down, especially on higher speed roads. Your
headlamps can light up only so much road ahead.
�In remote areas, watch for animals.
�If you're tired, pull off the road in a safe place
and rest.
No one can see as well at night as in the daytime. But as
we get older these differences increase. A 50
-year-old
driver may require at least twice as much light to see the
same thing at night as a 20
-year-old.
What you do in the daytime can also affect your night
vision. For example, if you spend the day in bright
sunshine you are wise to wear sunglasses. Your eyes will
have less trouble adjusting to night. But if you're
driving, don't wear sunglasses at night. They may cut
down on glare from headlamps, but they also make a lot
of things invisible.You can be temporarily blinded by approaching
headlamps. It can take a second or two, or even
several seconds, for your eyes to readjust to the dark.
When you are faced with severe glare (as from a driver
who doesn't lower the high beams, or a vehicle with
misaimed headlamps), slow down a little. Avoid staring
directly into the approaching headlamps.
Keep your windshield and all the glass on your vehicle
clean
-- inside and out. Glare at night is made much
worse by dirt on the glass. Even the inside of the glass
can build up a film caused by dust. Dirty glass makes
lights dazzle and flash more than clean glass would,
making the pupils of your eyes contract repeatedly.
Remember that your headlamps light up far less of a
roadway when you are in a turn or curve. Keep your
eyes moving; that way, it's easier to pick out dimly
lighted objects. Just as your headlamps should be
checked regularly for proper aim, so should your eyes
be examined regularly. Some drivers suffer from night
blindness
-- the inability to see in dim light -- and
aren't even aware of it.
Page 237 of 399

4-29
�Tie a red cloth to your vehicle to alert police that
you've been stopped by the snow.
�Put on extra clothing or wrap a blanket around you.
If you have no blankets or extra clothing, make body
insulators from newspapers, burlap bags, rags, floor
mats
-- anything you can wrap around yourself or
tuck under your clothing to keep warm.
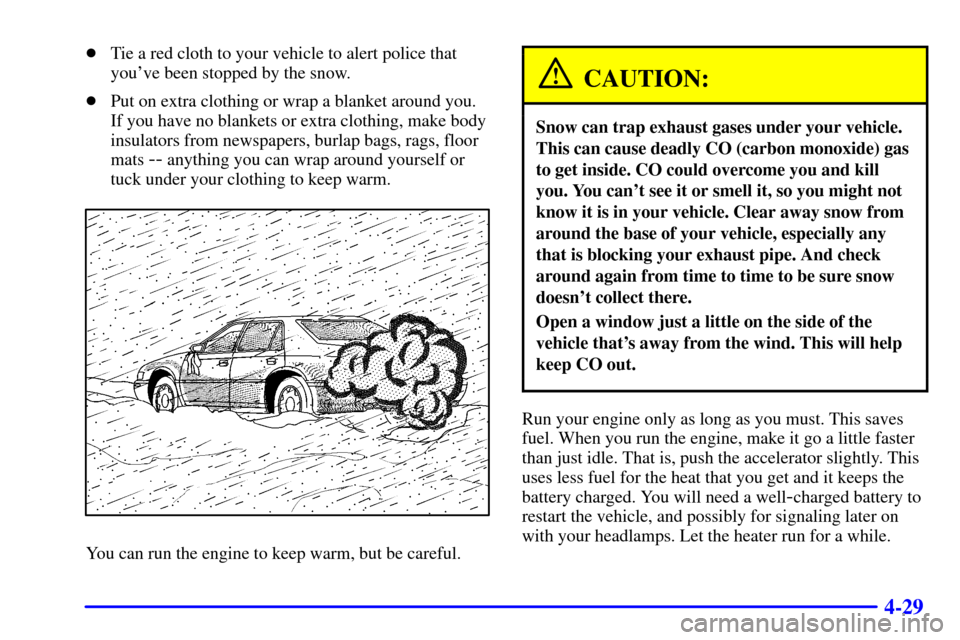
You can run the engine to keep warm, but be careful.
CAUTION:
Snow can trap exhaust gases under your vehicle.
This can cause deadly CO (carbon monoxide) gas
to get inside. CO could overcome you and kill
you. You can't see it or smell it, so you might not
know it is in your vehicle. Clear away snow from
around the base of your vehicle, especially any
that is blocking your exhaust pipe. And check
around again from time to time to be sure snow
doesn't collect there.
Open a window just a little on the side of the
vehicle that's away from the wind. This will help
keep CO out.
Run your engine only as long as you must. This saves
fuel. When you run the engine, make it go a little faster
than just idle. That is, push the accelerator slightly. This
uses less fuel for the heat that you get and it keeps the
battery charged. You will need a well
-charged battery to
restart the vehicle, and possibly for signaling later on
with your headlamps. Let the heater run for a while.
Page 318 of 399
6-37 Headlamps
1. Open the hood.
2. Remove the upper filler panel by loosening all the
screws and then removing the grommets.
3. Remove the two bolts fastening the headlamp to the
headlamp mounting bracket.
4. Pull the headlamp straight forward to disengage the
locator pin at the outboard edge of the headlamp.
5. To replace the low-beam bulb, first remove the
rubber housing cover on the rear of the lamp.
Page 319 of 399
6-38
6. Then, turn the bulb socket counterclockwise to
unlock the socket from the lamp housing.7. Remove the headlamp bulb socket.