Page 6 of 417
Fuel
Checking Fluids and Lubricants
GM Oil Life System™
Engine Air Cleaner/Filter
Passenger Compartment Air Filter
Brakes
Bulb ReplacementWindshield Wiper Blade Replacement
Tires and Wheels
Appearance Care
Electrical System/Fuses and Circuit Breakers
Capacities and Specifications
Normal Maintenance Replacement Parts
Table of Contents (cont'd)
Maintenance Schedule Service and Appearance Care
Section
6
Scheduled Maintenance
Owner Checks and Services
Periodic Maintenance InspectionsRecommended Fluids and Lubricants
Maintenance Records
iv
Section
7
Page 110 of 417

2-31
Turn Signal/Multifunction Lever
The lever on the left side of the steering column
includes the following:
�Turn and Lane Change Signals
�Headlamp High/Low
-Beam Changer
�Flash
-to-Pass Feature
�Windshield Wipers
�Windshield Washer
�Cruise Control
Turn and Lane Change Signals
The turn signal has two upward (for right) and two
downward (for left) positions. These positions allow
you to signal a turn or a lane change.
To signal a turn, move the lever all the way up or down.
When the turn is finished, the lever will return automatically.
An arrow on the instrument
panel cluster will flash in
the direction of the turn or
lane change.
To signal a lane change, just raise or lower the lever
until the arrow starts to flash. Hold it there until you
complete your lane change. The lever will return by
itself when you release it.
If you move the lever all the way up or down, and the
arrow flashes at twice the normal rate, a signal bulb
may be burned out and other drivers may not see
your turn signal.
If a bulb is burned out, replace it to help avoid an
accident. If the arrows don't go on at all when you
signal a turn, check for burned
-out bulbs and a blown
fuse (see ªFuses and Circuit Breakersº in the Index).
Page 261 of 417

4-58 Turn Signals When Towing a Trailer
The arrows on your instrument panel will flash
whenever you signal a turn or lane change. Properly
hooked up, the trailer lamps will also flash, telling other
drivers you're about to turn, change lanes or stop.
When towing a trailer, the arrows on your instrument
panel will flash for turns even if the bulbs on the trailer
are burned out. Thus, you may think drivers behind you
are seeing your signal when they are not. It's important
to check occasionally to be sure the trailer bulbs are
still working.
Driving On Grades
Reduce speed and shift to a lower gear before you start
down a long or steep downgrade. If you don't shift
down, you might have to use your brakes so much that
they would get hot and no longer work well.
You can tow in DRIVE (D). You may want to shift the
transmission to THIRD (3) or, if necessary, a lower gear
selection if the transmission shifts too often (e.g., under
heavy loads and/or hilly conditions).You may also want to activate the tow/haul mode if the
transmission shifts too often. See ªTow/Haul Modeº in
the Index.
When towing at high altitude on steep uphill grades,
consider the following: Engine coolant will boil at a
lower temperature than at normal altitudes. If you turn
your engine off immediately after towing at high altitude
on steep uphill grades, your vehicle may show signs
similar to engine overheating. To avoid this, let the
engine run while parked (preferably on level ground)
with the automatic transmission in PARK (P) for a
few minutes before turning the engine off. If you do
get the overheat warning, see ªEngine Overheatingº in
the Index.
Page 302 of 417

6-
6-1
Section 6 Service and Appearance Care
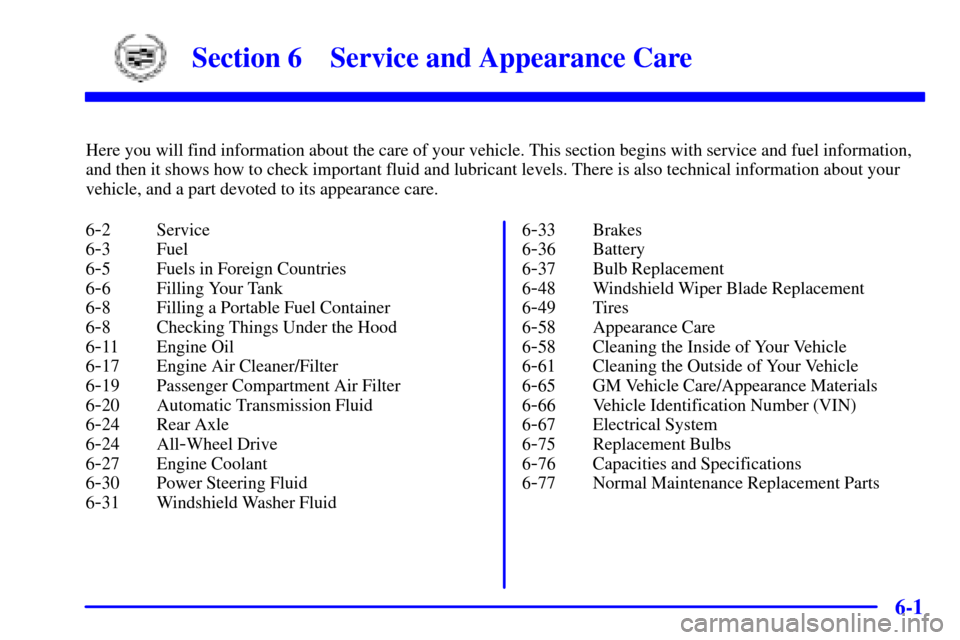
Here you will find information about the care of your vehicle. This section begins with service and fuel information,
and then it shows how to check important fluid and lubricant levels. There is also technical information about your
vehicle, and a part devoted to its appearance care.
6
-2 Service
6
-3 Fuel
6
-5 Fuels in Foreign Countries
6
-6 Filling Your Tank
6
-8 Filling a Portable Fuel Container
6
-8 Checking Things Under the Hood
6
-11 Engine Oil
6
-17 Engine Air Cleaner/Filter
6
-19 Passenger Compartment Air Filter
6
-20 Automatic Transmission Fluid
6
-24 Rear Axle
6
-24 All-Wheel Drive
6
-27 Engine Coolant
6
-30 Power Steering Fluid
6
-31 Windshield Washer Fluid6
-33 Brakes
6
-36 Battery
6
-37 Bulb Replacement
6
-48 Windshield Wiper Blade Replacement
6
-49 Tires
6
-58 Appearance Care
6
-58 Cleaning the Inside of Your Vehicle
6
-61 Cleaning the Outside of Your Vehicle
6
-65 GM Vehicle Care/Appearance Materials
6
-66 Vehicle Identification Number (VIN)
6
-67 Electrical System
6
-75 Replacement Bulbs
6
-76 Capacities and Specifications
6
-77 Normal Maintenance Replacement Parts
Page 338 of 417

6-37 Vehicle Storage
If you're not going to drive your vehicle for 25 days
or more, remove the black, negative (
-) cable from
the battery. This will help keep your battery from
running down.
CAUTION:
Batteries have acid that can burn you and gas
that can explode. You can be badly hurt if you
aren't careful. See ªJump Startingº in the Index
for tips on working around a battery without
getting hurt.
Contact your dealer to learn how to prepare your vehicle
for longer storage periods.
Also, for your audio system, see ªTheft
-Deterrent
Featureº in the Index.
Bulb Replacement
For any bulb changing procedure not listed in this
section, contact your dealer.
Before you replace any bulbs, be sure that all the lamps
are off and the engine isn't running. See ªReplacement
Bulbsº in the Index for the proper types of bulbs to use.
Halogen Bulbs
CAUTION:
Halogen bulbs have pressurized gas inside and
can burst if you drop or scratch the bulb. You or
others could be injured. Be sure to read and
follow the instructions on the bulb package.
Page 341 of 417

6-40
8. Remove the rubber,
circular
-shaped bulb
cap of the affected
bulb from the
headlamp assembly.
9. Turn the bulb connector counterclockwise
and remove it with the old bulb from the
headlamp assembly.
10. Unplug the electrical connector from the old bulb.
11. Plug in the electrical connector to the new bulb,
using care not to touch the bulb with your hands,
fingers or anything damp or oily.
12. Place the connector with the new bulb into the
headlamp assembly and turn it clockwise until
it is tight.
13. Reinstall the rubber, circular
-shaped bulb cap onto
the headlamp assembly.14. Reconnect the electrical connector to the lower
corner of the headlamp assembly.
15. Place the headlamp assembly back into the vehicle,
being sure to align the lower locator tab with the
pocket on the vehicle (see arrow). Push the
headlamp assembly straight in and then down
into position.
16. Install the two pins and snap the ends into their
locked position.
17. Reinstall the radiator cover by reversing the
removal procedure described previously.
Page 347 of 417

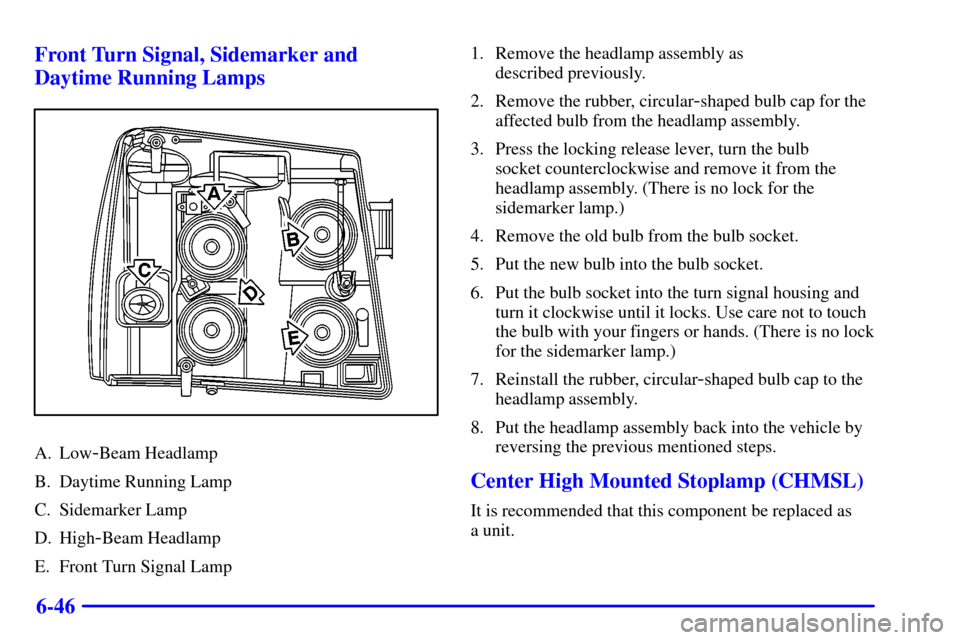
6-46 Front Turn Signal, Sidemarker and
Daytime Running Lamps
A. Low-Beam Headlamp
B. Daytime Running Lamp
C. Sidemarker Lamp
D. High
-Beam Headlamp
E. Front Turn Signal Lamp1. Remove the headlamp assembly as
described previously.
2. Remove the rubber, circular
-shaped bulb cap for the
affected bulb from the headlamp assembly.
3. Press the locking release lever, turn the bulb
socket counterclockwise and remove it from the
headlamp assembly. (There is no lock for the
sidemarker lamp.)
4. Remove the old bulb from the bulb socket.
5. Put the new bulb into the bulb socket.
6. Put the bulb socket into the turn signal housing and
turn it clockwise until it locks. Use care not to touch
the bulb with your fingers or hands. (There is no lock
for the sidemarker lamp.)
7. Reinstall the rubber, circular
-shaped bulb cap to the
headlamp assembly.
8. Put the headlamp assembly back into the vehicle by
reversing the previous mentioned steps.
Center High Mounted Stoplamp (CHMSL)
It is recommended that this component be replaced as
a unit.
Page 348 of 417
6-47 Taillamps
A. Turn Signal-Tail Lamp
B. Stop
-Tail Lamp
C. Back
-Up Lamp
D. Sidemarker Lamp
1. Use a screwdriver to
remove the two screws
from the lamp assembly.2. Remove the lamp assembly.
3. Press the release tab and turn the bulb socket
counterclockwise to remove it from the taillamp
housing. (The sidemarker lamp does not have a
release tab.)
4. Pull the bulb straight out
from the socket.
5. Press a new bulb into the socket, insert it into the
taillamp housing and turn the socket clockwise into
the taillamp housing until it clicks. (The sidemarker
lamp does not have a release tab and therefore will
not click when it is installed.)
6. Reinstall the rear lamp assembly and tighten
the screws.