2002 BMW Z3 ECO mode
[x] Cancel search: ECO modePage 3 of 187

Congratulations, and thank you for choosing a BMW.
Thorough familiarity with your vehicle will provide you with enhanced control and
security when you drive it. We therefore have this request:
Please take the time to read this Owner's Manual and familiarize yourself with the
information that we have compiled for you before starting off in your new BMW.
It contains important data and instructions intended to assist you in gaining maxi-
mum use and satisfaction from the unique range of technical features on your BMW.
The manual also contains information on vehicle maintenance designed to enhance
operating safety and contribute to maintaining the value of your vehicle throughout
an extended service life.
For more detailed information refer to the supplemental manuals.
This manual is supplemented by a Service and Warranty Information Booklet
(US models) or a Warranty and Service Guide Booklet (Canadian models). We
recommend that you read this publication thoroughly.
Your BMW is covered by the following warranties:
Ð New Vehicle Limited Warranty
Ð Limited Rust Perforation Warranty
Ð Federal Emissions System Defect Warranty
Ð Federal Emissions Performance Warranty
Ð California Emissions Control System Limited Warranty
Detailed information about these warranties is listed in the Service and Warranty
Information Booklet (US models) or in the Warranty and Service Guide Booklet
(Canadian models).
We wish you an enjoyable driving experience.
BMW AG
Preface
Page 19 of 187

19n
IndexDataTechnologyRepairsMaintenanceControlsOverview
Instrument cluster
1 Fuel gauge with indicator lamp
for reserve range68
2 Indicator lamp for turn signals23
3 Speedometer
4 Indicator and warning lamps for:
>
Battery charge current20
>
High beams23
>
Engine oil pressure20
5 Tachometer68
6 Coolant temperature gauge69
7 Indicator and warning lamps for:
>
Brake pad wear22
>
Brake hydraulic
system20, 21, 22
>
Parking brake21
>
Airbags21
8 Indicator and warning lamps for:
>
Service Engine Soon22
>
Automatic transmission
*
22
>
Safety belts21
>
Engine oil level21
>
Antilock Brake System (ABS)21
9 Indicator lamp for Automatic
Stability Control plus Traction
(ASC+T)/Dynamic Stability Control
(DSC
*
)22
10 Trip odometer/Gear indicator for
automatic transmission with
Steptronic
*
6811 Service Interval Display69, 128
12 Odometer68
13 Indicator and warning lamps for:
>
Front fog lamps
*
23
>
Engine electronics22
14 Trip odometer reset button68
The illustration shows the instrument
cluster in the US version. In the Cana-
dian models, some of the indicator and
warning lamps have a different appear-
ance, refer to pages 20 to 23.
Page 21 of 187
21n
IndexDataTechnologyRepairsMaintenanceControlsOverview
Indicator and warning lamps
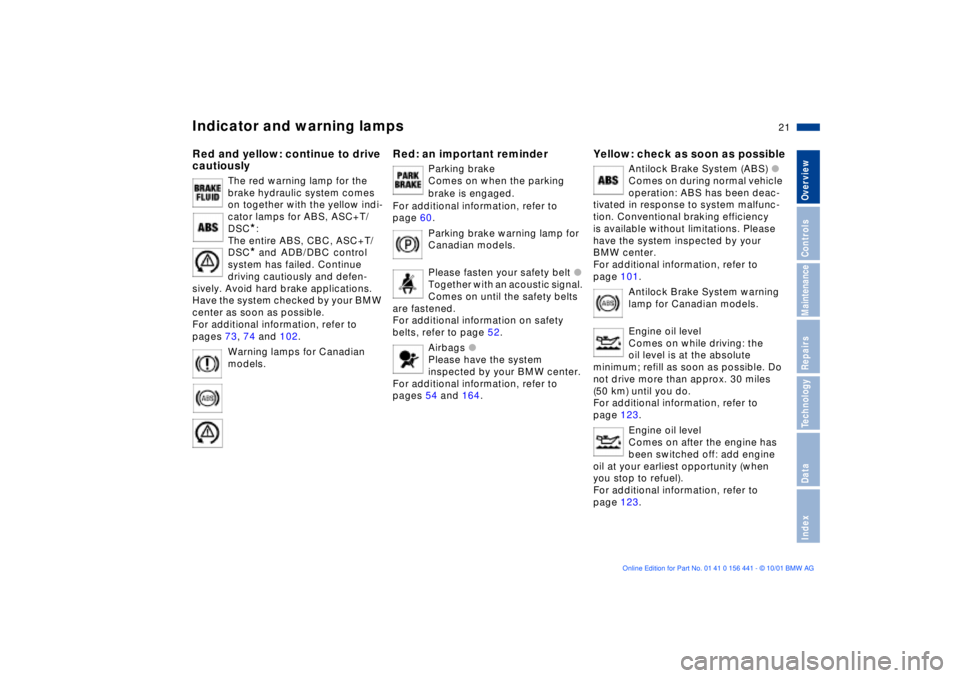
Red and yellow: continue to drive
cautiously
The red warning lamp for the
brake hydraulic system comes
on together with the yellow indi-
cator lamps for ABS, ASC+T/
DSC
*
:
The entire ABS, CBC, ASC+T/
DSC
*
and
ADB/DBC
control
system has failed. Continue
driving cautiously and defen-
sively. Avoid hard brake applications.
Have the system checked by your BMW
center as soon as possible.
For additional information, refer to
pages 73, 74 and 102.
Warning lamps for Canadian
models.
Red: an important reminder
Parking brake
Comes on when the parking
brake is engaged.
For additional information, refer to
page 60.
Parking brake warning lamp for
Canadian models.
Please fasten your safety belt
l
Together with an acoustic signal.
Comes on until the safety belts
are fastened.
For additional information on safety
belts, refer to page 52.
Airbags
l
Please have the system
inspected by your BMW center.
For additional information, refer to
pages 54 and 164.
Yellow: check as soon as possible
Antilock Brake System (ABS)
l
Comes on during normal vehicle
operation: ABS has been deac-
tivated in response to system malfunc-
tion. Conventional braking efficiency
is available without limitations. Please
have the system inspected by your
BMW center.
For additional information, refer to
page 101.
Antilock Brake System warning
lamp for Canadian models.
Engine oil level
Comes on while driving: the
oil level is at the absolute
minimum; refill as soon as possible. Do
not drive more than approx. 30 miles
(50 km) until you do.
For additional information, refer to
page 123.
Engine oil level
Comes on after the engine has
been switched off: add engine
oil at your earliest opportunity (when
you stop to refuel).
For additional information, refer to
page 123.
Page 32 of 187
32n
Central locking system Opening and closing Ð from the outsideThe conceptThe central locking system becomes
operational when the doors are closed.
The system simultaneously engages
and releases the locks on the
>doors
>luggage compartment
>fuel filler door.
The central locking system can be
operated
>from outside via the door locks, the
luggage compartment lock as well as
via the remote control
*
>from inside via the safety lock
buttons (locks doors only).
The anti-theft system is automatically
activated whenever you activate the
central locking system from outside the
vehicle. It prevents the doors from
being unlocked with the lock buttons or
release handles.
The central locking system unlocks
automatically in the event of an acci-
dent. In addition, the hazard warning
flashers and interior lamps come on.
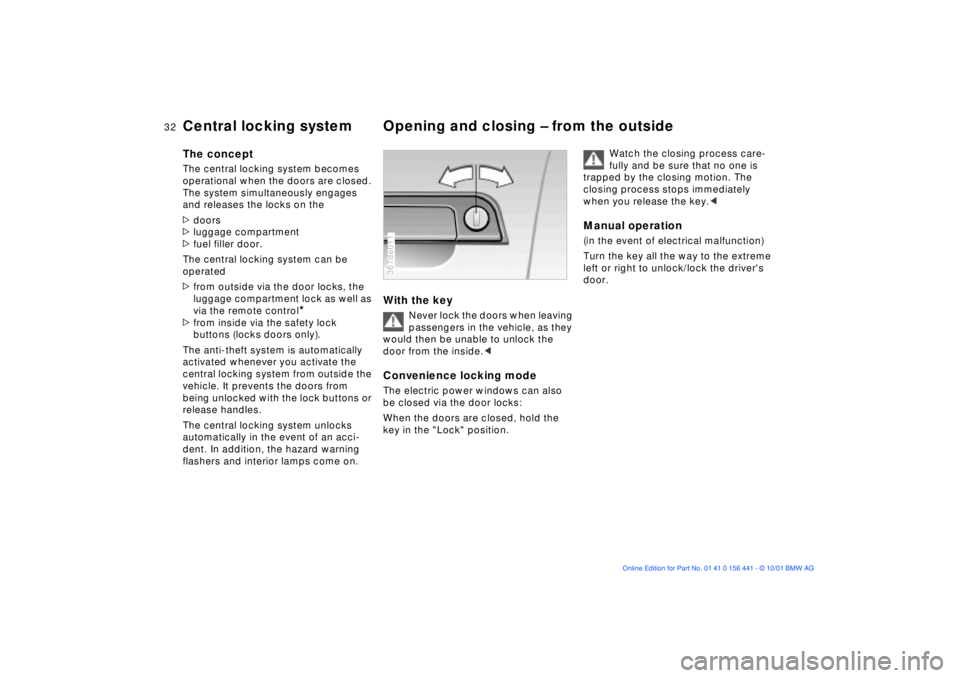
With the key
Never lock the doors when leaving
passengers in the vehicle, as they
would then be unable to unlock the
door from the inside.<
Convenience locking modeThe electric power windows can also
be closed via the door locks:
When the doors are closed, hold the
key in the "Lock" position.367de011
Watch the closing process care-
fully and be sure that no one is
trapped by the closing motion. The
closing process stops immediately
when you release the key.<
Manual operation(in the event of electrical malfunction)
Turn the key all the way to the extreme
left or right to unlock/lock the driver's
door.
Page 38 of 187
38n
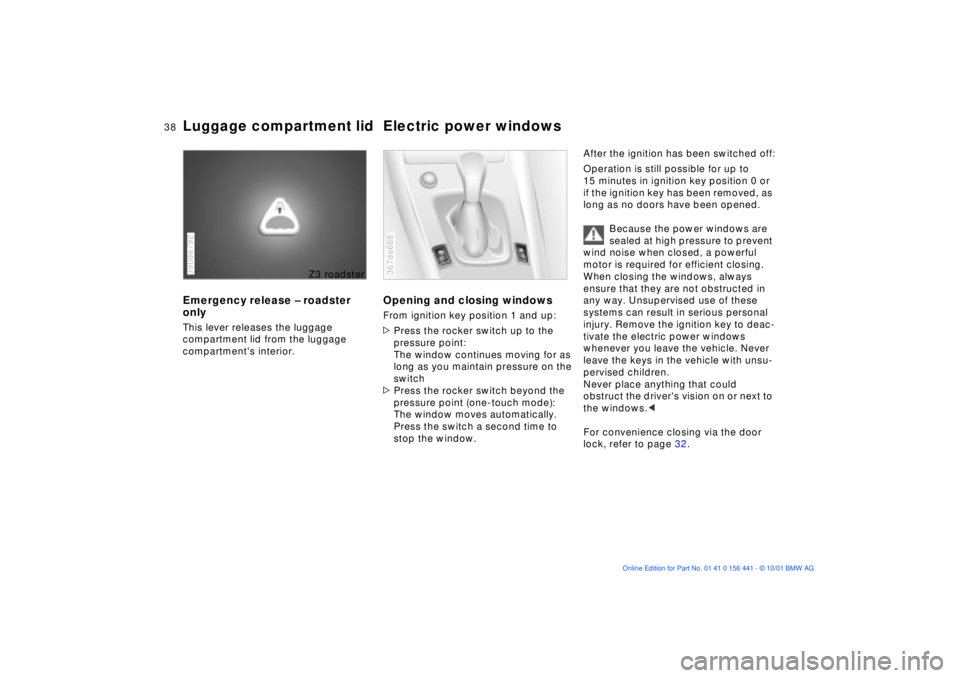
Luggage compartment lid Electric power windowsEmergency release Ð roadster
onlyThis lever releases the luggage
compartment lid from the luggage
compartment's interior.390de792
Z3 roadster
Opening and closing windowsFrom ignition key position 1 and up:
>Press the rocker switch up to the
pressure point:
The window continues moving for as
long as you maintain pressure on the
switch
>Press the rocker switch beyond the
pressure point (one-touch mode):
The window moves automatically.
Press the switch a second time to
stop the window.367de668
After the ignition has been switched off:
Operation is still possible for up to
15 minutes in ignition key position 0 or
if the ignition key has been removed, as
long as no doors have been opened.
Because the power windows are
sealed at high pressure to prevent
wind noise when closed, a powerful
motor is required for efficient closing.
When closing the windows, always
ensure that they are not obstructed in
any way. Unsupervised use of these
systems can result in serious personal
injury. Remove the ignition key to deac-
tivate the electric power windows
whenever you leave the vehicle. Never
leave the keys in the vehicle with unsu-
pervised children.
Never place anything that could
obstruct the driver's vision on or next to
the windows.<
For convenience closing via the door
lock, refer to page 32.
Page 55 of 187
55n
IndexDataTechnologyRepairsMaintenanceControlsOverview
AirbagsSitting correctly with airbags
For your safety, comply with the
following instructions for the
airbags. If you do not, the airbags may
not be able to provide their maximum
protection. All passengers in the vehicle
should be aware of and comply with this
information:
The airbags are supplemental restraint
devices designed to provide extra
protection; they are not a substitute for
safety belts. Wear your safety belt at
all times.
Adjust your seat to a position that is
comfortable for you, allowing unre-
stricted vehicle operation, and is not
closer to the steering wheel than neces-
sary.
Always grasp the steering wheel by the
steering wheel rim, keeping your hands
at the "9-o'clock" and "3-o'clock" posi-
tions in order to minimize any risk of
injury to hands or arms if the airbag does
deploy.
There should not be any other persons,
animals or objects between the airbag
and the passenger in that seat.
Do not use the cover panel for the front
airbag on the passenger side as a
storage area.
Do not apply adhesive materials to the
cover panels of the airbags, cover them
or modify them in any other way.
If you use a child-restraint system, read
carefully and comply with the instruc-
tions on page 56.
Be sure that child-restraint systems are
installed correctly and with the greatest
possible distance from the airbag in the
side trim panel. Do not allow children to
lean out of the child-restraint system in
the direction of the side trim panel.
Otherwise, serious injuries could occur
if the airbag is triggered.<
Even when you have complied with all
of these guidelines, there is still a small
residual risk of minor facial, hand and
arm injuries from airbag deployment
occurring in isolated instances.
The ignition and inflation noise may
cause a mild temporary hearing loss in
extremely sensitive individuals.
Corresponding airbag safety precau-
tions are provided on both sun visors
and the instrument panel (US models).
For additional information concerning
the airbag system, refer to pages 130
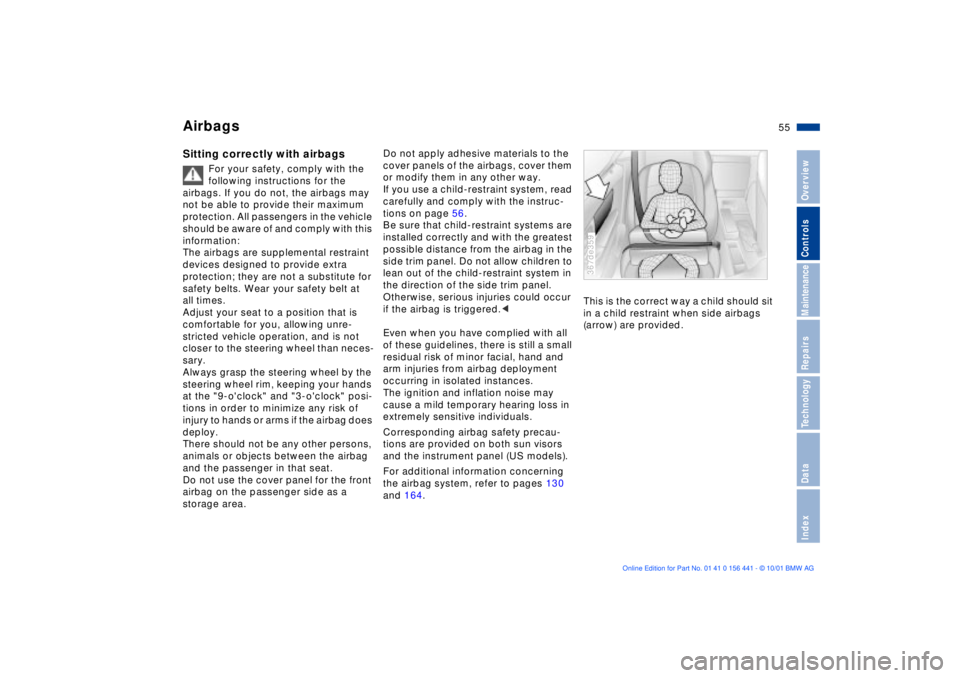
and 164.This is the correct way a child should sit
in a child restraint when side airbags
(arrow) are provided.
367de359
Page 59 of 187
59n
IndexDataTechnologyRepairsMaintenanceControlsOverview
Starting the engineBefore starting>Engage the parking brake
>Be sure that the gearshift lever is in
"Neutral" (or the selector lever in "P"
if the vehicle is equipped with auto-
matic transmission)
>Depress the clutch pedal.
Do not run the engine in enclosed
spaces. The exhaust gases
contain carbon monoxide, an odorless
and colorless, but highly toxic gas.
Breathing the exhaust gases poses an
extreme health risk, and can lead to
unconsciousness and death.
Do not leave the vehicle unattended
with the engine running. An unattended
vehicle with a running engine repre-
sents a potential safety hazard.<
Starting the engine>Do not press the accelerator pedal
while starting the engine.
Do not actuate the starter for too
short a time. Do not turn it for
more than approx. 20 seconds. Release
the ignition key immediately after the
engine starts.
Do not allow the engine to warm up
by leaving it running while the vehicle
remains stationary. Instead, begin to
drive immediately at a moderate engine
speed.<
Should the engine fail to start on the
first attempt (if it is very hot or cold, for
instance):
>Press the accelerator pedal halfway
down while engaging the starter.
Cold starts at very low temperatures,
from approx. +5 7 (Ð15 6) and at
altitudes above approx. 3,300 ft
(1,000 m):
>On the first start attempt, engage the
starter for a longer period (approx.
10 seconds).
If these temperature conditions are
anticipated for a longer period, have the
engine oil changed to a special oil, refer
to page 124. Please contact your BMW
center for additional information.
Usually, it is not necessary to depress
the accelerator pedal. However, at high
altitudes or in very hot or very cold
weather, depress the pedal halfway
down when starting the engine.
Engine idle speed is controlled by the
engine computer system. Increased
speeds at start-up are normal and
should decrease as the engine warms
up. If engine speed does not decrease,
service is required.
To prevent the battery from
discharging, always switch off any
accessories which are not required.
Switch off the ignition when the vehicle
is not being driven.
Page 63 of 187

63n
IndexDataTechnologyRepairsMaintenanceControlsOverview
Automatic transmission with Steptronic
*
P Ñ Park Select only when the vehicle is
stationary. The transmission locks to
prevent the rear wheels from turning.R Ñ Reverse Select only when the vehicle is
stationary. N Ñ Neutral Select only if your journey is interrupted
for a longer period. D Ñ Drive
(automatic shift program) This position is designed for driving
under all normal operating conditions.
All forward gears are available. Kickdown In the kickdown mode, you achieve
maximum performance and in
position D, you reach maximum speed.
Depress the accelerator pedal past the
increased resistance point at the full-
throttle position.
M/S Ð manual mode and
Sport Program When you change from D to M/S, the
Sport Program is activated. This is
indicated by "S" in the gear selection
display. The M/S mode is recom-
mended for performance-oriented
driving.
With the first brief touch, the automatic
transmission shifts from the Sport
Program to the manual mode. When
you tab the selector lever in the "+"
direction, the transmission shifts up.
When the lever is tabbed in the
"Ð" direction, the transmission shifts
down. M1 to M5 is indicated in the
transmission range display.
Upshifts or downshifts will only be
carried out by the ATC at appropriate
engine speeds and road speeds. If the 367de704
engine speed is too high, for instance,
the downshift will not be executed. The
gear selected will appear briefly in the
instrument cluster followed by the
current gear.
If you are driving in the manual
mode and wish to accelerate
rapidly Ð to pass another vehicle, for
example Ð shift down manually or with
the "Kickdown" function.<
You can only change from M/S to
selector lever positions "P", "R" and "N"
via the "D" position.
In the following situations, the Steptronic
"thinks" for you in the manual mode:
>In order to prevent engine over-
speeding, the transmission shifts
automatically to the next higher gear
shortly before the engine speed
cutoff point
>At low speeds, the transmission
shifts down automatically Ð you do
not have to act
>In the kickdown mode, the transmis-
sion shifts down to the lowest possible
gear based on the engine speed
>Depending on the situation Ð when
driving in adverse winter conditions,
for example Ð the transmission may
also start out in 2nd or 3rd gear.