Page 12 of 187
Contents
Owner service procedures
Advanced technology
Technical data
Replacement procedures:
Onboard tool kit136
Windshield wiper blades136
Lamps and bulbs137
Master key with battery
lamp143
Remote control144
Wheel change146
Battery153
Fuses156
In case of electrical
malfunction:
Power convertible top157
Fuel filler door157
Assistance, giving and
receiving:
Jump-starting158
Towing the vehicle159Adaptive Transmission Control
(ATC)164
Airbags164
Automatic Stability Control plus
Traction (ASC+T)/Dynamic
Stability Control (DSC)165
Car radio reception166
Safety belt tensioner166Engine specifications170
Dimensions171
Weights172
Capacities173
Electrical system174
Drive belts174
Page 135 of 187
Overview
Controls and features
Operation, maintenance
Owner service procedures
Technical data
Index Advanced technology
135n
IndexDataTechnologyRepairsMaintenanceControlsOverview
Replacement procedures:
Onboard tool kit136
Windshield wiper blades136
Lamps and bulbs137
Master key with battery
lamp143
Remote control144
Wheel change146
Battery153
Fuses156
In case of electrical
malfunction:
Power convertible top157
Fuel filler door157
Assistance, giving and
receiving:
Jump-starting158
Towing the vehicle159
Repairs
Page 137 of 187

137n
IndexDataTechnologyRepairsMaintenanceControlsOverview
Lamps and bulbsThe lamps and bulbs make essential
contributions to the safety of your
vehicle. Therefore, comply fully with the
following instructions during bulb
replacement. If you are not familiar with
any of the procedures, consult your
BMW center.
Do not touch the glass portion of
a new bulb with your bare hands
since even small amounts of impurities
burn in to the surface and reduce the
service life of the bulb. Use a clean
cloth, paper napkin, or a similar mate-
rial, or hold the bulb by its metallic
base.<
A replacement bulb set is available from
your BMW center.
Before working on the electrical
system, switch off the electrical
accessory you are working on or
disconnect the cable from the negative
terminal of the battery. Failure to
observe this precaution could result in
short circuits.
To prevent injuries and damage,
comply with any instructions provided
by the bulb manufacturer.<
The illustration depicts the right side
of the engine compartment.1 High beams HB3 bulb, 65 watts2 Low beams HB4 bulb, 55 watts
The bulb is pressurized. There-
fore, wear safety glasses and
protective gloves. Failure to comply
with these precautions could result in
physical injury if the bulb breaks.< 367us067
1. Turn the bulb holder with the bulb to
the left and remove toward the rear
2. Pull off the plug
3. Push the new bulb holder with the
bulb into the plug Ð ensure proper
locking
4. Reinstall in reverse order.
When cleaning the headlamps,
please observe the following:
>Do not wipe dry (this causes
scratches) and never use abrasives
or strong solvents to clean the covers
>Remove dirt and contamination (such
as insects) by soaking with BMW Car
Shampoo and then rinsing with plenty
of water
>Always use a deicer spray to remove
accumulated ice and snow Ð never
use a scraper.<
Page 138 of 187
138n
Lamps and bulbsPosition lamps5 watt bulb
1. Using your fingertip, press forward
on the rear edge of the lamp (arrow)
and remove
2. Turn the bulb holder with the bulb to
the right and remove it from the lamp
3. Pull the bulb out of the socket and
replace
4. Install in the reverse order.367de737
Front turn signals21 watt bulb
1. Turn the bulb holder with the bulb to
the left and remove toward the rear
2. Applying light pressure, turn the bulb
to the left. Remove and exchange the
bulb
3. Insert the bulb holder and turn to the
right as far as possible.367de068
Side turn signals5 watt bulb
1. Use finger pressure against the front
edge of the lamp (arrow) to press it
toward the rear for removal
2. Turn the bulb holder with the bulb to
the right and remove it from the lamp
3. Pull the bulb out of the socket and
replace
4. Install in the reverse order.367de241
Page 139 of 187

139n
IndexDataTechnologyRepairsMaintenanceControlsOverview
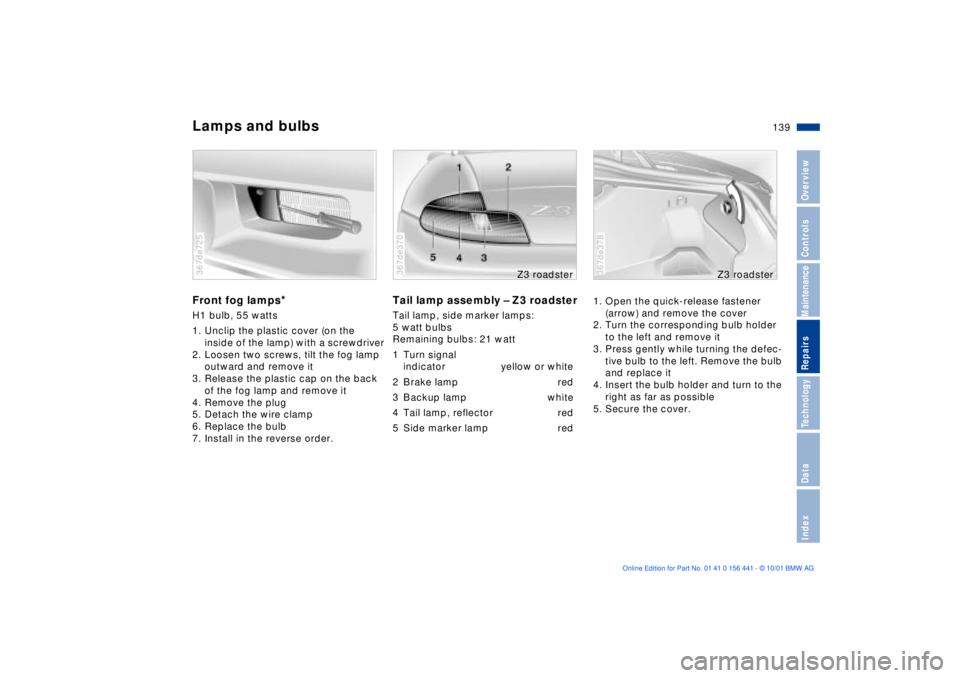
Lamps and bulbsFront fog lamps
*
H1 bulb, 55 watts
1. Unclip the plastic cover (on the
inside of the lamp) with a screwdriver
2. Loosen two screws, tilt the fog lamp
outward and remove it
3. Release the plastic cap on the back
of the fog lamp and remove it
4. Remove the plug
5. Detach the wire clamp
6. Replace the bulb
7. Install in the reverse order.367de725
Tail lamp assembly Ð Z3 roadsterTail lamp, side marker lamps:
5 watt bulbs
Remaining bulbs: 21 watt
1 Turn signal
indicator yellow or white
2 Brake lamp red
3 Backup lamp white
4 Tail lamp, reflector red
5 Side marker lamp red367de370
Z3 roadster
1. Open the quick-release fastener
(arrow) and remove the cover
2. Turn the corresponding bulb holder
to the left and remove it
3. Press gently while turning the defec-
tive bulb to the left. Remove the bulb
and replace it
4. Insert the bulb holder and turn to the
right as far as possible
5. Secure the cover.367de378
Z3 roadster
Page 140 of 187

140n
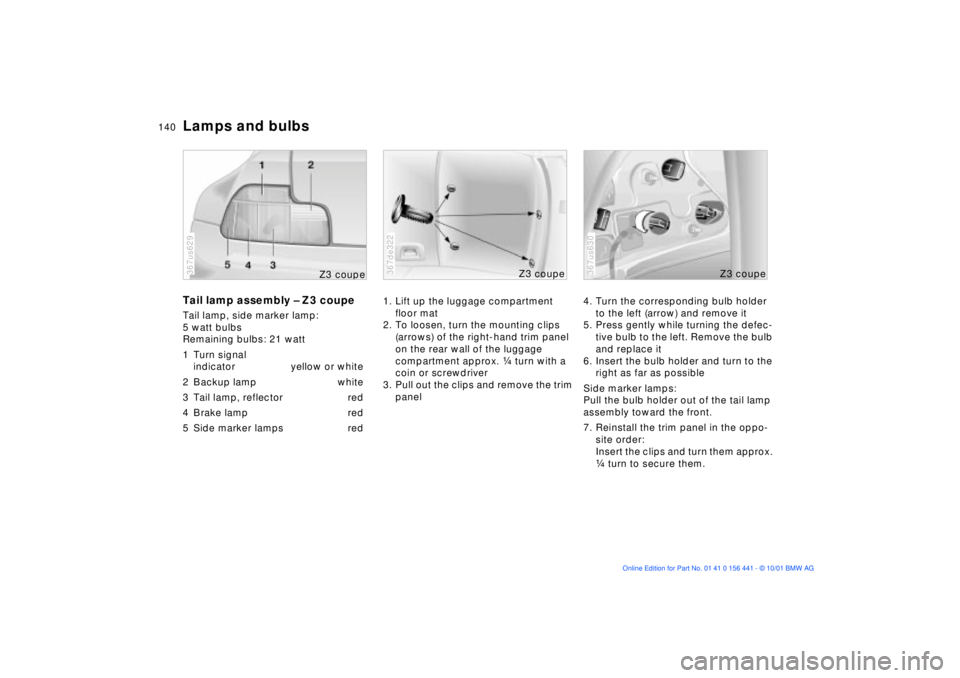
Lamps and bulbsTail lamp assembly Ð Z3 coupeTail lamp, side marker lamp:
5 watt bulbs
Remaining bulbs: 21 watt
1 Turn signal
indicator yellow or white
2 Backup lamp white
3 Tail lamp, reflector red
4 Brake lamp red
5 Side marker lamps red367us629
Z3 cou
pe
1. Lift up the luggage compartment
floor mat
2. To loosen, turn the mounting clips
(arrows) of the right-hand trim panel
on the rear wall of the luggage
compartment approx. f turn with a
coin or screwdriver
3. Pull out the clips and remove the trim
panel367de322
Z3 coupe
4. Turn the corresponding bulb holder
to the left (arrow) and remove it
5. Press gently while turning the defec-
tive bulb to the left. Remove the bulb
and replace it
6. Insert the bulb holder and turn to the
right as far as possible
Side marker lamps:
Pull the bulb holder out of the tail lamp
assembly toward the front.
7. Reinstall the trim panel in the oppo-
site order:
Insert the clips and turn them approx.
f turn to secure them.367us630
Z3 coupe
Page 141 of 187
141n
IndexDataTechnologyRepairsMaintenanceControlsOverview
Lamps and bulbsCenter (high-mount) brake lamp Ð
Z3 roadsterIn the event of a malfunction, please
consult your BMW center.367de369
Z3 roadster
Center (high-mount) brake lamp Ð
Z3 coupeIn the event of a malfunction, please
consult your BMW center.367de624
Z3 cou
pe
License plate lamps5 watt bulb
1. Press the lamp to the left and remove
it
2. Turn the bulb holder with the bulb to
the left and remove it from the lamp
3. Pull the bulb out of the bulb socket
and replace
4. Install in the reverse order.367de073
Page 142 of 187

142n
Lamps and bulbsInterior lamp Ð Z3 roadster10 watt bulb
1. Use a screwdriver to press out the
lens at the left recess
2. Pull the bulb out of the contact lugs.
When reinstalling the lens, first
position it on the left, then snap it
into place.< Luggage compartment lamp Ð
Z3 roadster5 watt bulb
The lamp is located above in the
luggage compartment.
1. Use a screwdriver to pry out the
lamp
2. Pull the bulb out of the contact lugs.
Interior lamps Ð Z3 coupeFront:
15 watt bulb
1. Use a screwdriver to press out the
lamp at the left recess
2. Press back the plastic tab on the
reflector, open the reflector and
replace the bulb.
Rear:
10 watt bulb
1. Use a screwdriver to press out the
lamp at the side recess
2. Press back the plastic tab on the
reflector, open the reflector and
replace the bulb.
Reading lamps Ð Z3 coupe10 watt bulbs
1. Use a screwdriver to press out the
lamp at the left recess
2. Press gently while turning the defec-
tive bulb to the left. Remove the bulb
and replace it.