Page 37 of 187

37n
IndexDataTechnologyRepairsMaintenanceControlsOverview
Luggage compartment lidTo lock separatelyTurn the master key to the right past the
pressure point and then pull it out in the
horizontal position
This locks the luggage compartment
and disengages it from the central
locking system. If you then surrender
only the door and ignition key (refer to
page 30), access to the vehicle through
the luggage compartment is not
possible. This is recommended for valet
parking, for instance.Manual operation(in the event of electrical malfunction)
Turn the master key in the lock of the
luggage compartment lid to the left to
the stop Ð the luggage compartment lid
opens slightly.
The luggage compartment is locked
again as soon as it is closed.
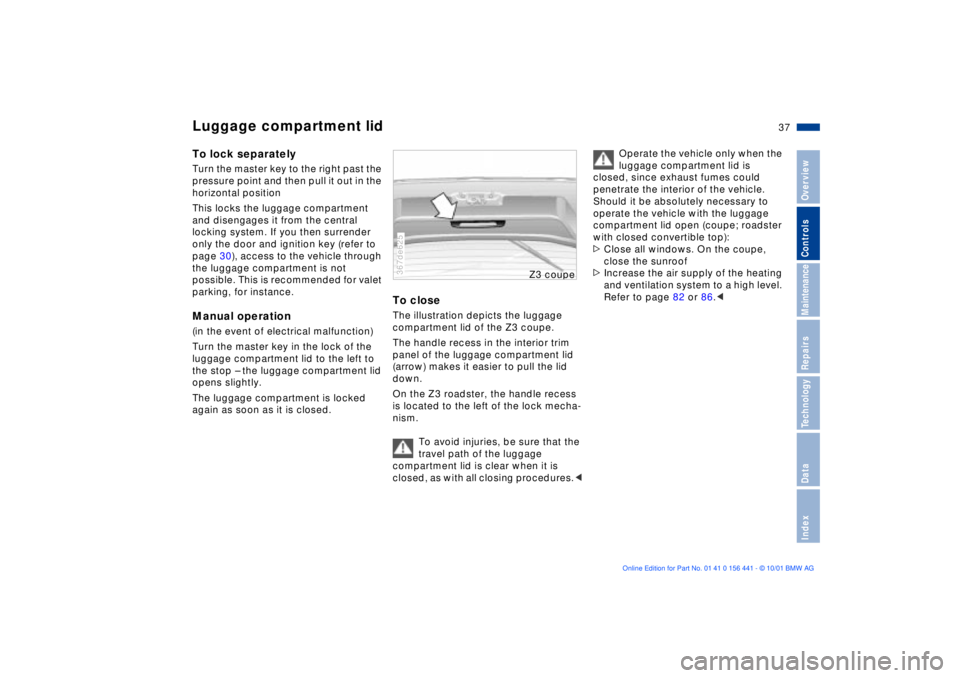
To closeThe illustration depicts the luggage
compartment lid of the Z3 coupe.
The handle recess in the interior trim
panel of the luggage compartment lid
(arrow) makes it easier to pull the lid
down.
On the Z3 roadster, the handle recess
is located to the left of the lock mecha-
nism.
To avoid injuries, be sure that the
travel path of the luggage
compartment lid is clear when it is
closed, as with all closing procedures.< 367de625
Z3 cou
pe
Operate the vehicle only when the
luggage compartment lid is
closed, since exhaust fumes could
penetrate the interior of the vehicle.
Should it be absolutely necessary to
operate the vehicle with the luggage
compartment lid open (coupe; roadster
with closed convertible top):
>Close all windows. On the coupe,
close the sunroof
>Increase the air supply of the heating
and ventilation system to a high level.
Refer to page 82 or 86.<
Page 39 of 187
39n
IndexDataTechnologyRepairsMaintenanceControlsOverview
Electric power windows Sunroof
*, coupe
Jam protectionIf one of the windows comes into
contact with an object between the
window and roof frame when it is
closing, the closing cycle is interrupted
immediately and the window will open
again slightly.
You can override this jam protec-
tion function (if there is an
attempted unauthorized entrance from
the outside, for instance) by pressing
the switch beyond the resistance point
and holding it.<
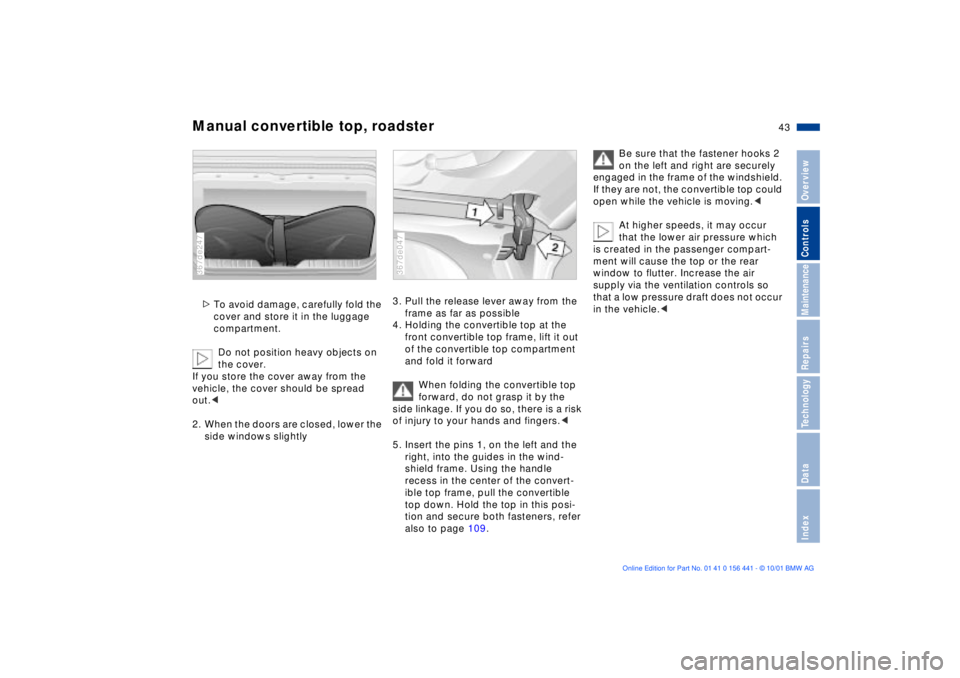
Lifting Ð ClosingFrom ignition key position 1 and up:
To lift: press button 1.
To close: press button 2.367de689
Z3 cou
pe
To prevent injuries, exercise care
when closing the sunroof. Keep it
in your field of vision until it is closed.<
To avoid pressure or drafts in the
passenger compartment when the
sunroof is open, keep the air vents in
the instrument panel open and increase
the air supply if necessary, refer to
pages 82 and 86.
Page 41 of 187
41n
IndexDataTechnologyRepairsMaintenanceControlsOverview
Manual convertible top, roadster5. Fold the release levers against the
convertible top frame.
In order to avoid subsequent
moisture damage, do not open
and store the convertible top when it is
wet.<
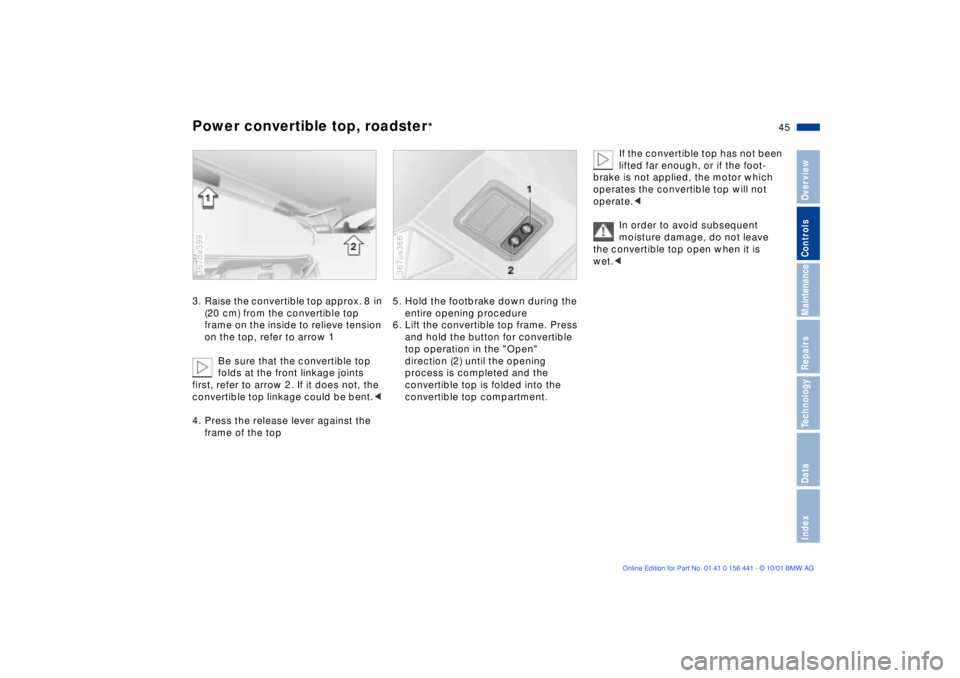
To mount the coverThe illustration depicts a representative
schematic of the fasteners for the
convertible cover.
To secure, press the outer ring of the
cover fastener onto the mating piece on
the vehicle (refer to the arrows).367de274
The attachment points of the cover are
indicated by the four arrows in the illus-
tration.
1. Position the convertible cover on the
convertible top compartment and
align the upper portions of the
fasteners with the lower portions on
the vehicle
2. Lift the cover at the rear, reach
underneath it and engage the two
middle fasteners
3. Attach the front fasteners367us669
Page 43 of 187

43n
IndexDataTechnologyRepairsMaintenanceControlsOverview
Manual convertible top, roadster>To avoid damage, carefully fold the
cover and store it in the luggage
compartment.
Do not position heavy objects on
the cover.
If you store the cover away from the
vehicle, the cover should be spread
out.<
2. When the doors are closed, lower the
side windows slightly367de247
3. Pull the release lever away from the
frame as far as possible
4. Holding the convertible top at the
front convertible top frame, lift it out
of the convertible top compartment
and fold it forward
When folding the convertible top
forward, do not grasp it by the
side linkage. If you do so, there is a risk
of injury to your hands and fingers.<
5. Insert the pins 1, on the left and the
right, into the guides in the wind-
shield frame. Using the handle
recess in the center of the convert-
ible top frame, pull the convertible
top down. Hold the top in this posi-
tion and secure both fasteners, refer
also to page 109.367de047
Be sure that the fastener hooks 2
on the left and right are securely
engaged in the frame of the windshield.
If they are not, the convertible top could
open while the vehicle is moving.<
At higher speeds, it may occur
that the lower air pressure which
is created in the passenger compart-
ment will cause the top or the rear
window to flutter. Increase the air
supply via the ventilation controls so
that a low pressure draft does not occur
in the vehicle.<
Page 45 of 187

45n
IndexDataTechnologyRepairsMaintenanceControlsOverview
Power convertible top, roadster
*
3. Raise the convertible top approx. 8 in
(20 cm) from the convertible top
frame on the inside to relieve tension
on the top, refer to arrow 1
Be sure that the convertible top
folds at the front linkage joints
first, refer to arrow 2. If it does not, the
convertible top linkage could be bent.<
4. Press the release lever against the
frame of the top367de399
5. Hold the footbrake down during the
entire opening procedure
6. Lift the convertible top frame. Press
and hold the button for convertible
top operation in the "Open"
direction (2) until the opening
process is completed and the
convertible top is folded into the
convertible top compartment.367us366
If the convertible top has not been
lifted far enough, or if the foot-
brake is not applied, the motor which
operates the convertible top will not
operate.<
In order to avoid subsequent
moisture damage, do not leave
the convertible top open when it is
wet.<
Page 47 of 187
47n
IndexDataTechnologyRepairsMaintenanceControlsOverview
Power convertible top, roadster
*
To close1. To remove the convertible top cover:
>Loosen the fasteners. Pull the cap
of the latch upward, refer to the
arrow367de724
>Release the front fasteners (outer
arrows)
>Pull the outer frame of the cover
under the edge of the convertible
top compartment
>Lift the cover from the rear and
release the middle fasteners
(middle arrows)367us670
>To avoid damage, carefully fold the
cover and store it in the luggage
compartment.
Do not position heavy objects on
the cover.
The cover should be spread out if you
store it away from the vehicle.< 367de247
Page 49 of 187

49n
IndexDataTechnologyRepiarsMaintenanceControlsOverview
For maximum safety, please comply
with the following:
Never try to adjust your seat while
operating the vehicle. The seat
could respond with an unexpected
movement, and the ensuing loss of
vehicle control could result in an acci-
dent.
Be sure that the safety belt is fastened
firmly against your body at all times. In
the event of a frontal impact, a loose lap
belt could slide over your hips, leading
to abdominal injury. In addition, the
safety belt's restraint effectiveness is
reduced if the belt is worn loosely.
When adjusting your seat, select a
position that provides the maximum
distance between you and the steering
wheel, instrument panel and door while
still allowing comfortable and safe
access to all vehicle controls.<
Correct sitting postureTo reduce strain on your spinal column,
sit all the way back in the seat and rest
your back fully against the backrest.
In the ideal sitting posture, your head
extends along a straight line from your
spine.
For long-distance driving, you may wish
to increase the backrest tilt angle
slightly to reduce muscular tension.
You should also be able to grasp the
highest point of the steering wheel with
your arms slightly bent.
After a seat adjustment in the coupe,
adjust the height of the safety belt also,
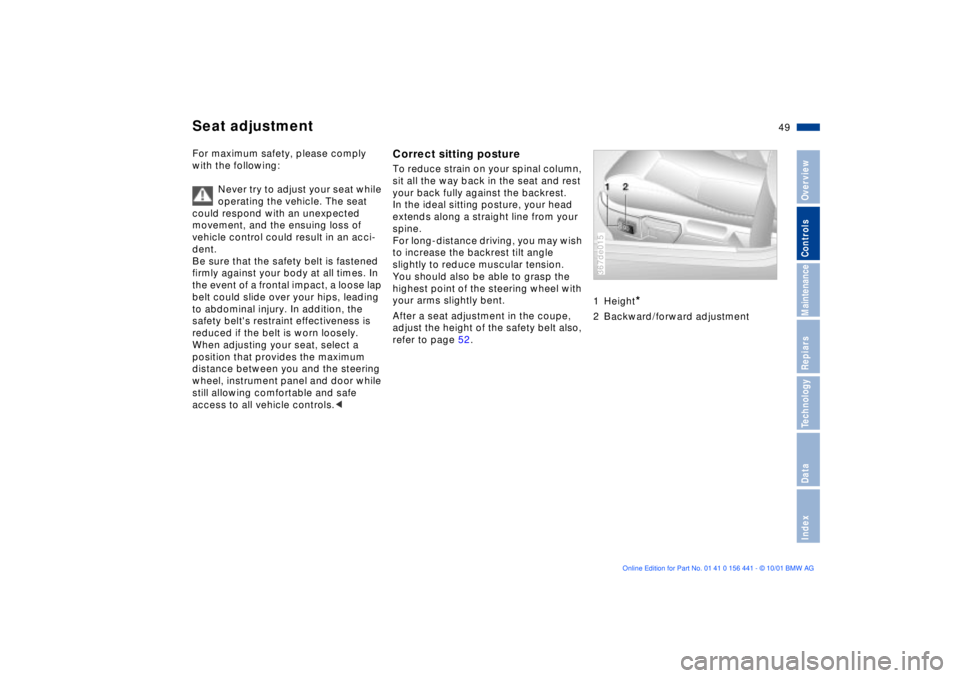
refer to page 52.1 Height
*
2 Backward/forward adjustment367de015
Seat adjustment
Page 51 of 187
51n
IndexDataTechnologyRepiarsMaintenanceControlsOverview
Mirrors
The mirror on the passenger's
side features a lens with a convex
surface. When estimating the distance
between yourself and other traffic, bear
in mind that the objects reflected in the
mirror are closer than they appear. This
means that estimates of the distance to
following traffic should not be regarded
as precise.<
Electric defrosting
*
Both mirrors are defrosted automa-
tically when the ignition key is in
position 2.
Interior rearview mirrorTo reduce the glare effect from the rear
while driving at night, tilt the mirror by
moving the small lever.Vanity mirrorsFold the sun visors down and push the
cover (coupe only) to the side.367de017