2002 BMW M3 CONVERTIBLE lock
[x] Cancel search: lockPage 92 of 159

92n
Automatic climate control
*
Tips for pleasant drivingUse the automatic system (switch on
AUTO button 7). Select the desired
interior temperature.
Detailed setting options are described
for you in the following sections.
You can make the settings of your
vehicle in such a manner that,
when you unlock the vehicle with the
remote control of your personal key,
your own personalized setting for the
automatic climate control is initiated.
the adjustment of the air distri-
bution and the air supply for you and Ð
in addition to that Ð adapts the temper-
ature to external influences (summer,
winter) to meet preferences you can
specify.
Individual air distribution
You also have the option of indi-
vidually configuring the air
distribution pattern to suit your
own personal preferences.
While the AUTO program is then deacti-
vated, the automatic airflow control
remains in operation. The system
directs air to the windows , the upper
body and into the footwells . You
can reactivate the automatic air supply
by pressing the AUTO button.
Temperature
The displayed temperatures are
reference values for the interior
temperature. We recommend 727
(+226) as a comfortable setting, even
if the air conditioner is on. When you
start the vehicle, the system ensures
that the selected temperature is
reached as quickly as possible. It then
maintains this temperature, regardless
of the season.
Air supply (blower)
By pressing the left or right side
of the button, you can vary the
air supply. This deactivates the auto-
matic air supply Ð the AUTO display
disappears from the panel. Neverthe-
less, the automatic air distribution
remains unchanged. You can reactivate
the automatic air supply by pressing the
AUTO button.
When you set the lowest blower speed
by pressing the left half of the button,
all of the displays are canceled: the
blower, heating and air conditioner are
switched off, and the air supply is
stopped. You can reactivate the system
by pressing any button for the auto-
matic climate control.
To defrost windows and remove
condensation
This program quickly removes
ice and condensation from the
windshield and side windows.
Page 93 of 159

93n
OverviewControlsMaintenanceRepairsDataIndex
Automatic climate control
*
Air conditioner
The air is cooled and dehumidi-
fied and Ð depending on the
temperature setting Ð rewarmed when
the air conditioner system is switched
on.
Depending on the weather, the wind-
shield may fog over briefly when the
engine is started.
Window mist will be reduced by
switching on the air conditioner.
Condensation forms in the air
conditioner system during opera-
tion, which then exits under the vehicle.
Traces of condensed water of this kind
are thus normal.<
Automatic recirculated-air control
(AUC)
If there are unpleasant odors or
pollutants in the outside air, you
can temporarily block the airflow from
the outside. The system then recircu-
lates the air currently within the vehicle.
By repeatedly pressing the button, you
can select one of three different oper-
ating modes.
>Indicator lamps off: outside air always
flowing into the vehicle
>Left-hand indicator lamp on Ð auto-
matic mode: the system detects
pollutants in the outside air and
responds by deactivating the outside
airflow as required. The system then
recirculates the air currently within
the vehicle.
Depending on air quality require-
ments, the system automatically
switches between outside air supply
and recirculation of the air already
within the vehicle
>Right-hand indicator lamp on: the
flow of outside air is permanently
blocked. The system recirculates the
air already within the vehicle.
If the windows fog over in the
recirculated-air mode, switch the
recirculated air off and increase the air
supply as required.<
Rear window defroster
With the convertible top closed
or with the hardtop
* mounted,
press the button. The indicator lamp
remains on. The rear window defroster
switches off automatically.
The rear window defroster auto-
matically assumes operation
within 5 minutes after the engine is
started at outside temperatures below
40 7 (4 6).<
Page 95 of 159

95n
OverviewControlsMaintenanceRepairsDataIndex
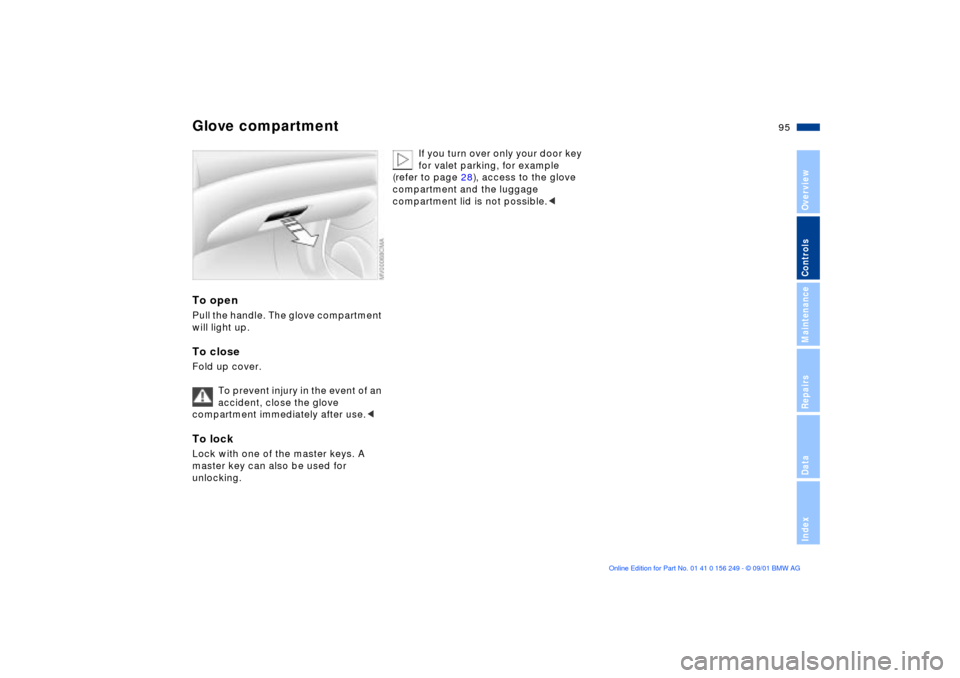
To openPull the handle. The glove compartment
will light up.To closeFold up cover.
To prevent injury in the event of an
accident, close the glove
compartment immediately after use.< To lockLock with one of the master keys. A
master key can also be used for
unlocking.
If you turn over only your door key
for valet parking, for example
(refer to page 28), access to the glove
compartment and the luggage
compartment lid is not possible.<
Glove compartment
Page 105 of 159

105n
OverviewControlsMaintenanceRepairsDataIndex
Brakes: do not rest your foot on
the brake pedal while driving.
Even light but consistent pedal pres-
sure can lead to high temperatures,
brake wear and possibly even brake
failure.
Aquaplaning: when driving on wet or
slushy roads, reduce road speed. If you
do not, a wedge of water can form
between tires and road surface. This
phenomenon is referred to as aqua-
planing, or hydroplaning, and can lead
to partial or complete loss of traction,
vehicle control and braking effective-
ness.
Driving through water: do not drive
through water on the road if it is deeper
than 1 foot (30 cm), and then only at
walking speed. Otherwise the vehicle
can sustain damage to the engine, the
electrical systems and the transmis-
sion.<
The conceptThe Antilock Brake System (ABS) keeps
the wheels from locking while braking,
thereby enhancing active driving safety.Braking with ABSIf you are in a situation that requires full
braking, you will exploit the full benefits
of the ABS system if you apply
maximum brake pressure ("panic
stop"). Since the vehicle maintains
steering responsiveness, you can
nevertheless avoid possible obstacles
with a minimum of steering effort.
Pulsation at the brake pedal combines
with sounds from the hydraulic circuits
to indicate to the driver that ABS is in
its active mode.Cornering Brake Control (CBC)CBC is an advanced engineering
design of the ABS. When braking while
cornering at high speed or braking
during high lateral acceleration, or
when braking during a lane change,
vehicle stability is improved and
steering response is enhanced.
Brake fluid level Low brake fluid level in the reservoir
combined with longer than usual pedal
travel may indicate a defect in one of
the brake system's hydraulic circuits.
Proceed to the nearest BMW
center. Higher brake application
pressure may be necessary when stop-
ping, and the vehicle may exhibit a
slight tendency to pull to one side.
Brake distances may even be longer.
Please remember to adapt your driving
style accordingly.<
Driving notes Antilock Brake System Brake system
Page 107 of 159

107n
OverviewControlsMaintenanceRepairsDataIndex
Hardtop
*
Two people are required for installation
or removal. Work with extreme caution
in order to avoid paint damage and
damage to the body or hardtop.
To facilitate hardtop installation or
removal, you can obtain a specially
designed hardtop lift
* or hardtop rack
*
at your BMW center.
Storage
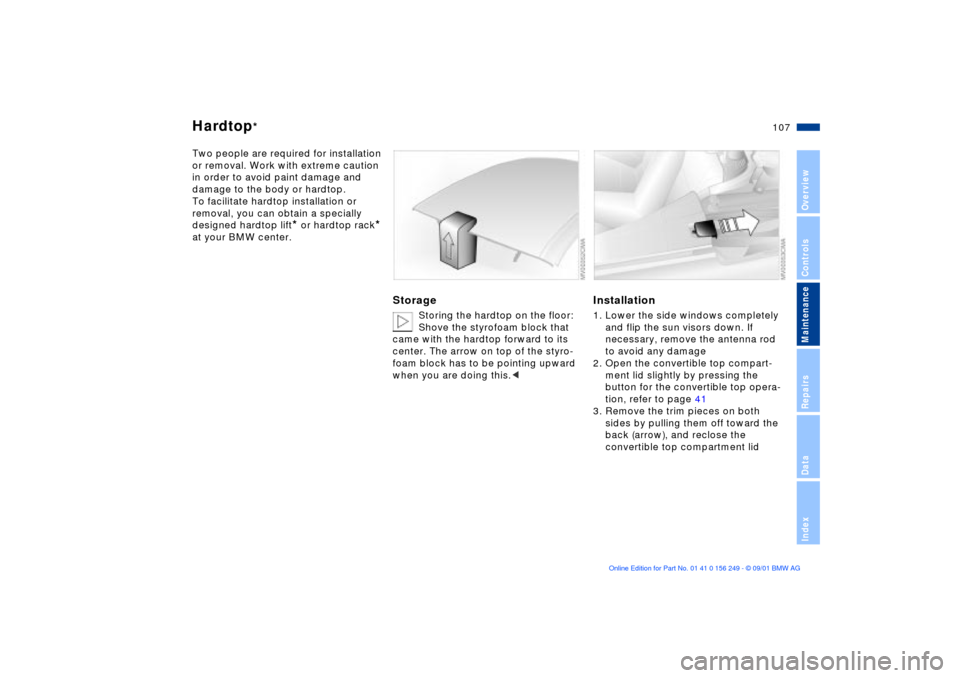
Storing the hardtop on the floor:
Shove the styrofoam block that
came with the hardtop forward to its
center. The arrow on top of the styro-
foam block has to be pointing upward
when you are doing this.<
Installation1. Lower the side windows completely
and flip the sun visors down. If
necessary, remove the antenna rod
to avoid any damage
2. Open the convertible top compart-
ment lid slightly by pressing the
button for the convertible top opera-
tion, refer to page 41
3. Remove the trim pieces on both
sides by pulling them off toward the
back (arrow), and reclose the
convertible top compartment lid
Page 108 of 159

108n
Hardtop
*
4. Open both front locking levers on the
hardtop by pressing the buttons
(arrow). The levers will release
slightly. Raise the levers as far as the
stop will allow
5. Before installing, first flip the cover
panels that are located underneath
the left and right interior lamps down.
To do this, press on the slight bump
on the cover panel. There is a holder
in the cover panel to securely store
the trim pieces 1 that have been
removed
6. Open the red release lever as far as
the stop will allow 2
7. Position the hardtop onto the
supports with the help of a second
person. Be sure to put the mountings
exactly into the proper brackets
Lift the hardtop carefully. Be
extremely careful not to shift the
seals. Seals that have been shifted out
of place or actually pulled out cause
leaks.<
8. In the back, close the red locking
levers by turning to the inside as far
as the stop located behind the trim
will allow. Flip the cover panels back
into place
9. To lock the hardtop in the front, keep
pressing on the front locking levers
until you hear it engage.
RemovalFollow the same procedure as when
installing, just reverse the steps.
Page 113 of 159

113n
OverviewControlsMaintenanceRepairsDataIndex
To unlock Pull the lever located under the left-
hand side of the instrument panel.
Do not attempt to service your
vehicle if you do not have the
required technical background. Failure
to work in an informed, professional
manner when servicing components
and materials constitutes a safety
hazard for vehicle occupants and other
road users. If you are not familiar with
the guidelines, please have the opera-
tions performed by your BMW center.<
To openPull the release handle and open the
hood.
To closePull the hood downwards and allow the
hood to fall from a minimum height of
12 in (30 cm) so that it audibly engages.
Check for proper locking by pulling on
the hood at the left and right above the
headlamps.
To avoid injuries, be sure that the
travel path of the hood is clear
when it is closed, as with all closing
procedures. If it is determined that the
hood is not completely closed while
driving, stop immediately and close it
securely.<
It is not possible to accelerate
from a standing stop using
SMG II
* when the hood is open.<
Hood
Page 118 of 159

118n
Coolant
Do not add coolant to the cooling
system when the engine is hot. If
you attempt to do so, escaping coolant
can cause burns.
To avoid the possibility of damage later
on, never use anything other than
factory-approved, nitrite and amino-
free extended-duty antifreeze with
corrosion inhibitor. Your BMW center is
familiar with the official specifications.
Antifreeze and anti-corrosion agents
are hazardous to health. You should
always store them in their original
containers and in a location inacces-
sible to children. Extended-duty anti-
freeze with corrosion inhibitor contains
ethylene glycol, a flammable
substance. For this reason, do not spill
extended-duty antifreeze with corrosion
inhibitor on hot engine parts. It could
catch fire and cause burns.<
Check the coolant level and
add coolant
Check the coolant level when the
engine is cold (approx. 68 7 or
+20 6).
1. Open the cap for the expansion tank
by turning it slightly counterclock-
wise to allow accumulated pressure
to escape. Then open
2. The coolant level is correct when the
upper end of the red float is at least
even with the upper edge of the filler
neck (refer to the arrow in the illustra-
tion), but no more than 0.8 in (2 cm)
above it Ð that is, up to the second
mark on the float (refer also to the
schematic diagram next to the filler
neck)
3. If necessary, add coolant. If the
coolant is low, slowly add
coolant until the correct level is
reached Ñ do not overfill.
Comply with the applicable envi-
ronmental laws regulating the
disposal of extended-duty antifreeze
with corrosion inhibitor.<